
Am I the only one sick of all these master photographers and YouTubers showing flawless, precise photo edits done in one take with no mistakes? Here's a look at my master workflow for creating flawless photos, one lucky shot at a time.
Step One: Scouting
It all starts with the scouting. Generally, this consists of a carefully planned precision process. I begin by getting in my car. Then, I start driving. When I see a location (normally a body of water, because people like ocean sunsets, right?), I stop.
Step Two: Composition
Most photographers will tell you of the importance of carefully planning out your compositions to match the lighting, balance elements within the frame, etc. That's a load of phooey. Life is too short for planning. YOLO. Here was my thought process in framing this image:
(Drone drifting casually over lake)
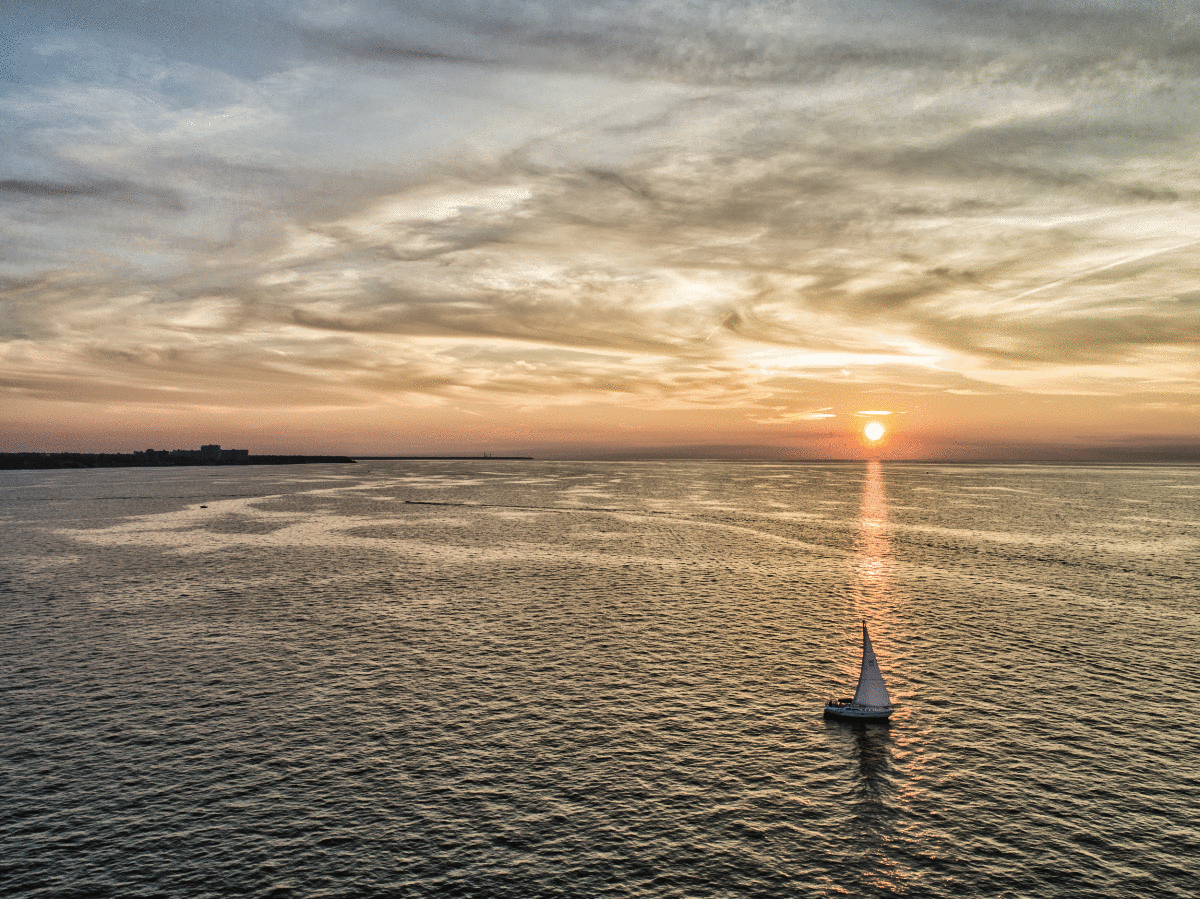
Oh crap, a sailboat! No one has ever seen one of those on a lake before. This isn't cliché at all. I'm gonna take a picture of it and be famous!
Whoa, look at the sunrays on the water the boat just sailed through! How cool would it be if I lined up the boat in them?
Whoa, this boat is moving really fast! I better engage sport mode!
(Furious chasing of boat)
(Burst mode resulting in 200 copies of the same image)
I'm sure there's a winning shot somewhere in that burst.
Uh oh, the people on the boat see me. They look pissed. Pretty sure one of them is making an obscene gesture at the drone.
(Furiously racing drone the other direction)
Sure, someone smarter than me could have planned out that composition, but I say it is much more fun to find a dollar on the ground than it is to work for it.
Step Three: Settings
How did I choose the settings for the shot? The way any professional would. I used a 9-shot exposure bracket. Any professional will tell you that this is the best way to ensure you got a proper exposure. If you don't take at least five identical shots of any scene with only the shutter speed changing, you're doing it wrong.
Step Four: Culling and Selection

In focus? Somewhat correct exposure? It's a winner!
Of course, with that 9-shot bracket shot dozens of times, culling took a while. Luckily, I have a foolproof system for determining the most elegant image with maximum creative and monetary potential among the hundreds sitting on my memory card. I call it the "messed up least" method. Basically, it goes like this: I go through all the images and look for the one where I messed up least. Is it in focus? Is the exposure within the ballpark? Say hello to my future masterpiece. In this case, I also had the additional requirement that the boat had to be in the sunray. Once I found an image that satisfied those three strict and specific requirements, I was off to the races.
Step 5: Cropping
After I made my selection, it was time to crop my developing masterpiece. For this, I draw on many years of mathematical expertise and artistic training to apply a carefully developed algorithmic process that combines the golden ratio with a singular value decomposition of the major elements of the image over an ornithological projection while simultaneously capturing my artistic vision perfectly. Ok, everything I just said is a lie. I just used the rule of thirds grid in Lightroom. That's what all pros use anyway.
Step Six: Presets
So many presets, so little time.
Step Seven: Sliders and Things
As great as presets can be, sometimes, unfortunately, there is no preset that can adequately capture the infinite creative vision contained within my images in its finite settings, so I have to get down and dirty with Lightroom's sliders. Now, Lightroom has upwards of 50 sliders, plus some cool-looking curves and colorful circle things. The first thing I tried with this image was drawing a smiley face with the curve thing, because I want my photo to make people happy. I showed the result to my friend, but he said it did not make him happy. That made me sad. Undeterred, however, I tried again. It is not my fault my friend is a picky jerk who doesn't appreciate art.

My curves layer is sad because my friend made me sad.
Step Eight: Creative Edits
Now we're getting somewhere.
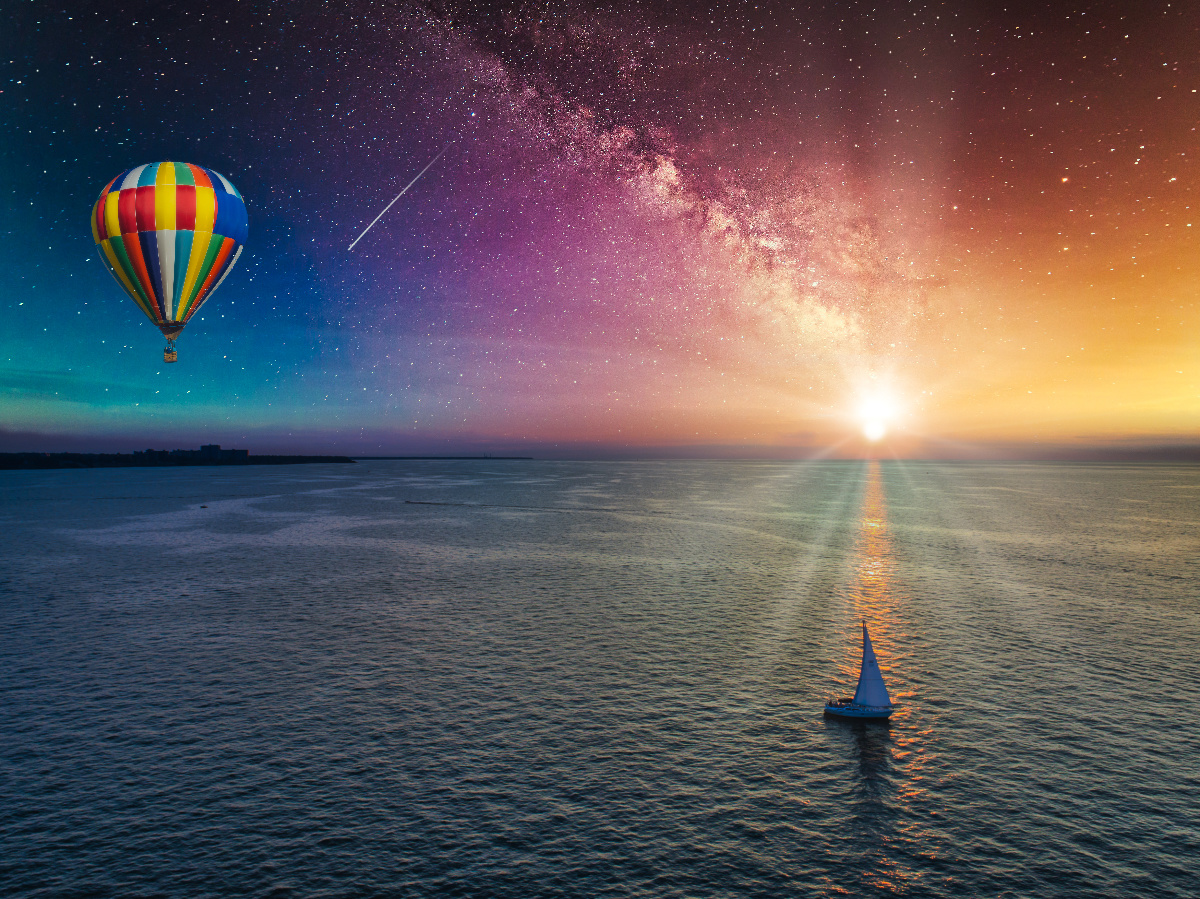
Was it time for a sky swap? A hot air balloon? Both!? I think so. Two hours into the edit, I was starting to gain some real momentum. Yes, I was violating several laws of astronomy with this edit, but science can't contain my art.
Step Nine: I Took It Way Too Far

This edit is boring. It's fine. Whatever.
Several hours in at this point, I began to realize that I should have turned off this road quite a way back. This is normally the time the edit of what is to become the final image finally begins. So, what does that entail? An exposure adjustment, some contrast, a little dehaze and sharpening, and blue-ing up the water so it looks less like Lake Erie and more like the ocean so I can sell the print to people looking for pictures of tropical islands. It's a boring edit. I'm a boring person. Time to export and upload to Instagram after choosing the 30 best hashtags and tagging 20 feature accounts.
Conclusion
There you have it: an honest (maybe slightly exaggerated) look at how a photographer shoots and edits an image. Buy my presets.


Your punishment is no PhotoShop for a month. "Photos" only for a month, included in Windows 10, is all you're allowed....
.
Schitts Creek! lol....it fits
That was funny, Alex! Thanks for the humor, and thanks especially for writing the entire article yourself, instead of just linking to something that somebody else wrote. I truly appreciate original content.
Very funny, Thank you for writing it.
Alex, seeing someone use a real world editing process gave my heart joy. The best humor has a kernel of truth at the center, or in this case, an entire bushel basket of truth.
"look for the one where I messed up least. Is it in focus? Is the exposure within the ballpark? Say hello to my future masterpiece"
Ha! So true! 😏
Yes, I know it was exaggerated, but it still makes me feel like less of a f**kup in my own workflow. BTW, Alex Cooke, I need a refund on those presets I just bought... The awesome hot air ballon wasn't included.
Lmao
LOL
Sometimes it's hard to tell where the satire ends and the seriousness begins. My first tip would be - don't use drones, because your fellow humans hate themd, but I won't get many takers on that. I can relate to Lake Erie water color but as I turn up the fake blue in pursuit of the green, my face is getting red.
One thing I really agree on is that the good shot is never one you went out intending to get, or were prepared for at the moment.
Look up the term sarcasm and re-read the article.
M*ass*terpieces are really fun to look at.
this was a real odd article, thank you - i like your sense of humor ;)
Over-mastered? Too much mastering for its own good? Masterpiece for the hell of it?