Through editing photos, many people aim to produce work that remains grounded in truth while still adding a bit of themselves and their personal vision to it. Using ON1 Photo RAW 2018.1 software, a fully featured all-in-one image editor, here’s how to leverage a few of its most powerful tools to tell your story.
Before we begin, let me explain why photo editing is still necessary for almost everyone’s intent. Some people believe that what comes straight out of their camera is the truth. However, while the engineers that built the camera and sensor technology are brilliant, they simply weren’t there when you snapped the photo. Within the camera’s software, they can compute a good estimation of the colors or exposure in a tree standing in front of you, but most times the resulting image won’t match with what you felt it looked like in person. So if touches of our images are just calculated guesses from engineers you never met, let’s figure out some ways in which we can tell your version of the truth and put a little bit of creativity in along with it.
The great thing about using ON1 Photo RAW 2018.1 for this is that it covers all the bases from simple editing touchups, to creative effects, to advanced layer-based compositing. I can start with the basics and keep the image moving forward in editing if I choose to without needing to jump around to different programs.
Generally speaking, my goal with photo editing is to have the final image appear “just how it was” to its viewers. However, behind the scenes, there is always work to be done to get a photo straight out of camera to look its best. Below is my technique to make reality look its best in a two-dimensional space using Photo RAW 2018.


1. Use HDR When Necessary
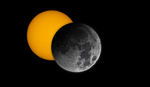
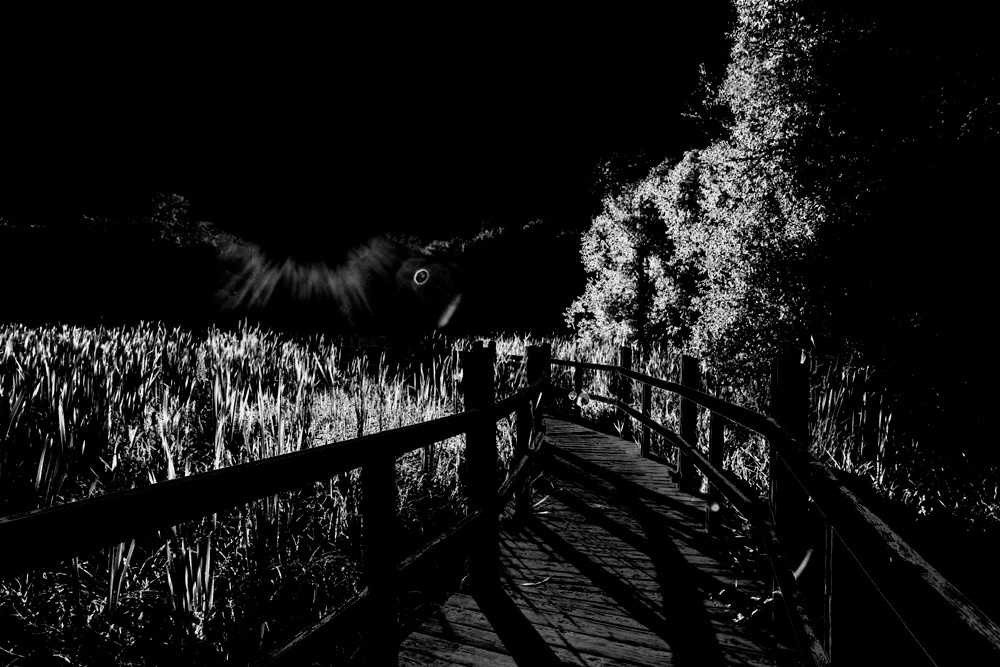
In the “before” scene shown above, I used the original Canon 5D that was released in 2005 to photograph as much of the darkness and lightness it could handle before being clipped. As you can see, especially with the sun in the frame, this is made very difficult to capture all the potential photographic data contained here.
To solve this, I shot seven separate exposures in raw format on a tripod ranging from -4 EV up to +2 EV, effectively capturing all the data I needed in the composition, albeit in different frames. To easily combine all the information into one single image, I first started with Photo RAW 2018.1’s HDR tool.
HDR doesn’t have to mean surreal coloring, out-of-control haloing, and grungy micro-contrast if you don’t want it to be, and ON1 understands this. Their smart HDR tool allows me to keep things subtle by giving me a starting setting of “Natural” which will basically combine the image set into one file without introducing any of the eye-damaging unicorn vomit.
In this particular scene where there’s a lot of foliage that moved in the wind from frame to frame, I opted to use a very high deghosting setting as well which took care of all the mismatch issues. Aside from deghosting, most every other adjustment I can make in the HDR tool transfers over to the Develop and Effects modules after saving it out, so just get the exposure about where you want it, and maybe the temperature and tint, but zero out the rest under the Tone & Color and HDR Look tabs to ensure a totally neutral look. All these can be refined later if you wish.
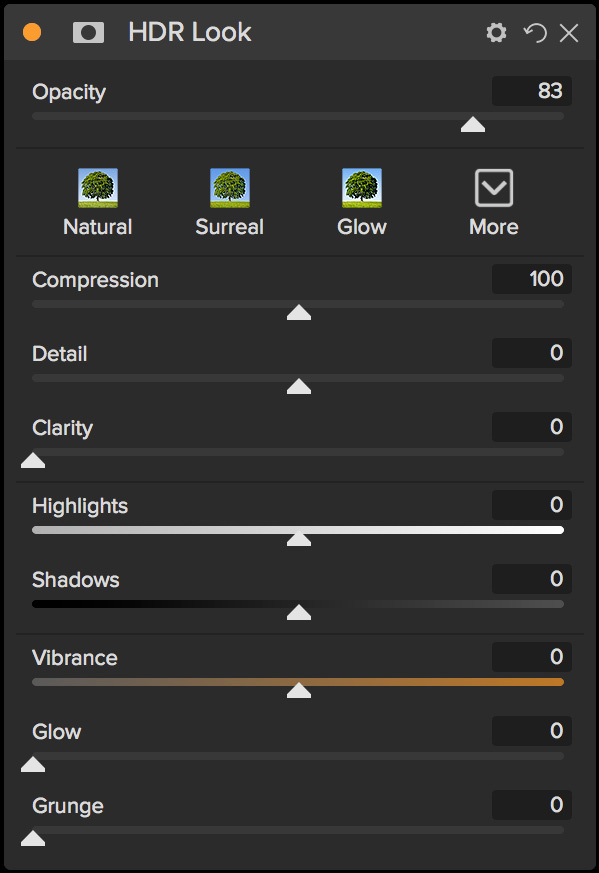
HDR settings can be tweaked in the HDR Look panel inside Effects after saving out the composite. For a natural looking starting point, I zero out everything.
2. Global Editing
Speaking of neutral, that’s the name of the game for this step. Global editing refers to the changes being made here affecting the entire image, and this takes place under the Overall Settings tab in the Develop and Effects modules. Notice the Tone & Color panel here? If you made changes inside the HDR tool, they will be reflected here for further refinement as necessary.
In this step, I’m just setting up my image file to have all the information necessary before diving into localized adjustments, which will make changes only to the areas of the image I need them done. For this photo I’m working on, I’m recovering as much of the sun as I can and checking that the shadowed areas aren’t in danger of being clipped.
One other step I take before getting my hands dirty on the creative side is to take care of removing dust spots and any other objects in the frame I want gone. If you’re editing a nature scene, there’s likely going to be a number of things you could tidy up, such as removing fallen leaves, distracting specular highlights, tourists, manmade structures, litter, and so on. It’s up to you how far you want to take this. For my photo, I mainly just wanted to remove the manmade gazebo structure peeking in from the upper left corner and get rid of a few dust spots appearing against the sky. The structure was as easy as selecting the Perfect Eraser tool from the lefthand toolbar and drawing over it. For dust spots, I used the Retouch Brush and zoomed in close to find all the specs for a single-click removal.
3. Local Adjustments
There are some correctional post-processing tools that make a lot of sense to work with globally, such as white balance temperature or color tint. Really though, many of the corrections that take place in photo editing can be better served as local adjustments. Rarely are photos so minimal that a change in contrast or luminosity affecting one area is the right amount for another area, or when one color would look better with a hue or saturation adjustment that all colors need to be changed the same amount too.
For local adjustments to work, we use layers and masks. Think of a mask as you would a stencil; it allows you to only affect the exact spots of an image that you want. Masks can be applied by manually painting them on with a brush or gradient, or by leveraging the Photo RAW software to create them for you based on luminosity or color.
Generally, each specific goal when you are editing an image should be done a separate layer. Changing the color of an object is one layer, and changing the exposure of that same object is a different layer. Know that the masks applied can be copied and pasted across any other layer, so don’t worry about having to repeat drawing the same mask over and over again when separating out different adjustments happening on the same object. It’s more important to give yourself the flexibility to make changes to any work done at any time down the road.
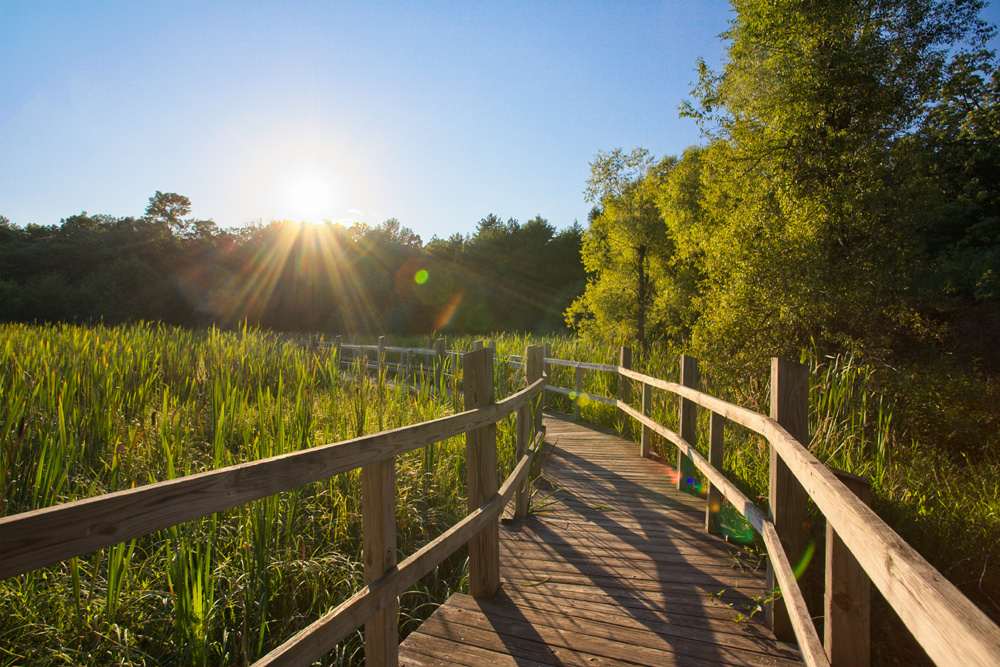
In my photo example, I recognize there are four distinct parts to it — the sky, the sunburst, the foliage, and the boardwalk — so I know I’ll probably use at least four layers to work on each of these independently.
First, looking at the sky, there’s not much going on with it as it was a cloudless day. However, I think this will work to the photo’s advantage as it keeps everything simple and the blue will look really nice up against the greens. So what I decided to do was just make the sky pop with a little more color to really play off the saturated greens. The fastest way to improve a blue sky is to head over to the Effects module and add a filter called Color Enhancer. The Color Enhancer has a preset called Sky that will do all the work for me basically. I know from experience that playing with the sky’s saturation is one of the fastest ways to make a photo look unrealistic so I’m really going to pay attention to the how much effect I use for this. In the end, I lowered this filter layer’s opacity to just 34 percent.


Lowering the effect's opacity keeps the realistic look in check.
Since I just worked with the sky to play well against the greens, I decided it’s only natural to follow that up by getting the foliage to where I want it. To save a lot of time in masking, all I did was go into the Develop module, add a local adjustment layer, then use the Color Range eyedropper to pick out the green on one of the leaves. Using the Color Range slider, I was able to adjust it down to just affect the foliage that was being kissed by the sunlight. From here I just added more warmth to the Temperature slider and a touch more Vibrance to boost the mood of the late-day sun.


Foliage layer mask based on color.

Using the Color Range eyedropper to refine the foliage layer mask, then raising temperature, tint, and vibrance adjustments.
Next is personal preference, but whenever I have a sunburst in my photo I almost always like to accentuate it further because I like how they look. For this image, I went into the Effects module and used the Tone Enhancer filter. Using the Highlights Lighter preset I painted in with a mask over each sun ray; clicking one end, holding shift on the keyboard, and clicking the opposite end keeps my mask lines perfectly straight. Now that the sunburst was lighter, I also wanted to adjust the color of it so it wasn't so red. Easily enough, I just created a new Color Enhancer filter layer, copied and pasted the sun ray mask I just created over to it, then used the Color Range tool to tweak the orange hue and saturation.


The Tone Enhancer tool inside the Effects module has several presets to get your edit moving along faster. It can be easier to just use a preset and fine tune its opacity rather than go through all the individual sliders.
Altering the color of the sun rays.
The last piece that of the image that I determined earlier could use some editing was the wooden boardwalk. Whether just an optical effect or not, I didn’t like how green it appeared and thought it could benefit from some added color contrast to make it more separated from the foliage and visually stronger. All I did to make this happen was create a new local adjustment layer in the Develop module, painted in a mask covering the main areas of the boardwalk, then shifted the Tint slider towards magenta, added some warmth with the Temperature slider, and added a little more Saturation.


A hand drawn layer mask for editing the main areas of the boardwalk.

Boardwalk local adjustments.
As you can tell, I’m sticking to just a few basic tools, a few of which you probably already use right now. The difference here is that by using masks and separated layers, each adjustment is targeted and in the end creates a cleaner, more natural looking photograph. I’m still getting to decide what I like and what better reflects my style in my image, but I’m also not making sweeping changes that attempt to turn nothing into something. This last step below is probably the most fun and where a photographer can really develop a particular look in their photos.
This step is, of course, the all-too-important dodge and burn. If you’ve ever wondered how a photo is able to achieve such interesting depth and moodiness, nine times out of ten it’s probably the dodging and burning that appeals to you.
Like everything else in this section, dodging (lightening) and burning (darkening) are going to be on their own separate layers. I prefer to use curves for my dodging and burning, so I went into the Effects module and created a Tone Enhancer filter for each. Scrolling to the bottom of the Tone Enhancer filter there is a dropdown to make a curves adjustment. Set the curves to the maximum lightness and darkness you want to paint in and then click Invert Mask. Now, all that needs to be done is to paint in the mask with a low-opacity brush. Check the amount of adjustment by playing with the opacity slider. I noticed my burns were going way to dark so I countered this by dropping the layer opacity to 36 percent.


Dodge curve made with the Tone Enhancer filter inside the Effects module.

Burn curve.
Think of dodging and burning in the mindset of “enhancement”; that is just dodge things that are already a lighter tone and burn what already is a darker tone. Don’t try and flop the exposure to the other end since this generally creates an unrealistic, flat look.
4. Finishing Touches
In the finishing touch stage of photo editing, I usually have let what I’ve done already rest on my hard drive for a little bit and then return to it at a later time. By doing this, I can have a fresh gut reaction to what I’m seeing and it’s very easy to spot anything that needs more tweaking.
Because I did everything on separate layers with masking inside Photo RAW 2018.1, it’s simple and quick to first recognize that maybe the greens are a little too toxic waste colored and either lower the opacity on the foliage layer or fine tune the color on them.
With my image shown here, I came back to realize my greens were just a little off from where I wanted them, the photo’s color temperature was too warm for the mood I wanted, and I noticed that I needed more contrast globally throughout the image. To fix the green foliage color, all I needed to do was go into my previously created foliage local adjustment layer and bring the opacity from 95 percent down to 75 percent. Then I moved over to the Overall Settings tab and played with the Temperature slider until I felt it looked better. Finally, in the Effects tab I added a new Tone Enhancer filter and in the Curves adjustment I enhanced the highlights and kept the low-end shadows the same to give the photo a bit more pop.


Raising the highlights and protecting the shadows to pull out more contrast in the final image.
Things to Remember
- Don’t underestimate subtlety: Always test changes with Photo RAW’s opacity slider and frequently turn on and off layers and filters to see the before and after comparisons.
- Use local adjustments and layer masks inside the Develop and Effects modules.
- New goal, new layer (and give it a custom name so it’s easier to find later).
- Walk away and come back later to see the image with fresh eyes.
In this article, I just touch on a couple of my most-used Effects filters and editing tools, but there is so much more to explore with ON1 Photo RAW 2018.1. Be sure to download a free 30-day trial to really see what I mean when it comes to the depth of this photo editor.