
Capture One offers quite a few tools to adjust your raw files. It’s best known for its color editing capabilities, but luminosity adjustments are also very well designed. One of them was introduced last year with Capture One Pro 9, and it’s called the Luma Curve. It’s a powerful feature to adjust contrast manually while avoiding any color shift. Let’s see how it works and how it compares to an RGB curve.
If there had to be only one tool you should learn to use and fully understand to master image editing and retoucher, no matter the software you rely on, it’s the curves. It may appear intricate for beginners, but once you can get a grasp of it, the uses are numerous. In Photoshop, you can pretty much do everything with it when applied in layers. In Capture One, the same can be said as it can be used in local adjustments and it offers very similar features to the one found in Photoshop, except for blending mode.
Actually, it’s not entirely accurate. While blending modes are not available in Capture One, there is the Luma Curve that replaces a curve switched to luminosity blending mode. When using the Luma Curve in Phase One’s raw processing software, you can shift brightness levels without risking altering the colors of your image. Perhaps you are wondering why it’s interesting because the RGB curve works great for you. Well, let’s say you’ve color corrected your image but the contrast isn’t quite what you’d like it to be. The contrast slider works perfectly fine, but it will work mainly on the midtones. So if you want to boost your highlights or your shadows without touching anything else, the Luma curve is the perfect tool.
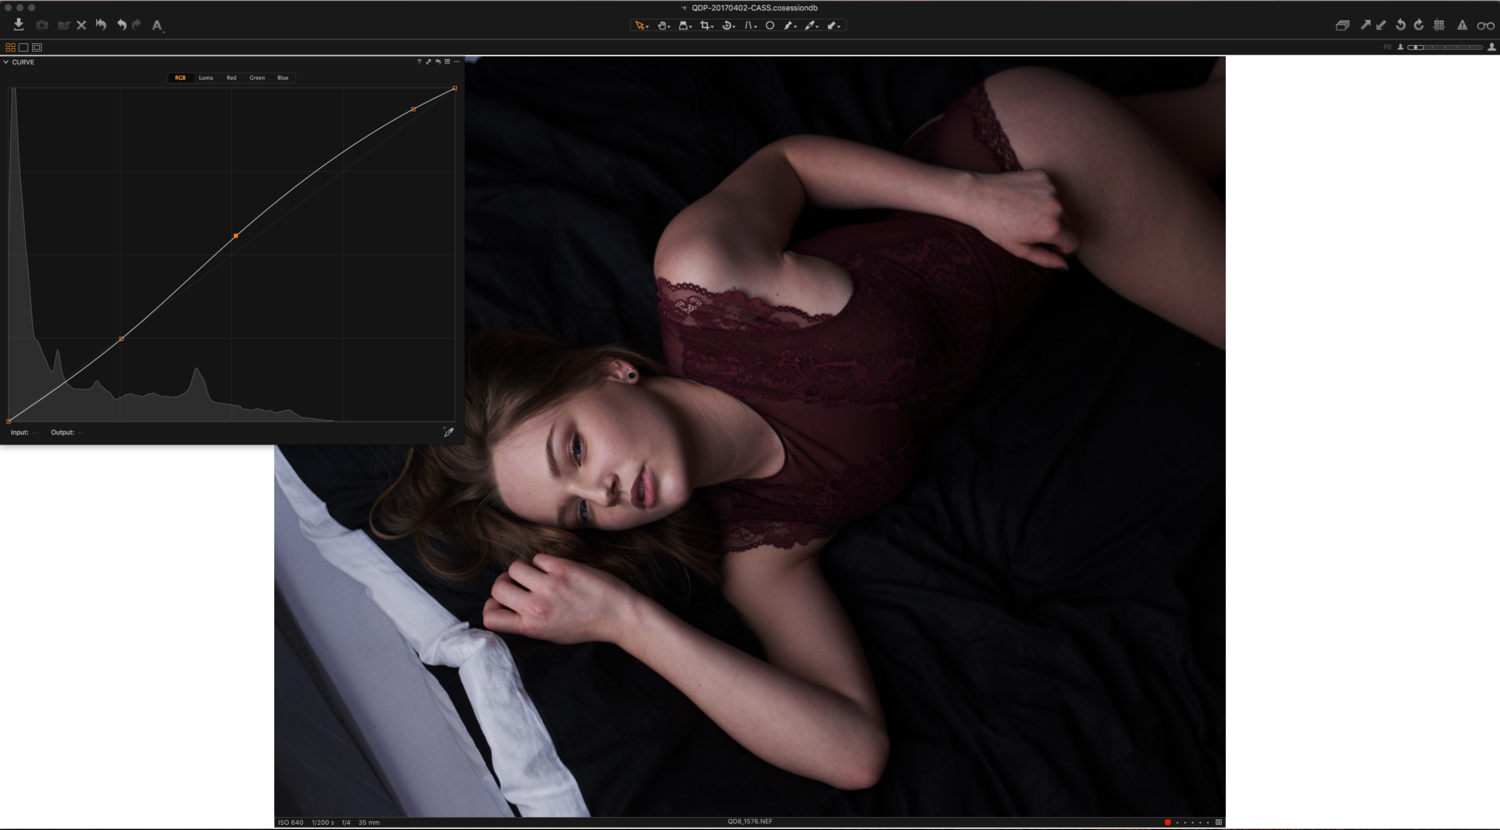
Here’s a sample image with no adjustment in the curve tool:

Let’s try to make it a bit more high contrast so that our model looks more alive. As it is, it seems a bit dull. I’ll start by using the RGB curve and pushing the mid tones and highlights up while maintaining the shadows as they are. Three points will do the trick here.
The contrast is not bad at all. However, the skin has turned become more saturated and thus looks redder. While I could go into the red curve and tone it down, I prefer to keep the color channel curves to make further color toning rather than color correction. I could also use the skin tone tool, but I’ve already adjusted it and don’t want to tweak it anymore. This is where the Luma curve comes in.
In the image above, with the RGB curve reset and the Luma curve adjusted, you can see that we kept the nice high-contrast look but without the added red saturation in the skin. Note that there may be times where you want the added color shift from the RGB curve but only lightly. In those instances, keep in mind that you can tweak both the RGB and Luma curves as well so that you don’t have too much color shift, but still can obtain the contrast you wish to have.

The Luma curve is not a complicated tool at all as you can see. But often, people stay clear off of it because no other photo editing software offers it. However, once you start using it, you’ll notice you cannot work without it anymore. Finally, one more thing to know is that the curves can be adjusted locally using the local adjustments. So if contrast needs to be tweaked only in some parts of the image, you can always take advantage of the Luma curve just in those areas.
Is the Luma curve something you’ve already used? Do you like it or does it seem weird not to have any color shift while playing with a curve? I’d love to hear your thoughts on this Capture One feature in the comments below.


I recently switched from LR to Capture One and I'm in love with the luma curve. So helpful. That, paired with much better color adjustments, it'll save my time in Photoshop significantly.
Luma Curve is my favorite editing tool in Capture One. Makes perfecting contrast a snap.
Thanks for the tip, I am relatively new to Capture One, but really am liking it, and had overlooked the luma adjustments, so this was very helpful!
I believe, and I may be wrong (it's been a while), that the old Nikon Capture NX2 had a similar luminance curve adjuster. But regardless, I use the luma curve all the time in C1. Love it. I am also surprised by how much I like the contrast tool in C1 as I'd gotten used to avoiding similar sliders in LR and Aperture.
I use Capture One every day but haven't been able to get good results from the luma curve. When I use it to add an S-curve, i get muddy results and the colors get yucky. I must be doing something wrong. Maybe I should start with setting the Base Characteristics to Portrait or lower?
Same here, no way to get good results with Luma. A small video would be very helpful...