
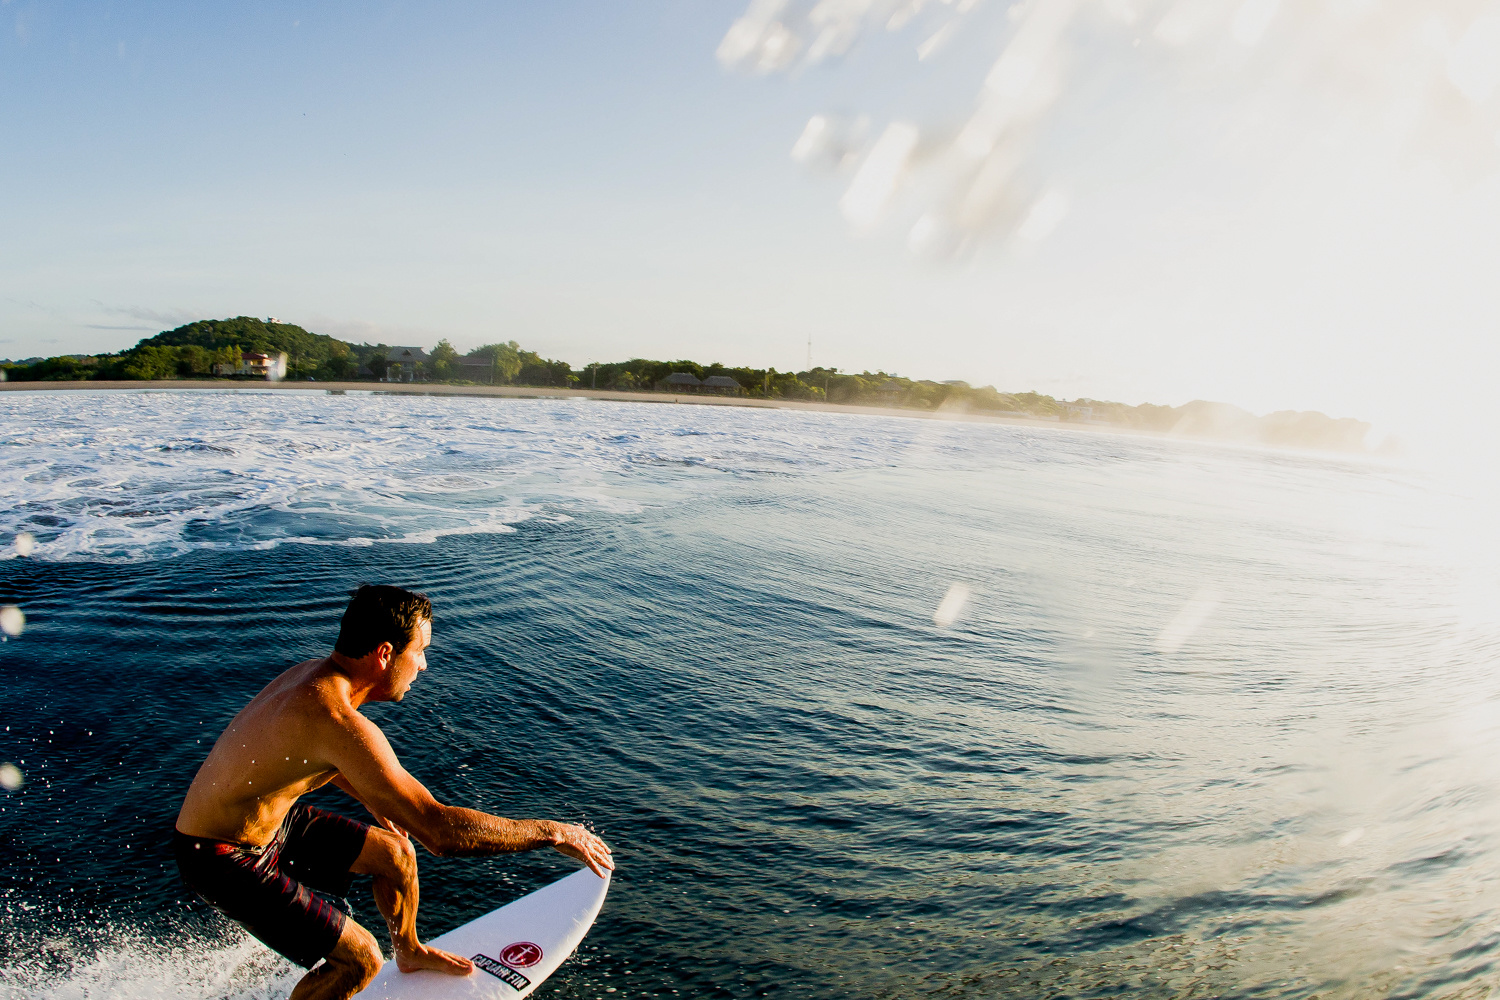
Photography, at face value, is already a difficult combination of capturing a scene as it unfolds and manipulating a tedious balance of exposure, aperture, and ISO to illuminate an image that does true life justice. When you add any additional element to the equation, the entire process can be thrown off. I often find this challenge in photography to be resting on the surface of the ocean in surf photography. Here are six tips I’ve learned that can help your surf photography.
In this post, I’m going to offer a few basic tips, both technical and practical, to help you the next time you find yourself bobbing on the ocean with a camera inside a box. When you break water photography down, you can find yourself in two separate categories: divers with deeply submerged cameras and surface photographers capturing the more visible power of the ocean. Many great water photographers can gracefully blend the challenges of both into a beautiful style. To go deep underwater, one deals with fading and refracted light, as well as an increasing pressure intent on crushing. To stay on the surface assumes the challenge of water spots, focus, and harsh, direct light. In this article, we will focus primarily on the latter of these two worlds and hopefully leave you with a few hacks to make your next swim a bit more productive.

Tip 1: The Right Water Housing for You
You’re ready to dive in; your inspiration is gravitating towards the ocean. You want to purchase a water housing, but you aren’t looking to spend a few thousand dollars. What is the best solution?
To begin in water photography will eventually require a significant purchase of some sort. If you are trying to cut your teeth from scratch, you might want to ease into the mix. Look for used deals on Amazon, Craigslist, or local classifieds. If you’re not quite sure, you’ll want to save the large investment for down the road. There are a bunch of options in the $100-$400 range; here is a short list of few of my favorites:
Nikonos: Designed by Nikon is 1963 for underwater photography, its compact design, ease of use, and excellent optical quality set the standard for several decades of underwater imaging. Nikon ceased production in 2001, but there is still a pretty sturdy secondary market. You can pick these up pretty affordably on eBay, Craigslist, or maybe the local camera store.
GoPro: These critters have come a long way since the original wrist strap 35mm cameras. The GoPro Hero 4 is widely considered the best mini camera on the market. With plenty of companies jumping on the accessory train, the mounting possibilities are endless. Many professional surf photographers shoot with a supplemental GoPro mounted to the top of their DSLR water housing. The price tag on these can begin around $200 for the Hero+ and run up to $400 for the Hero 4 Black 4L.
Nikon AW1 Mirrorless: Slightly more expensive at about $700, you'll get the option of interchangeable lenses, but beware, some of Nikon's lenses don't work in an underwater environment. The 14.1 megapixels will give you a pretty decent image, and you'll have a nice point and shoot for any ocassion.

For GoPro/XSories
If you’re ready for the big purchase, there are number of great brands to consider. The initial assessment should be of your camera. The majority of housings are custom built for specific camera sizes. If you plan to upgrade your gear, it would be wise to factor this in before your purchase. If you are ready to pull the trigger on a water housing, here are a few of my favorite options to consider:
These aluminum-welded water housings are some of the strongest on the market. They are widely used by a lot of professional surf photographers in a variety of challenging conditions.
Price: $1000-$2000
Pros: Tested, strong and durable
Cons: Heavy, welded corners can cause injury, limited customer support, costs extra for buttons, initially expensive
Poly-molded housings for dive or surf. These housings are pretty big in the industry; they are machine made and offer a bunch of extra parts for an affordable price, so customizing your rig is pretty easy.
Price: $1000-$2000
Pros: Market tested, versatile, standardized, wide customer service footprint
Cons: Initially expensive
I like this model. Rather than creating a housing for a specific camera, they have created a housing that has an exchangeable back. So, when you upgrade your gear, you don’t need to purchase a whole new housing.
Price: $1100-$1500
Pros: Standardized backs, buttons for all functions
Cons: Young in the market, limited customer service

Tip 2: The Dreaded Water Spots
Imagine this scenario: It’s a brutally cold day. The surf is heavy; drifty overhead ledges are detonating all around you. The current is unforgiving, you’ve been out for a couple hours trying to nail a specific shot. As your calves begin to cramp from the perpetual swim, you finally find yourself in the perfect spot. A freight train barrel is churning right toward you. Smack in the middle of this mesmerizing vortex is your buddy, standing tall, effortless, graceful. This is the shot you swam out for. Pulling the camera up to your face, you fire a burst of photos.
“Nailed it,” you think to yourself, dismissively closing that session successfully and swimming back to the beach.
Later that day, back at the car, you go through the images only to find a giant glob of water was collecting on the lens port. Water spots! All the images you had imagined as the next great cover shot have the effects of those light-refracting demons.
There are so many solutions out there, none as effective as a good dose of spit. As I’m walking out to the beach, I lather my tongue on my lens port. I’m not really sure what it is, but saliva adds a film to the port that holds the water rather than dispelling it. If you keep vigilant in licking the lens port, you can avoid water spots all together. As I get into position, lens just under the surface, I pull my camera up at the last minute before I begin shooting. The saliva film will hold your port clean for a good 15 seconds, just enough time to nail the shot.
Tip 3: Lineup Positioning
Just as if you were surfing, there is an etiquette with shooting in the water. First and foremost is considering the safety of yourself and others around you. It is your job to get out of the way if danger is imminent. Being an obstruction on the wave as other surfers are coming at you can be a dangerous situation if you’re not familiar how to react. Consider the conditions as well: if it seems too big, heavy, or scary to swim, then stay on the beach. In all scenarios, the classic mantra applies: if you don’t know, don’t go.
A key element in surf photography is being in the right place at the right time. Understand the break you are shooting. How is the water moving, how will this affect the way the wave breaks? In depth knowledge of how waves work will dramatically help your images.
Communication with your subject in the lineup is an important element. When you are working specifically with someone, letting them know what is working for photos and what isn’t can be useful. Having an idea of what the subject is going for is also key. Are they setting up for a consistent air section, barrel, or a powerful turn? If you know, you can figure where you need to be. Considering the conditions, it might also be pretty obvious. If you’re shooting blind at anyone scratching into a wave, you’re more than likely going to just end up with a bunch of throwaway images. Have a clear idea what you’re shooting. You are swimming because you recognize something elemental about the way the wave looks from the water: capture that.
Tip 4: Focus and Composition
There are a number of approaches to shooting in the water. I am going to cover two specific methods that I have found to be beneficial in my photography:
-
In the mix: This is a method I use when I’m pretty certain of the distance I will be shooting (e.g. barrel sections). I predominantly use wide angle and fisheye lenses with a max width of 24mm, then I set the focal distance around 8-12 feet before I put my camera into the housing. With an aperture no faster than f/9, the depth of field is relaxed to give me a nice window of focus on my subject. These settings work best on bright days, when you can ramp the aperture upwards to f/16 and still have an adequate shutter speed to capture action. When the surf is consistent and I have a clear idea of the shot I want, this is my method of choice. Proper execution will allow you to apply most of your efforts to staying positioned in the surf, only to raise your camera at the appropriate times in a rinse and repeat fashion. Shooting this way can get really fun on consistently head high beachy; you can find yourself pushing the limits up into the lip and occasionally over the falls. Stay alert; don’t go to a place you’re not comfortable. Pay close attention to the way the wave is breaking and what the bottom is made of; a toss onto dry reef can be deadly.

-
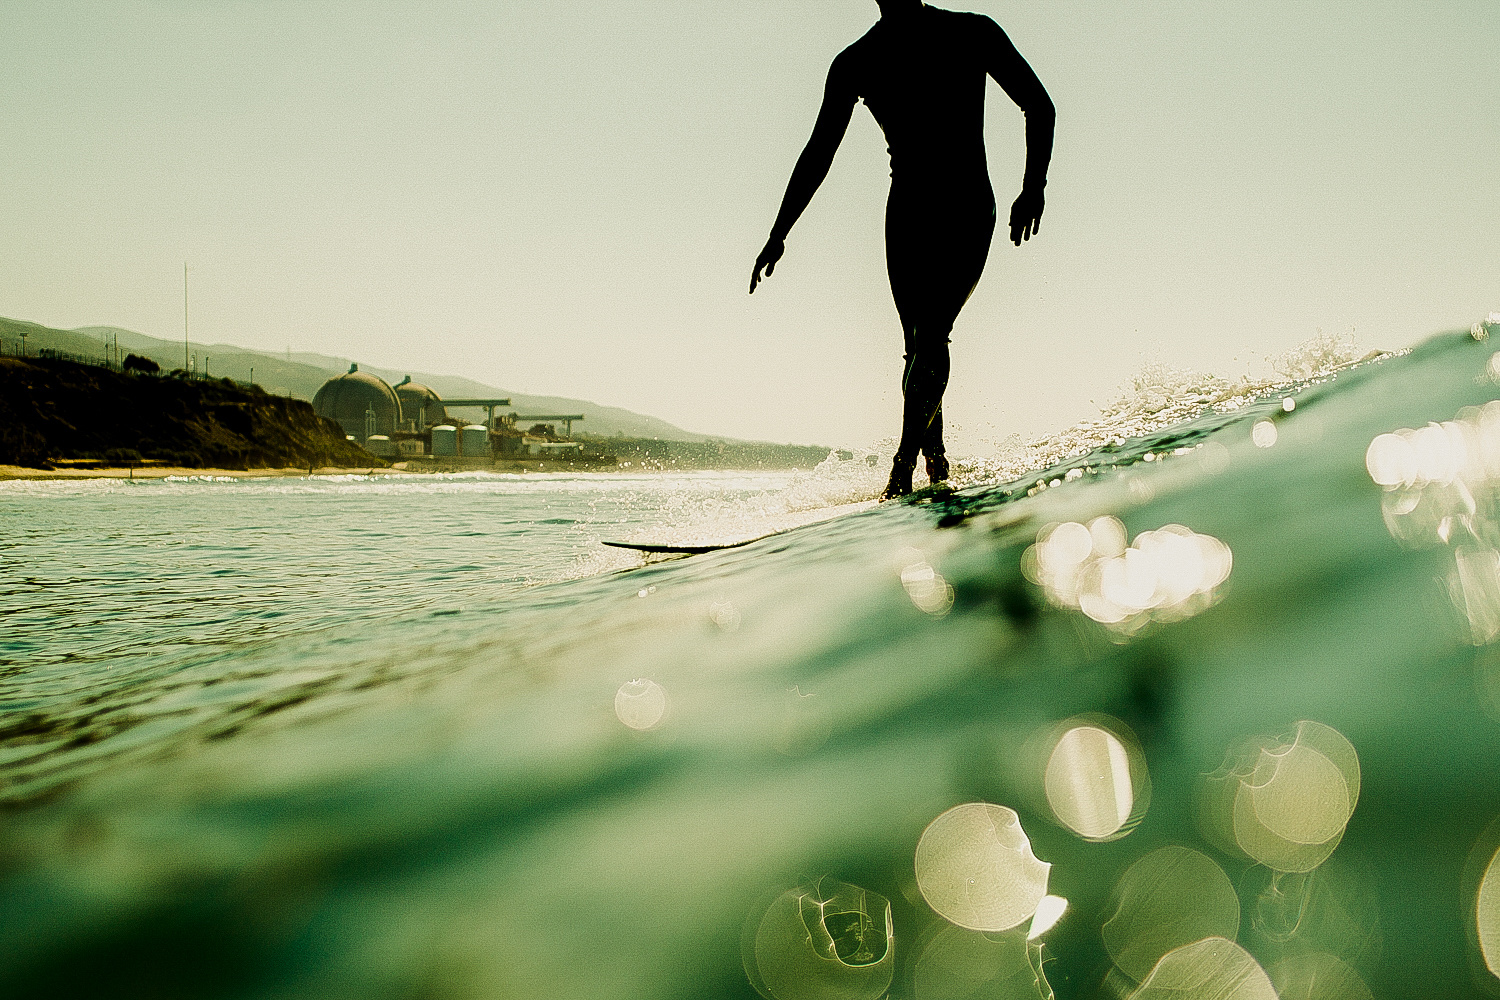
From the shoulder: This is my favorite of the two approaches. I set my camera to autofocus and activate the “one shot” option. Then I set my focal points to a single point in my view finder, preferably the center. Now I can aim my focus effectively. To allow for movement of the subject I will lead slightly, focusing my points just slightly on the water in front of movement. The freedom of focus allows me to bring my settings all the way to 1/8000, f/1.4, ISO 100. To compensate for changing light, I will just use the shutter speed as my main adjustment. Consider the light source; if you’re shooting into the light at f/1.4, you increase the potential for purple haloing on your subject. This purple border is the effect of chromatic aberration — correctable in Lightroom, but best avoided all together. The shallow depth of field on the water’s surface produces beautiful artifacts and flaring characteristic of some of my favorite imagery. The main principle of these settings is to find a spot in the surf, a channel perhaps, that allows you to stay put. If you are able to spot this vantage point, an appropriate prime lens is suggested. I gravitate towards my Sigma Art 35mm f/1.4 and Canon 50mm f/1.2L, but I encourage you to experiment.
Tip 5: Learning to Fail
Water photography is incredibly challenging. You may swim for hours and come up with only a few half-decent images. In surf photography, you’re at the mercy of the swell and the ocean. Currents, swell period, and tides all play a factor in helping you get into the right location. Just as a surfer watches and times the break of a wave, a photographer must be able to predict how things will unfold and quickly get into position. This mastery of timing can only be accomplished through experience and accumulation of failures. A true love for photography and the ocean will serve you well as you grow your knowledge. Some of the best photographers I follow shoot primarily out of passion. They are out every morning, camera in hand, shooting some aspect of the ocean environment; this persistence is key. Love for the ocean neutralizes the discomfort of brutal conditions. The motivation to shoot should always fall from passion rather than notoriety. If you’re trying to nail a cover shot, you’re in for a long journey.

Tip 6: Respect The Ocean
It kind of sounds like part of a soulful mantra preached by Bodhi as he paddles out to some mythic swell of the century. I’m saying it nonironically. The ocean is powerful; it will shrug you off in a second. The triumph of photographing big surf isn’t just getting out, it is staying out and then getting back to the beach unscathed with a handful of good images.
If you’re not sure of your swimming ability, you shouldn’t be out. There is an element of paying dues with surf photography; just when you think you’ve paid up, the ocean sends you another bill. The amount of time you can put in, learning how water moves at a break, the more you will benefit.

The most important thing is to figure out what works for you. It is a process of elimination in a lot of ways. The important part of surf photography is knowledge through experience and then building on that experience.


Great Article Jason. I grew up on an island and so most of my childhood was spent in the water and surfing. You couldnt have been more right about the customer support of SPL. Quite frankly... I didn't dig the guy I spoke to - very arrogant and seemingly couldnt care even though I dished out $2k+. But... I do love my housing.
I just recently came back home from Zanzibar and threw together a very (non-professional) creative depiction of surfing there: https://vimeo.com/160926200
Thanks for the article Jason!
Rad! Thanks for the share!
Hey Jason, I wanted to ask you whether you were faps? (The body board fins if its so called that?) when you're in deep water & shooting? Fortuantely my experience was chest high, so I could manage with reef shoes & thats it. Also, how do you manage swimming with your housing? 1 arm is quite a disadvantage in the water unless you got fins...
oh god! not you WERE faps. you WEAR faps.. sorry
Shayne,
I wear fins. I should have probably mentioned their necessity in the article. I have a pair of soft rubber DaFin swimmers. Best purchase I've made.
Thank you for sharing the article Jason. Just so you know we also offer conversion kits to update units to other camera models or even manufactures. Always great to see more articles about water photography in general as many viewers of this site could find themselves shooting in the water at some stage.
Phil, thanks for the info! Sorry for missing that feature in the article. Definitely agree, water photography is an inevitability!
Keep us in mind for any future updates! jason@thekellerwhale.com
Thanks for the compliments, glad you enjoyed it.
Pete, Thanks for the comment. I tried using RainX for a while. Problem with lubricants, they force the water to bead together and run off. However, the water doesn't always evacuate for the shot... leaving spots on the photos. Spit, though super low tech, builds up a film of water. The water STAYS on the lens in a very thin film, dispersing any drops all together. Readily applying in the water keeps it primed.
There may be a product that works, but truthfully I'm not comfortable with adding chemicals that eventually end up in the ocean. Keep us posted if you find better methods!
dang, this would have come in handy a week ago... haha nice stuff!
7. Know how to surf. (Seriously, it helps).
8. Take a look at the work of Corey Wilson and Brent Bielmann, two of the best water photographers in the business today, for an idea of what constitutes elite-level surf imagery. The positions those guys put themselves in are absolutely insane.
Jason, those San O shots are getting me all frothed out on memories of cutty little Cardiff/Enci/Leucadia reefs and sandbars. Miss that place. Bet Turtles was ON this winter. Yeewww
yeah.
its been a really fun winter!
Great post. Ive been a surfer in New England for 20 years and have always wanted to try shooting in the water. Ive had this idea for a book on New England surfing for a few years I think would be a great project. Its such a great large community of surfers that even a lot of locals dont realize exists.
https://fstoppers.com/photo/125618
Tip 0: Don't live in the Midwestern US where you've literally never seen a surfer with your own eyes.