
Creating sharp photographs can be challenging, a vast array of camera settings and subject matter can make it tricky. But there are three ways to successfully enhance the sharpness of images using Lightroom.
From capture to publishing it's important to maintain a clear view in photographs. Unless purposefully capturing abstract or intentionally blurred shots, most of the time we, as photographers, are trying to get sharp images. So let's say you have an image that is in focus but isn't quite as pin-sharp as you'd like, what do you do? Well, there are three main sections to sharpening by using Adobe Lightroom Classic. One is to use a global sharpness adjustment to prepare the entire image. Another is to selectively alter sharpness in localized areas using a mixture of adjustments. And the final method is to sharpen when outputting your photographs ready for publishing. Let's take a look at how each one works and why you might want to opt for one over another.
Global Sharpness Adjustment

In the Develop module in Lightroom Classic the Detail panel reveals all the sharpening controls for global sharpening adjustment
In the Develop module in Lightroom Classic we can use the Detail panel to apply sharpness filtration to our photos. By using this method, Lightroom applies a uniform sharpening process across the entire image from edge-to-edge in the frame. With this global sharpening adjustment, we can take advantage of the four key sharpening control sliders.


The amount slider is self-explanatory, by sliding to the right we can see that the intensity of the sharpening is increased. But the radius slider just beneath is also important for good results. It's responsible for controlling the thickness of the line contrast between edges with a smaller value affecting a smaller line, and a larger value making larger-scale changes. This is important because sometimes we need to sharpen a subject that is massive in the frame and other times it's useful to eke out finer details in a subject, like the fine feather details of a birds' plumage.


Following on from the radius slider, the detail slider also makes changes to either small or large-scale edges. The slider starts by making changes to larger edges first and by sliding to the right gradually increases its sensitivity to smaller line edges. Thanks to this sliding scale it's possible to avoid introducing unwanted noise on images because noise grains tend to be small across the frame.

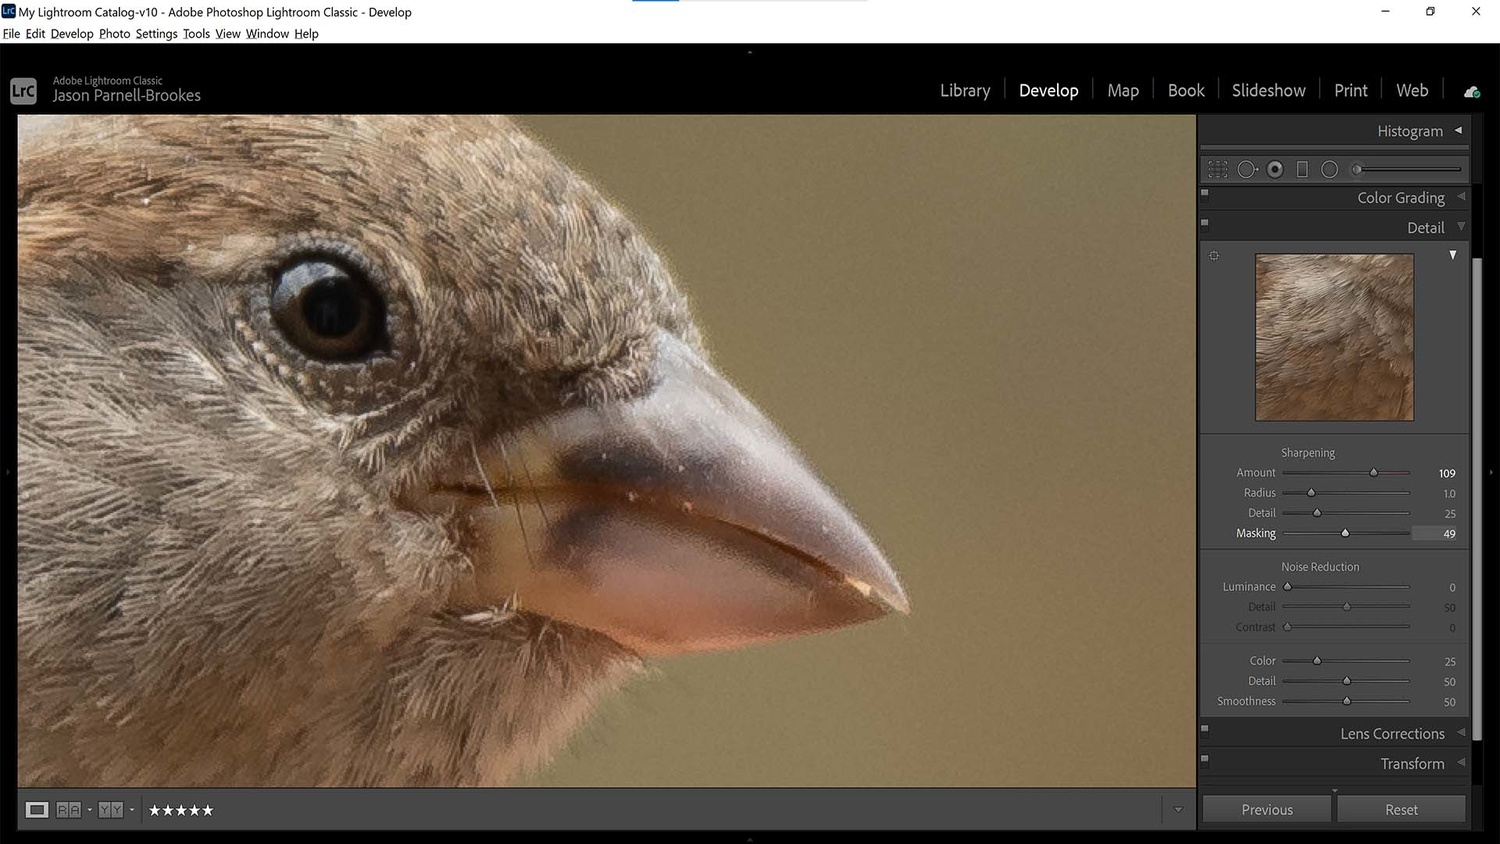
Adding sharpening brings with it the problem of enhancing noise, as we've already discussed. That brings us to the final slider in the sharpening section of the detail panel: the masking slider. Set at a value of 0 the sharpening controls are applied to the entire image, but as the masking slider moves to the right, the sharpening effect will start altering only the stronger edges in the image.
Fine-Tune Small Areas
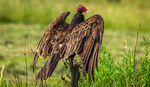
The sharpening controls in the detail panel control the sharpness of a photo across the entire frame, regardless of subject matter, with controls only altering intensity and frequency of sharpening based on line edge contrast. However, what happens when you want to sharpen only a small section of a photograph? For example, you may want to increase eye sharpness in a portrait or a specific spot on a product in a commercial shoot. That's where the adjustment brush comes in.

If only specific areas require sharpening, such as the eyes of subjects, then the adjustment brush, radial filter, or graduated filter can all be used to add sharpening in these regions
Using the adjustment brush we can sharpen specific areas that we paint over. That means less worry about enhancing noise in the image because we can be much more selective over areas that are sharpened. Adjusting brush size also helps to fine-tune sharpness over minute portions of the photograph, leaving close-by areas unaffected.
The downside to using the adjustment brush for sharpening is that there's limited control over the type of sharpening we can use. For example, there's only one "sharpness" slider, as opposed to the four slider controls for global sharpness adjustment. Things can be recovered slightly if using multiple brushes by utilizing the noise slider to reduce noise problems, but it does create extra work. Generally, this isn't too much of an issue though as the adjustment brush would be applied to smaller select regions of a photo, rather than on a large scale across the frame. So too can you use the radial filter or graduated filter to increase or decrease sharpness with the same amount of control as the adjustment brush, but I find myself turning to the adjustment brush more often due to its masking flexibility and ability to paint irregular shapes.
Output Sharpening

Output sharpening adds a final level of sharpness consumate with the intended media, whether that be for screen, matte, or glossy paper, and allows users to choose the desired intensity of this output sharpening
After making sharpness adjustments in the editing stage further sharpening can be added to images during export. Go to the export window (Ctrl + E or Cmd + E on a Mac) and scroll down to the output sharpening drop-down menu. Tick the Sharpen For box and select from the three options: Screen, Matte Paper, or Glossy Paper. This type of sharpening is designed to compensate for sharpness loss due to the type of medium you're intending to publish on.
For example, printing on matte paper will require a different level of output sharpening when compared with publishing for view on digital screens due to the physical differences between pixels and printing nozzles. It should be used right at the end of the processing stage, just before the image is being published, and not to replace any sharpening processing needed at the time of editing.
If used correctly, Lightroom has the ability to make your sharp shots even sharper without enhancing unwanted noise or other compression artifacts. It gives three options for global, localized, and output sharpening control to keep a handle on the photo at every stage of the process. It's unwise to use these controls to sharpen an unsharp image (or unsharp areas) because ghosting or sharpening halos can start to appear if overdone and the photo will begin to look like it's too heavily tampered with. Instead, it's advised to go back and reshoot the subject so that it's sharp at source, or better yet, review the images when taking them to ensure the photos are sufficiently sharp before undergoing sharpening processes in Lightroom.


The author might want to add this essential bit of info - while using the masking slider in the sharpening section, holding down the Alt key (Windows) shows the actual mask that will be applied.