
I'm sure most of you have taken one look at the lens flare filter in Photoshop and decided to quickly over look it. Well I am here to say that you might want to reconsider and give it a chance. With the right steps and processing one can actually make it look decent. Now I'm sure there will be a few people that will still think adding flare is asinine, and to that I say to each their own.
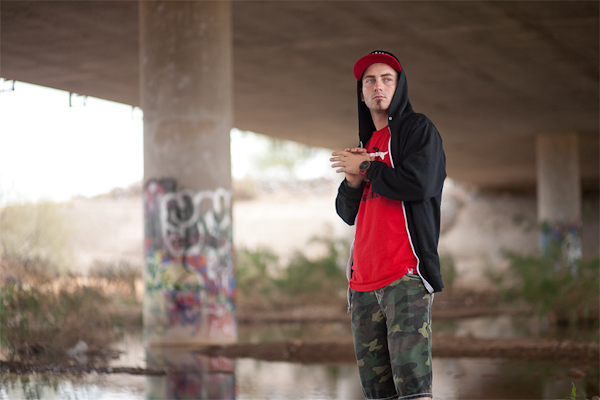
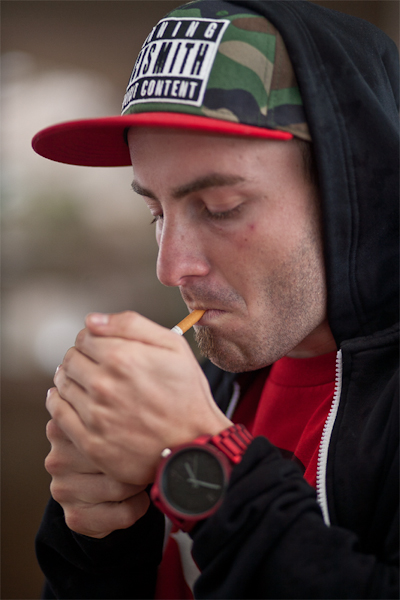
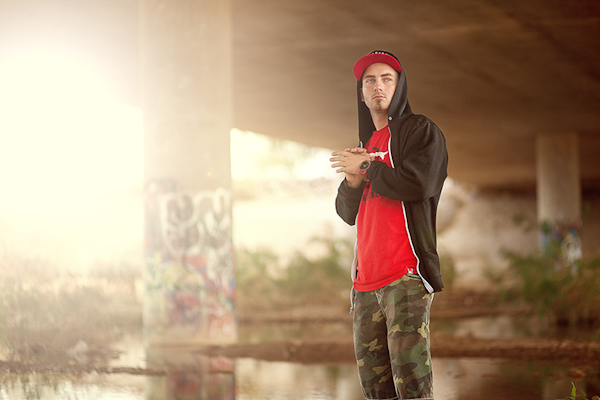
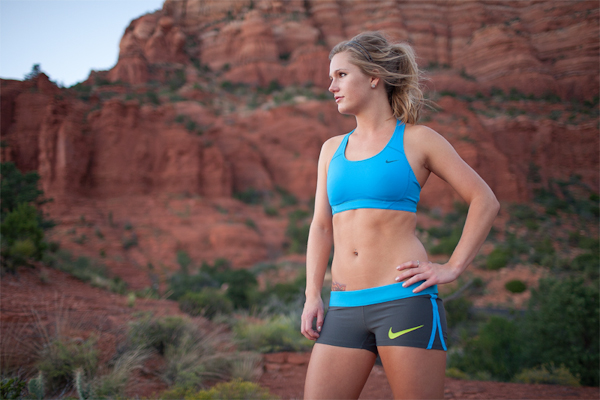
Before you start this process you should shoot or choose an image that would already look believable having had flare. Make sure there is a directional light source that you can exaggerate with the flare. I see a lot of lens flare that is irrationally added and the image will tend to be very "cheesy" for lack of a better word.
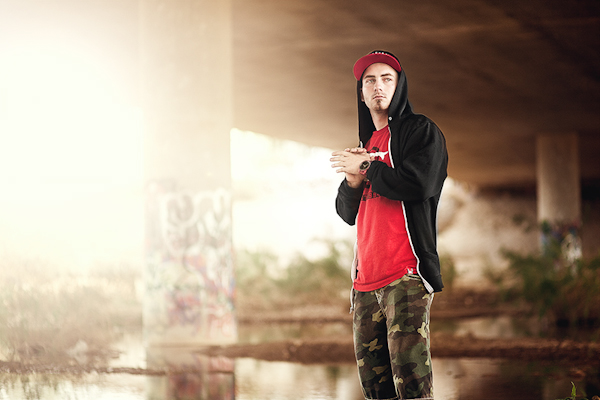
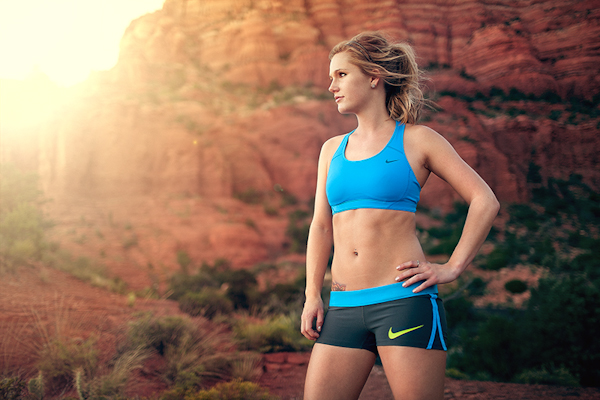
Once in Photoshop always make a duplicate layer. Then go to Filter-Render-Lens Flare. Choose The 105 Prime. I feel that the 105 prime is the best choice of the lens flare filters due to the lack of cheesy orbs the other ones add. I usually have the brightness between 140 and 170. Place the lens flare in accordance to the light that is already hitting the subject. Now create a layer mask for that layer and use a large super soft black brush at a low opacity between 1 and 10% to erase the orbs. You can change the brush size to erase some of the flare off the subject to make them pop out.
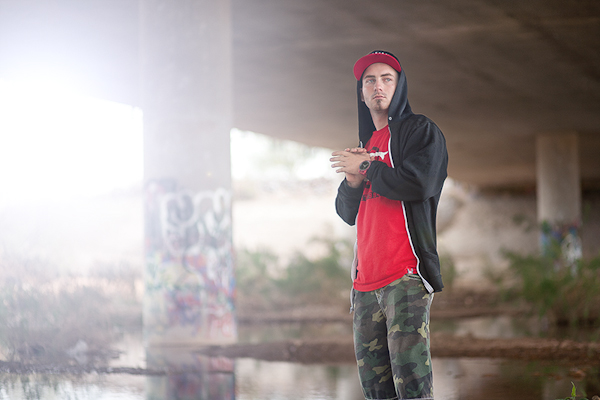
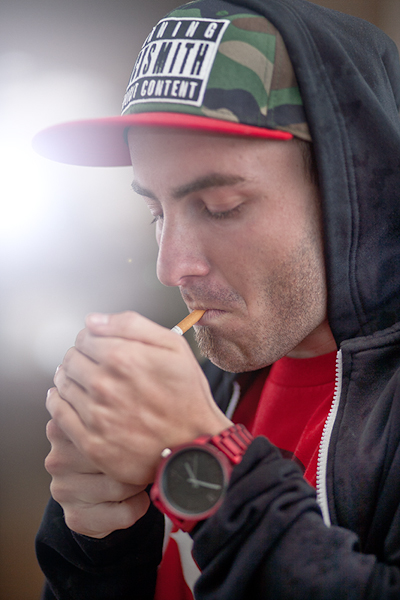
So now you have this flare but it is a blueish light that probably does not match your subject. Open up the color balance adjustment layer and under shadows, midtones, and highlights add a bit of yellow and red on each slider. Don't go over board, you should not be + or - more than 10 to 20, especially on the highlight sliders. The image's color balance will still not match up at this point. Take a large super soft black brush at a low opacity around 15% to gradually erase the colors around the lens flare so its mainly just the flare that is being effected by the color balance adjustment layer. Open the levels adjustments, change the RGB to Blue and move the output slider to the left. (Its the bottom slider that starts off at 255, move down to around 245). Follow the same masking process as the color balance adjustment. Remember White reveals, black conceals for layer masks.

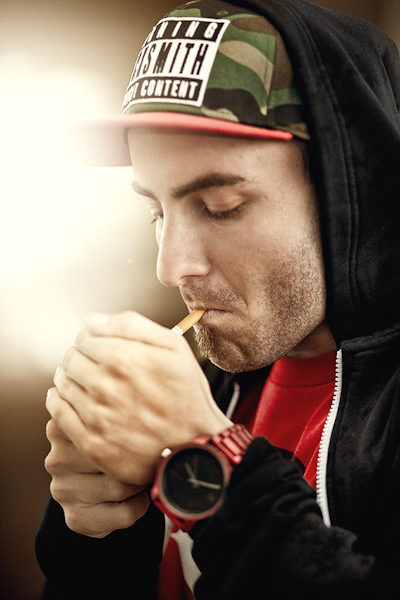
It is now where i do all my dodging and burning and selective sharpening.
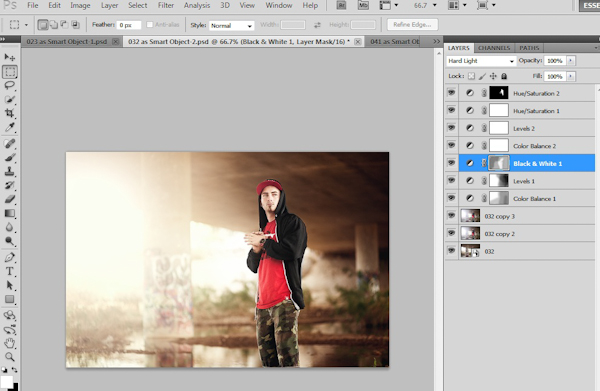
Depending on what sort of processed look you want you can add a Black and White layer and change the blending mode to "soft light" or hard light".
This will add a bit of contrast while being able to control the luminosity of each color. After that I will open another color balance and levels adjustment layer and fine tune the tones of the entire image. I sometimes have several color adjustment layers effecting different parts of the image. The final step for me is adding several hue/saturation adjustment layers. With these I will fine tune the skin tone, color of the clothes, background, and anything that needs to be corrected. In my Opinion the hue/sat slider are one of Photoshop's most useful tools. This is how you can get better skin tones, change clothes colors to match the photos color pallet, ect... Remember to always play around with the opacity of each layer. I rarely leave it at 100%.

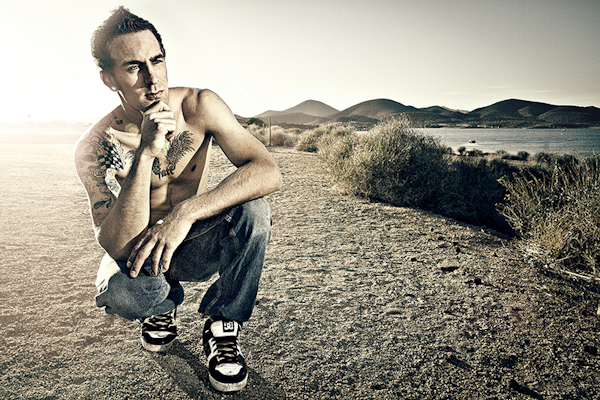
Here are some more before and afters. All images on this page were shot in natural light except the very last before and after. Hope I was able to teach you something and if you have any questions please don't hesitate to ask. I am more than willing to help.


The first line of this article sums up my thoughts up until now! I´ll try this, really just because actual lens flare in camera 99% time (in my opinion) looks sh*t, I go to great lengths to avoid it.... but, at least this gives more options after the fact. The example shots here (except perhaps the last one) look awesome.
To all saying "get it right in camera" I agree, but "right" might be a little subjective! Sometimes blown highlights and clipped blacks can make an image great, or black and white looks better than colour, but I would rather decide these in post and have the option to change my mind about it several months later if need be. Get it right in camera, enhance it in post!
This was a great post, Thomas. Thanks!
I think people are going to look back and shake their head at all fake lens flare. It'll be easy to look back and go - oh that's fake. Then you're instantly out of the realty of the situation taking away from the value of the image.
Highly doubtful with the constant progression of digital media, but its interesting you say that since there are quite a few very successful photographers that do similar types of added flares, gradients, or composites. I hope this day day in which you speak comes so then you can sit there and say I told you so, but until then you should respect all forms of photography
haha, i think photography... well modern digital photography... goes through post production techniques that everyone gets really hot on for a bit (remember high pass?). yes flares seem hot right now BUT this is also a technique that can be used very effectively for a long time to come in my opinion
Get it right in Camera? What does that mean exactly? Getting it right in camera is getting the image that I have in my head. I know how to get the image right in camera so that I can achieve what I need to in post. Just like Adams he made sure he had what he needed in film to achieve what he wanted in post. He got the images right for his cloud library and shot them perfectly so that he could burn them into other images. He made sure that his exposures were bang on to allow all the chemical processes that he knew he needed to preform afterwards to get the picture that couldn't be taken in Camera because even Ansel couldn't make clouds do things or make film have more dynamic range. In the end I am trying to achieve an pre visualized image if you can get that in camera awesome but often that isn't possible in camera. Do you change your vision and give up or do you find a way to get the image in your head out? This technology didn't just show up one day. It was demanded by photographers to allow us to get the pictures out of our imaginations.
I like what you've done - but it doesnt beat real flare, I would have just done the shoot on a sunny day
except the fact that with this method i can pull 10x's the amount of detail
Except that as a working pro you don't always have the luxury of waiting for the perfect day and perfect situation for a shoot. So until Canon makes the 1Dw (weather manipulation included!) people will sometimes need to rely on post production techniques to get the images they (or their clients) want. It's articles like this that help them to learn the proper way to do that manipulation so they can complete their vision.
helpful thanks!
Thomas... Why did my post get deleted?
If it did I'm not sure why, I have no control of users comments man
Bummer. I wrote a whole paragraph saying nice things about the article and the reasons why... Maybe a moderator can get it back on here.
gotta love the negative nancys.
dope post, the photos look real and awesome.... some of the comments are so idiotic, i couldn't read all of em.
I'm looking at the photos in this post (great tip by the way) and all the spots look familiar. Then I realize it's because you're in AZ too.
Great post. Cool pics. Good knowledge to have. Comments should be shut off on all these posts. Read it and like it or go touch your self somewhere else.
Nice post Thomas. I think it is also important to note a few things.
1. This is an informative post and as such should be used as a reference or learning tool if desired. I think it is especially important to note that these post production effects are all aesthetically pleasing and spice up imagery. If there is one thing that I have learned is that photographers and clients have totally different ideas about what "final" images should look like. You were able to punch up the image and make it more interesting and captivating. Well Done.
That brings me to my second point.
2. Art directors, Editors, Photo Editors, etc. usually have a different idea about what images should look like. I thought I was a purist until I started getting payed for my work. The fact is, 99% of the imagery that makes an impact in the Commercial market is manipulated. It is necessary and for the most part out of the hands of the photographer when working for magazines and high end clientele. I have realized that a great photographer is also an artist. That means there should be a balance of geek:chic. technique without artistry is boring. Artistry without technique is very difficult for the audience to grasp and consume.
Why this long ass post???
I used to get a lot of "critique" from fellow photographers and artists. What I found is that instead of appreciation and genuine feedback, I got opinion and some sot of reflection of someone else's preference and personality. Then I realized I was doing the same thing with the 'Terry Richardson's' of the world. "oh he's a hack." "the guy doesn't take this stuff seriously" "he could've... he should've..." It's BS! The guy is kicking ass. If I don't like his work, when I become editor in chief of GQ or Vanity Fair, I just won't hire him. smh It is really absurd.
This post is a genuine appreciation.
I really enjoyed the post and I think the flared images are great.
There is a good reason that you are part of the Fstoppers crew.
Thank you. Keep the posts coming and please do not waste your time addressing non-sense and negativity. Let those people post things on their own wildly successful photography web-site for professionals.
Several of the comments here, complaining about techniques that were offered to them free from the artist, make me feel that you should have to pay for access to these tutorials. If you don't like the info, remind yourself that it was free, and then move on.
Many thanks for posting the tutorial. Not everyone is a photographer — some of us are retouchers/compositors, art directors etc., so things like this are very useful to add to our toolkit.
I absolutely love this post. I've been having a hellllll of a time lately because most of my clients are scheduling sessions to capture the sunlight, which is great - they just turn out very faded out and too much light entering my lens. I love this alternative for when I have a photo with just enough light poking through that the lens flare would be appropriate. Why does it have to matter (in reference to the previous comments) if the light is real or not? If someone wanted a 100% natural photo, they would use their own cameras. This tip is for photographers who are in positions such as mine, where the "real" sun just won't do. I love what a lens flare does to a photo. It adds a little something extra which is never a bad thing :)
Just a simple thought… As professional photographers, most of us are not shooting for placement in a museum, nor are we hoping to get publish. The vast majority are shooting for paying clients. If our client wants lens flare, and it's cloudy, what's wrong to adding it in post. Our client is happy, we get paid, and so we are happy. While I do not underestimate the importance of getting it right in the camera, I certainly don't underestimate the importance of getting paid either.
Wow! Totally loving this! Thank you for sharing. Btw, I do have a question though... I love how you manipulate the final picture where you have the subject equating down. How do achieve that effect of the stark contras. I love the effects done on that. Thanks again of sharing! :D
i tryed i real soft one on mine.. its not perfect.. but i like it.. https://www.facebook.com/Elketj/photos/a.720148771412527.1073741830.6091...