Over 20 years of digital photography produced 80,000 images. Culling is a time-consuming, tedious process that I’ve neglected. Consequently, my hard drives and cloud storage are bloated. Can Aftershoot PRO help me lighten the load?
AI has a lot of bad press with criticisms I greatly sympathize with. But if used to our advantage, it can be incredibly beneficial for speeding up our workflow. Aftershoot PRO does that.

It caught my eye because it has also released a beta version of the new Aftershoot Edits, again using AI. This time it works with Lightroom to adjust photos to match your style. Abandoning caution, I decided to let it get to work on my catalog to reduce the clutter and see if it could apply my styles to different photoshoots.
The Culling Workflow
You start by “Ingesting” your photos into the program and onto your working hard drive. (Ingest is synonymous with import.) As with most software, you can choose where you want the photos imported. You can also add a secondary location for backing up your photos. There is also the option to rename the files and retain the folder structure from the memory card.

Similarly, you can import images already on your internal or external storage.
After import, you click on the Start Culling button. This opens the Set Preferences window, where you can choose the thresholds you want to apply. This means the software allows you to decide how rigorously to cull your images according to various parameters you can set.
The first of those parameters is blurred photos. The great thing is that even if multiple similar images are blurred, the program will leave you with one of those. There are three levels from which you can choose: Strict, Moderate, and Lenient. The strict setting will cull all images where the images are unsharp. So, if you only want to keep the pin-sharp images, choose that. At the other end of the scale, the Lenient setting will only exclude those photos that are completely out of focus. So, if you shoot with a very shallow depth of field or perhaps use a soft-focus lens, then the lenient setting may be the best choice. Moderate, of course, falls between those alternatives.
The second parameter is the Grouping of Duplicates. This has four settings: Lenient, Moderate, Strict, and Extreme. The Lenient setting will create new duplicate sets with the subtlest of changes between the images, so you keep more images. I can see this appealing to wildlife photographers who shot multiple frames of the same animal with only the slightest change between them. Strict will group more images together and will probably be employed by event photographers who will shoot many similar images. Moderate will, of course, fall between those settings. If you are trigger-happy, shoot far too many photos, and your camera fires off 120 frames a second like mine, then the Extreme setting may be best for you.
Selections in a Duplicate Set give you different percentages of images you have filtered that it will select to keep. Less is 10%, Moderate is 20%, and More is 30%.
Finally, the Volume of Sneak Previews suggests the images the program thinks will do well on social media. Again, you can choose a percentage of your photos that it selects in this way, from 0% to 20%.
Below are the advanced settings that allow you to turn off each of the three filters. So, I would switch off the blur detection for my abstract photos. For my seascape photography, there are dynamic features, like the positioning of the waves or gulls flying into the photos. I like to choose manually which I should keep. So, in that case, I would turn off the duplicates selection altogether.
Once you have applied the settings you wanted, you press the Start Culling button.

Depending upon the number of photos, the culling process takes a few minutes to process the images.

Once processed, you will see a grid of the selected images. In the top right-hand corner of the images in grid view is a number showing how many close duplicates of that photo there are.
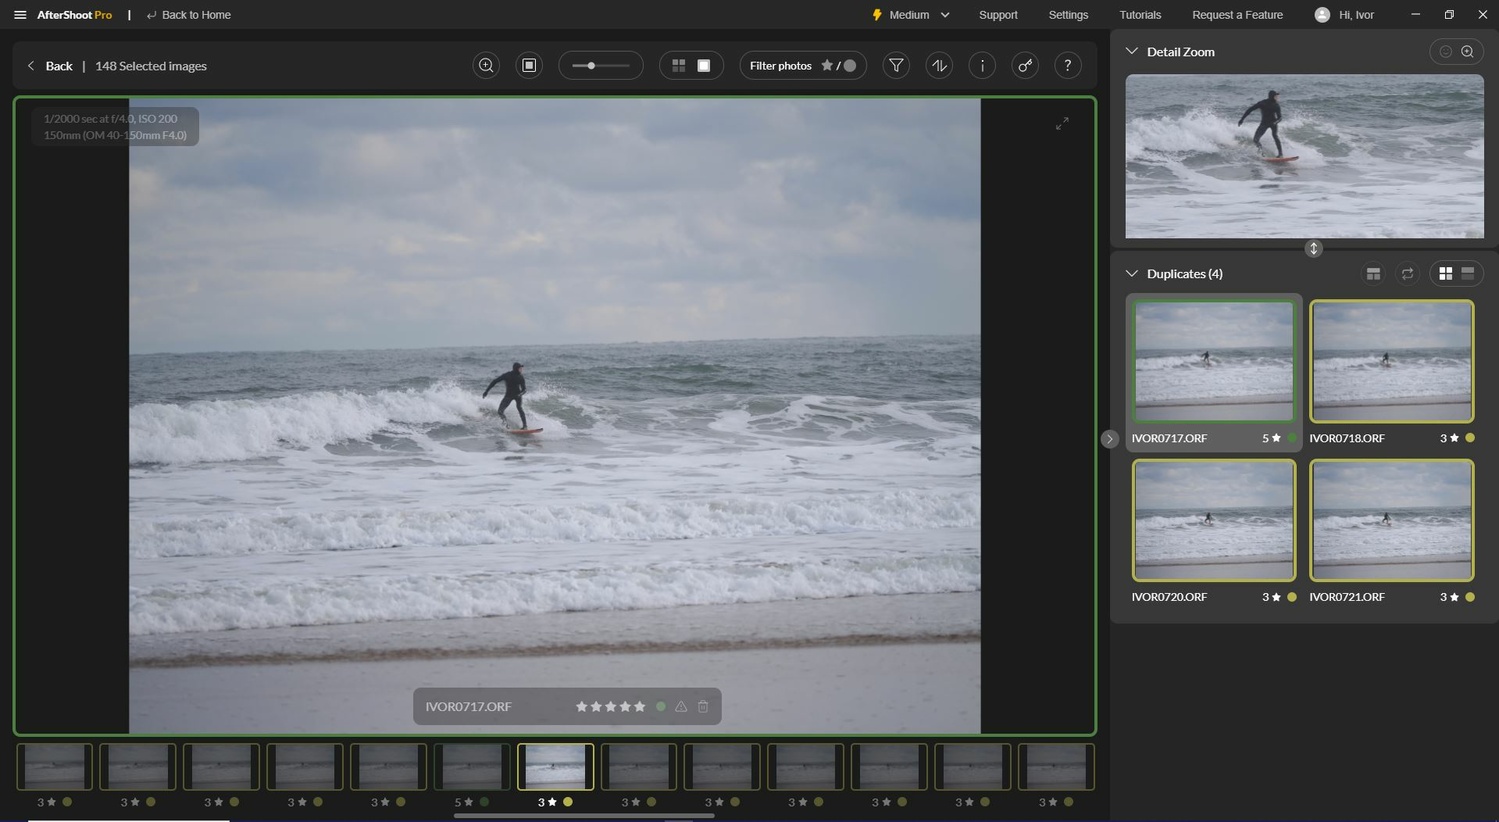
I found the most useful feature was the Quick Filters on the right. 
You can choose to see which photos are marked as duplicates, which are blurry, those containing subjects with closed eyes, and which have warnings. The Warnings tab organizes the images where a better version couldn't be found, but the program thinks there was a reason for the images being shot that way.
You can also restart the culling process and change the parameters if the cull is either too severe in its filtering or too tolerant of errors.
Clicking thumbnails will open the pictures in Loupe View so you can inspect the images more closely.
Like many other programs, there are many useful keyboard shortcuts. For example, G takes you to the grid View. X on the keyboard rejects images you don’t want to use. Keyboard shortcut A will swap the duplicates with the selected image. S will mark one as a selected photo that you want to save. There are plenty more too.
Looking in the duplicates folder, the image Aftershoot has decided to keep has a green tag and five stars. The duplicates are marked yellow with three stars. Other stars and colors have different meanings, and I won’t go through all of them here. However, it’s worth noting that you can reassign colors and stars to different groupings than those suggested by the program. Most photographers will have added star rankings to their images externally, and there is the option to overwrite those.
Once you have finished tweaking the image selections, clicking Save Changes writes the settings to sidecar files so other programs can read them. That takes a couple of seconds. Then that same button changes its function and allows you to Export the photos to either Lightroom, Capture One, or into a folder.
Developing Images With Aftershoot
Aftershoot has gone further because it can now automatically apply Lightroom Development settings to your photos based on your previous work. This is taking things beyond just using presets, which often require significant adjusting afterward.
Aftershoot studies your previous images. It then applies those settings to make your new pictures have the same style. For example, a wedding photographer may have a coherent look for outdoor bridal shots, so Aftershoot adjusts the settings for similar images to copy that style. For this to work, you upload your previously adjusted images directly from your Lightroom Catalog. Aftershoot’s AI uses that to create your own unique AI Profile. It then applies what it has learned from those previous photos to your new unadjusted pictures.
I tried this, and again it worked well for most images. Certainly, better than just applying a preset.
First Impressions: What I Liked and What Could Be Improved
I was impressed, especially so by the speed of the program, sorting through thousands of images in minutes and the accuracy of the suggested culls, which was near perfect. I swapped a couple of choices, but that was much faster than reviewing and manually comparing every shot. Culling is part of my workflow I enjoy the least. Culling is also costly for those who earn a living from photography.
Within minutes, it sorted through a wedding shoot, pulling out the same photos that I previously chose manually. A process that originally took me a couple of hours was done in under five minutes. It easily rejected those shots where someone had blinked or there was excessive motion blur.
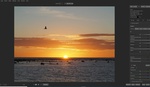
Similarly, when applied to multiple seascapes, it worked well too. However, as I mentioned, with dynamic scenes that included moving waves and flying gulls, I needed to choose which of those photos I would keep based on my aesthetic preferences, which was not necessarily the choice Aftershoot made. However, I suspect the AI will learn those over time too.
I did try the EDITS module on my Lightroom-developed photos, and it worked well. However, more recently, I’ve changed to using DxO PhotoLab to develop my images, and I hope it will expand to include the development settings applied by that and other raw tools in time. Nevertheless, the culling does work with PhotoLab 6, as I can see the star ratings and color tags applied by Aftershoot. But it currently only allows the exporting of the sorted images into the Lightroom and Capture One catalogs. Hopefully, that will expand over time to include DxO PhotoLab and On1 Photo Raw.
The program runs directly on the computer and does not need an active or fast internet connection.
There is a free month’s trial of the Aftershoot, and then it is a subscription of $119.88 annually, which saves 30% off the monthly charge of $14.99 for the AI Culling. EDITS is currently in Beta and free for subscribers. On release, it will be a fixed fee, but the price is yet to be announced. In the meantime, you should get a 10% discount when you buy it by using this link to access the free trial.


I've been using Aftershoot for a little while, and it's usually fine. I gotta say though, it really only works for weddings, events, and portraits, and really only to weed out the blurry shots. Its idea of composition is totally whack.
I run it at the most constrictive settings, and its kinda okay, but I always have to check its work and cull down further because it does miss some key shots, and makes alot of odd choices. It never gets the ones where I'm my most creative, like a small subject surrounded by blurry foreground elements, or a photo that's not of a human...
Considering the current state of AI, honestly it's not terrible. I shot a job last week where I shot about 800 frames in a night, Aftershoot culled it down to 2300 in a little under an hour (5900X, it does it all on the CPU), and I culled that down to about 500, and needed to go back into that 8000 frame folder to pull shots that Aftershoot missed, or didnt' choose the best ones..
I've had a few jobs where its selections were so odd, I just scrapped it and did it on my own.
It's good enough where I'll keep using it, but my experience is nowhere near as bright as what was reviewed here.
I'm optimistic that it will get better with time.
It only works for weddings, you say?
Hm, it seems that most of these automated AI culling tools work best, or only, for things like wedding shoots.
My intended use would be for bird photography.
Still worth getting a trial, I guess, because in principle this software looks like it has a promising workflow.
I used it on a mixture of landscapes, portraits, action shots and bird images, and it worked well for me.
Thanks! That's good to know!
Am I right to understand that it culled 151 photos in 10 minutes 42 seconds?
Thanks got the comment, Alexander. Yes, in that example it spent approximately 23 seconds on each photo. In that time it identified the best 74 images to keep, rejected 62 that were duplicates, chose eight that would be good for social media, and rejected three blurred and four where the subjects eye were closed. While it did that I was also importing photos using Lightroom, so without that it might have been a bit faster. I always push software while I am testing it to give a more realistic result for those who have less powerful machines. My interest is in whether the software works; I'm not selling it.
If I were doing that process manually, I would spend much longer over it. Also, I could make my self a cupof coffee while it worked.
So the OP didn't tell us what computer he's using.... So who knows how it scales!
4000 frames on my 5900X takes about a half hour, and that's no spring chicken.
Aftershoot is HIGHLY dependent on # of CPU cores.
Aftershoot does its entire culling process on the CPU, and you can dictate how much of the CPU it allocates. When you set it to maximize CPU usage, it'll use all cores and threads, up to about 70-80%.
The fact that it took 11 minutes just to cull through 150 photos tells us either OP had CPU utilization set to low, or mid, or is using a low-core, or old system.
I have a 9 year old 3.4 GHz AMD quad core (+ 6 graphic cores,) processor, 32 GB RAM, and an 4 SSD hard drives. 4 GB Graphics card. Win 10. Yes, it would go faster on a newer, faster system.
Dude...!
When you say it takes 20+ seconds per image, you've GOT to tell people you're working with mesozoic DDR3-era hardware...
That makes an ENORMOUS difference, man.
On your system, what would take my 5900X a half hour, would take your Phenom X2 over 20 HOURS.
Yeah, I usually say that I am working on an older machine, but forgot on this occasion. However, with the vast numbers of computers of different ages, and all the varieties of hardware, no two people are going to ge the same speeds. You've got a fast computer, great for you. Others will have slower ones.
Like any product, buyers should try them out for themselves. It's always best is people download the trials of software and test the compatibility with their own systems.
I've been using it to edit my weddings and portraits for a few months. I only take about 10 mins to cull at family picture session myself so I just skipped over that and went straight to the edit part. It got my style pretty well so I've been using it edit my photos. It's not perfect for horizon straightening yet but much better than adobe. I like that it's flat fee per year. All of the competitors are per image which for me was more than paying an editor to do it. Overall I'm pretty satisfied. I feel like this should be built right into lightroom though and think that it will in the future.
There's no way I would give anything to decide, cull, edit to a machine in photography. OMG. Art, style, purpose with a photo just captioned, maybe not perfectly but you got it and you can fix in post...
There is the opportunity to assess the choices it makes, and for photographers who shoot hundreds or even thousands of shots at events, it is a boon. You can assess the choices it makes and it's easy to swap over duplicates. I shot about fifty similar photos of the sunrise over the sea and it grouped them. It didn't choose the one I wanted to keep where the waves, spray, and flying gulls were in the right position, but it was easy to swap the choice over.
When shooting hundreds of images of people, having a machine choose which ones have subjects with closed eyes save's huge amounts of time.
I think much depends upon what you are shooting and the number of images you need to sort through.