
We look at what makes a successful backup system, the components, the ideal outcome, and how we test that all is working before the inevitable happens.
As a creative, one of the worst and most frustrating ways our journey will be hindered will be losing files, whether it's due to a faulty memory card when capturing on the day of shooting or during the ingestion of images post shoot and prior to post-production.
So, what makes a reliable backup?
I recommend starting with three copies of your data stored on two different source mediums with at least one additional stored off-site. Three backups? Why the need for three backups? Surely, this is not only time-consuming, but expensive? Read on, and I’ll explain.
Would it surprise you to know that most commercial disaster recovery (DR) plans include three levels of backup security? On-site, offsite and cloud. Let’s look at the steps we need to take to ensure your data is secure and backed up regularly.

The above diagram is an example of a standard business backup solution. It looks complicated. Let's break it down into seven easy, straightforward steps.
Step 1: The Shoot - Media Capture (SD Cards)
Starting with the photo capture, ideally, I'd recommend using a camera with two card slots, giving a level of redundancy. Use good quality, high-capacity cards with fast read and write speeds and ideally, shoot using raw to both cards simultaneously or raw and JPEG if you deliver JPEG only. Having images copying to both cards reduces your chances of losing files to card failure, and shooting raw as well as JPEG allows for greater post-production manipulation should you accidentally over- or underexpose your image. Brands like Lexar or SanDisk are brilliant and have an extremely low failure rate.

Step 2: On-set Backup
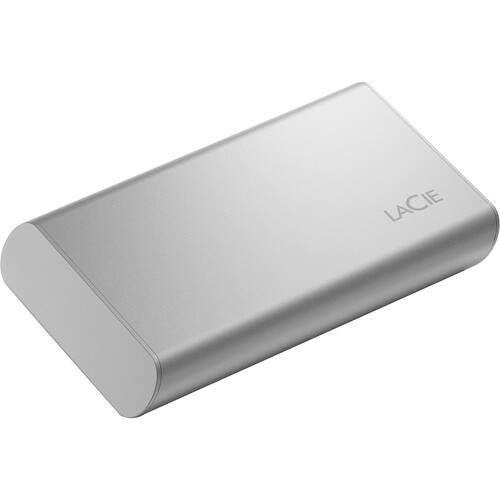
A rugged drive such as the SanDisk Extreme Portable SSD attached to a computer or iPad is ideal if it’s being used outdoors or if you’re accident-prone! These types of drives can be used for backing up while you’re out on a job. Weddings are a great example where you might want to back up part way through a day. The SSD drive inside makes it an incredibly fast, light, and versatile backup option.

Step 3: Import to Working Drive
What is a working drive? Well, before backing your completed images up on your cloud storage, NAS, or onsite storage drive, you’ll probably want to perform some level of editing on your photographs. Importing your images from your camera cards on to a fast working drive attached to your computer solves two issues. Firstly, it doesn’t clog up your computer’s internal hard drive with lots of photos and slow down the operating system.
 Secondly, having a fast SSD hard drive for editing means that programs like Adobe Lightroom can render the previews more efficiently, helping you complete work more quickly.
To use your working drive, import your files using your computer from your camera cards or on-site backup by either dragging your files in finder or file explorer from your memory card to a new folder you’ve created on your attached working drive or import them and use the copy option at the top of Adobe Lightroom. This alternative uses the application to transfer the files rather than doing it manually. I prefer doing it this way as it does save you a step of having to import first and then add into Adobe Lightroom.
Step 4: Edit Your Content
Complete your editing in your chosen application.
Step 5: Send to Your Client via Your Website or Online Gallery
If you’re delivering images to paying clients or selling them via your online gallery or website, then you should include this as part of your workflow. I currently use Zenfolio, as it allows me to build my website and includes an online store, which works for me. Alternatives include Shootproof or Pic-Time. These allow me not only to sell my images but allows storage of JPEGs and raw files for a small additional charge. Exporting from Adobe's Lightroom to Zenfolio means clients get to see the images on a website, but they are also securely stored online in a separate location away from my home or working space. This could be considered an additional offsite backup.
Step 6: Onsite Backup (Synology NAS or Other Similar RAID Redundancy System)
Literally, wherever you store your photos on a permanent device in your working location, this is your onsite backup. You can use a Network Attached Storage (NAS) drive that plugs into your broadband router or an external drive attached to your computer. NAS enclosures will be set up with a RAID (redundant array of independent disks) configuration, which essentially uses two or more disks in a single box to create a more resilient backup. With different types of RAID available, you’ll need to choose the appropriate one suitable for you and your way of working. Copy the completed images across to your onsite storage drive. Do this either within Adobe Lightroom (which preserves the storage location in your catalog file, avoiding the broken links) or by moving the files and then using the synchronize feature in Adobe Lightroom to show all your images in the new location. I recommend the Synology DS1821+ because of its simplicity in use and the key features such as expandability and reliability. Plus, it has great mobile applications that allow you to see and share your files or any movies stored on the device while out and about. You can also get this to transfer using hyper backup to another Synology NAS across the internet or another large external drive plugged into the front USB port that you take away from the main location. This then becomes your offsite backup.

Step 7: Cloud Backup (Backblaze B2)
Carbonite, Crash plan and Backblaze are all examples of a cloud-based backup service. Accessible from pretty much any internet-capable device, they require one large backup and additional incremental smaller backups as you work, meaning you can access the latest version of a file or a previously edited version. I recommend Backblaze B2 cloud storage because the costs are reasonable, set, and transparent. It also integrates with Synology perfectly, making online cloud backup a seamless and hands-off experience. It has a great mobile app too, allowing you to see all your files online.

Remember, with all of these options, make sure to check your backups are occurring regularly and also do test restores. Having the magic triangle of offsite, onsite, and cloud is great, but by only choosing one or two out of the three, you've still got a single point of failure.
Cloud is only going to deliver as fast as your internet will download. Onsite is great until someone breaks into your studio and things get taken. Offsite might not be available straight away; you might have to drive somewhere to retrieve it. All of these solutions are going to be somewhat useful to you. Some might not be suitable, but this article should have given you an idea of what is needed to create a robust camera-to-client backup system.
Header photo by thiago japyassu, courtesy of Pexels under Creative Commons license.


The writer forgot an obvious back-up solution that can work very well for some professional and amateur photographers: sneaker-net.
By which I mean, you rotate a couple of SSD or HD between your main location (home office, studio, etc.) and another location that is convenient and that you visit regularly. If you work from home AND a studio, the solution is obvious: rotate drives between the two.
I'm an amateur, I work at an office. Every Monday morning I carry two SSD drives (A1 and A2) to the office and put them in my desk, and bring home that evening two other drives (B1 and B2). A1 and B1 are in rotation as are A2 and B2. Sunday evening, my Mac runs Carbon Copy Cloner to put all the relevant backup files onto the two drives at home. Every Monday, the drives are swapped. If the house burns down and my cloud backup (which I have) doesn't work, I have at worst a backup that is one week out of date. Not only does this work for one's images, catalogs and collections, but it also works for one's financial papers, etc.
This doesn't work for everyone; you need a convenient off-site location and you need a modest amount of discipline to rotate the drives (some folks just can't do that). But where it fits it provides you with an extra layer of security in addition to your main on-site backups and your cloud backup.
Final point: if you do this for financial files in addition to images (e.g., your business files), be sure they're encrypted.
... lets hope that all 4 drives are encrypted.
I do the same. I rotate between my apartment, my parents and my girlfriends parents - no encryption necessary for the photos. Didn't know the term Sneaker-Net though ;-)
For the sensitive data I use VeraCrypt.
Hi Steve White. You are right this is a perfectly alternative solution. I used to do this for small business when I owned a Tech company with tape backup solutions in place for law firms. The only reason this was omitted from my article was that from experience, humans are fallible. We forget things. Creative minds are all about creation and producing great images. As small business owners, automation wherever possible is preferred in my opinion. If an SSD, hard drive or tape was forgotten or a personal emergency happened where someone wasn't carrying the backup drives then they couldn't be swapped out. Having offsite backup in 2 places (Backblaze and Zenfolio) With one completely automated (Backblaze) and the other an optional upload (Zenfolio) gives double peace of mind that the backup is complete (plus you don't have to carry round drives with you then). I've literally had people call my office crying after leaving DAT tapes on the bus with financial information on previously. Thank you for your comments though and it's always good to have alternative solutions for people to consider. Hope you've had a great Christmas and Happy new Year
Since I'm retired, I've been moving backup hard drives between my home and lock box at the local bank.
thanks for documenting your backup strategy... my comments:
1. Use 2x identical memory cards in all cameras I shoot with images written to both cards.
2. I always have 2x SSD's when out in the field shooting... have a self developed script to copy and process the memory cards to both drives at the same time including checking for dups, image integrity and creating checksums of all images.
3. the durable SSD's are expensive so I use 2x standard Samsung T5/7 and keep them apart so little chance of both breaking or been stolen.
4. also use synology but with 10GigE network and nvme caching drives so one can edit the content directly from the NAS.
5. enable snapshots on synology so one can quickly recover content if an edit goes wrong etc. Use 12 snapshots/daily + 4x weekly and 3x monthly which has saved me numerous times.
6. cloud storage? naaa been bitten a couple of times. I have an offsite synology and rsync all content to it every hour. For me it has the added advantage that if my main sites synology dies or is stolen I can simply fetch and plugin the offsite NAS and I am good togo in 45 minutes... a cloud restore of 70TB would take days and obviously cost a fortune in monthly billing to a cloud provider.
7. on synology install docker (synology requires a good cpu and 16/32GB RAM) and a nextcloud docker instance which allows you to offer private cloud download areas to ones customers. I actually put my main "glue" cloud-cli script to get this working here: www.lightaffaire.com/code
8. All SSD's and NAS use encryped filesystems so if lost or stolen all data will be safe... think GDPR.
Thank you for your comments LightAffaire Photography. All great solutions. The script is really interesting, I'd love to hear more about that.
Synology 10 Gigabyte Ethernet is great but you have to have a 10GB switch and then your Mac should have a 10GB Port on the back then too as otherwise you get a bottleneck at the point of data downsizing. The NVME caching drives are an excellent idea though as is upgrading the ram in the Synology devices. This is why they are the best, right? You can achieve a good result with 4 x 1GB ethernet leads and data aggregation bond switched on in the networks section if your main computer is cabled in to the same switch.
Having another and using Hyper backup is a great idea. It's a little expensive for me using the DS1821+ as I have about 40TB in my array so it IS something I'd look at in the future but at present it's not a viable option for me or potentially most of the photographers I've helped in the past.
Downloading everything would take days but some providers offer the option of sending you a drive with just the content you need on and they will refund part of the cost of that when you return the drive. Plus restoring everything, you're right would take days as some areas of broadband provision can be flake especially in rural areas.
Synology encrypts the drives by default when using SHR and GDPR is always a consideration when keeping any client data for an appropriate length of time.
Some really good points and definitely things that I could add to a more in depth article for those that may be interested. A level of technical knowledge is required for a lot of this and for a lot of creative people this can be overwhelming. My mantra is make it easy, make it affordable, make it work.
Thank you for your comments though. Hope you've had a great Christmas and Happy new Year
the glue script is available @ https://lightaffaire.com/code
Thanks for the article. I love those mini Sandisk SSDs. They make such a difference (esp. the 1000m/s ones) as it never takes more than a minute to back up a whole shoot (either on site or at home when alongside tif converted files and edits)
One step in the process I always do is back up to an SSD on shoot and then keep it in my wallet. It means I've always a backup on me if anything happens to my kit / car on the way home. At this stage I'm happy to have the other backup on my dual memory cards but should maybe have an SSD in my kit bag also :)
Such a pain the Lacie have stopped making the BOSS systems now as they are amazing (I was lucky enough to be able to buy one before they stopped making them). If you can find one either on eBay or somewhere they are brilliant.
Backblaze automatically verifies its backup as part of the process. I did for get to mention it, but it's included in the process when using online backup software. Chronosync is ace too and part of my workflow for my older Macs which now house a lot of older non- critical information.
Thank you for your comments though. Hope you've had a great Christmas and Happy new Year
My two cents:
- it is important to have a backup system that keeps versions of changed files for a very long time (forever, if possible) — you may find your files are corrupted after a long time. If the backup system deletes the old version too early, you will be out of luck. Many users use Backblaze Unlimited Backup, which keeps previous versions only for 30 days by default, which is way too short. You can pay an additional fee to keep versions for 1 year or for an unlimited time. When using Backblaze B2 storage directly, the backup software (like Hyperbackup on Synology NAS, for example) is responsible for the version retention policy and should be configured carefully in this manner.
- Wasabi can be a good alternative to Backblaze B2 storage. It is S3 compatible and works nicely as a backup destination for Synology Hyperbackup or other backup systems. The main difference is that download is free of charge on Wasabi, while it costs $0.01 per GB on B2. It may lower the costs in some situations.
Thanks for your comment Michal Krause I've not come across Wasabi. I'll take a look at it. I use Backblaze B2.
or just enable snapshots that are standard on synology as long as the base filesystem is btrfs (it usually is)... then configure the retention policy as long as you require. Users can be allowed to search threw their snapshot'ed files and restore as required. No need for another piece of software and its dependencies.
I’d also add that you will eventually need to archive, which is a cheaper alternative to having a big RAID. So I have a small 6TB RAID (12TB RAID1) for active storage and once this is full I have cheaper archive drives, 1 which I keep on my desk + an off site back up in my car + a firebox with drives in which is hidden in my loft. So once my working RAID is full I move all my files off to archive over 3x drives.
It breaks down like this:
Active files: laptop + ssd + Time Machine
Storage: RAID + Carbon copy clone (in firebox)
Archive: 3 x cloned drives: 1 in office for access, 1 in fire box, 1 off site.
but that is dependent on you doing the work and moving the disks around... 2x NAS one onsite and one offsite with snapshots enabled and syncing from onsite to offsite runs 7x24 without any needed manual intervention.
Hi, adam whatever solution works for you is going to be the one you're going to use right? If you want to automate (which I do to a significant extent) then syncing offsite is the option. Otherwise, you're spending lots of time checking and verifying backups and making sure you've done them - set and forget. then give a 6 monthly check to make sure everything is working.