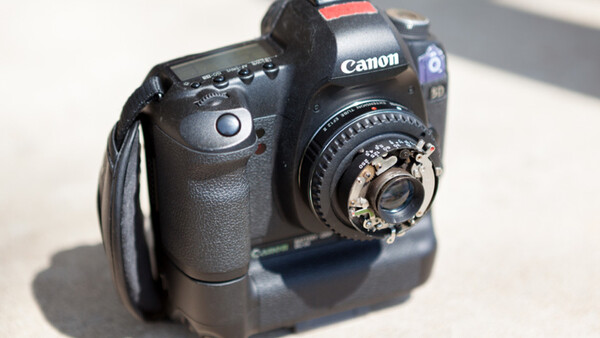
Photographer J. David Buerk was sitting around one Sunday morning with his Lubitel 2 TLR with plans of making a disassembly and cleaning tutorial when he decided to try to retrofit the lens to his Canon gear. This simple project takes advantage of the beautifully unique 75mm f/4.5 lens.
All you'd need to try this mod for yourself is a TLR (or just the lens), a lens cap, a handful of tools, and your high school geometry class protractor. An entire Lubitel 2 TLR system can be picked up on eBay for under $50.
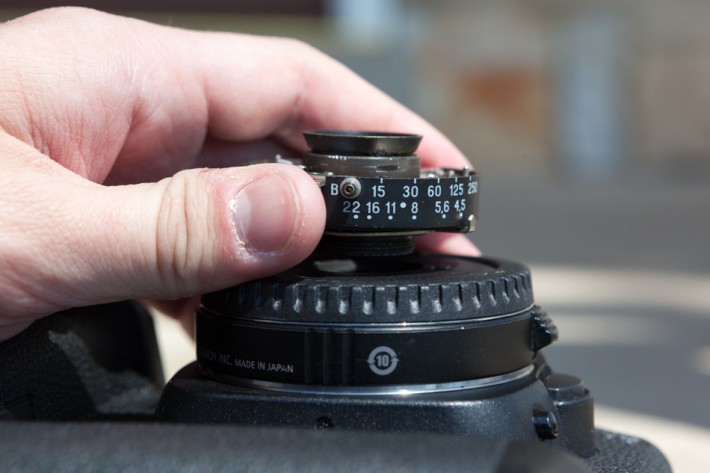
David starts by removing the lens from the TLR body.
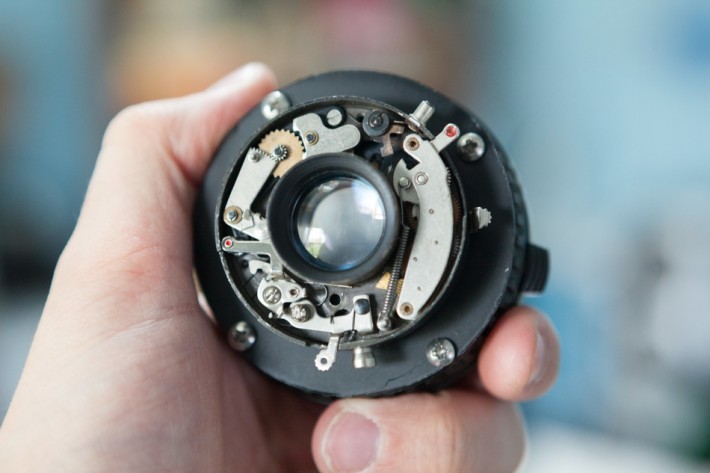
The first step is to remove the focusing lens assembly by loosening the tiny set screws around the range finding ring and unscrewing. Then remove the focusing gear ring on the taking lens the same way by loosening its set screws.
Next you'll want to remove the shutter, aperture, and timer assembly. David recommends removing the film door for easy access.
Carefully use a wide set of needle-nose pliers to keep the ring in place, and twist the assembly. Once loose, you can then safely use your fingers to unscrew and remove the entire assembly.
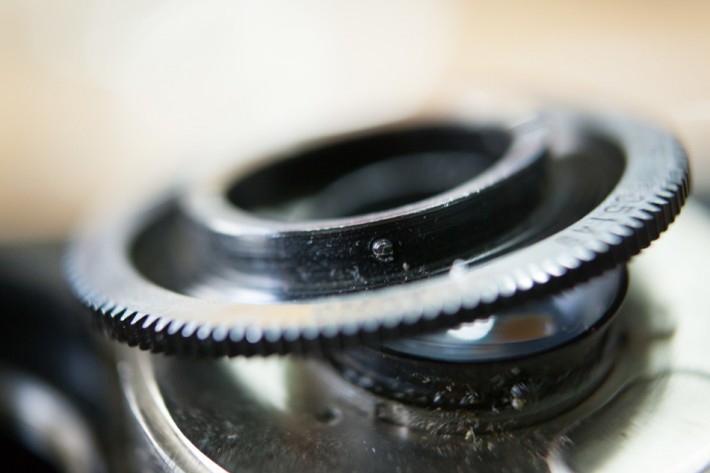
Don't forget to hang on to the retaining ring — you'll be using that for the retrofitted mount.
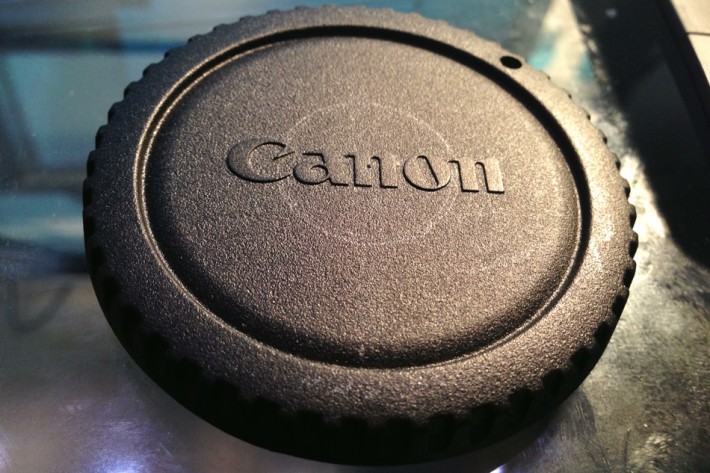
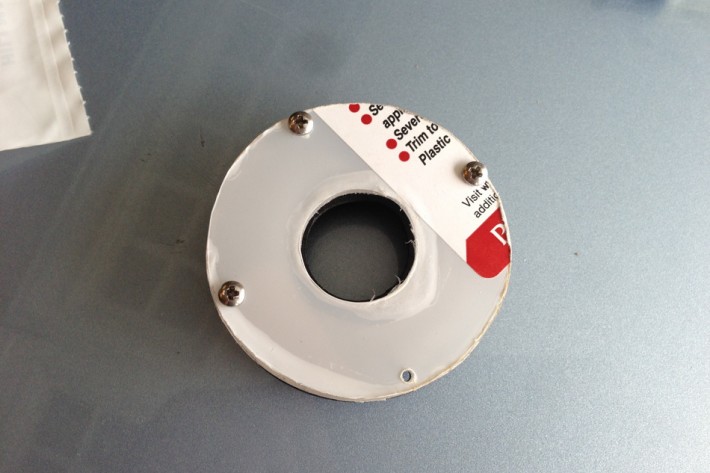
Next you'll take your lens cap (David's was for Canon EF), trace the outside of the cap onto a Post-It. Then measure the diameter of the Lubitel lens retaining ring.
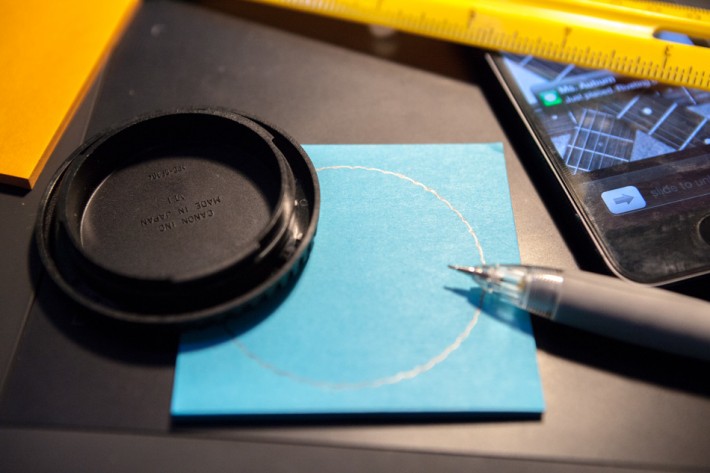
To find the center of the circle, David broke out his compass and protractor.
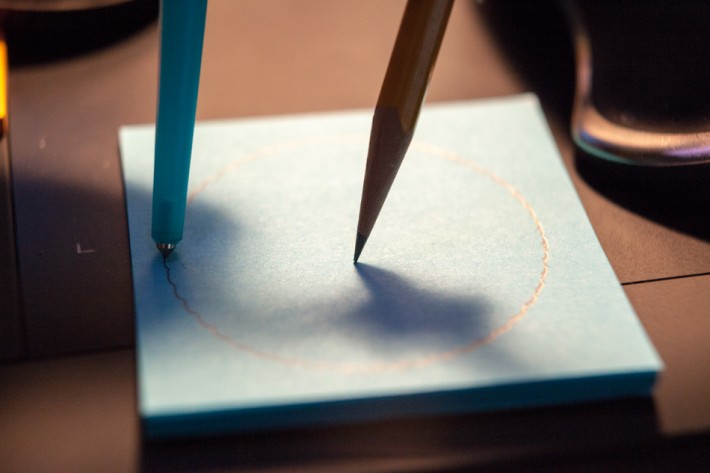
Cut out the circle from the Post-It. and press the point of the compass into the center of the cap, leaving a small dent. Next use the compass to trace the diameter of the Lubitel lens retaining ring on the lens cap.
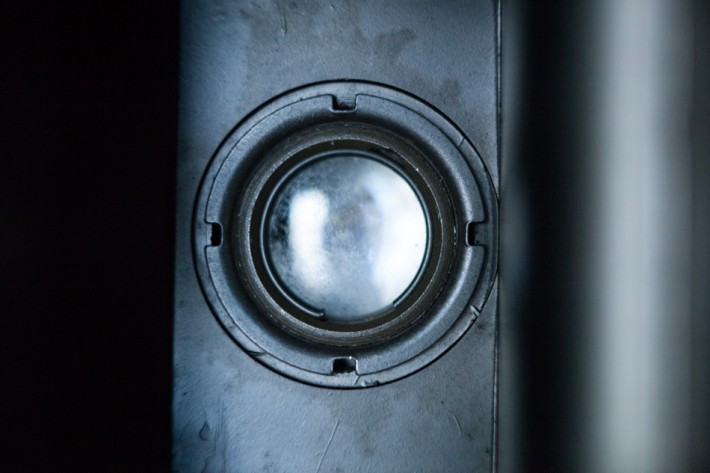
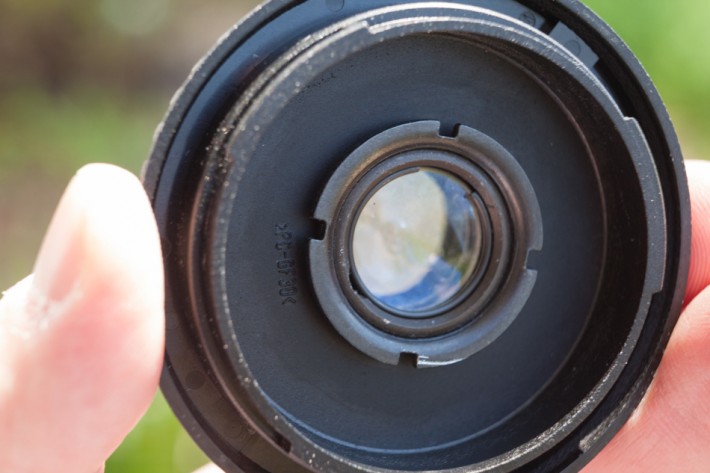
After Dremel-ing out the hole for the lens, David assembled the aperture and lens assembly into place.
David then experimented around with various Canon extension tubes. He found that the 12mm was too short, the 25mm too long.
Even with the aperture ring installed the lens wasn't quite long enough to make up the distance so David decided to make spaces out of plexiglass.
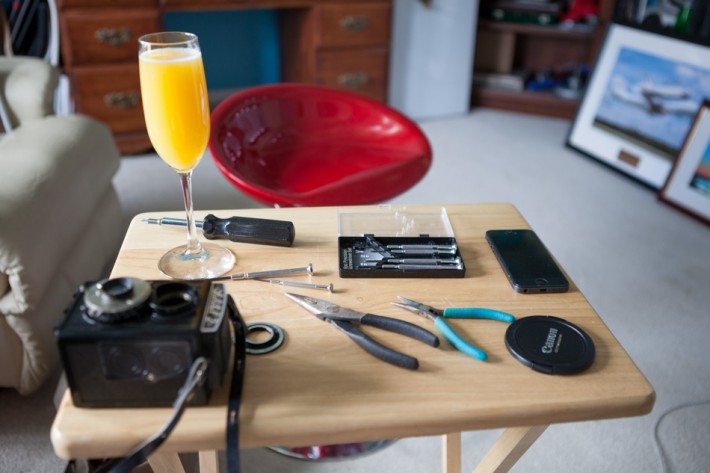
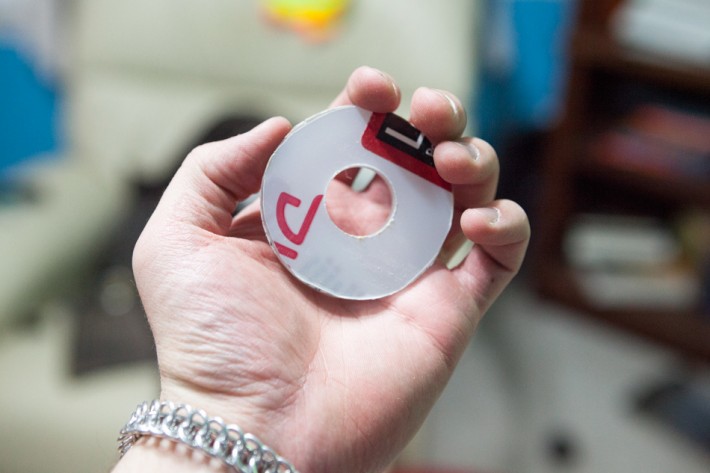
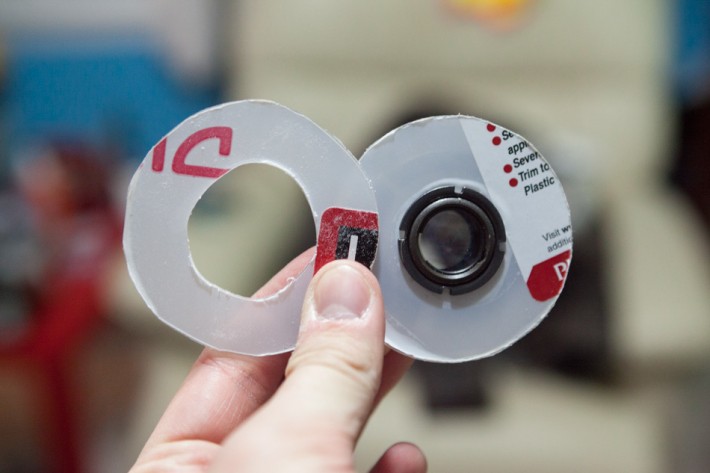
I bought a sheet of Lexan and cut out two rough circles matching the diameter of my Canon body cap. I don't have the proper tools to make a really pretty, perfect circle like others have — I'll just smooth it out later the hard way. Besides; it's an imperfect lens — having an imperfect mount kinda just adds to the fun
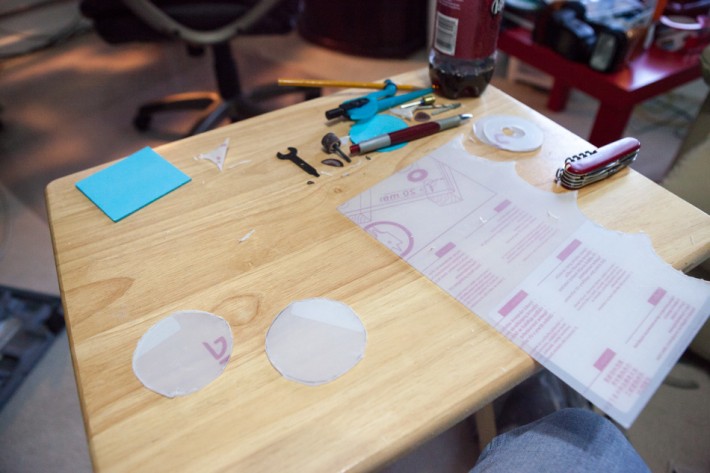
Following the same steps from the lens cap, he cut out a hole in the spacers for the lens.
I estimated perfectly! Just like any other lens, focus ends up just past infinity and traverses closer to headshot distance, which is great since this is a 75mm f/4.5 lens, shooting just slightly wider than my "moneymaker lens", my prized EF 85mm f/1.2 II USM.
The spacers were taped together and to the camera body.
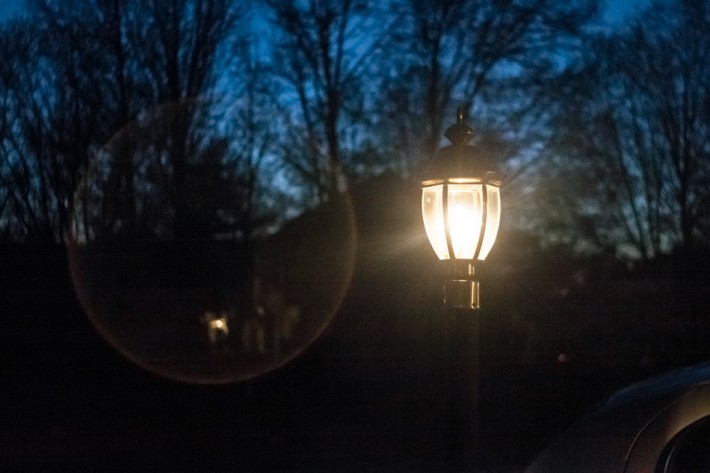
These were the first images David took with his new lens.


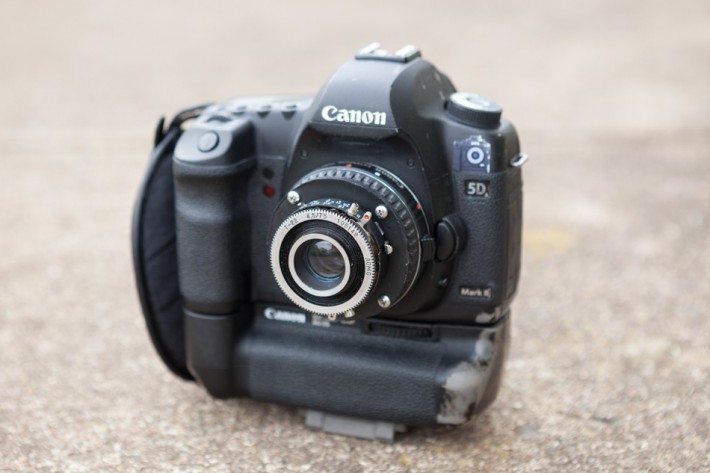
In order to solidify the mount David opted for screwing the lens assembly together rather than supergluing it.
After spray painting the spacers, David assembled the lens.
Below are some images David has since taken with this setup.


If you want to try this mod out for yourself be sure to check out the original post for the nitty-gritty details.
To keep up with David, be sure to check out his Facebook page and his website.
All images used with permission.
[Via J. David Buerk]


Join the Fstoppers community for free
-
Post comments and join in the discussions
-
Browse the site ad-free
-
Share your work and get featured in the community
-
Compete in the photo contests for fun and prizes
3 Comments
nice! It was also his photography skills were good.
Thank you, Timothy!
I would totally buy one.. hint hint