
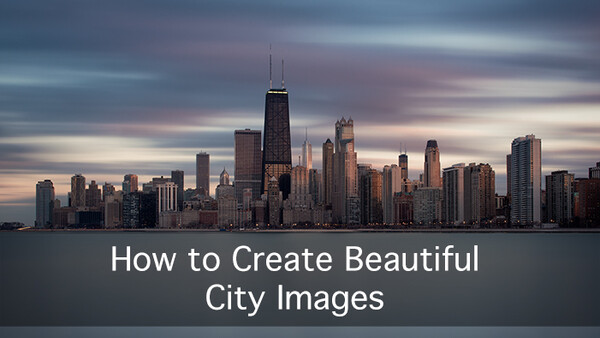
Whether you’re traveling around or venturing out beyond your own backyard, cities offer an endless supply of interesting locations and moments for photographers. To take advantage of their potential you’ll have to not only identify the best compositions but also execute them well. Here are some tips that will help to take your city and cityscape photography to the next level.
Plan Every Detail But Stay Flexible
If you happen to live in the city you’re shooting then you’re no doubt already familiar with those magical spots, but if you’re a visitor then you’ll have to do some homework. Luckily there are a whole host of tools to help with this. The first and most obvious is to do a Google image search for the city name and see what comes up. You can further explore existing photos on sites like 500px and Flickr to find the best locations. This isn’t just an exercise in location scouting, it's also about seeing what sort of photos people are shooting so that you can plan your own unique spin on them. There’s no sense in taking the same photo that everyone else already has, so use some of the tips and techniques described below to make them your own. One of my personal favorite tools is Google Street View. While it may not make it as obvious to spot the interesting landmarks, it does give you a feel for the locations so that you can plan your compositions in advance. Once you’ve identified some potential locations, budget your time to maximize your chances of a good image. The most important factor is of course time of day. If for example you’re shooting cityscapes, consider how the rising or setting sun will illuminate buildings and surroundings. For these prime light hours, plan your arrival with at least an hour to spare for preparation and test shots. Also allow for some exploration time during your visit where you simply wander and see what catches your eye since not everything can be researched. While you can still get good shots during the day (as described below), this time can also be used to prequalify locations that you plan on visiting during prime light. No matter how well prepared you think you may be, unforeseen events like weather, construction and closures do happen so have a backup and remain flexible.
Pack Right
When I first started shooting cities I was under the impression that I needed every lens out there in case a specific situation or composition arose. After a few years of shooting travel and architecture, I’ve come to realize that simplicity is best. Looking through my archive of images, the majority of photos fall in the 24-85mm range, with some ultra wide exceptions when I shoot interiors (on a full frame camera). Ultimately your style of photography and the nature of the city will lend themselves to specific focal lengths more than others so it's best to start with one lens and see where it takes you. Below is a list of the best lenses to use for city photography and their respective purposes.
24-70mm - If you’re going to have one lens, this is the one to have with you. It will work well for cityscaping, street photography, architecture and most interiors. Fast glass is generally not necessary unless you’re a street photography enthusiast since we'll want a good amount of depth of field in most images anyway.
50mm - This is the second lens you should have with you in addition to your 24-70mm. Primes like the 50mm or 35mm are well suited for panoramas and general photography thanks to their relative lack of distortion and close nodal point. Having a prime lens on your camera also forces you to be more careful with compositions and gets you moving around.
70-300mm - Although the standard cheap 70-300 isn’t always a stellar optical performer, it’s still a good choice for city based shooting. It works well for street photography as well as picking out small details and facades. While a 70-200 f/2.8 or f/4 will provide higher quality results, it’s weight and size makes it far too impractical to carry with you for extended periods of time.
16-35mm - If you plan on shooting lots of interiors, a wide angle like the 16mm can open the door to some interesting compositions. Wide lenses like this are quite difficult to shoot with outdoors in the city, so if you don’t plan on shooting too many interiors then you can probably leave this one at home.
The above lenses are meant for full frame cameras so find your crop sensor equivalents if that’s what you shoot with. The latest range of macro four-thirds cameras from Fuji and Sony produce outstanding image quality in a much more lightweight and manageable package so they're certainly worth exploring if you’re aiming to pack light and look discreet. Your choice of camera will depend on your budget and size preferences but try to get one that offers features like exposure bracketing for ease of shooting. Full frame cameras offer better long exposure quality and high ISO performance but generally come at the expense of size, weight and cost.
Cameras and lenses are only one ingredient in the recipe to success. Often times, top quality results are found in the accessories you bring. Below are some must have tools that should be in your camera bag.
Shutter remote - This is a must-have for many situations and producing crisp, shake-free images. I recommend purchasing a trigger with a built-in intervalometer to help with long exposures and timelapses.
Tripod - A small travel tripod may seem like a bit of a pain to carry but it will pay dividends in terms of the type and quality of images that you can produce. If you plan on shooting during sunrise, sunset and blue hour (which you most certainly should), you can’t do without one. Visit your local camera store and find a tripod that strikes a nice balance in terms of weight, maximum height and price. I recommend getting the tallest tripod you can afford that is still small enough to easily pack into a carry-on bag. I personally use the Benro Travel Angel and find it to have a nice blend of the above qualities.
ND filters - As we’ll discuss later, ND filters open up a number of creative possibilities with long exposure photography. A 4 stop and 10 stop filter should be sufficient for most shooting situations.
Extra batteries - This may seem logical but people often don’t take enough batteries with them. If you’re shooting lots of long exposures or timelapses you’ll need at least 3 batteries with you at all times.
L-Bracket - I’m always surprised how many photographers don’t have L-Brackets installed on their cameras. L-Brackets allow you to quickly switch between landscape and portrait orientation mounting on their tripod without messing about with the ball-head. While these tend to be pricey they are well work the money. Most are for Arca Swiss plates so factor this into your tripod purchasing decision.
Nodal slide - If you’re planning on dabbling with panoramas, a nodal slide can take a lot of the frustration out of stitching the images and lead to better quality results.
The right bag - All these accessories are great but you’ll need something to carry them in. Find a bag that’s not only comfortable but also makes it easy to quickly access your gear. If you’re planning on visiting a city where crime is an issue, try to purchase a bag that looks less like a camera bag and more like an average canvas bag.
The Little things - In addition to the above, there are a few small items that your bag needs to have. A soft cleaning cloth for lenses and filters, some gaffers tape for those McGyver moments and for covering up your viewfinder during long exposures and finally, a flashlight.
Insurance - While this isn't a piece of gear per se, it's as important as anything else you can buy. Insurance for $25k worth of gear will likely cost you in the ballpark of $500-$750 per year but provides safety and peace of mind while you work. Too often I hear cases of people that have had their cars broken into, been mugged or simply dropped their expensive lens or camera. Nobody thinks it will happen to them until it does so be sure to protect yourself against it.
Get the Shot
So you’ve got gear and you’ve got your locations, now what? The first thing I recommend upon arrival is checking the weather report and adjusting your plan based on the forecast. If for example you planned to shoot long exposures, you better do so on a partly cloudy day to create some visual interest. With an amended plan in place, it’s time to head out and start shooting. Here are some tips on things to look for and be aware of, as well as techniques to try out.
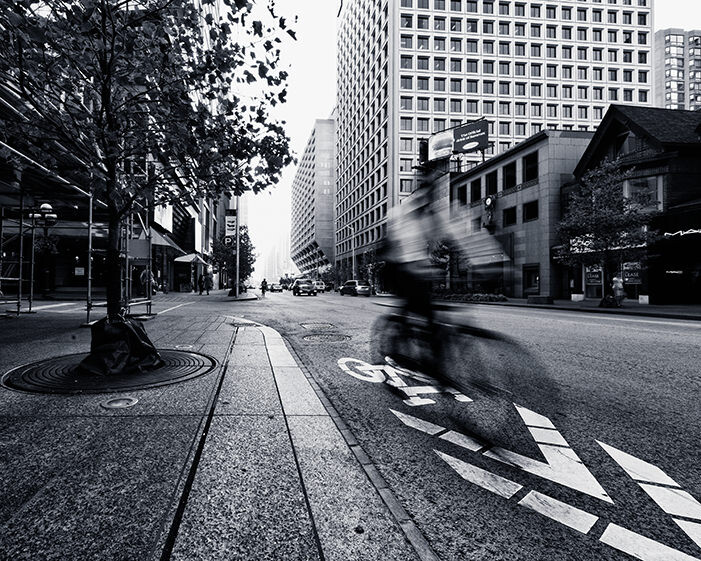
Lead in lines
Find interesting elements that will pull the eye through the frame and create a sense of depth. Train or street car tracks, lane markers, street dividers, all make for interesting elements when combined with a wider focal length. Narrow streets with tall buildings can create a great effect as well but should be shot at a longer focal length of 85mm+ to create a sense of compression.
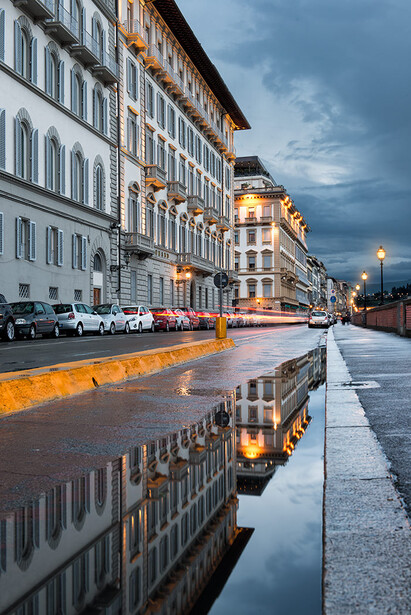
Puddles
If you happen to get a clearing after the rain, puddles can prove to be a gold mine for interesting reflections. Spend time walking around looking at every puddle for something interesting. Be sure to shoot these low and experiment with out-of-the-box compositions.
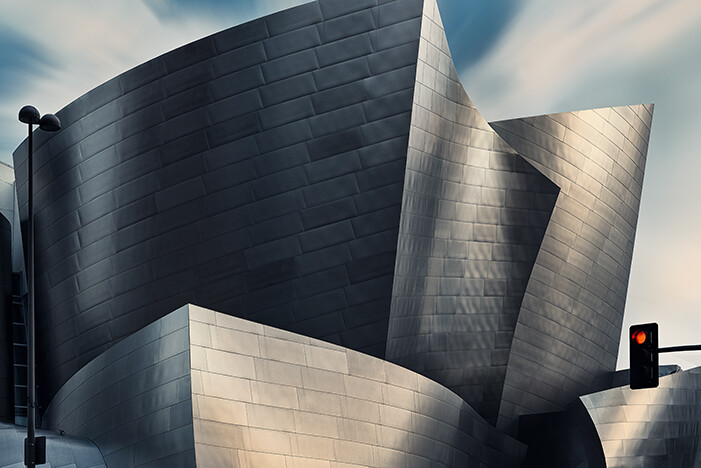
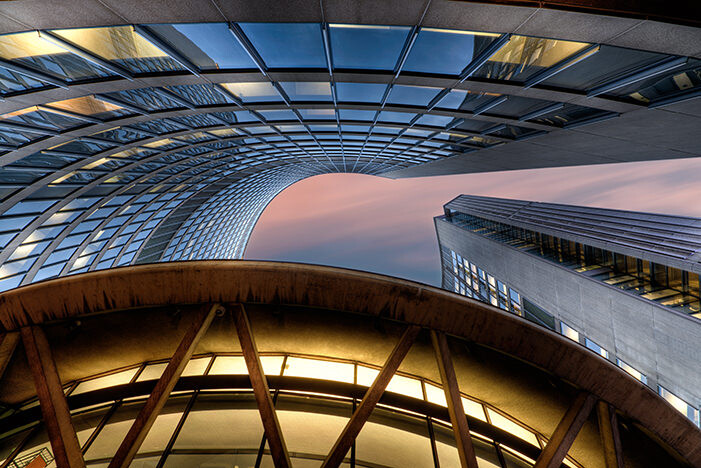
Look up
Sharp upward angles can offer interesting compositions when you’re surrounded by tall and closely positioned buildings. Look for sweeping curves or converging points that can be embellished with a wide angle lens. Because of the rather abstract feel of these shots, try tilting your camera or incorporating long exposures to create more visual interest.
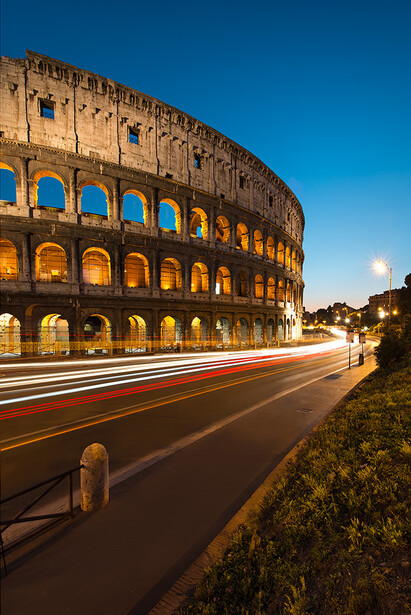
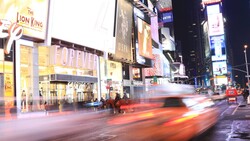
Have fun with light trails
When blue hour comes, light trails can create some really eye-catching images. Find an elevated position like a bridge or overpass in order to capture longer trails and experiment with various shutter durations. Longer exposures are not always better so play with durations in the 5 to 30 second range. A tripod and shutter release are of course required here.
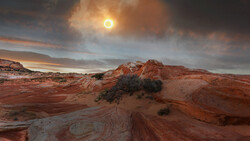
Shoot for post processing
It’s safe to assume you’re going to be doing a fair bit of post processing on the images so always shoot more than you expect you’ll need to give you more creative flexibility once you're at your computer. If you’re shooting on a tripod, bracket your exposures with a 2 stop +/- so that you have the extra dynamic range if you require it. Think about how you can combine multiple moments together (like a single image, layered timelapse) to create something different and eye-catching. If you have issues with front to back depth of field, try focus stacking your exposures and blending them together later. For example, the below image was shot over a 40 minute time period with a variety of f-stops, shutter speeds and focal lengths.
Go up
Find locations where you can capture the city from a top-down vantage point. A nearby hill, an observation deck, or the top of a parking garage are all good options. Above ground garages are particularly interesting - and of course free - so map these out and visit them. Roof topping is another option albeit not a legal one. If you decide that you're feeling adventurous, it's best to reach out to your colleagues and see if they know any local roof toppers. They'll know the best buildings to visit, how to get in, and hopefully how not to get caught.
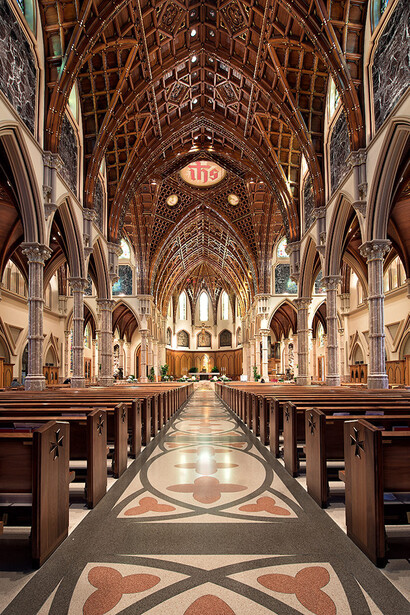
Go in
Don’t confine yourself to the outdoors. Churches, malls, museums, office buildings and hotels all offer interesting architectural details that are worth exploring. Be mindful of using tripods in these locations as they tend to attract the eye of security guards so it’s often best to shoot handheld at a high ISO and remain discreet. Small tripods or clamps can be useful indoors so consider them if you plan on shooting lots of interiors.
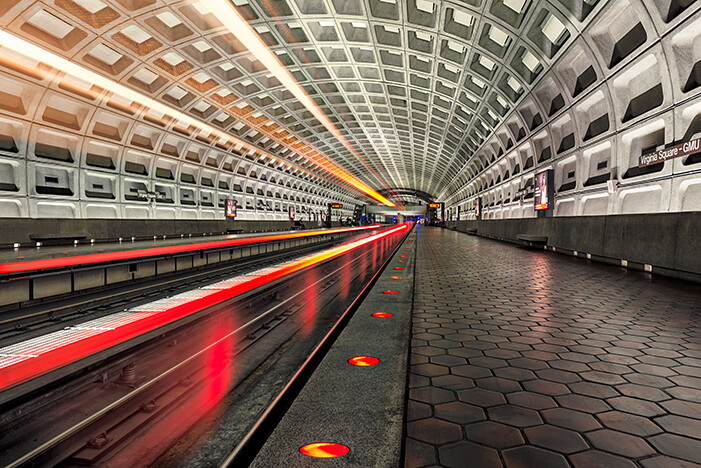
Go down
If you happen to be visiting a city with a subway system, it's most definitely worth a visit. Subways can offer some unique and interesting photographic opportunities as many of them have subtle architectural details, lines and patterns. Subways are also great for capturing interesting moments between people so keep your eyes peeled for shots through subway windows, car gaps and points of emotion. Experiment with slower shutter speeds to capture movement but be careful with tripod use as they are generally forbidden.
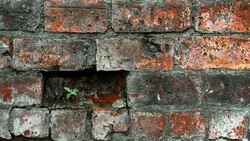
Look for textures and lines
Sometimes small fragments can lead to a visually interesting image without any fancy gadgetry or techniques. Keep your eyes peeled for possible juxtapositions or opposing lines and target them with a telephoto lens.
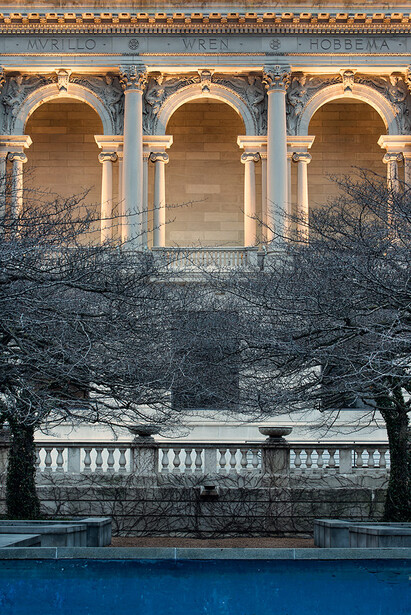
Look for interesting framing
Break down your scene into various focal lengths and imagine how it can be made to work at a wide, mid and telephoto focal length and experiment with compositions. Find elements that can serve to frame a scene, build depth and tell a story.
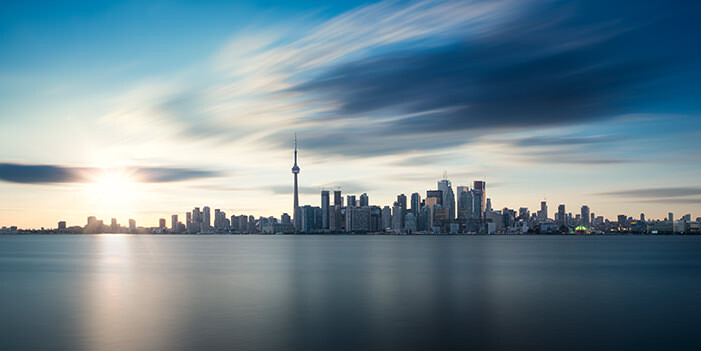
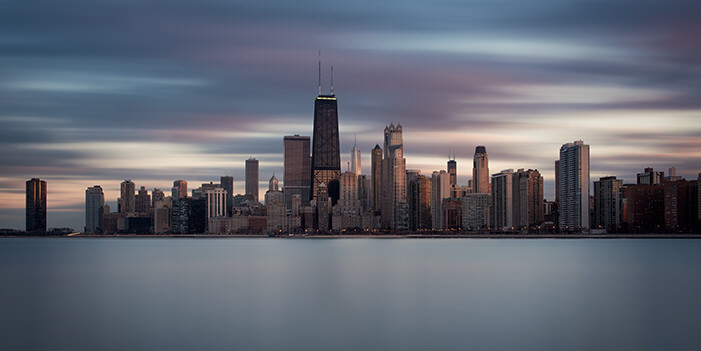
Leave your shutter open
On a windy day, using a long exposure to capture movement in the sky or water can take an otherwise boring scene and make it look interesting. Although they are becoming more common these days, long-exposure images still stand out from the rest in many viewers eyes. For a detailed set of tips on this, check out my article on capturing long exposures.
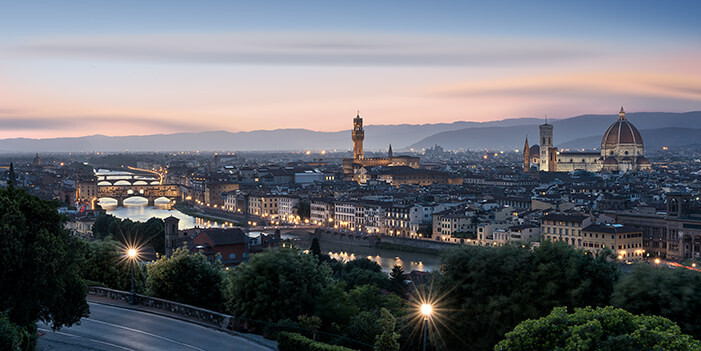
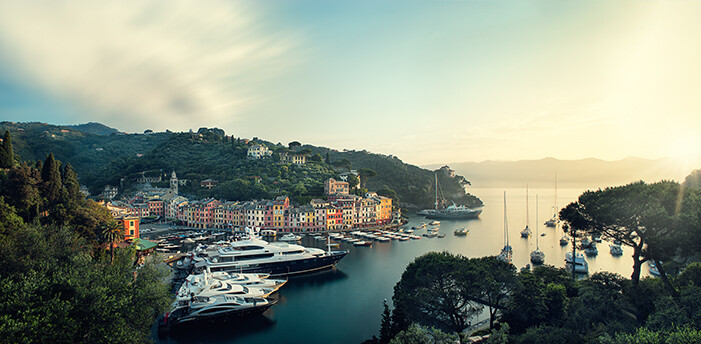
Shoot a panorama
Cityscapes are perfect candidates for panoramas. They allow you capture a scene that feels unique thanks to the combination of compression from a longer focal length, as well as the large field of view you would normally get from a wide angle lens. If you want to get really adventurous you can try to combine panoramas and long exposures together.
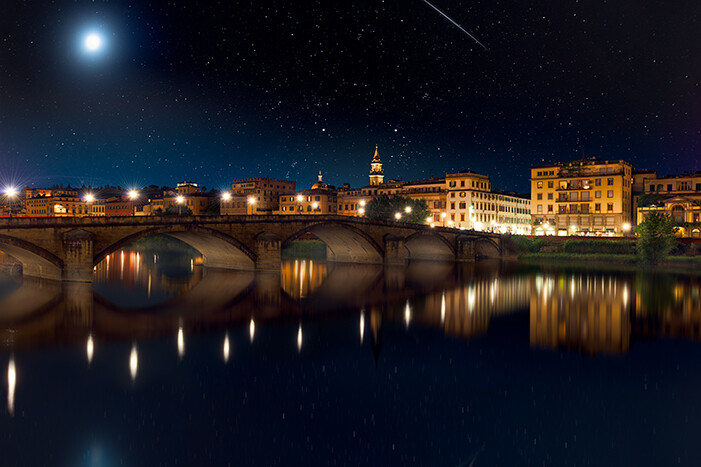
Shoot into the night
Although sunrise, sunset and blue hour are the ideal times to shoot, some great images can still be had after darkness falls. Although images on the camera LCD tend to look washed out and dark sky colors render rather green and yellow, know that you can remedy these problems in post production. Take advantage of street lights for starburst effects through closed-down apertures and look for potential compositing opportunities with starry skies. For more details on this, see the full video tutorial on how I created this night time composite.
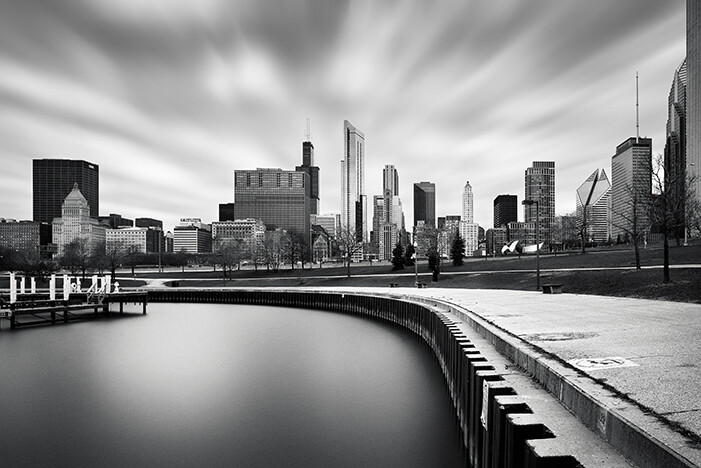
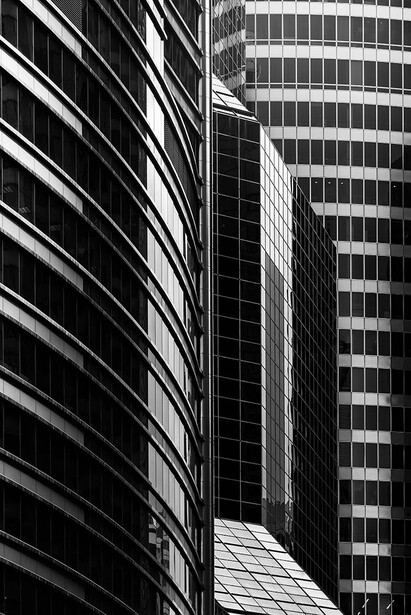
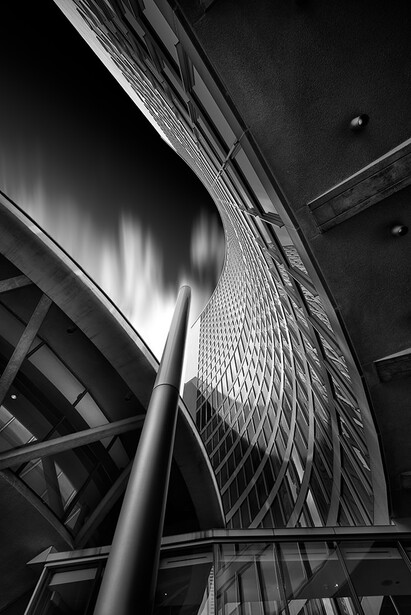
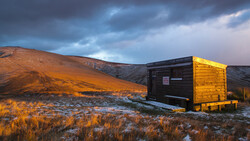
Capture for B&W
Don’t let harsh mid-day light or drab conditions get you down. By capturing with a B&W conversion in mind, you can use contrast to your advantage and still produce striking images no matter what time of day it is. Once again, combine these with long exposures through the use of a 10 stop ND filter and you'll be amazed at how great your afternoon images can look. The below image for example was shot at around 4:00pm in middle of summer.
Look for movement
The great thing about cities is that they feel alive, they’re never static. Try to find compositions that showcase the dynamism of its streets and people and tell a story. These scenes can often be made more interesting by capturing them from low or high points as well as experimenting with camera angles.
Know your rights
Some cities are more photography friendly than others, but for the most part you're well within your right to take photos wherever you go. Most security related problems stem from tripod use since they're viewed as a tripping hazard and source of potential liability, so don't be surprised if you're asked to fold it up. When it comes to banning photography outright, unless there is a clear sign that photography is prohibited, you're generally within your right to take photos. Security guards will often use scare tactics and threaten you with fines or confiscation, but unless you are shooting commercial work, these are generally baseless and unenforceable. Stand your ground and do your research up-front to find out whether any areas within the city are off-limits for photography.
Post Processing for Success
Retouching city images involves many of the same techniques that you would use for landscapes. As suggested previously, you should ideally have multiple exposures of most scenes, but avoid the temptation to use typical HDR merging tools to combine them. These tend to produce unrealistic and ugly results so it’s best to blend your exposures through a combination of painted masks and luminosity masks in Photoshop. While these techniques may sound intimidating, their application is actually quite simple and yields natural, clean results. Once your exposures are merged, remove distracting elements that draw attention away from the main subject in your frame. With a nice clean image in place, it’s time to add some visual interest and make the image pop. To do this you should familiarize yourself with the dodge and burn technique to help build the impression of sharpness and contrast. While you may think of dodging and burning as more of a portrait retouching technique, it’s application is equally important in architecture, city and landscape images. Familiarize yourself with various color grading techniques to help you fine tune the colors of your images and put a unique stamp on your final product. Once your image is ready for the output stage, apply a reasonable amount of sharpening and grain and optimize it for the desired viewing resolution.
The great thing about photographing cities is that they offer something for everyone. Even if you’re typically a fashion, portrait or product photographer, you’ll always find something that will inspire you if you just keep your eyes and mind open. They're never static and always changing so get out often and start shooting.
Connect with me here: Michael Woloszynowicz | Facebook | YouTube | Instagram

42 Comments
Awesome post Michael! I'm kinda new to landscape/city photography so this is perfect. Really detailed post, lots of amazing pictures here. Love the city/night shot and the water city reflection shot. I feel like I need to take a walk around my city and really start to see, rather than always drive a hundred miles away to get away from the city.
Thank you Chris, the more you walk around the more little gems you tend to spot. Sometimes the great shots aren't obvious at all. The night shot was a complete fluke. I expected it to look like garbage when I shot it.
That is one great article!
Thanks a lot Antti
Holy crap, great post
lol well that's a lot less words than I used, but spot on :)
Thanks very much Lee :)
I really love this article!
Glad you enjoyed it Will, thanks
Your work is fantastic Michael, very informative post.
When it comes to what you might consider your best images, do you preconceive the composition and styling, or do you find that you only have a rough idea or two, and then let your eye and intuition guide you when out and about?
Thanks Mike! I have a pretty good idea but it doesn't always work out exactly as planned so I allow for some deviation. With the panos and long exposures I usually try to have a good plan since they tend to require a fairly methodical approach.
Wow awesome post. Extremely informative and awesome examples!
Thank you Josh! Cheers
Dedication to getting the details! Well done Michael!
Much appreciated Jaron
Simply amazing compilation of photos! It honestly makes me want to go shoot landscapes and cityscapes right now! The articles tips and tricks were helpful as well ;)
Glad you enjoyed it Christian, thanks a lot!
Great shots and post work here, and brilliant advice. A mammoth post but well worth it, thanks for taking the time Michael!
Thank you for reading and for the kind words David
You could make a workshop out of this post :) great stuff as always, thank you!
Thanks for stopping by Stephen
Really informative post with some great inspirational images.
Thanks very much Christopher. Glad you enjoyed it.
Great article and fantastic images- your variation in different photographic styles is really amazing mate!
Thank you for stopping by and for the kind words Felix. Cheers
It is very, very detailed post, full of interesting and usefull information! Thank you Michael! Keep up the good work. Like your articles.
Glad you enjoyed it Sergey. Thanks for the kind words.
Great post Michael! That was an enjoyable read.
Glad you enjoyed it Willis, thank you
That Post ist stunning, like your photos! Really great stuff. You should think about writing a book!!
Thanks very much Sebastian. I will definitely think about it :)
Totally agreed ! If he writes a book I'll buy for sure !!!
Great post, Michael! I've been following your videos and posts and it's all been so super helpful and educational for me. Thanks so much for all your contributions. Really, you are a great teacher. I keep hoping to see an announcement on fstoppers for a retouching video series by you. I would buy that in a heartbeat! Cheers.
Thanks for the kind words Joe. There will definitely be some retouching and lighting resources coming soon :)
Wow! Brilliant post and fab images. Great and interesting read
Much appreciated Steward, thank you
Michael, How are you doing those long exposure shots from the water? (Toronto, Chicago) - Are you on a break wall? Can't see getting anything sharp in long exposure from a boat.. Want to try this out for a series I'm doing!
No none of them were done from the water. In case of Toronto it was from the edge of one of the Toronto Islands and in Chicago there is an old break wall in Lincoln Park that you can go out to. It would definitely be a blurry mess if you tried it from a boat :)
Wow ! Im so amazed by your shot (and very nice article btw) but wow : A Night in Florence. How did you managed to have the stars in a city with such light pollution ?
Awesome article! Do you know any good photography insurance companies in Toronto?
I registered with fstoppers just so I could say thanks for a great article.
The best photog ever !