Adapting lenses to different camera mounts isn't something that is new to photographers. This photographer shares some specific DIY steps to adapt cheap projector lenses to a mirrorless camera. The result? Beautiful f/1.2 swirly, bokeh-filled images.
Tom Calton shares his experiences with finding 4 projector lenses on eBay and the simple process that he used to adapt a couple of them to be used with his Sony a7 III camera. The lenses bought were made by Bell & Howell:
- 2-inch 16mm f/1.4 Super D Proval
- 2 -inch 16mm f/1.6
- 4-inch 19 to 32mm f/1.2
- 2-inch 51mm f/1.2
What You'll Need to Adapt These Lenses
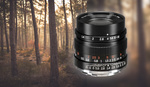
- A beautiful lens to adapt
- A way to focus the lens, by attaching a helicoid
- A means to hold the lens steady and adapt it to the camera mount of your choice
Projector lenses need to be adapted to give them the ability to focus. They also need to fit onto the camera body securely and without light leaks.
Adaptations aren't for you if you're concerned about dust getting on your sensor, autofocus, tack-sharp focus through your image plane, or if you want to have more than one f-stop, so be warned.
How Much Will All This Cost?
Calton was able to get all of this at a low price of under $100! Since these are used lenses, luck plays a big part in these purchases.
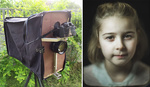
The Process
He walks us through the process of selecting and adapting the lens, explaining why each modification is needed. While he is working with a full-frame Sony E mount body, this process can be changed to suit any camera body that you may own.
So, are the results worth it? Will you be trying a DIY projector-to-mirrorless lens adaptation anytime soon?