
Lately I've cottoned to the film beat quite a bit here. I've written about Super 8 and about film stock options for analog photography, about the revival of Ektachrome, and about instant photography. I love it all, but I'm also aware of the fact that we very much live in the twenty-first century. We live on computers and we live online, and if photos don't exist in these spaces, they may as well not exist at all. So what can be done about getting photos taken on film, old or new, into a form fit for such a universe? Let's talk about film scanning.
Scan at the Lab
There are several different ways to go from exposed film to electronic image. The first is to simply hand your film over to a lab or scanning service that will do everything for you. This is the easiest way, but it has several downsides. For one thing, many lab scans aren't very good. If you're not paying a premium, you'll likely end up with a low-resolution scan that was exposed on "auto" through a commercial minilab. These can range from the acceptable to the utterly useless.

When lab scans go bad. Left and right half are exposed differently. Fuji Superia 200, Minolta X-700.
For a year or so, I have been getting scans from color negative film done this way. I've had ok scans from the majority of the films, but I also had several batches where one side was clearly darker than the other, and some where scans were completely out of focus while the negatives were sharp. Your mileage will vary. I treat such scans as proofs, and always re-scan images I want to actually do something with.
Better scanning services are more expensive, but results are also typically much better. Your images are loaded into professional-quality film scanners and often an actual human will sit in front of the screen to make sure your photos are captured. Whether you're sending in that box of Kodachromes auntie Ruth took on her Nikon F in the 1960s, or a few rolls of Fuji 400H from a recent wedding you shot, your work is done after you post or drop off the film. A good lab (check out, for example and in no particular order: Old School Photo Lab, The Darkroom and The Little Film Lab in the U.S., Canadian Film Lab in Canada, AG Photolab in the UK, or MeinFilmLab in Germany) will take care of everything for you, including color corrections to match a certain look you may have decided on.

Better lab scan. Fuji Superia 200, Leica C2 Zoom,
Scan Yourself
If you want to scan yourself, there are many varieties and tiers of film scanners. Are quick scans of prints from a photo album all you're looking for? In that case, a smart phone and a scanning app, such as Google's PhotoScan may suffice.
For most internet uses, and for quite a few print and professional uses, a film flatbed scanner is both the easiest to use and the most economical option. Scanners like Epson's V600 (around $200) and V800 (under $700), or Canon's Canoscan 9000F (around $180) have proven to be quite popular and are routinely used by professional photographers and archives to scan images to create virtual contact prints or to put things on the internet, if not necessarily for exhibition-quality work. Prints as well as medium and large format images do considerably better on these scanners than small 35mm ones, but if you don't need your slides to become wall-to-ceiling prints they will still often look quite good.

Flatbed scan from an Epson V600. Agfa Precisa 100 CT, Minolta X-700.
For those stepping up to a dedicated film scanner, there aren't all that many options out there anymore if you want to buy new. There are several very good scanners people still use that are not made anymore (Nikon and Minolta, among others, produced very capable ones). If you are considering one of these, then be aware that support for both software and hardware may not be forthcoming.
Dedicated film scanners from makers like Plustek or Reflecta are good currently available options. They come in many editions, some only for 35mm film, some for 35mm and medium format, some with and some without IR scratch removal. Some come with professional quality software, others only with dumbed-down consumer software. Which one you end up choosing depends on your needs. Budget is certainly one consideration, so are included software, features, and portability (I bought a Plustek OpticFilm 8200i AI to use during a year when I was renting just a small room and had no real desk to work on, and later brought it home in my carry-on luggage without trouble).

Plustek OpticFilm 8200i AI scan at 3600dpi with Silverfast 8.8. Agfa Precisa 100 CT, Nikon F80.
Some photographers also swear by the method of photographing negatives or slides with a good DSLR and a macro lens. Since for many this doesn't require extra hardware it is certainly an attractive alternative. If you don't typically do macro photography, though, purchasing a lens and a stand will certainly be in order. Personally, I have never found this option appealing, despite the good results some get from it. The hassle of setting up and taking down such a contraption, in addition to the fact that it keeps at least one camera body and macro lens from other uses while set up is a factor to consider.
Whatever you do, don't get one of those little scanner towers you can sometimes find at electronics chains or the like for around $50. While they will create an image, it is not usually a very good one. If your film is only a little bit under- or overexposed (especially in the case of underexposed slides) your images will hardly have anything recognizable on them. That said, it's better than nothing. If you have one sitting in a closet somewhere then sure, give it a try. But don't assume that bad quality images have to do with your source material. With these cheap gadgets, they're almost always the scanner's fault.

Cheap scanner. Shadows are almost indistinguishable. Fuji C200, Rollei 35T.
Software
Film scanners either come with the manufacturer's bundled software or with a specialized software package from a dedicated scanning software maker. Sometimes, you can choose between the two.
If you ended up with a scanner for which you don't like any included software options (or indeed are trying to resurrect an old scanner with a modern operating system), VueScan is a reasonably-priced and pretty much universal scanning option.
All of these applications have their cheerleaders and their detractors. The only way to figure out what works for you is to try them out yourself (I use EpsonScan on my Epson and Silverfast 8.8 on my dedicated 35mm scanner, having tried and decided against VueScan for my purposes).

Medium format on an Epson V600. Larger negatives make scanning easier and give more detail. Kodak Portra 400, Minolta Autocord.
You will usually better end results by not relying on any automatic functions, such as color correction, sharpening, or exposure control. There is, of course, a trade-off to be made between image quality and how long you need to work on any one image.
Dmax and Resolution
Two important considerations when buying a scanner are which resolution it can produce and how much dynamic range contained on a piece of film it can tease out.
Scanner manufacturers routinely fib about resolutions. There are differences about theoretical resolutions and what the scanner actually captures. Most of the time, the actual resolution you will get out of a scanner is much below the maximum given in the specs, sometimes by a factor of two or larger. If you don't know what you need, a scanner capable of producing a real (not just advertised) resolution of around or above 3,000 dpi is a good starting point.
Dmax means the density distinguishable on a scan. This is akin to dynamic range. Higher numbers are better. Flatbed scanners typically have values of just above 3, dedicated film scanners hover above 4, and very expensive professional scanners can reach 5 (The $25,000 Hasselblad Flextight X5 has a Dmax of 4.9). These numbers are also not necessarily truthful, but a scanner advertising a Dmax of 4.0 will likely be better than one boasting 3.2.
Recommendations
After all this you may wonder: what should I actually get? If you're unsure, my recommendation is always to purchase an affordable flatbed film scanner that can do both 35mm and medium format (like the aforementioned Epson V600 or Canoscan 9000F). Large format photographers obviously will have to make sure their 4x5 or larger negatives will also fit. There is of course much more to scanning: do you scan a negative as a negative and invert later, or do you let the scanning software do it? Do you scan as TIFF, as JPG or something else? Do you need full 48-bit color depth, or will 24 do? As with everything in photography, technology is only a part of the equation. Figuring out a workflow that works for you will enable you to get much better quality than simply hitting the auto scan button, no matter which scanner you use.
How do you scan your film? Are there any other entry-level options you like, or professional scanners you can recommend to those serious about getting film digitized?


For my personal work I actually have 2 scanners that I acquired over the course of this year. After coming from the Epson V700 and never being fully satisfied with my roll film results, I could not be more happy! I am using the Pacific Image (AKA Reflecta in other markets) XA & PF120 scanners. They match the old Coolscans pretty closely for quality and functionality. I use them with Vuescan. My 6x7/6x6 scans yield 60/50ish megapixel results at full resolution, and my 35mm scans from the XA give me about 33mp. The scanners have great dmax and the stated resolution is extremely close to actual. The proof is in the prints and my prints look great!
For work I still send my film off to be dev/scanned quite frequently. The home scanning solution is much slower, but also much more satisfying in many ways.
Good article. Some Minicab scanners are now available on second market. Kodak F135+ and Noritsu LS-600 can be purchased for less than $1000 on eBay. These scanners can produce excellent results and scan much, much faster than any consumer scanners. There are also some very good communities on Facebook to help at using these scanners. Here is an article about the Noritsu LS-600: http://www.gostreetphoto.com/noritsu-ls-600-film-scanner-review/
Film is tricky for beginners. It took me a while to pay attention to the complete process details for greater results.
With 35mm I love the results I get from an old Minolta DiMAGE Scan Dual, using VueScan (for linear negative RAW), and ColorPerfect plugin to make images positives through Photoshop.
I once owned one of those. It is an excellent scanner if you are not looking for too high a resolution and if your film is pristine in cleanliness. Anything else you'd need a scanner with infrared scanning/cleaning, and of course with a higher resolution. Last I checked they are pretty inexpensive. Much better than using a flat bed.
While I live in hope that I can get my Nikon CoolScan running again, the Epson v700 is a solid performer and I regularly use North Coast Photo: http://www.northcoastphoto.com/film_developing_scans.html
I've felt their prices are good as is their service. While I do not know the detailed offering of other providers, the fact that I can download the scans online after they process them is really helpful.
I believe they use the Noritsu scanner mentioned above too.
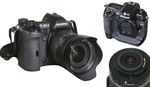
For anyone using that scanner in the first picture, I recommend flipping it on its side to greatly minimize dust on film and optics inside of scanner. Film scanners with the film in the horizontal position are poor designs. It's why the Nikons would always need cleaning and the Canons did not. My vertically oriented Canon film scanner has never needed cleaning.
Working with gravity. Brilliant! The obvious oftens alludes us. It comes in the category of point your camera down when you change the lens.
Cool! I'd be very interested to see how you set this up. Is the scanner on a shelf of some sort?
I don't have such a scanner. I use a Canon FS4000 (their last dedicated film scanner) where the film is not horizontally loaded as in the scanner in the article, and like the Nikons. For anyone that does have that scanner they could put in on a shelf if they wanted to, or simply move it to the edge of a table when in use. In either case I would make sure it is secured in some way to keep it from falling.
Edit: I would also make a cloth cover for the entire scanner to keep it dust free when not in use.
I use a V700 for my 4x5 and 120 work with no complaints.
The far superior quality of large and medium formation film compensates for the scanner.
True! Good thing i dont shoot much 35mm
The article doesn't mention Drum Scans. Higher quality more expensive better quality, huge files. There are a few Drum Scan services around here in the US. Google for locations or search on large format photography web site
The cost of drum scans are ridiculous. I don't believe them to be worth getting. With a good dedicated film scanner it would be hard to tell the difference.
I've been thinking about getting a Plustek scanner. I have negatives and slides going back to 1980.
They make high quality scans, though if you have a lot of images, a good flat bed would be a much quicker option! My V600 can do 12 negatives in one go, a V700 can do 24.
The problem with any scanner is speed when you have a big collection of family photos to digitise. I've been using a solution which is a compromise in some ways but nevertheless has some advantages. A DSLR with a sharp 50 mm lens at f/8 or so, an Opteka slide copier screwed onto the lens, all tethered to Lightroom. The compromise is the close-up lens in the Opteka and the lack of any dust removal. But you can get through piles of slides really fast, especially if you use auto-focus and exposure. The rigidity of the copier tube spares you the trouble of setting up a stand. The other big advantage is using RAW format which gives a lot of latitude in post-processing. I have even recovered images from badly exposed slides that were almost black. You can quickly develop crop and colour balance presets in Lightroom to speed the workforce up further.
My advice is to decide beforehand what film frames are worthy enough to scan and just don't waste your time with photos not worth scanning. You'll save a tremendous amount of time.
The problem with using a camera to do the "scan" is that you will end up spending more time in the end than simply using a dedicated film scanner with infrared dust removal, and especially so with color negative film. Getting proper looking color from camera "scans" of negatives can be very time consuming and frustrating.
Using pretty much any scanner a person can also create a flat, unclipped TIF that can serve the same purpose as a RAW file to be further heavily developed.
I use a Plustek 8200i AI for my 35mm film and an Epson V850 for my 120 film. I digitally print both black and white and color from these scans; the quality is good enough for exhibition purposes. For my black and whites, I prefer to make a gelatin silver print the old fashioned way - it does look better to my eyes, but it is much more nuanced than you might think. To be sure, getting a high quality scan is slow, but then again, getting a wet print is slower still. I'm happy to put in the time.
I'm just begining to do my first scannings with 35 mm film. I'm using an Epson V200 (old model) but I do appreciate your recommendations with the best values to start with, to scan them. I will use Photoshop to edit them.
Tks