
As a professional nature photographer, Topaz DeNoise is an essential part of my workflow. I had heard about it for years, but since I owned Lightroom and Photoshop, I didn’t add Topaz into my software library until last spring. I was late to the party, but at least I can save you the trouble. Just DeNoise alone is worth every penny. Come see why.
Last May, I was scrolling social media and saw that Topaz was having a big sale, so I bought the Image Quality Bundle of DeNoise AI, Gigapixel AI, and Sharpen AI. I was mainly interested in Topaz DeNoise for helping fix noise in my low-light photos. I bought the bundle and went to work using it on some of my favorite older photographs that desperately needed high-quality noise reduction. I was so impressed that I now use DeNoise on all of my high-ISO photographs. Let me tell and show you why Topaz is my go-to suite for enhancing my pixels, as you will see for yourself why I am a huge advocate for the Image Quality Bundle.
If you're interested in getting the software yourself, they're having a big Black Friday sale until 11/29/21. You can get DeNoise AI, Gigapixel AI, and Sharpen AI, plus one year of updates for just $99.99, which is 60% off normal pricing.
Easy to Use With Big Results
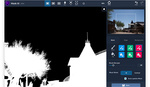
One of the best things about the Topaz programs is how simple everything is to get started. After I have done my adjustments in Lightroom or Photoshop, I just export the photo as usual. I then load it into Sharpen AI to make the file crisp and lifelike. After that, if it is a high-ISO file, I load it into the DeNoise panel and watch the magic transform it. Photos that are slightly blurry or high detail that I want to enhance and make pop, I load into Sharpen AI for a pass-through to become crisp. If it is a file that I want to print or display big, I load it into Gigapixel AI. All three of the programs use the same simple interface style. When you first open the program, the center has a big upload button to select your file(s). At the top right are icons where you can select your view for either a single view of only the adjusted image, split-screen, or side-by-side comparison. To the right is a panel with toggle options to allow the program to select the best settings for your image, or you can customize everything with easy-to-understand labeled sliders. In photos that need a helping hand, I am not shy to crank the sliders toward 100 percent. These programs are smart, and they tailor the results to your specific file.
Real-World Tests
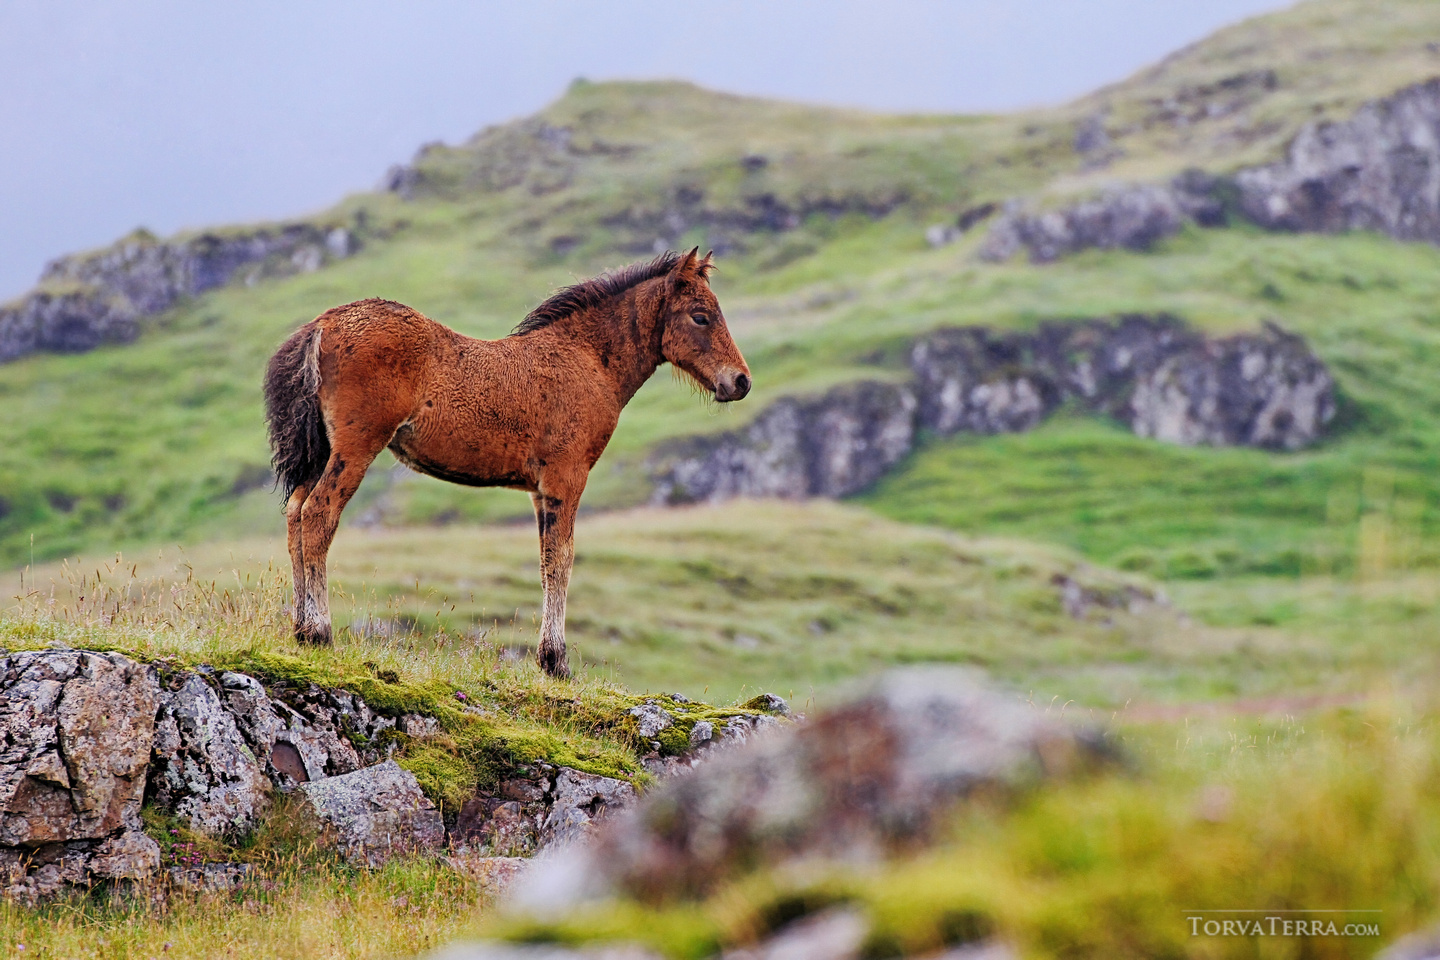
Often, when I am working in the field, photographing wildlife, the light is not exactly working in my favor. Many species that I specialize in are crepuscular, like owls who favor twilight hunting. Other times, it is just cloudy, poor weather like rainy days that cause me to crank the ISO. I will always try to get “the shot” whenever possible, but the light isn’t always cooperating. In these moments, I know that I am capturing amazing wildlife moments and expressions regardless of available light. With Topaz DeNoise, I do not have to worry about the ISO. The AI algorithms are intelligent, and after six months of use, I trust them to pick apart the details from the noise and give me the results that I need. I wish I bought the bundle sooner.
Topaz DeNoise AI
The first set of photographs that I ever ran through Topaz DeNoise AI were a series of wildlife photos taken at different times, in various locations around the world, all created during rainstorms. I wanted to see what this software could do. These are images with visible rain droplets falling and dark skies overhead, but the animals were there putting on a show. Drenched in the rain too, I patiently photographed the animals and documented the scenes. These files are a true test of the power of AI for the program to keep the rain droplets and the fine fur and feather detail while smoothing only the areas of noise. The results were a night and day difference. My photos were completely recovered from low-quality noise to smooth and sharp photographs. No longer distracted by the pixelated portions, the viewer can now connect with the expressions of a young bear cub in the Alaskan wilderness or a burrowing owl chick bathing in the falling water of a summer rainstorm.
Take a look at the results below. I made sure to include the screenshots heavily zoomed in as well as the final product to show the before and after comparisons. The close-up view of the pixels is the best way to see what this software can do. Also, you can see what settings I chose in the program for each file and get a feel for what the user experience is like to use Topaz software on a photograph. Easy peasy, the program just fixes your file and you hit the giant save button once you like how the slider effects look on your image.


The fact that I can recover detail and reduce noise to such a powerful degree with DeNoise not only allows me to use photos that might otherwise have collected dust in my archive, but it has changed how I think in the field. I know what I can do in post, so overcast and heavy rainfall days are no longer the enemies. With DeNoise, my photographs are higher quality, and so then are my prints. I can take a photograph, run it through the Image Quality Bundle to pull the noise, sharpen it, and then upscale it and create gorgeous prints for my clients and collectors.
Topaz Sharpen AI
With Topaz Sharpen AI, you can use the program to do normal sharpening, with the intelligent AI selecting only the portions of your image with a subject. However, I was excited to use the program differently. I have been playing with Sharpen’s algorithm for analyzing out-of-focus images and turning them into usable photos. We have all been there: you are out in the field, action is happening, and either you get motion blur, the lens was hunting and didn’t catch the subject, or you just scuff up. Just for fun, I ran a few blurry photos through and was shocked how well the AI transformed them! My favorite is a photo of a wild pinto stallion running on the beach. This photo was taken during the last light of the day, so it is high ISO. As the horse passed by me, my lens lost focus, and the images were soft. I chose the best one to test out, and here is the result.


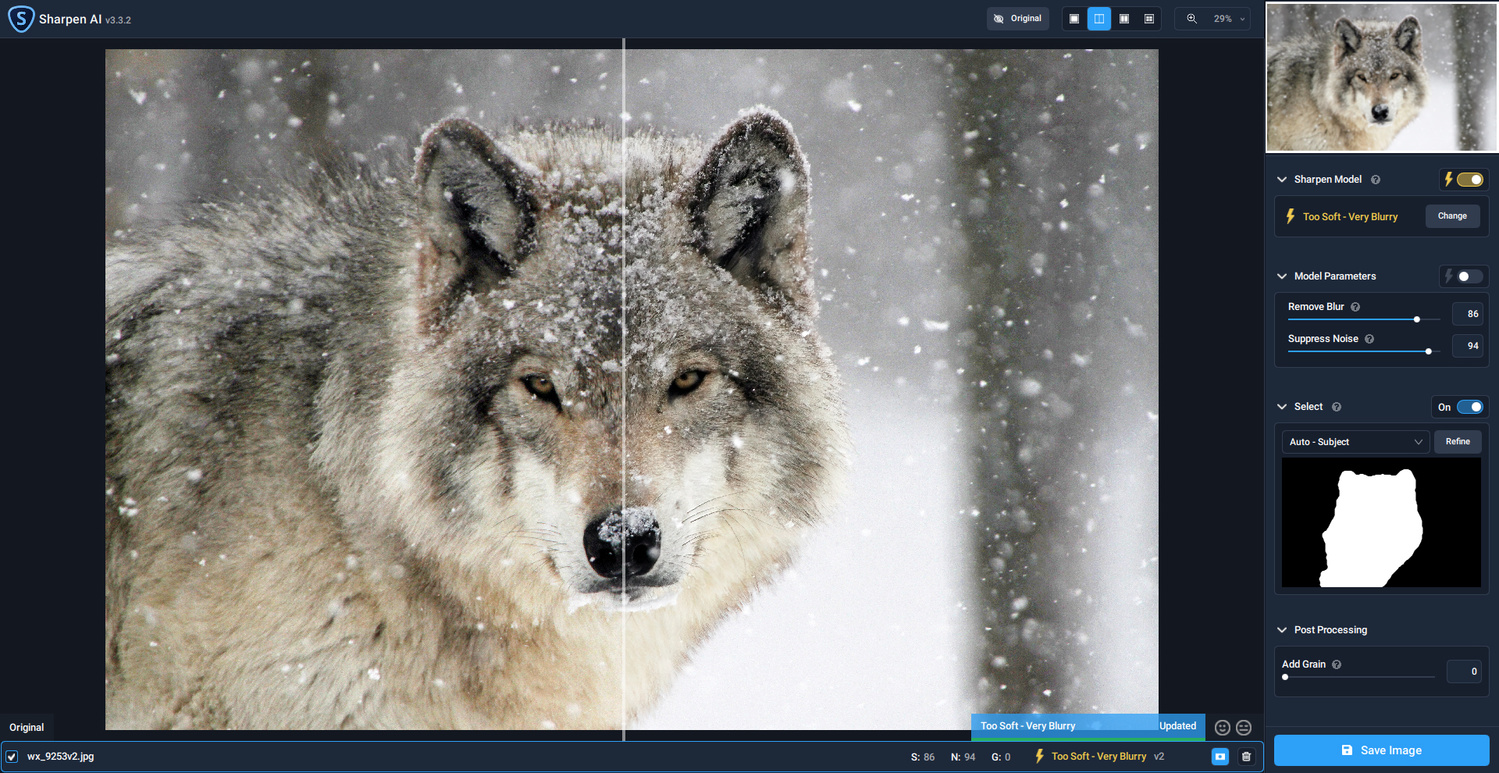
In another test of the program's abilities, I selected a high-ISO photograph of a wolf taken during a blizzard in Canada. This is an older photo of mine but one of my favorites for the subject and intense eye contact in extreme weather. I have loved it despite it not being the best quality in pixel-peeper terms. Now though, with the power of Topaz, I ran it through both Sharpen AI and Denoise to bring out the best in the image and let the subject shine.


I also ran through a few photos that were sharp enough to be fine, but I felt could use a bit more detail. I find this especially useful to my style, as I often use a shallow depth of field with a sharp subject and purposefully blurry background. By bringing out the textures in the fur, feathers, and other key areas, the image appears that much more 3D to pull the viewer in.
Gigapixel AI
The Gigapixel AI uses powerful AI to sharpen your photographs and add resolution. This is called upscaling, and it is very refined in Gigapixel to give you realistic-looking results. A small file just dragged or resized larger will look blocky and pixelated. Running the file through Gigapixel instead allows the program to analyze it and use AI to add in extra matching pixels to make the file larger. In crop sensor cameras, this can help you add file size to display or print your images larger. Even with a full frame mirrorless system, I notice the difference in my files. Where I was most impressed was with the results in my prints. This is where the program comes in clutch for professionals and keen hobbyists who want high-quality big prints for their clients or portfolio. Gigapixel makes your files huge and sharp, ready for whatever application you need them for, whether it be a nice 20x30" matted framed photo, the cover of your photo book, calendars, or something else. This should be your last step to add that finishing touch to a photograph and give it the polish of fine detail and clarity.

A Few Notes
A few things to know about the Topaz programs are that once you purchase, you own the program for life. There's no monthly fee here. Your software license also comes with a year of free updates too! If a new version that you want comes out after your first year is up, you can go to the site and get a discount on your upgrades. This is a completely different business model than other popular software, and my pocketbook is very happy about that.
While I am very pleased with the software, there is only one aspect that some users may not like. These programs are beefy, and when you run them on a photo, your computer will focus entirely on that task. In older machines with fewer processing cores or speed, it may take a few moments to run your selections over the photo and save your file. While my computer is pretty fast, I just wanted to note this. If your computer is older or more basic, just be patient as the AI does its magic. If you’re familiar with rendering videos or working with large file types, you’ll be used to this. That’s the time to stretch, grab a drink, or check your phone. The results are worth the wait.
Final Thoughts
The Topaz Image Quality Bundle is fantastic, and I highly recommend you take a look at it for any genre photography, but especially those of us using natural light. While one always hopes to get everything perfect in the camera and be blessed with only the best light, I am glad to have these programs to help when conditions aren’t ideal. If you’re interested in trying out the Topaz Image Quality Bundle you can grab a free trial on their website here. With a free trial available you don't have to take my word or examples for it, grab a copy and test it out for yourself. With AI this strong, your photographs will thank you.


Kate, I tried hard, but I don't see any differences. I enlarged the page by 400% and then I was able to see a very small difference in sharpness in the photos of the horse and the wolf of which I think it can easily be achieved by sharpen a tiny bit the high frequencies.
Hi Jan! Its difficult to see the difference in the photos when they are resized small for the web page. However in the screenshots I have zoomed in so that you can see the pixels closer up (more accurate to the size you may display or print then at) and how the programs are really making a difference. You would notice the greatest difference when printing large. I promise its a huge improvement! Since there is a free trial, try running one of your photos through that has noise and zoom into the file afterward or print it and compare. I also notice a huge difference in the out of focus photo of the horse which was completely unusable before. The AI really made it look in focus now. Try a few of your photos out. Let me know what you think.
If you open just the photo in your browser can you see the difference?
https://cdn.fstoppers.com/styles/full/s3/media/2021/11/21/denoise_bear_b...
Thanks for the quick answer. I might give it a try with photos I took under very low light conditions (ISO 12800). So far, besides sharpening the high frequencies (e.g. hair), I have also increased the local contrast a bit to get crisper results (when it was lacking). I have never made very large prints, 60x90cm at most (about 2x3ft).
I tried a second time and displayed the image of the fox in a new tab and enlarged it by 300% (which is way too much). I compare the tiny snowflakes on the fox's nose, the hair, I still can't really tell the difference. Are these 1:1 enlargements? If not, could you post in a comment a 1:1 crop of before and after in full resolution of the original image?
I'm not doubting your results! I'm just curious to see them too. Thanks again. You know I like your style. Cheers!
Thank you very much. Now you can see the difference much better. There is less grain in the darker parts of the background. It does a really good job of separating the fine texture of the fur against the darker denoised background.
I have been using Denoise (just Denoise, not the whole package) for a while. It does a pretty good job of smoothing and sharpening the correct parts of the image (once you figure out how you like the various sliders). It does sometimes produce odd wavy artifacting on blank sections (think empty sky), but it is only apparent when zoomed well beyond 100% so it's better than the noise. I'm not convinced it's doing anything I couldn't do with tools built into PS. The reduced time and effort made the cost worth it to me. Instead of spending an hour or more selectively smoothing and sharpening, I can do it in a minute of fiddling with Denoise's sliders.
Thank you.
Hi Kate. I agree with your comment about processing speed. One thing readers should note is that if you have, for example, an Nvidia RTX series graphics card (or I assume any gfx card that implements tensor/AI processing) that will make a HUGE difference to the speed at which Topaz AI processes. Before and after tests on my system revealed a couple of orders magnitude improvement in processing speed with an RTX2060 card installed. No time to get coffee of check your phone - a large pano will take about 15 seconds to process, compared with many minutes previously.
Topaz AI is now an essential part of my processing workflow, although it will be interesting to see what the forthcoming Skylum Luminar Neo is capable of.
Cheers.
I tried them all: topaz denoise, dxo pure raw and on1 nonoise. For fur and feathers the on1 is the best. In the “AI clear” mode topaz kills lots of details while processing high iso images. It’s probably the worst out of all three. The regular mode still leaves a bunch of noise.
Here’s a nice comparison: https://www.youtube.com/watch?v=uMwN4lEpTHo
Hey, Kate
I have been trying to decide whether or not to get the Topaz bundle for a couple of months now. But this article of yours was what I needed to convince me to go ahead and get it. Purchased it a few days ago. Thanks for the encouragement!