With Adobe just releasing their latest iteration of Lightroom Classic, I thought now might be the time to look at how to optimize and speed up Adobe's favorite image management and editing application.
I always get asked about Lightroom. The most frequently asked questions are why can’t I find my pictures, where have my catalogs disappeared to, and why is Lightroom running so slow?
This article will give you some tips for using my favorite editing program, which will improve your confidence and allow you to customize it to best suit your workflow.
Clean Up and Personalize Your Lightroom Navigation and Workspace
Clutter Distracts From Getting the Job Done
1. How to remove the modules you don’t use: Lightroom has a number of extra modules: Map, Book, Web, etc. Right-clicking with your mouse on the menu at the top brings up the drop-down menu. Left-click the modules you don’t use to remove the tick from them, and they will disappear. My essential modules are Library, Develop, Slideshow, and Print. Clicking them again will return them.

2. How to personalize your branding in the app: While this is not strictly a decluttering option, this looks good if you’re presenting to an audience or showing your screen to a client during in-person sales. Choosing "Personalized" by right-clicking in the top-left corner allows you to change the header content and you can even change the font, size, or add a logo.
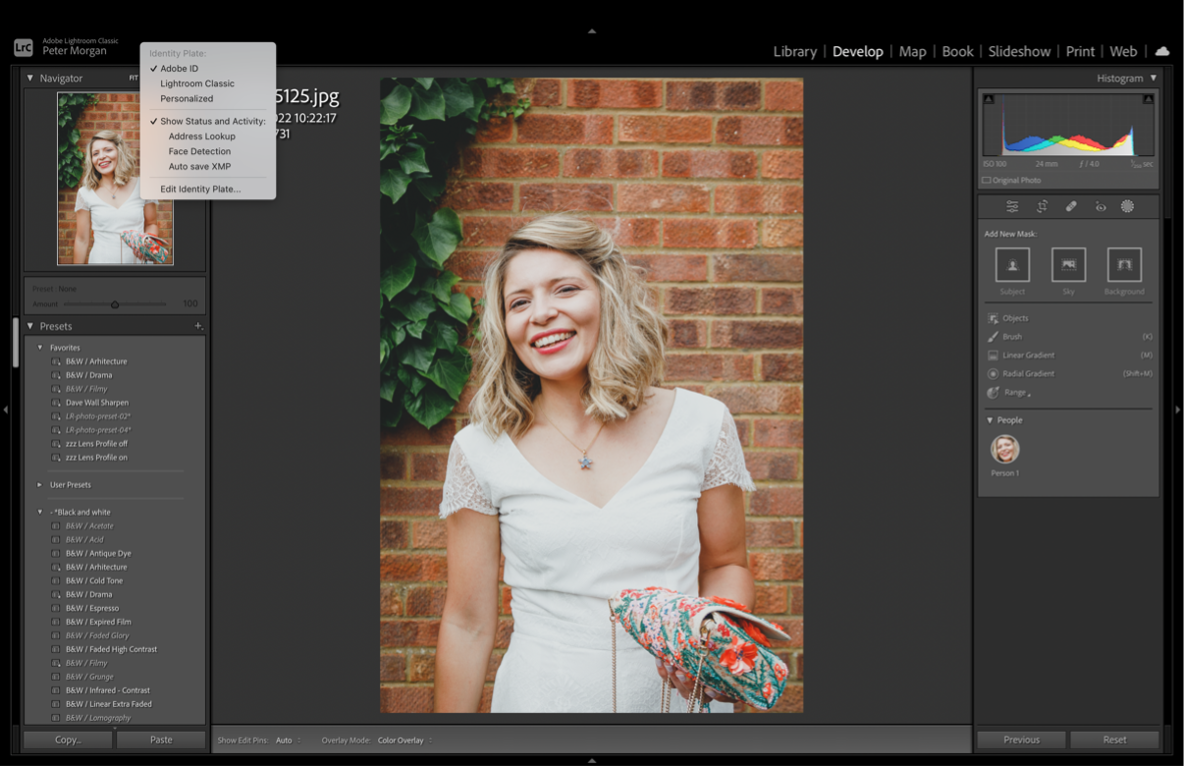
3. How to change the background color when viewing an image in the Develop module: I find the white background behind the image distracting when editing, as light draws the eye. Right-clicking on the background to change it to a dark gray allows me to concentrate on the image without distraction by matching the color with the interface.

4. How to manually hide the pop-up bottom panel: This creates another distraction, as it pops up when the mouse pointer is moved over the bottom of the screen. By setting this to "manual," it will only appear when the arrow at the bottom is clicked. You can also do the same with the left, right, and top panels and synchronize them so they appear together if you like.

5. How to turn on expanded cells: To get more information on your pictures in the Library module, set the grid view style in the view tab from "compact" to "expanded." This means you’ll see more information on the image on the grid. Changing the option to expanded cells allows you to right-click on the photo information and change it to show whatever information you like, such as the lens and camera used when taking the image or capture settings.


Right-clicking here allows you to select whatever information you want to show in every cell for each image.
 You can then select from a list of attributes to show.

Organizing Your Photos
Unless I am gathering photos from different folders together to share in a group, I don’t tend to use collections, so this advice will focus on folders. I use a naming system in folders that allows me to find where everything is quickly. However, if your current catalog includes everything in the pictures folder or imported onto the desktop (please don’t do this!), these tips should help you find photos that may have been misplaced or you may have even forgotten were on your hard drive.
1. How to show the parent folder: The parent folder is the upper-level folder that a subfolder sits in. It’s a bit like making a new folder on your computer in the pictures folder. The top-level folder on your Macintosh HD drive should be your username and the same for the main drive in Windows.

If it doesn’t show in Lightroom, right-click on a folder and click "Show parent folder." Eventually, you’ll get to see your main user folder.

2. How to synchronize your folders and find things you didn’t know were there: Synchronizing drives allows you to get Lightroom to search the folder and subfolders below it ("Show photos in subfolders" needs to be selected in the Library tab). Running the Synchronize command on a folder imports all the images not currently cataloged in Lightroom and removes all the ones that are showing old previews but might have been moved or deleted (hint: they will show an exclamation mark in the corner of the preview if the image has been deleted or moved).

Start by right-clicking on the folder you want to check, then select "Synchronize" from the menu that pops up. It might take a bit of time to count the missing images, but have patience. As an example below, I have 26,573 mages not currently showing in Lightroom and 0 that are showing as there but no longer actually exist on the drive.

The import process will start.

This will take time and will show everything that it can find that can be recognized by Lightroom. It’s going to pull in photos and video files when "Add" is selected at the top and doesn’t move them unless you choose "Move." It just catalogs where they are on the drive. You can then delete the images you no longer need in Lightroom, and it’ll also remove them from the hard drive.
Backing Up Your Lightroom Catalogs
Storing multiple catalogs on your computer’s internal hard drive can be problematic. If the computer crashes, then you might be left with a corrupted or unusable catalog. An alternative could be to sort the pictures into years in a single catalog. If you shoot more than one genre, then have a folder for each genre, then a sub-folder for each year. Having only one catalog to back up using Time Machine (or your chosen Windows application) makes it easier to find older images. I would recommend a Lacie rugged SSD of at least double the size of your internal hard drive to store your catalog. Your Lightroom backups should be stored on a different drive from your catalog. Time Machine will back up these external drives if they are attached at the time it is running every hour, with incremental backups occurring after the first initial large backup.
When Lightroom exits, it will ask you where you want to back up. Select the external drive and let it run. Catalogs over 4 GB in size will compress, and you'll have to use unzipping software to decompress them, but this is built into macOS and Windows these days.

Clear Out Space Used by Old Previews
Running out of space on your internal hard drive? It could be the preview files. Previews are generated when importing images (or if you ask it to do it manually) 1:1 preview can be large if you're shooting high volume like weddings and while Lightroom is supposed to clear out the previews file every 30 days. Occasionally, due to system crashes, updates, etc., it doesn't clear out. This issue can be exacerbated if you have multiple catalogs, as every catalog has its own previews file. The discard option can be found and changed in Lightroom Classic menu - Catalog Settings - File Handling.

First, find your previews file. It's normally stored in the same place where your catalog file is stored. Make sure Lightroom is closed and delete it. This will then mean when you launch Lightroom, it should run more quickly, but you will have to generate previews for catalogs you're working on by going to Library - Previews and choosing either standard-sized previews or 1:1 previews.

These tips will allow you to navigate and understand Lightroom better and help you get the look, feel, and usability that you want to maximize the efficiency of your workflow process.
Lead image by Ross Grieve.