
Did you know that Adobe Photoshop has a great selection of very helpful in-app tutorials for all levels that you can access for free? Here's a run-through of you can get your hands on them all.
Yes, I know that it costs money to own Photoshop, whether you have a standalone copy or pay for a monthly subscription. However, that's money you've already spent and these tutorials are included with your product at no extra cost. They are not an extra perk that belongs to some kind of pro-level subscription that costs you more, as is the case with many other pay-to-play software platforms in existence today. Indeed, Adobe's in-App offerings are rather extensive, which is something a lot of people don't know about, don't care to know about, or don't know how to learn about.
In this article, I'll show you how to take advantage of the free how-to tutorials that Adobe offers. Of course, the internet and sites like YouTube offer thousands upon thousands of free tutorials you can access to more deeply understand Photoshop, but how often do you spend an inordinate amount of time looking for something that's suitable, or looking for a creator that's suitable? One thing I like about Photoshop's in-App tutorials is that they're created by well-known Photoshop aficionados such as Jesus Ramirez of The Photoshop Training Channel and Colin Smith from The Photoshop Cafe. In short, the tutorials are created by people who know what they're doing.
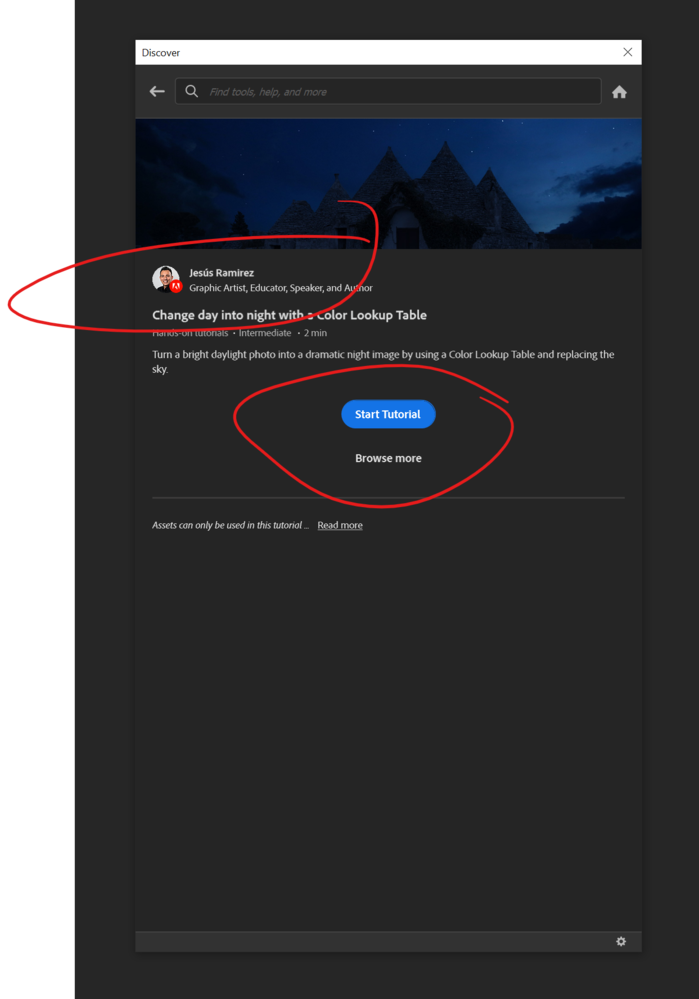
To access the tutorials just open Photoshop whichever way you like. Once you're in, just click ctrl + F (Windows) or cmd + F (Mac). That will bring the Discover panel to you, as you can see in the image below. Once you're there, you have a whole host of options.

You can select from a range of tutorials, hands-on tutorials, quick actions, and so forth. For this article, I went with hands-on tutorials. The difference with hands-on tutorials is that you get the working files to use as you go along, whereas you don't with regular tutorials, meaning you have to use your own images. You can also choose the category you'd like to work on and the skill level that's most appropriate. Another great thing I really like is that all the tutorials are very short, yet packed full of helpful information, meaning you can learn a lot in a short space of time.

For this article, I chose the tutorial which helps you turn a day photo into a night image. I just randomly scrolled down the Discover panel until I found something that interested me.

After you click the tutorial you're interested in, you get a blue-colored prompt asking you to start. Just click that blue prompt and you're away.
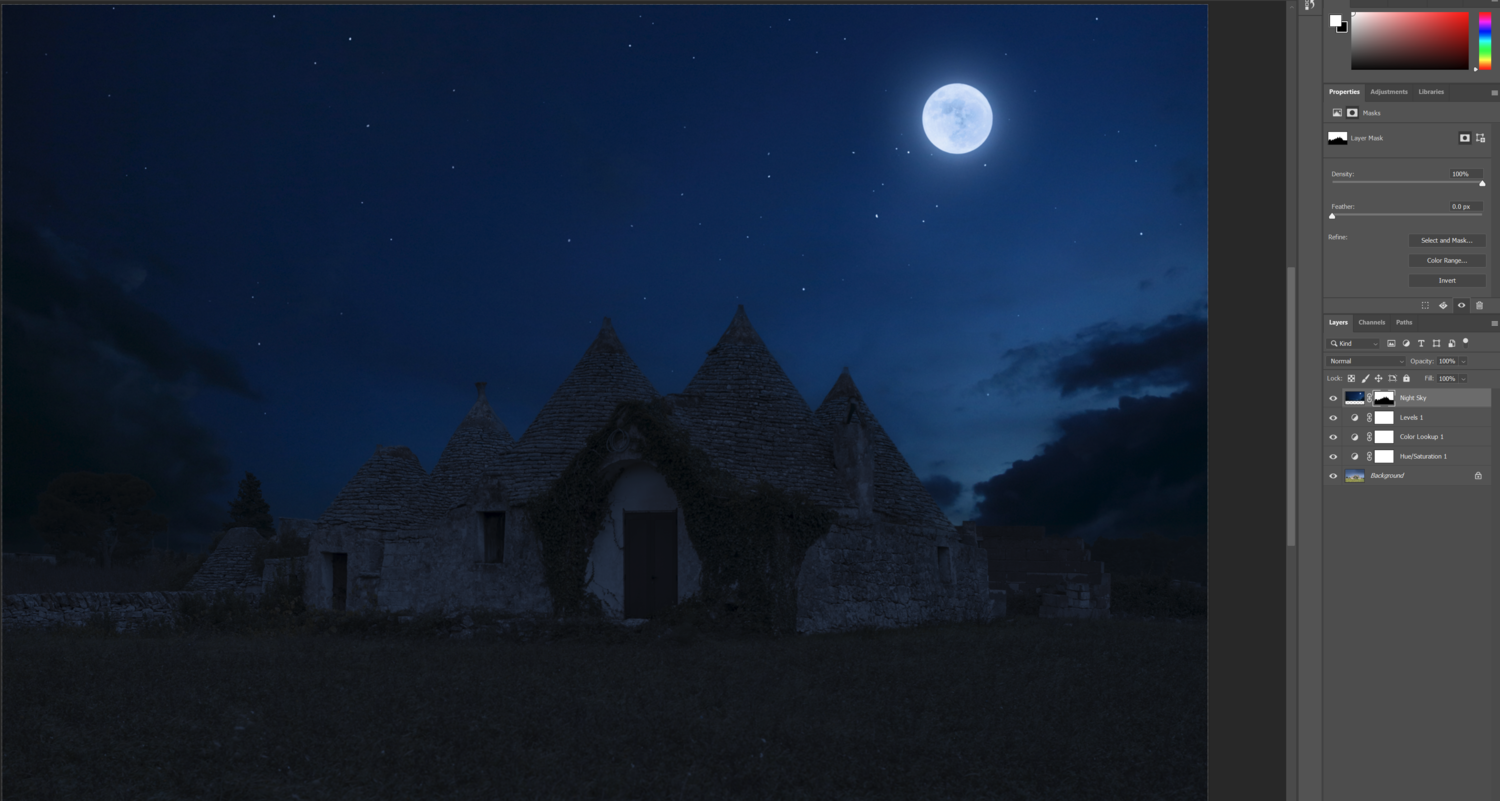
I have to admit, I did get a little confused at this stage. I wasn't sure what to expect and for some reason, I thought some kind of walk-through video was going to appear. It didn't, which left me floundering a little. After I'd clicked the blue Start Tutorial button, Photoshop opened the files and populated my Layers panel. I then noticed another blue prompt at the bottom of my screen, under the Layers panel, telling me what to do. The blue prompt bubbles are the directives that you must follow. They tell you exactly what to do so that you really just need to follow along and click. And pay attention to what's going on, of course.
 A good hint that you still need to do more is the 'Next' button on the left side. If it's grayed out and unclickable, you must follow more steps. If you're up to date, the Next button will turn blue. From there, it really is just a matter of reading and clicking. But again, if you want to learn, then take the time to understand what's actually happening and what you're actually doing. It's easy to click when you're told to click, but see what to click and why, when, or how is the most important part of this learning process. In this tutorial, I went through using Levels, Masks, Adjustment Layers, and selections. One thing I didn't actually know was that under the Select Tab, there is a Sky option, which uses Adobe Sensei to automatically select the sky with great accuracy, as you can see below.

Once you've been through all the steps, Photoshop will show you a dialog box with a message saying well done, indicating you've finished the tutorial. Of course, you can go through it once again if you want to double-check something, or as many times as you like in the future.

In this particular example, I went through the process of turning a day photo into a night photo, replete with stars and a full moon. You can make your own adjustments as you see fit and edit to your heart's content with your own ideas, but this tutorial itself only took about three minutes. The great takeaway in this for me was the automatic sky selection option. I don't know why, but I'd never used it before. I'll have to test it out on more complex skies in the future but it's definitely something I'll add to my kit bag of tricks.

Here's the initial day image above, taken in good light well before dark. Below is the finished image simply following the blue prompts provided by Photoshop's hands-on tutorial and without any edits or added adjustments from me. Not too bad at all for a three-minute tutorial. Personally, I think the foreground is a tad dark and I would not leave the image as it is below, but that's not really the point of the tutorial. It's teaching you the process necessary for turning day photos into night photos and introducing LUTs, including the specific Night to Day LUT.
All in all, these short tutorials are packed with great information. And it's even better that you can access them all at no extra cost. Give them a try and let me know how you go in the comments below.


Thank you for not making this tutorial into a video.