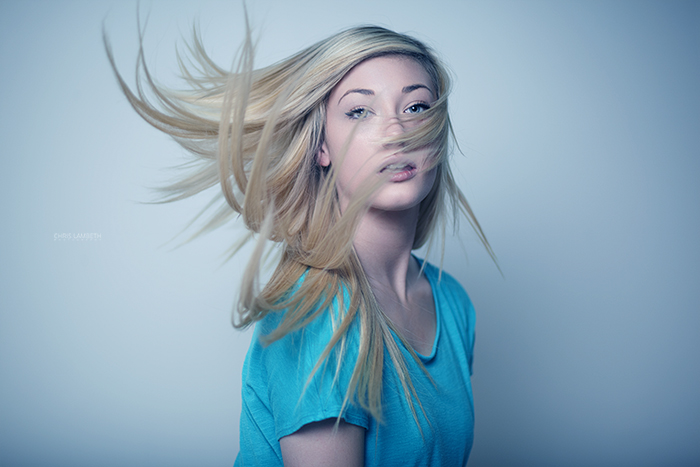
I have had quite a few people ask how I achieved this look. So I figured I would do a quick little photoshop tutorial on it to help you guys out! It is much much easier then you think. Hope you enjoy!
Written version:
1. Duplicate current layer (CMD+J)
2.Double click layer.
3.Turn off green and blue channels.
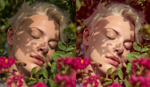
4.Warp transform (CMD+T, right click, select warp)
5.Warp to desired effect amount.
6.Mask out eyes or any feature you do not want the effect on.

Hope you guys enjoyed it and feel free to check my website and Facebook page for more!


![[Pics] Manipulated Photos Of Notable Historic Figures Before The Digital Era (Before And After Images)](https://cdn.fstoppers.com/styles/small-16-9/s3/wp-content/uploads/2012/03/3.jpg)

Awesome
Similar to what how I do this. I blog posted this effect some time ago. I will say you do have a nice final result. Good job.
cool
Yes it works... :) Definitely gonna try this! Thx
It's just alook like the 3d colours not the effects :/
Has anyone tried this with the red and blue glasses?
I tried it. I have been doing a similar technique for about 3 years now. This is close but the 3d is not believable. The image still looks super flat and they hair looks cut out. In order to make these types of images work, you need depth and shapes need to appear round.
OMG please send me a tutorial!!!
I'm sorry, this is not a good effect at all. YEs, it has some 3D effect, but it's not a real/believable effect at all. Maybe on a different image. I usually create two slightly different images then use some displacement map technique and the results are way much more believable. Then again, this is suposed to be an easy way, like putting juice in the freezer and calling it an Ice cream.
I don't think the effect was meant to achieve realism, but hey, who puts popsicles in microwaves and calls them kool aid?
I really dig the look without glasses. Stellar photo dude!
i definitely have to try this , thx