
If you are going to shoot a model, it is great to have an idea about the right lighting setup. Experimenting when the model is standing in front of your camera may not be the best time to do this. With the software set.a.light.3D, it is possible to simulate any possible lighting setup imaginable.
I don’t have a studio of my own. But sometimes, I convert my living room into a simple studio. I call it my living-room studio, and it is perfect for a few simple shoots. For this living-room studio, I have two Profoto B10 lights with different modifiers available and two Profoto A1 flashguns.
It is easy to use a simple but effective Rembrandt lighting setup, but not always. Sometimes, it is nice to use a completely different lighting setup. Having a good idea about the right lighting setup is crucial for a successful shoot, I think. For me, trying different light positions and modifiers when the model is standing in front of my camera doesn’t work that well.

My daughter, Madouc, in the living-room studio for a gothic look photoshoot, looking at the large octabox above her, wondering if it will fall down.
Although there is nothing wrong with fine-tuning the position of lights, I prefer to have a rough idea of where to put the lights with the appropriate modifier. If you own a real studio, you have a lot of opportunities to try new things out. There is less pressure to perform. If you don’t have a studio, like me, it often comes down to the moments you have one available or when you temporarily transform your living room into a studio.

My son, Aillas, ready for the shoot. The Rembrandt setup is just playing it safe.
There were times when I just used the well-known Rembrandt lighting setup again if the ideas I had didn’t work. On those occasions, I played it safe, because changing the complete setup takes a lot of time and effort, especially when I don’t know for certain if the other idea will work. This was very frustrating at times, until by chance, I stumbled upon set.a.light.3D.
At first, I used the website Lighting Diagrams. This online program makes it possible to create lighting diagrams that also can be found in different articles on the web. But these diagrams don't help me visualize the result of a lighting setup. Fortunately, set.a.light.3D from Elixxier software offers that possibility.

For a studio shoot, I tried a simple beauty dish setup to find out if the results were similar to the simulation in set.a.light 3D.

This is how the reality turned out with the planned light setup as simulated in set.a.light 3D.
The program makes it possible to build any lighting setup imaginable. It is able to simulate the outcome. Every type of light is available, and it's possible to choose a virtual model as well. You can change the pose of the model, the clothes, and the appearance as well.
Just drag and drop the lights you want to use or create your own. Change the camera height, focal length, and exposure settings. Set the flash output, and try out the effect of different modifiers. The studio can be seen in 3D, and it allows you to rotate the view to see your studio from any angle. There is a lighting diagram available and a simulation of your lighting setup.

The second setup with the model, Iris, was a dark one, planned in set.a.light.3D.

This how the simulated light setup turned out in the studio. I found the simulation very useful.
I downloaded a trial and experimented with the program. I tried a few lighting setups for the shoot I had planned. The great thing about set.a.light.3D is the realistic simulation of light output and shadows on the model. It also takes the effect of the walls, ceiling, and floor into account if you set the dimensions of your virtual studio to match the real studio.
By building a lighting setup in set.a.light. 3D, I was able to find the right setup for my shoot without the need to experiment with the lights in the studio while the model was waiting. I could place the lights according to the simulation to get the desired results.
The first try was for a normal but small studio. I tried set.a.light 3D also for my living-room studio. I discovered how much effect the walls and ceiling had on the light just by simulating the shoot. This way, I was prepared to use a collapsible black background for covering up a white wall, eliminating the reflectiveness.

I also tried out a light setup for my living-room studio. Again, I was aiming for a dark and moody low-key portrait.
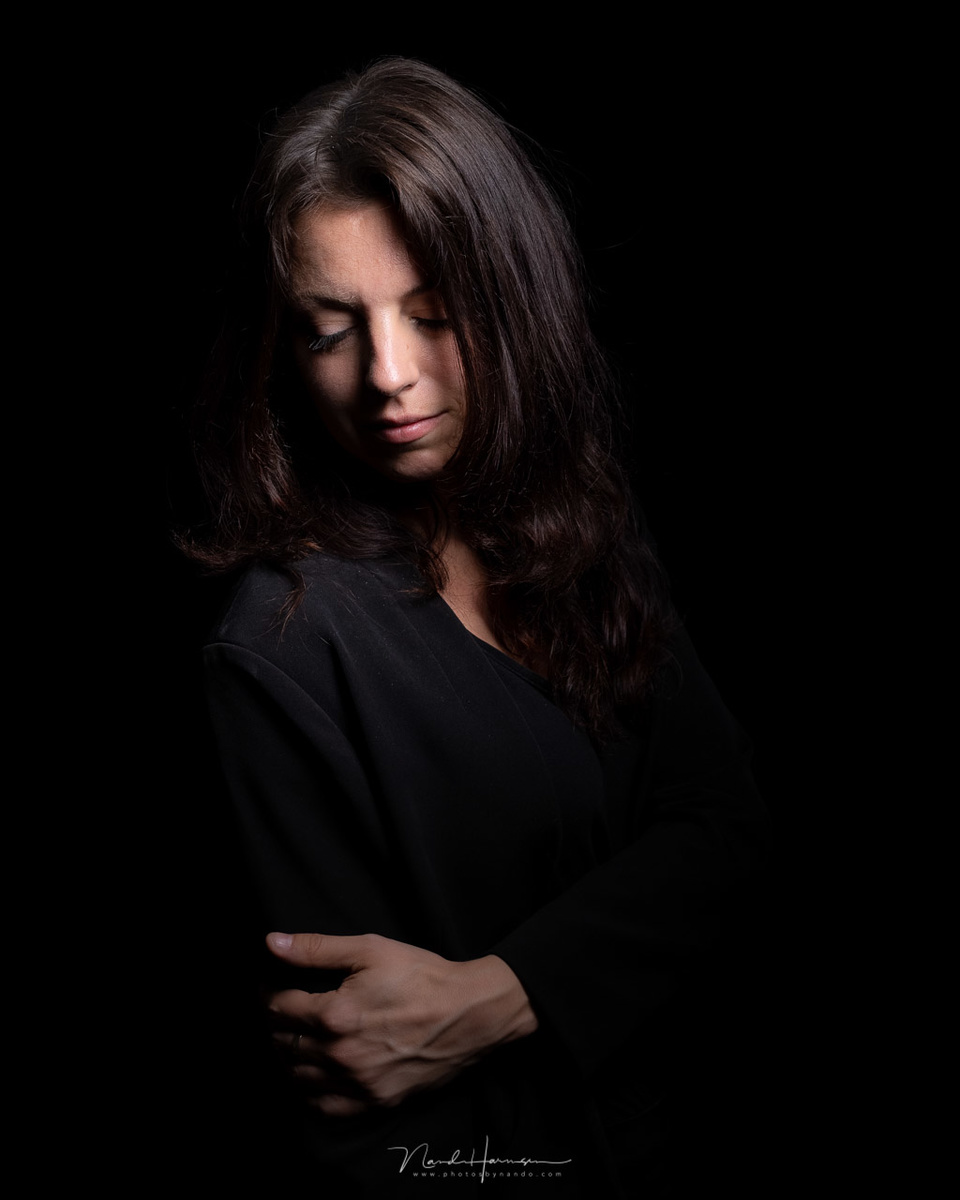
One of the results from the shoot with Ilke, based on the light simulation from set.a.light 3D.
I think a program like set.a.light 3D is perfect for the beginning studio photographer. It enables you to visualize the result of placing lights and light modifiers. It shows you how much walls, ceilings, and floors will affect your result. It is easy to experiment with a lighting setup in this simulation program before using it in real life.
Perhaps the more experienced studio photographer has less need for such a program, but I could be mistaken.
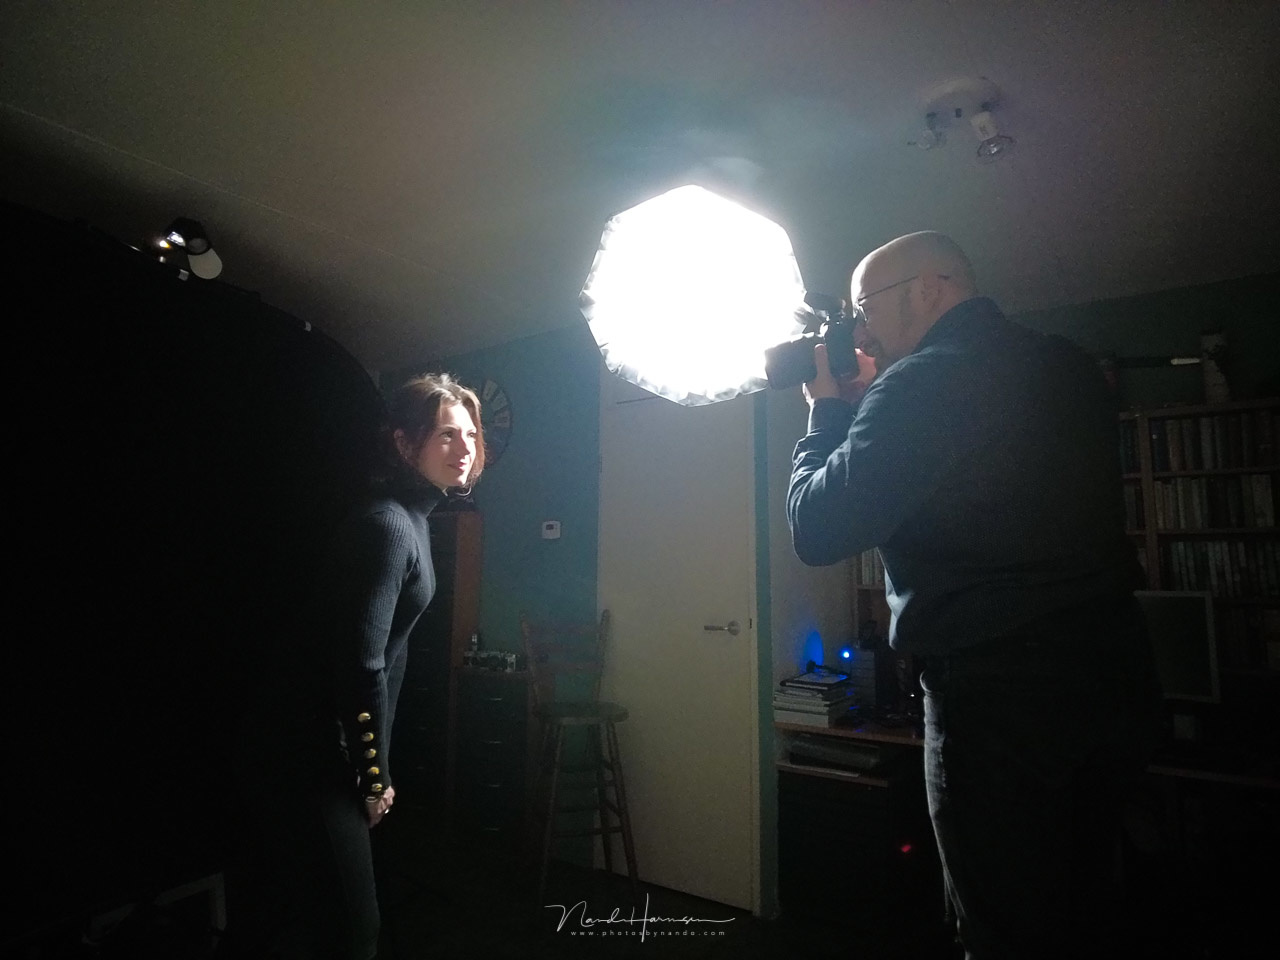
A behind-the-scenes impression while photographing Ilke in the living-room studio.
I find set.a.light.3D a very valuable piece of software. There are two versions available. A basic version can be bought for $79 and the studio version for $154. Looking at all the possibilities, I think these prices are very reasonable. You can try the software for 15 days without any limitations. It is available for both Microsoft Windows and Mac.
I bought the studio version with my own hard-earned money. I have no relation with the manufacturer Elixxier in any way, and my opinion of this program is based on my own experience.
What do you think of set.a.light.3D? Did you know about this program, or do you already use it? Please share your experience in the comments below. I also would like to invite you to give your opinion about software like this and how useful you think it is. I’m looking forward to your response.


Pretty cool software, but I have mixed feelings about it. I'm a big fan of parabolic modifiers (I have a couple of Broncolor Para umbrellas) and reflective umbrellas in general. While "set.a.light" offers 2 sizes of small parabolic umbrellas - there is absolutely no option to focus a strobe within your umbrella. The focusing rod is the whole point why those umbrellas actually exist, and the focused vs flooded positions give completely different looks. The same idea is applicable to regular umbrellas - the light position matters a lot, but there is no way to adjust it.
The application renders the same picture (in terms of shadows) from a "direct" non-diffused parabolic and reversed non-diffused parabolic, the only difference is brightness which is nonsense... Good idea but needs some work. Worth $150+? Probably not.
It would be great if it allowed you to create your own equipment based on a standard set of characteristics that translate. Then it could be more accurate. I like the package. It works well for initial setup and definitely gets you well within the ballpark. But, it won't be a bullseye.