Poor image quality cameras such as drones or older DSLR cameras benefit particularly well from this technique, but it does work with any camera.
It came as a bit of an epiphany to me, when I realized how big of a difference this technique makes to my drone images and old DSLR photos. The technique does come with a few drawbacks, so use it only in certain situations.
The technique is simple and mainly known from astrophotography to reduce noise in photos shot at high ISO values such as ISO 3200. The technique requires you to shoot and stack multiple images and equal out the noise, which can be done in Photoshop or other software applications. The result is cleaner images without sacrificing sharpness. I am normally very heavy-handed in my editing phase, which usually brings out a lot of noise even from photos shot at base ISO, such as ISO 100. With this technique I can effectively reduce my ISO to something like ISO 7 (yes, seven) dependent on how many photos I stack, giving me a bigger room for pushing the pixels without making the image particularly more noisy.
How to Do It
Many cameras come with a burst mode. In this case, I use an example from my DJI Mavic Platinum with a burst mode of five images but you can get seven in one push. If I want even cleaner photos, I can simply keep pushing the shutter in burst mode until I have the desired amount of photos.
After you have edited your raw files in any raw file editor such as Lightroom, Camera Raw, or any other application you need to “Load Files into Photoshop Layers.” Personally, I use Adobe Bridge as you can see in the photo below.

When you have opened your photos in Photoshop, be sure they are all perfectly aligned. If this is not the case, you will experience weird ghosting. Just select all your layers and go to Edit > Auto-Align Layers and select “Auto” as the projection. Be aware you need to crop your photo a couple of pixels as Photoshop warps, screws, and moves the photos into alignment.

When the layers are aligned you select them all and right-click and choose the function “Convert to Smart Object.”

When the separate layers are collected into one, which often takes a little processing time dependent on the amount of layers you combine, you select the new Smart Object and go to Layer > Smart Object > Stack Mode > Mean.

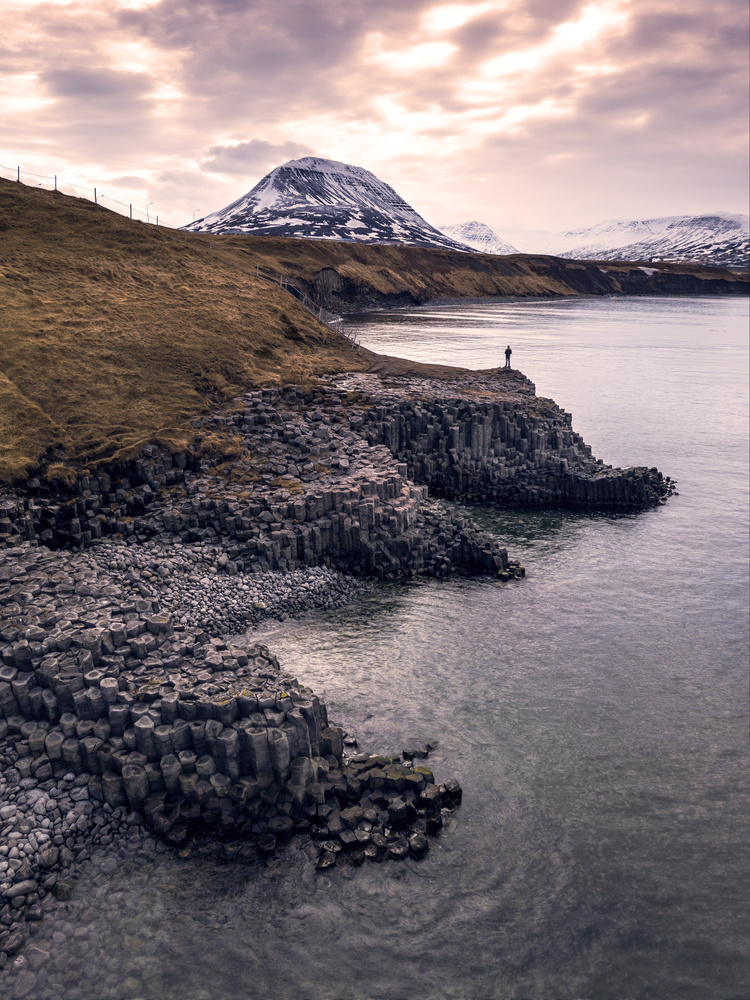
After another round of processing, you now have an image with greatly reduced noise. In the below images where I zoom to 100 percent you can see the comparison between the images with the effect applied and not. You will see a huge difference in how the water is interpreted, however in the basalt columns you will observe the interesting part.


In areas with movement, such as the water, there is a huge difference between the mean stacking mode and the original photo. You will have to decide yourself what works for your particular photo. If you prefer the original effect of the moving object or subject you can always do a bit of masking. Here is a full version of the photo below.

Another example where I underexposed the shadow area of the original the technique is even more visible. Here is a comparison of the straight out of camera photo and the finished edit. The difference is striking since I had to really bring up those shadows.


Zooming into the edited version (100 percent) and switching between the stacked and unstacked, the technique really proves itself. If it is hard to see on these small images, also check the 200 percent zoom below.

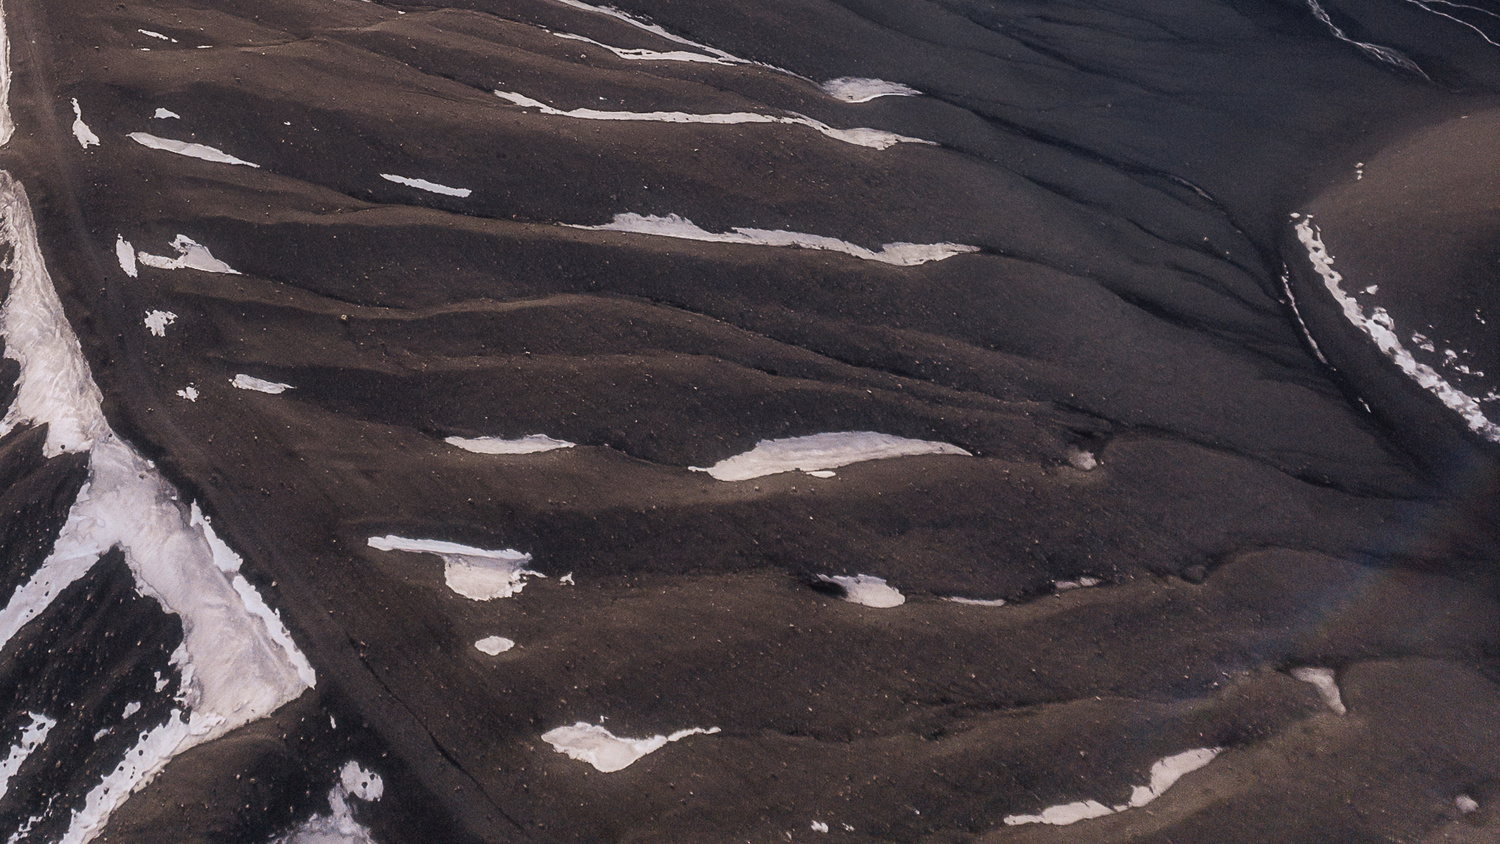
And the 200 percent zoom:


Mean or Median?
In all practical sense, there is no real difference between mean and median in areas without movement. Zooming all the way in the mean stacking mode averages everything out creating a softer less contrasty look, while the median stacking mode removes differences between the layers keeping the contrast.


There is only a subtly difference in the areas without movement, which you will not be able to see zoomed all the way out. The movement in the water is interpreted very differently and I prefer the softer look of the mean stacking mode. This is also a simulated long exposure effect.
You Cannot Just Copy the Same Photo
As I initially stated in the title you need to know about this technique before you start photographing. You need different photos as you cannot just copy the same photo multiple times and combine those. Doing so does not give you the difference in noise between the individual photos, which is necessary for this technique to work.
Super Duper High Quality
For even higher quality photos, you can combine burst mode and manually bracket your photos; Make a five exposure burst underexposed, five normal exposures, and five overexposed photos. Alternatively, make several AEB exposures on the drone. The result should in theory be the same, but it will require a bit more work in post-processing.
Check out the video above to see the results and a few more drawbacks where I compare some old night photos from my Canon 5D Mark III photographed at high ISO.
Is this a technique you know about? Have you already used it, or are you going to use it in the future?


The point of your post, though, was this particular PP improves the image quality. If this PP makes your overall image soft and out of focus, that's not an improvement.
I'd argue it does improve image quality as it removes the noise. I personally prefer the after photos by a landslide. It's way cleaner than the before photo. If it looks softer to you I can't argue against it, but if it's there it's minor to what I gain in noise reduction, which I prefer to the original. Have you seen the video, Jen?
No because it wasn't captioned.
I very much prefer sharp-but-a-slightly-noisy images over hella-soft-what's-wrong-with-my-eyes images.
If you like them like that, that's your prerogative. Photography, like art, is subjective to people's tastes, after all.
This technique actually preserves detail, and saves more detail than a single shot could.
What is happening here is that noise is being interpreted by the brain as texture. When the noise is removed, the ‘texture’ disappears, and it seems like we lost detail. The loss of the texture makes the ‘after’ images seem less sharp.
Thats a great tips Mads!
Thank you very much, Hans :)
Cool.. never had much faith in the in built noise reduction programs in PS. WIll have to give this a go - thanks
No probs, just had a guy try it out with phone photos, he reported a massive difference :)
In case you haven't shot in bursts, an inverted highpass is a great way to reduce noise as well.
A normal highpass sharpens, when you invert it, it takes the noise away. Then mask it in selectively and you're good to go. :)
Mean vs median from a technical perspective and when to use which:
TLDR: Median gives slightly cleaner results but is also more prone to artifacts.
All pixels are stored as numbers, usually between 0 and 255 for every color channel (R, G and B). For simplicity, let's only look at one pixel and one color channel. We have five photographs and if we compare the numbers for one specific pixel in our images we might get something like this: 101, 102, 98, 25, 95. In a perfect world every pixel would have a value of 100 and four are pretty close to it. But there's one outlier, this is our "noisy" pixel. The one which should be removed.
What mean does: It averages every pixel, resulting in a value of 84.2, which gets rounded to 84.
What median does: It sorts every pixel and takes the middle one: 25, 95, 98, 101, 102 which results in 98.
Median is actually much closer to the correct value of 100 and in real world scenarios it is indeed slightly more accurate for reducing noise. But if the images contain any moving objects, like leaves or waves, it can lead to artifacts because it (almost randomly) discards information.
That's a very nice and interesting technical answer. Thanks a lot! :)
In my experience its a game of luck if you don't have a tripod, as bad as Photoshops auto align is I wold not trust in this technique as far as I could throw it. :(
This is not a TRICK!! It’s an OLD stack technique used when shooting static scenes
Removes detail from moving water in above scenic shots. Beware.
Great article!!
Just 1 question:
Let's say I took 20 shots of a mountain and I want to use this technique, do I need to individually process each image in Lightroom (for things like white balance, saturation, etc) and then blend the images at Photoshop or can I just blend the 20 images in Photoshop and then process just 1 blended image at Lightroom?
As long as you work in 16bit all the way through theoretically there shouldn't be any difference. But I'm not 100% sure if you can go the other way around as to what I showed.
Thank you!!
One wants to align the raw pixels, and average the raw pixels, in as much as possible. The alignment & averaging ought to be done before any major pixel-altering process. If you want to white balance first, then white balance all of them to the same setting. Likewise with saturation, etc., but ideally, one does not want to do pixel value manipulations before averaging, including de-mosiacing —and definitely NOT noise reduction.
Now pre-demosiac stacking would be a difficult task —unless done by the camera— so one can go ahead and do some amount of work in Lr first, but applied precisely in the same way for each frame, before alignment & average-stacking.
I'm only afraid that, for example, I do the stacking first and then go to work in Lr to bring out the shadows, white balance, etc...
Is the "new image" (the one that Photoshop created stacking all the other ones together) going to have all the information to work with in Lr that the initial RAW images had?
The initial raw image was a 12-bit or 14-bit integer raw file with either a red, green, or blue pixel at each location. The new file would be a 16-bit integer TIFF file with RGB colour at every pixel. Compromises were made at some point, (demosiacing), and had to be.
The only two ways to get even better information is, ① Do the stacking pre-demosiacing, (that is, in camera) or ② use a program which uses 16-bit or 32-bit floating-point engine such as DarkTable (does not do average image stacking), RawTherapee (not sure at all), Krita (certain it does, but not sure if it can align), or MyPaint (not sure about this one either).
Most of the programs I know which auto align all use 16-bit integer pixel-pipeline, so that may be the best you can get, but it will certainly have more than enough data to bring out the shadows. If you are worried, bring out the shadows before stacking, but apply the same setting to all the images in the stack.
Thanks!
I just shoot at iso 200 for everything. Done.
Tony Nortthrup has a video on that. ;-)
Dude. This is witchcraft. So easy, miles easier than the other ways I've been doing it. Especially on the images I have taken down a mine where the minimum ISO was 12800. Witchcraft I say! Amazing.