Photoshop is an amazing tool for photographers and retouchers alike, but with its numerous features and options, it can quickly become confusing. Everyone knows confusing software is far from being a fast workflow element, but Aaron Nace from Phlearn is always there to help out, and this time, he gives us six tips to improve our productivity.
Unleash the Undo Button Power
Being able to come back to a previous state of your image can always prove to be useful. I’m sure you have, at least once in your life, yelled at your computer because Photoshop couldn’t undo that one little thing you wanted to correct. Well, Adobe actually lets you choose how many states are recorded and can be canceled. So, if you have a powerful enough computer, be sure to adjust the default setting to something higher. This way, you will not have to scream desperately at your screen in the hope that Photoshop will listen to you.
Blazingly Fast Export
Amongst the wide variety of features that Adobe’s software can do in many different ways, there is exporting/saving a file. Between save, save as, save for web, export, quick export, etc., how can you know which is best for what? Like Aaron Nace described very well in his video, the Quick Export functionality is very practical when you need to save a file quickly without having your computer asking for compression level, file format, or anything else. Decide once, and you are ready to go! Be sure also to assign this feature a shortcut, so that you can save even more time!
Use All of Your RAM
If you don’t have anything else but Photoshop running, it’s probably wise to check your RAM settings. Chances are, your current choice or the default choice is slowing you down. The system doesn’t need a lot of resources to run, so allow Adobe’s software to use up to 80 or even 90% of your ram.

Scratch Disks, the Hidden RAM
On the other hand, if you don’t have much RAM on your computer or if you like watching movies while retouching, having scratch disks available is crucial. See, when the RAM allocated to Photoshop is entirely used, the software will rely on scratch disks to store data. Using the system drive as a scratch disk is quite bad practice, because if full, you might freeze your system. In the video above, using an external hard drive is recommended. But if you do so, be sure to have a fast external hard drive using Thunderbolt or USB 3, otherwise you may encounter performance issues.
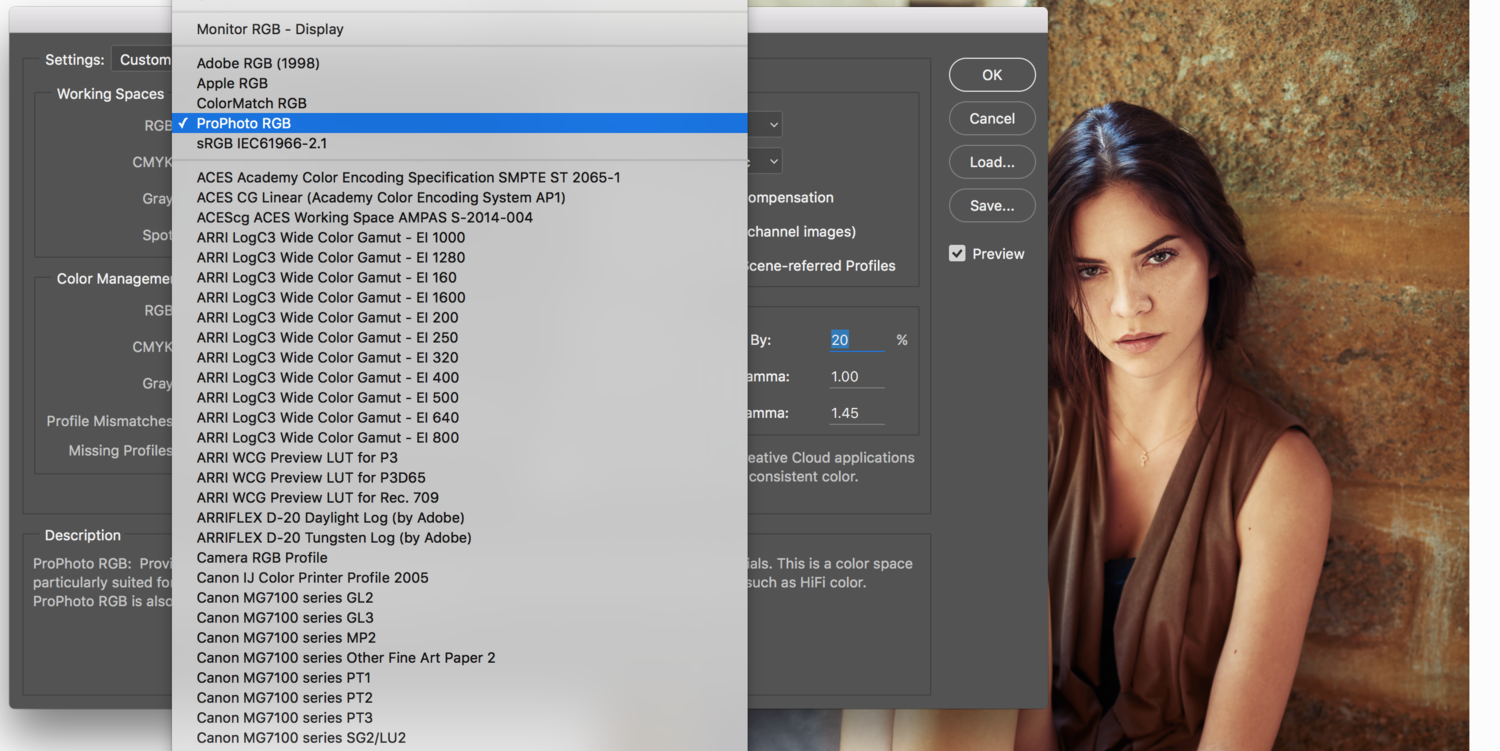
Adequate Color Space for Color Accuracy
If you create content that is only published on the web, you probably shouldn’t care about this point. However, if you wish to print your imagery, using the appropriate color space is extremely important. Nace advise us to use ProPhoto RGB or Adobe RGB. Both are fine and large gamuts. When using either one of them, be sure to adjust your camera settings accordingly to have the largest gamut possible from start to finish. Export your files from your raw converter of choice in the same color space you are using in Photoshop so that you don’t need any conversion. Finally, be sure to have a calibrated monitor that can display those large color gamuts! Otherwise, you may be surprised what the final image looks like once printed.
Find Keyboard Shortcut
Finding a specific keyboard shortcut in Photoshop can prove to be a pain. You have to remember the exact menu where the option you are looking for was placed, then find it in the shortcut tool, and finally change it. The simple step of initially finding where the feature is hidden in the menus can be tricky. Using the tip shown in the video above can save you some time. Export the shortcut list as an HTML file, open it in a web browser, and then use cmd/ctrl+f to find something in the document.


I tried the ProRGB and Adobe RGB for the logical reasons of more colors = more clarity/data to work with... but I did this, then spent the hour in photoshop editing in the proper color space it was in lightroom, then save it for web...and then boom... it looks like crap when I uploaded it. I didn't care to spend countless hours to try to figure out how to make it look like what I'm seeing on my monitor, on the web, so I went back to my old ways. Shoot, edit and upload in sRGB. Sucks the internet can't accept the ProRGB colors the way it looks like on my screen.
Go to "Edit>Convert to Profile>sRGB". I usually edit in ProPhotoRGB but then activate my gamut warning when I'm done. If I have any areas that area out of gamut (sRGB) I can selectively desaturate just those areas so that when I convert to sRGB Adobe isn't shifting all of the colors of my image to compensate that area.
Thanks for the tips. I tried that but it converted the colors into weird super saturation, adding to my workflow. I guess I'd do for specific jobs I know it will be intended to print.