
Peter Stewart is an internationally published photographer that specialized in travel and fine art photography. To understand how to take awesome scenery photos, you must know the three basic qualities of light: intensity, direction, and color. Check out how a master does his work.
Intensity: This refers to the strength of light. If the sun is high in the sky, light can be harsh and too strong. Cloudy days bring soft and diffused light.
Direction: This refers to light placement. There are three categories of light placement: front, back, and side-lighting. Side-lighting produces more texture between light and shade.
Color: The color of sunlight varies depending upon conditions and time of day. If the sun shines at the beginning or the end of the day, the color of the light will be much warmer and will lead to a much more dramatic scene.
While all three are different qualities of light, they all have another important factor in common: time of day. Choosing the correct time of day is a foremost in capturing a scene at its best. The intensity of light brings out different colors in a landscape image. Colors in landscape photography depend on light available and also what time you shoot a scene, as well as and where you place your camera. On top of balancing light, Peter draws the vibrant color back in Photoshop, giving it life for the eyes of the consumer. Check out these images photographed and edited for the audience to see.

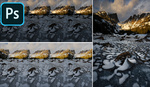
Four exposure blend: Exposures manually blended in Photoshop. De-Fished using Adobe Lens Profile for Samyang 12mm.

Four exposure blend.

Three exposure edit: HDR bracketing, manually blended in Photoshop. Nik Color Efex Pro used for post-production color enhancements.

Three exposure edit: HDR bracketing, manually blended in Photoshop. Nik Color Efex Pro used for post-production color enhancements.

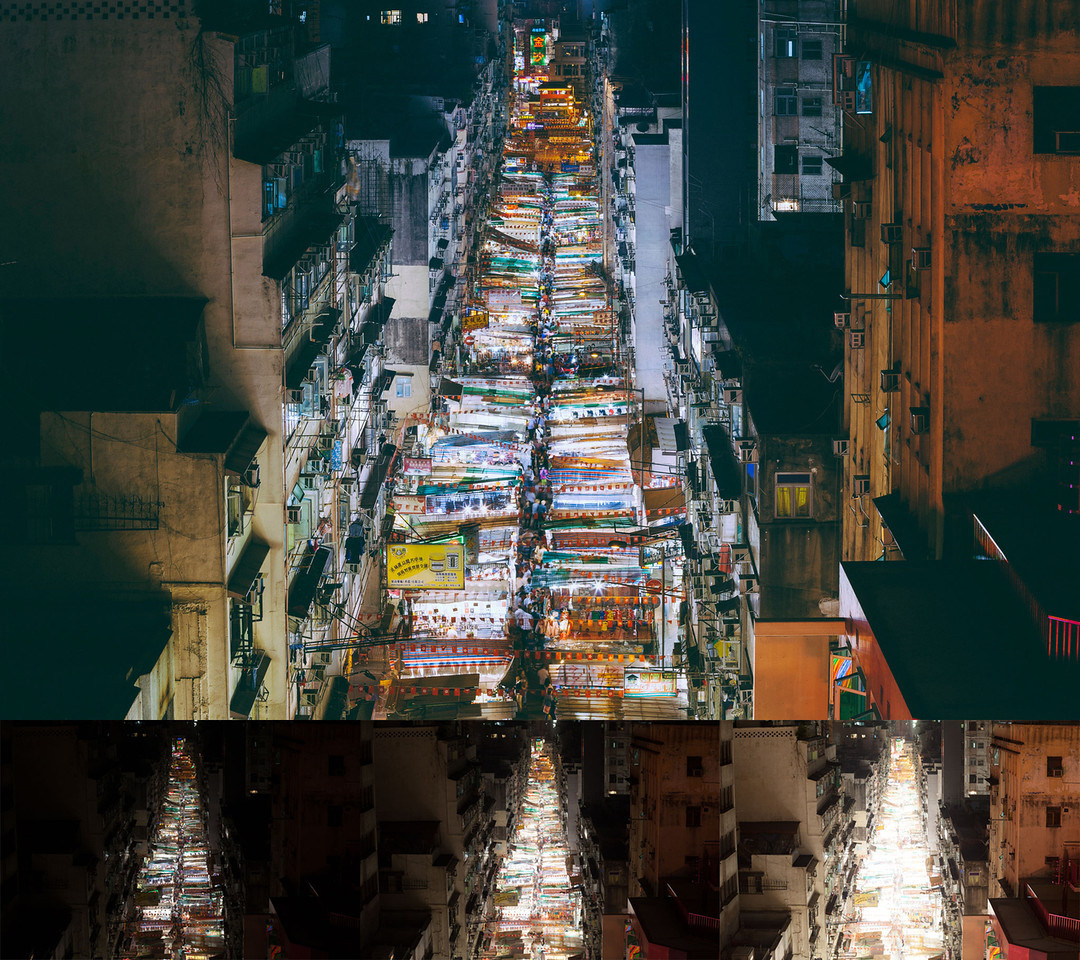
Three exposure edit: Two exposures manually blended in Photoshop. Perspective fixed in Camera Raw. Color adjustments made using Nik Color Efex Pro and VSCO. Replacement sky composited into final image.

Three exposure edit: HDR bracketing, manually blended in Photoshop. Nik Color Efex Pro used for post-production color enhancements.

Three exposure edit: HDR bracketing, manually blended in Photoshop. Nik Color Efex Pro used for post-production color and exposure enhancements.
Three exposure edit: HDR bracketing, manually blended in Photoshop. VSCO film presets used for color enhancement.

Three exposure edit: HDR bracketing, manually blended in Photoshop. Nik Color Efex Pro used for post-production color enhancements.
Three exposure edit and sky replacement layer: Three exposures manually composited in Photoshop CC. Replacement sky layer manually overlaid and painted in.

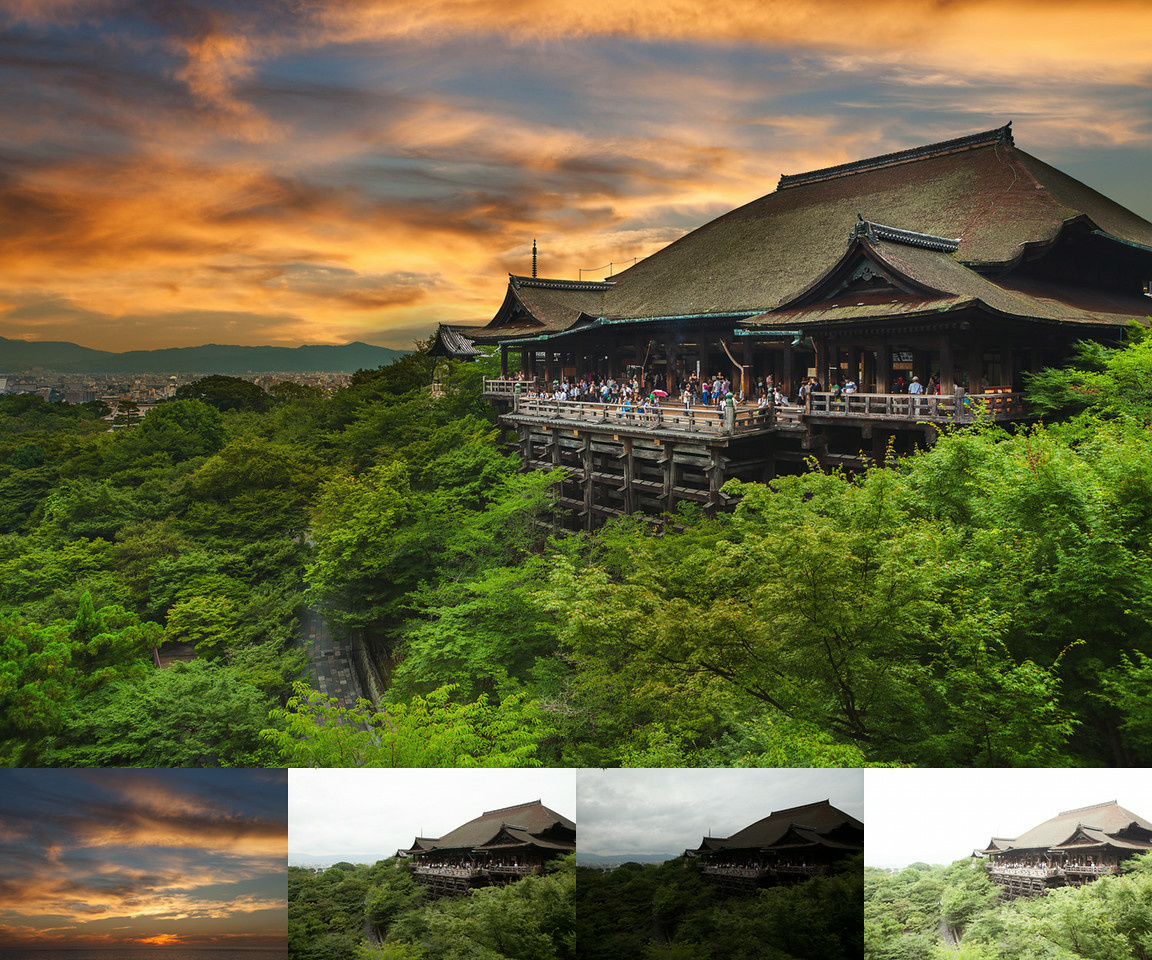
Three exposure edit: HDR bracketing, composited using Photoshop's Merge to HDR. Nik Color Efex Pro used for post-production color enhancements. Mt. Fuji composited in using an earlier, clearer image.

Single exposure edit: Single raw image copied twice, then flipped and cut diagonally, then masked to create a seamless join. Image then brightened to reveal detail. Selective Color used to bring out the reds in the walls and blues for the windows. Composite sky added. Final color grade added and color noise reduction performed.

Single exposure edit.

Single exposure edit: Contrast and color temperature corrected. Color enhancements made using VSCO and Nik Color Efex Pro.

Single exposure edit: Color temperature adjustment using Adobe Camera Raw. Single exposure edit: Nik Color Efex Pro used for post-production color enhancements.

Single exposure edit: Various sky adjustments and dodging and burning performed in Photoshop. Nik Color Efex Pro used for post-production color enhancements.

Single exposure edit: Overexposed image with detail brought back using Camera Raw. Nik Color Efex Pro used for post-production color and contrast enhancements.

Single exposure edit: Gradual orange sky gradient and color adjustments performed in Camera Raw. Sunrays created in Photoshop with added glow. Minor color and exposure enhancements from Color Efex Pro.

Single exposure edit: Perspective correction and power line removal in Photoshop. Color enhancements using Color Efex Pro, with some dodging and burning back in Photoshop.

Single exposure edit: Single raw image, processed in Adobe Camera Raw. Tonal adjustments made using Nik Color Efex Pro. Composite sky blended into frame manually. Final color grade using VSCO plugin.

Single exposure edit: Single raw image processed in Adobe Camera Raw. Adjustments to contrast and color to reduce haze and warm up the image. Composite sky blended into frame, with sun glow added in. Final color grading using VSCO.
Understanding natural light develops your ability to create better images. You'll then start to see the beauty of light and colors in a new and exciting way. Do you have any images to share? Show us in the comments!
All images used with permission of Peter Stewart.


I have to weigh in after reading all the comments. First of all people who say that his edits are a representation of what the human eye sees deceive themselves to justify this kind of editing. I showed the pictures to my wife and she has no idea about editing and photography and asked her which one looks more what you can see in real life and she always pointed at the raw files. And if I take a picture with my camera of a landscape it is exactly what the human eye can see given the lighting is good. Fancy colors and fake skies is not what we can see in real life. If you look at his raw files they all look normal. Nothing fancy. You guys have to be honest to yourselfves. Do you want to be a graphics designer or a photographer ? He's more graphics designer than photographer which is fine but don't pretend he's some magic photographer. Everyone who has editing skills (I'm not talking about myself ) can create pictures like this.