
Having used flash for most of the work I've shot, it’s fair to say that I made a number of mistakes when starting out with a flash kit. Everything that could go wrong did, but I learned a number of techniques along the way. In this article, we will dive into some of the most common mistakes I see photographers make when using flash.
Off-camera flash is one of my favorite tools to use. Not only does it allow me to tell the stories that I want, but it also allows me to create any light, anywhere, with any setting. That said, flash photography can be either scary or a little too exciting for photographers. Neither is good, if I’m honest. There are a number of photographers who use off-camera flash not because it is needed but because it makes one look much cooler. Whatever the reason for using off-camera flash, mistakes often occur. Everything from using too many lights to using the wrong lights. Let’s dive into what mistakes beginners tend to make and how we can best avoid them.
Using Too Many Lights
Despite owning 10 high-end flashes, I rarely use more than two, maximum three, for my work. Sure, it is really impressive to do a huge lighting setup with many lights, but as soon as you start adding light, you are creating more problems. You need to control, meter, modify, and position that light. The more light you have, the more problems you have. As such, I don’t recommend having a lot of light on set. Even if it is not that impressive, chances are it will be just right. Having a lot of light can take away from an image and make your work more about the lighting than about the content of the image. Always concentrate on what you are photographing, not on how you are photographing it.
While there are many ways you can approach lighting work, one way is to start with a single light, bare bulb. Then you begin to modify it, one light there, one light here, and so on. There comes a point where you need to stop, usually after light three, and start photographing. Most problems can be solved by adding a flag or changing the modifier you are using. With this in mind, lighting should always start off as simple and get complicated when you really have no other solution. Keep the mantra of more light = more problems in mind.
Placing the Light Too High
One of the things that we are taught as photographers is that good lighting is overhead lighting. While this is true in some cases, photographers do end up putting their lights a little too overhead. This lighting mistake creates unwanted shadows on the face and makes every bump visible. Think of a face as a mountain range. You want to show the dimension in it but at the same time, hide the imperfections. The camera sees more than the human eye.
One of the ways to solve the problem, if you still want to light from way above, is to ask the subject to chin up a little. Another way is placing your modifier not above the subject but in front and above, as well as adding a small bounce card at the bottom. But to be frank, this setup is not something I would recommend to photographers in general. Overhead lighting is a little overdone, in my opinion. You can do a lot of great things with a simple softbox or a hard reflector. If anything, you can do more!
I hate overhead lighting to the point of placing my lights below the subject for a dramatic effect. Yet another wrong technique, but a powerful one nonetheless. Make sure to ask your subject to look in the direction of the light, though.
Placing the Light Too Far Away
As we all know by now, the inverse square law tells us that the closer the light is to the subject, the more falloff it will produce. This is true; however, there is a limit to how far your light should reasonably be. Each light-shaping tool has a property known as light depth. This is essentially a measure of how dramatic the falloff will be. For example, a softbox will have very different light falloff than a Fresnel. Fresnel is a bad example actually as it’s a whole other topic in itself. Let’s compare falloff from a hard reflector and a softbox. A softbox will have less "throw," so to speak, and hence the light depth will be lesser than that of a hard reflector.
It is also important to remember that the further you place your light, the harder it becomes. As such, there is only so much distance you need to create most looks reasonably.
Lighting Based on a Lighting Setup
Another mistake is lighting without intention and based on a setup one saw on YouTube. The truth is, knowing how to do a lighting setup is only so useful when it comes to doing work. The reality of the matter is that clients expect you to be able to do any look they find necessary. Moreover, when producing personal work, it is important to know what aesthetic you are going for, rather than what lighting setup you want to use. It should not cross your mind that you want to use a five-light setup just because you can. What you should think about instead is that if you light your image in a certain way, you will have a given result which will make the image feel like a certain memory. Let me explain this before the reader gets confused. If I am faced with photographing a theater-inspired character, I will use a lot of spotlights, colored lights, blur, and unusual techniques. This is done to create an aesthetic of a theater. It is not done because I know how to use spotlights and gels.
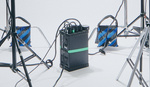
Using Too Much Power
This is a mistake that will kill your flash. Mind you, using too much power only applies to those who are using flash heads that can pump out 2,400 watts of power if needed.
There is really no reason you need to have your light at full power if you have so much power. Although I do like to shoot everything at ISO 100, there is really no reason you can’t use ISO 400 for your work. That said, if you have lights that can only do about 250-500 W, you will end up pushing them harder than pack and head systems. Even then, turning the power one stop down can do wonders for prolonging the life of your capacitors and flash tubes. That said, whenever I rent a pack, I have no problems with doing full power on it all day. Sort of like a rental car: pedal to the floor and off you go. The flash won’t break on your shoot, but the lifespan will be much reduced if you are doing full power all day on it every day.


Beginners: ignore all this terrible advice.
You're funny!
One terrible mistake that can make an experienced author look incompetent is shaming beginners for mistakes.
Actually, I'm a bit shocked seeing such a header here on Fstoppers, maybe I'm overreacting.
There's always some shock value that goes into making the title. It is a tool that I use to spread the message to as many people as possible, which is ultimately the goal.
C-Stand Police
Grip head on wrong side doesn't inspire confidence either.
Ha! I always get it wrong. What's the best way to remember? What's the correct way?
If you're standing behind the stand, always have the grip heads on the right. Righty tighty, lefty loosey.
I use overhead lighting a lot for the work I do. It depend on how you use it.
I guess I'm an idiot according to the author.
But it's coming from the same person who recommended beginner photographers buy Profoto lights. So ....
You have solid lighting, Daniel! I'm only speaking about those cases when the light is too high. Your overhead lighting is great!!
I was joking, Illya :) I know that in the context in which you discussed it that you weren't saying that all overhead lighting was idiotic.
Propfoto lights are expensive, even when bought used.