Over the past 13 months, I've been traveling the world, visiting and photographing many beautiful landscapes and cityscapes. But how did I find all those photogenic places? A few months ago, I wrote an article about how to level up your photography through scouting and exploring new locations. But to achieve a good balance while traveling, you should also have a base of known photo spots available. In this article, I show how I find and organize those.
It's nearly impossible to plan a photo travel of several months from start to finish. If you travel regularly, you know that, even for shorter trips, you must stay flexible and react to the conditions as they unfold. If you plan a travel route that's too specific and time-constrained, you'll miss many photo opportunities.
It doesn't mean that you shouldn't have the places you want to visit mapped out somehow. It also doesn't hurt to go into the details and plan a timeline. But be prepared to make changes during your travels and allow yourself to react to the weather and other unforeseeable events.
I achieve this flexibility by separating the research of photo locations from the planning of my travels. The search for photo spots is an ongoing endeavor, while planning my travels takes place a few weeks and sometimes months before embarking on a trip. I usually create a rough outline for a photo tour before I book my flights, and then refine the planning until and throughout the journey.

Photo Spot Database
One of the most important parts of online or on-site location scouting is organizing the data. There are several ways to do this, including creating personalized maps via Google My Maps. I used this approach a few years ago. But the data is not accessible offline, and the more maps I added, the more confusing it became.
That's why I switched to Microsoft OneNote as my photo spot database. It offers a fantastic way to organize photo locations, link those to photo travels, and sync the data between different devices. This data is then also usable offline. Adding OneNote to my planning workflow has been a game-changer.

I've created folders for different countries in OneNote. Inside those, I add at least one page called Locations Overview. There, I collect all photo spots I come across for that country.
Inside OneNote, I keep a folder called "Locations" in which I create additional folders for different countries. I have at least a "Locations Overview" page in each of those. It is where I first collect potential photo spots as I stumble across them while browsing through different photo-sharing platforms, travel articles, and other sources of inspiration. The list I keep there can be a bit chaotic at first. But I go through these pages regularly and refine them.
For some locations, I add helpful links right inside the "Locations Overview." For others, I create dedicated pages, as you can see in the screenshot below. Those dedicated pages contain the coordinates of the place as well as a Google Maps link. If I am online, the link takes me to Google Maps. If I'm offline, this won't work. I can then copy the coordinates over to Google Maps. I keep offline maps for the places I travel to, so I always find the photo spots, even if I don't have internet.
In addition to those coordinates, I also mark photo spots on Google Maps. To do this, click on the location inside Google Maps. In the details windows that will pop up, press the "Save" button and select the default "Starred places" list, or create a custom list. A marker for the location will appear on the map. Those will also be visible inside offline maps.

Whenever I find time, I go through the different countries and create additional pages for some locations from the Locations Overview. There, I add the coordinates and other details like a hike description from Komoot or Outdooractive, for example.
It's also helpful to add details about hikes, the best times to visit, and links to further information on such a details page. A great source of such information is Locationscout. There I can get photography tips for popular and also some lesser-known locations, including exact coordinates. You can also add photos to your database. The OneNote clipper is a browser plugin that'll help you with that. I show how to install and use it in the feature video.

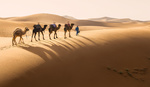
My travels through Indonesia last year were not planned in advance. I was traveling through Malaysia when I decided which places to visit in Java afterward. I already had a list of locations ready inside OneNote to decide where to go. Sawarna was one of the locations I chose from the list.
Planning a Photo Trip
A growing and detailed database of photo spots is a good foundation for planning a photo trip. For such plans, I created a "Travels" folder next to the "Locations" folder in OneNote. There I add pages for the travels I'm planning. I'll have my list of things to do before a trip, like booking hotels, flights, trains, and other transportation. I usually also create a photo itinerary for the tour. Depending on the length of the travel, I pick locations for the country I'm visiting from the locations list and combine them into a route.
The great thing about OneNote is that it allows you to create internal links between different sections. If you create an itinerary of the places you want to visit, you can link those places to the detail pages you already have inside the locations folder. Now is also a time to refine those if you find they lack essential information.

One of the most popular photo locations in Venice is the Ponte dell'Accademia. Finding details for such photo spots is easy with the help of sites like Locationscout.
In the beginning, I was talking about flexibility during a photo tour. If your itinerary doesn't work out for some reason, you browse the list of photo locations inside the locations folder for alternatives. Ideally, this list should contain more photo spots than the ones that made it into your travel plan.
With a strong database, you might not even have to create an itinerary for your travels. While traveling through Asia for three months last year, I visited three countries. Besides selecting those countries, there wasn't much prior planning besides booking the first flights and hotels. The itinerary was a work in progress during the trip, with a lookout of one or two weeks, which allowed me to book transport and accommodation. To do this, I leaned heavily on the locations list I had created during the months and years before the travel. Additional research was also involved since my database wasn't good enough yet. But it gave me a good start.

While visiting Venice, I not only photographed locations from my database. I spent a lot of time wandering the streets, trying to find unique perspectives like this one. In addition to photographing it, I added it to my locations list in case I return someday and get different conditions.
Conclusion
Even if you have created a database of known photo spots, don't forget to look for new locations. The joy of photography, at least for me, is the discovery of scenes I haven't seen photographed before. In another article, I share one way of finding those.
And don't forget to add those new locations to your database. Who knows, someday you might come back, and then you'll be able to pick from an even richer selection of scenes to photograph.
I should also mention that OneNote is not the only note-taking app you can use to create such a database. My preference doesn't have to be yours, so do your research and find the solution that best suits your needs and workflows.


Using Apple products I have a similar flow : Apple Notes is great (and free); links, photos, lists can all be made or dragged in and will sync across my iPad, iPhone, Laptop & Desktop no matter which one I edit.
I can create maps in Google Maps (free) and download them for offline use. A paid alternative to Apple Notes would be Bear.
My paid apps include the invaluable Packing Pro (there are similar apps both for Apple and Android) which I've used for many years and can quickly add new items to create lists for many trips (weekends, a month in Kyrgyzstan, dayshoot, whatever - I've got around 30 lists at present, each one i can use as a template for a new list and add/delete items as required).
All weights (invaluable to know total weight and how much of that weight is in each bag or being worn) / photos of items etc. are customised in the Catalog and everything can be backed up easily for restore. I never ever forget a thing with this app.
Of course Photopills, Gaia GPS, Wikiloc (great - paid US$10 p.a.), Altimeter, Windy, Clear Skies and Astro apps all go into the planning too.