The TourBox Elite is a popular device. It saves on switching between keyboard and mouse and scrolling through adjustment panels in software such as Lightroom and Photoshop. We discover whether it speeds up a photographer's workflow and is a worthwhile Christmas present.
First launched as a Kickstarter, the TourBox Elite has been on the market for a little over a year. This version is an update to the TourBox Neo and now includes haptic feedback and a Bluetooth connection. I received mine a few days ago and itching to try it out on the photos of a big wedding shoot this weekend.
One side of me likes technology. However, I’m always a bit skeptical of gadgets that are supposed to make our lives easier. Equally, I have found that the adage is true: you get what you pay for. This is a high-quality device with a reassuring price tag, so I had high hopes for it. Is it something I would give a fellow photographer or artist as a holiday present?
Unboxing the TourBox Elite and My First Impressions
First, some of the small details.
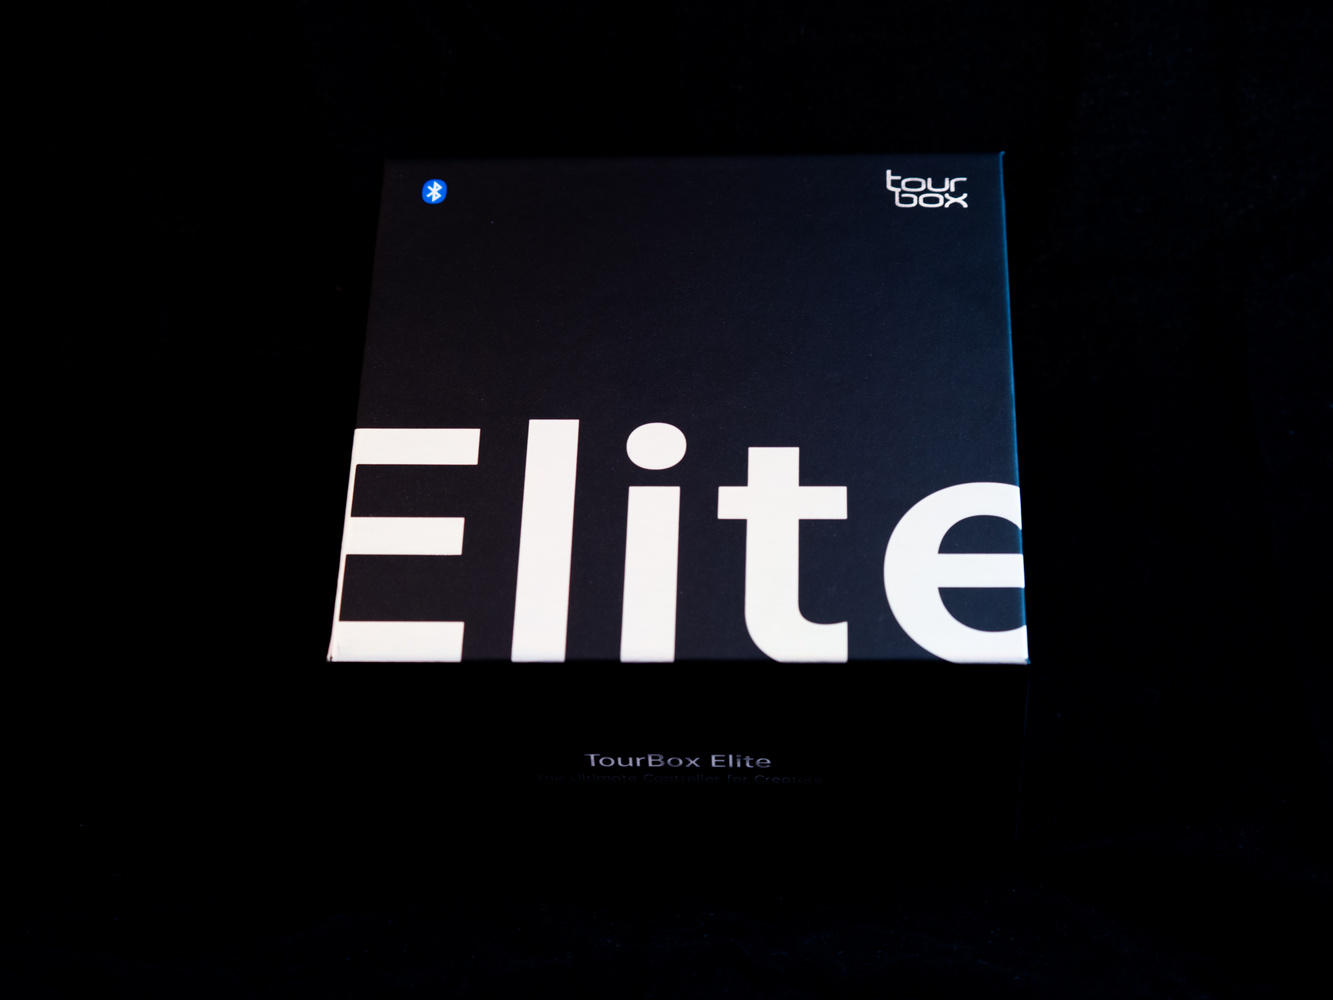
The TourBox Elite arrived neatly packaged in a solid cardboard box, which is perfect for storing it. The long USB-C to USB-C cable arrived separately packaged. Inside the main package was the TourBox, a quick start guide, plus the foldout safety instructions with the usual seven sides of small print that nobody reads, despite the instruction to do so. It does say that failure to properly set up can lead to injury or death, so it’s probably worth perusing.
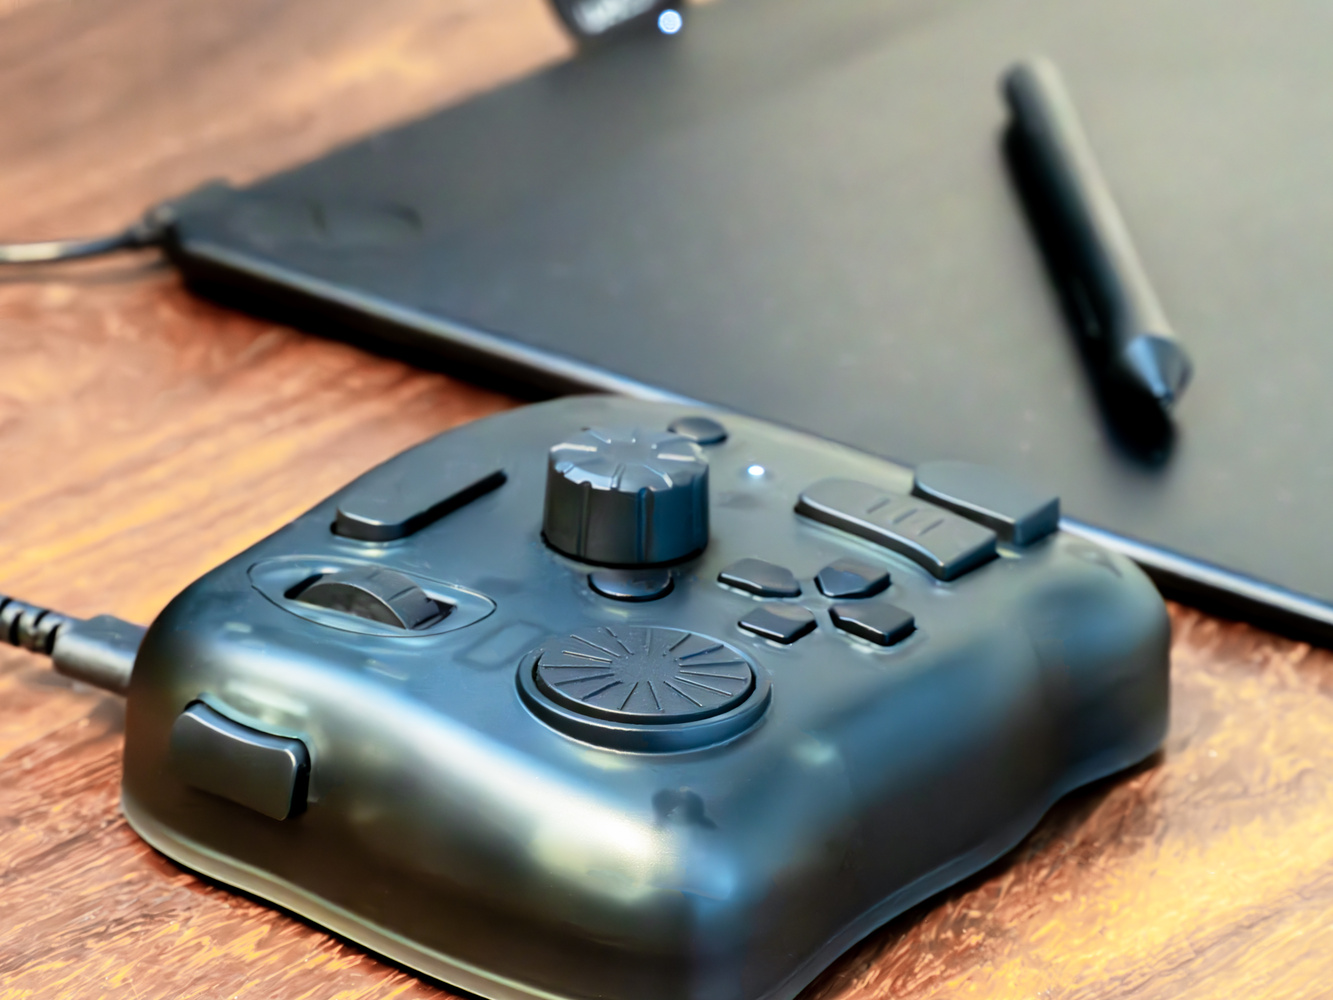
With the two AA batteries (included) fitted, the TourBox Elite feels solid and is a relatively heavy 14.7 oz (420 g). That’s a good thing as it sits firmly on its four rubber feet and doesn’t slide around on my desk.
I like the case of this Smoke version. It is a translucent, very dark gray plastic that gives a hint of what is hidden inside. There are also white and black versions besides this one. It’s studded with 11 buttons and three rotary adjusters – knob, dial, and scroll – all of which can be pressed as buttons too.
What Does the TourBox Elite Do?
If you have a programmable mouse (I do) and have set up all the hotkey buttons to carry out complex actions (I haven’t), then that’s kind of what the TourBox Elite is capable of, but much more so. There are two big differences. Firstly, it isn’t a mouse and, secondly, it can automatically change its controls’ behaviors to suit the software you are using. That means those buttons you set up for Lightroom will have different functions as soon as you switch to whichever other programs you choose to use it with.
It connects to the computer using either Bluetooth or a cable; it operates equally smoothly with either. It has dual connectivity with Bluetooth, so it can work between different devices at the same time.
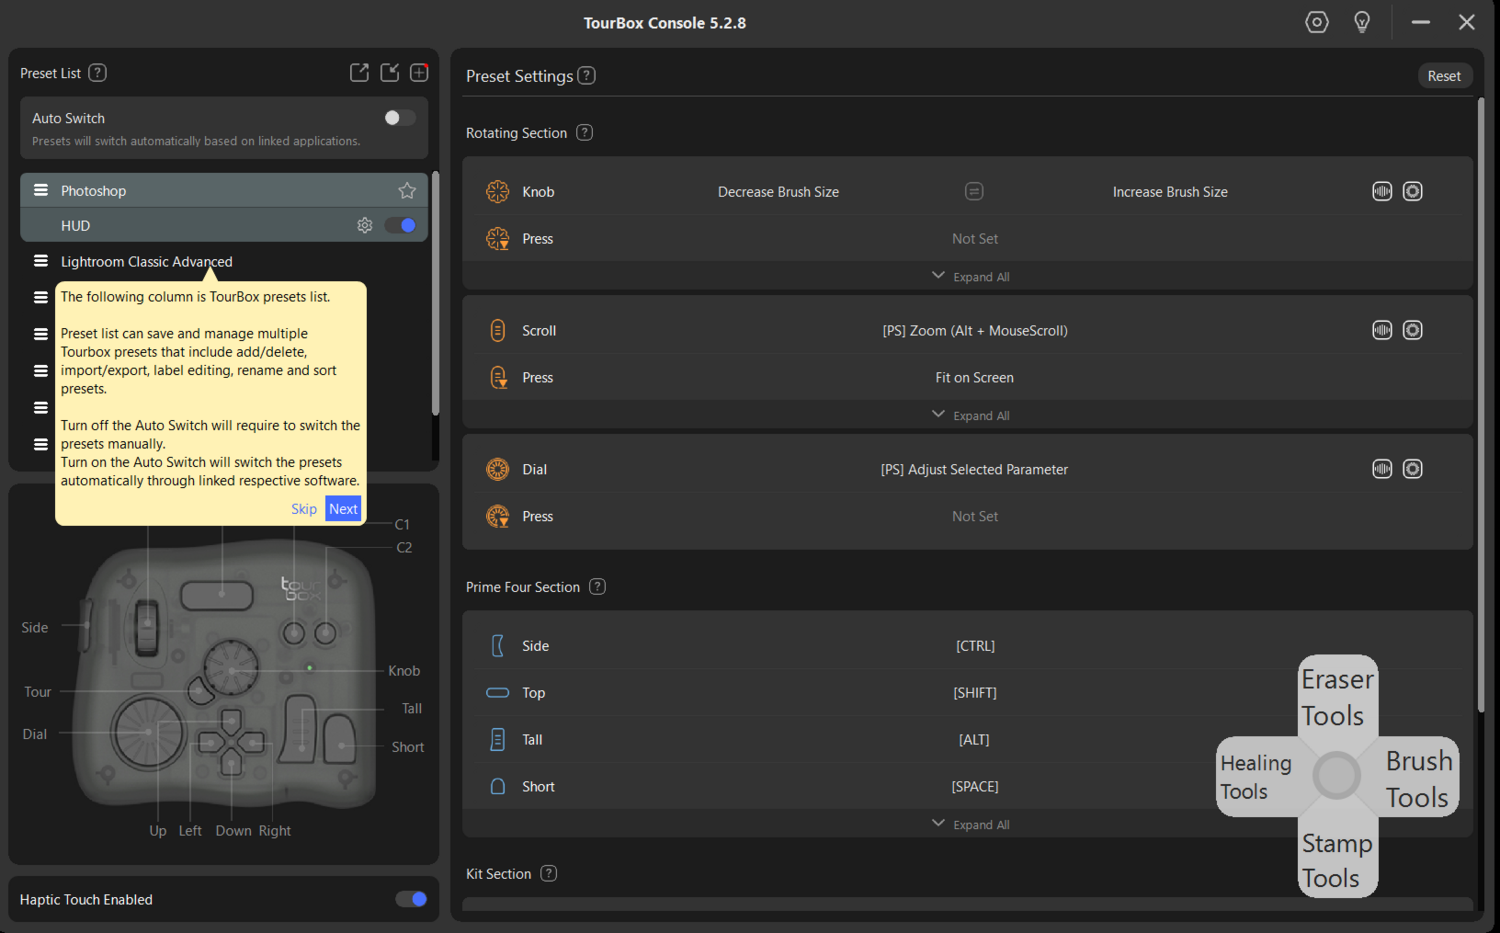
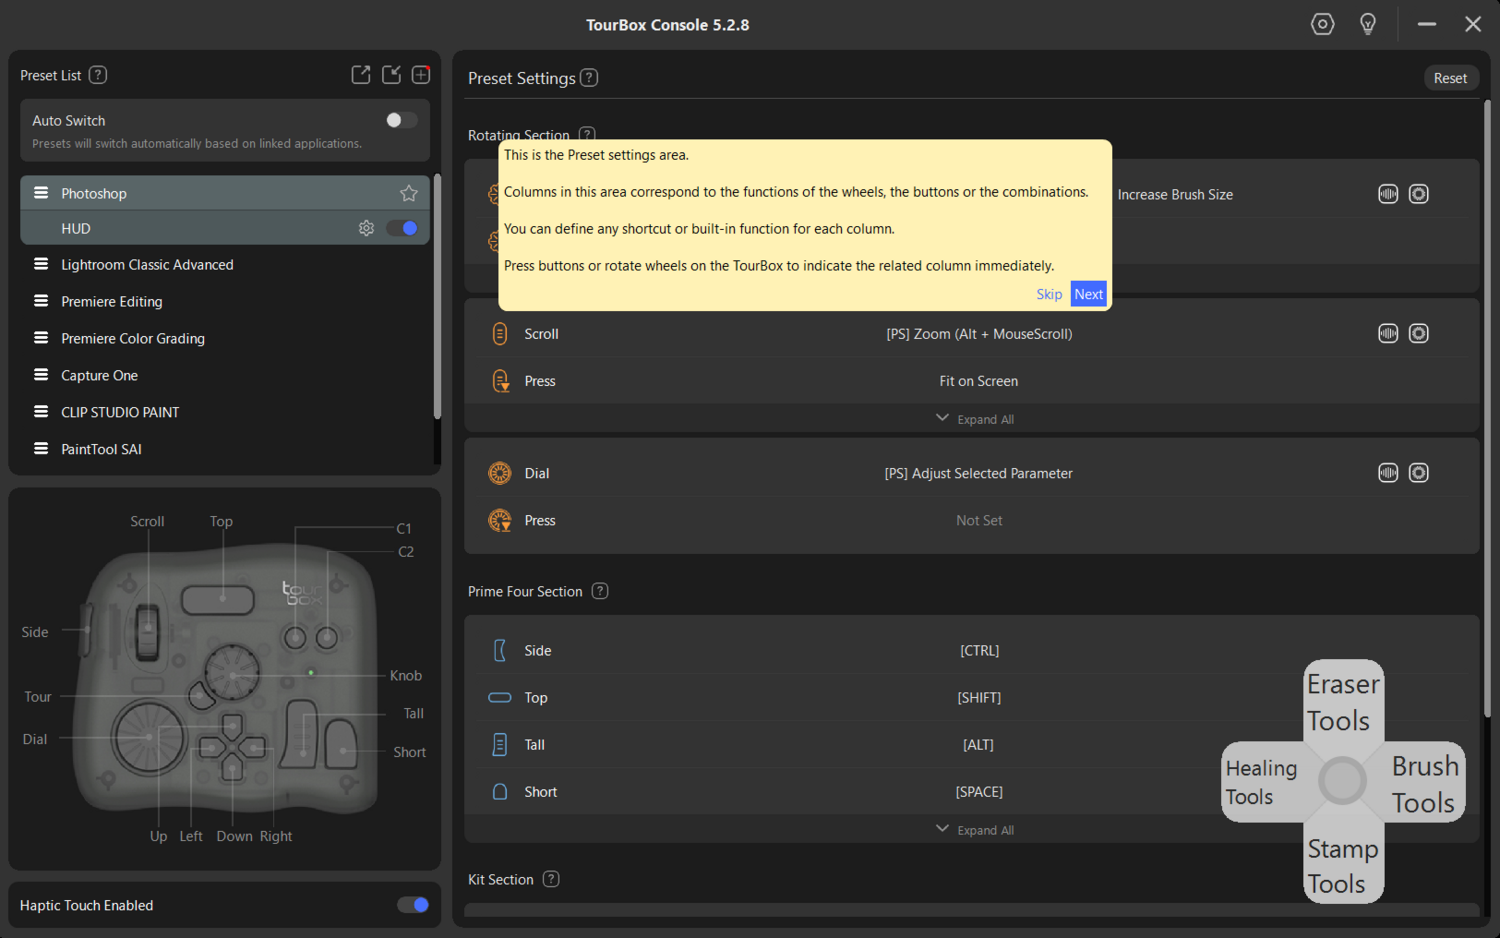
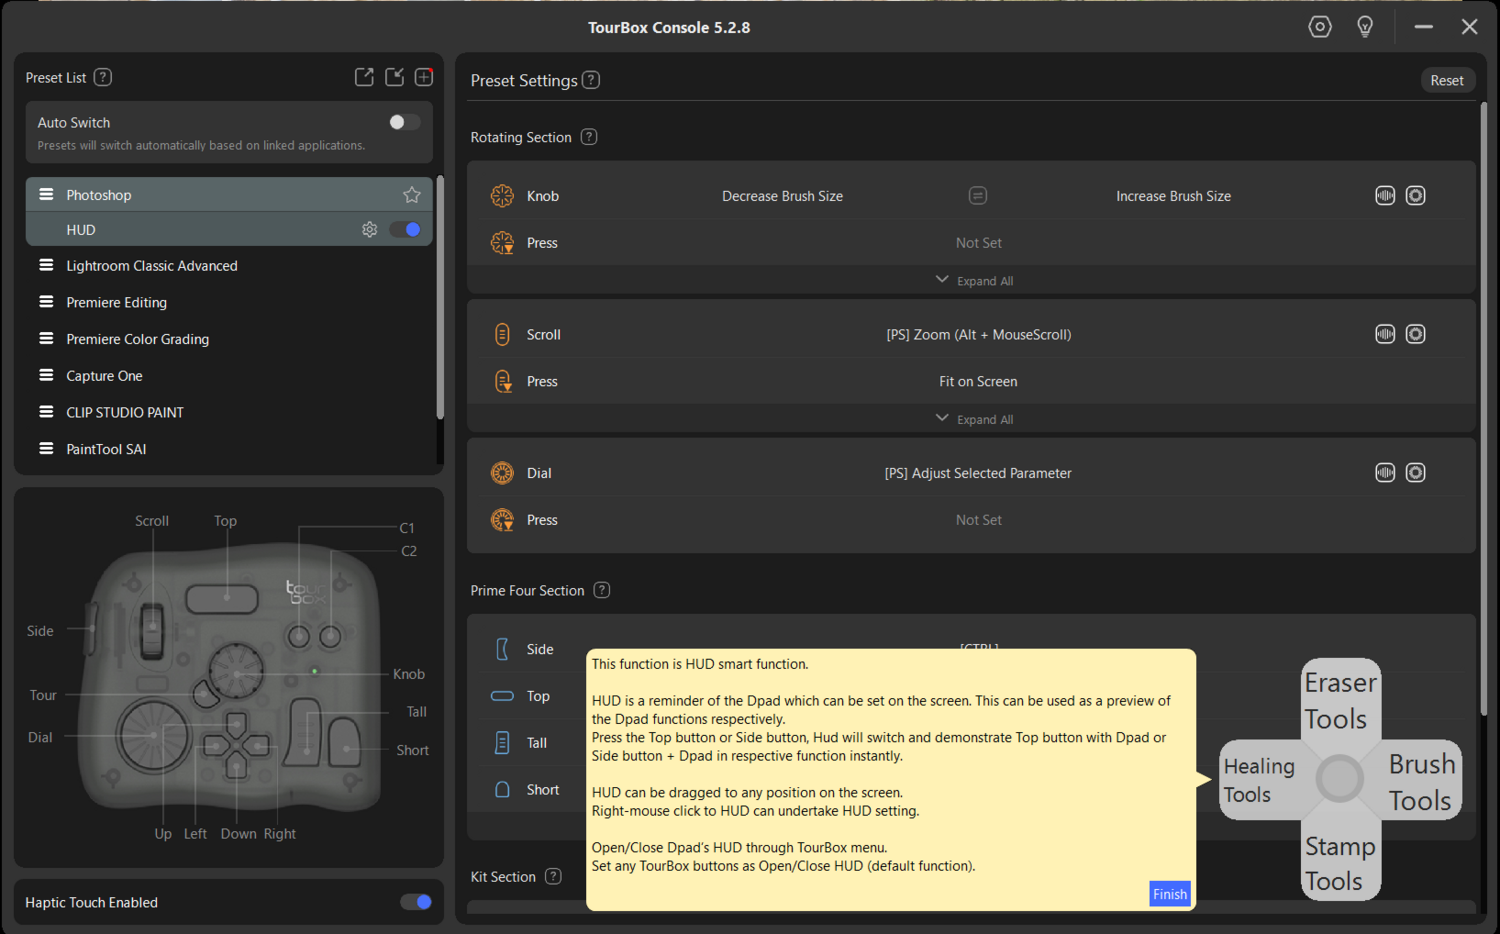
There is downloadable software – TourBox Console – that is required for the device to work. This app allows you to set up the various buttons. When you first fire it up, there is a helpful guided tour telling you what the various sections of the TourBox do.
It already comes with a series of editable presets, including Lightroom, Photoshop, Capture One, Premiere Pro, and others. If there isn’t a preset for your favorite software, then you can download one from the TourBox website or create one yourself. There are no downloadable presets for DxO PhotoLab nor ON1 Photo Raw, so I needed to build those myself. So far, I have tried it on Photoshop, Premiere Pro, DxO Photolab, Microsoft Office, and my internet browsers. Handy hint: you may need to launch an application before it appears in the application list.
It was the first three of those programs where I found the TourBox most useful at first, which I’ll come to in a moment. Over time, I started using it for other programs too.
This device has haptic feedback. When you make adjustments using the rotary controls, the device clicks with each change of the settings, and it’s possible to change the strength of the feedback that the controls give you.
The other useful functionality is the ability to install macros. TourBox Elite will map a series of mouse movements, adjustments, and clicks, and you can program them to a single press of a button.
The latest version of the TourBox Console software comes with Wonderflow. That helps you search for the function you need, or you can find it by pressing the relevant shortcut key(s) on your keyboard, and it will automatically map the function to TourBox Elite’s buttons and dials using the TourBox Console. The following video explains how to use it.
The TourBox Elite in Use
Initially, I tried the TourBox using its default presets for Lightroom. However, I quickly changed the button functions as they didn’t do what I wanted. With Wonderflow, that was easy to do through the TourBox console, but they need to be carefully considered. Before diving in, think about what functions you need first and note which buttons or knobs you want to program them to.
I found it useful to create different presets for each different module of Lightroom, so a separate set for the Library, Develop, and Print Map modules. There are over 160 possibilities for each preset, far more than I would ever need. Those are achievable by programming single, multiple, and simultaneous clicks.
However, at first, I found it most useful in apps where I was doing precise editing, in programs such as Photoshop, On1 Photo Raw, and Affinity. The ability to easily select my most commonly used tools and change the sizes of their brushes was much faster and more accurate using the TourBox Elite, especially so when I used it in conjunction with my tablet.
Although there are downloadable (free) user-made presets from their website, there were none for DxO PhotoLab 7, so I created some. Spending a little time and effort doing that is worthwhile, as the device does speed up the workflow. You can also export the presets to share them with others.
Similarly, when I set it up and used it with other apps, it worked well once I got used to it. Now, it's my go-to control for Lightroom and other apps.
Using the TourBox and my Wacom tablet together produced a very different workflow from what I historically used, which was mostly a keyboard and a mouse. Now, it is a slower workflow because I am learning it, but it’s speeding up as I am tweaking the device for the functions I want it to perform and getting used to using it. In conjunction with my tablet is a more accurate way of working.
Something I thought was missing that would be useful was the ability to print the preset settings. This old dog can learn new tricks, but having customized and printed cheat sheets is handy. But then, I discovered the floating HUD, which shows you the basic controls of the arrow buttons and shows what each action does.
Several people use the TourBox with their left hand while operating their tablet pen or mouse with their right. It’s something I am learning to do. Nevertheless, I suspect those who are into gaming will find it quicker to learn because there is something reminiscent of a gaming controller about the device.
TourBox has created a video that shows in more depth how to set up the device. If you buy one, it is well worth a watch.
What I Liked and What Can Be Improved
What I Liked
- This is a neat piece of kit and it’s transforming my workflow.
- It has a solid build.
- The design is ergonomic.
- The haptic feedback helps when applying accurate adjustments.
- The Bluetooth connection is stable and doesn’t interfere with my other wireless devices.
- Wonderflow makes it very easy to set up.
- It can automatically switch between multiple applications.
- It has a powered USB-C connection

What Could Be Improved
- I would like to see the ability to print the active functions that are programmed into the TourBox console.
- Having an extended version with a mouse ball, a small joystick like on a camera, or a touchpad would make a mouse completely redundant.
- Having the USB-C able to charge the battery instead of having to replace the AAs would be an improvement. However, I can see there would be a risk of users replacing rechargeable with standard batteries that could then overheat if the device offered a charging current. Saying that, I will be using rechargeable batteries with the device.

There are two brightess settings for the HUD.
In Conclusion: Would it Make a Good Gift?
This would be a superb gift for any photographer or digital artist. I’ve spoken with a few others who use it, and they say it is worth taking the time to set up and learn. With constant use, I am finding it an invaluable tool. As I said above, it’s worth spending time thinking about the settings you want to apply to each button.
I’m going to be shooting a big wedding this weekend, and I can see how this is going to speed up the manual culling, selection, and development process.
You can purchase yours here.


Thanks for the review , and I’m interested to see how you feel about it after you’ve edited a wedding shoot. For me, at the moment, I can’t see the advantage, I use my Wacom and a touch pad (to swipe between screens and zoom in and out) to perform all the functions. Hardly touch the keyboard. Last question , are there left and right handed versions?
So far it's working well with the wedding photoshoot.
There seem to be a lot of right-handed photographers using this device with their left hand and their tablet pen with their right, and I am endeavoring to do the same - I am VERY right-handed but I can play guitar which requires precise movements of my left-hand fingers, so I think I should be able to learn to do this. Likewise, I've read reports of left-handed people using it. They don't make a different version for left-handed people. However, I think it is more left-handed friendly than many devices and cameras.
I’m left handed ( almost ambidextrous ) , so use the Wacom with my left hand and touch pad with my right hand. Always wandered why left handed people use left handed guitars , I play a “normal” guitar , like you said easier when you’re left handed. Curious how the tour box does in the long run.
It's been around for a while now and is very popular. My son is left-handed at some things and right-handed at others. I would give my left arm to be ambidextrous. (Sorry, it's an old joke.) I feel most sorry for left-eyed photographers as cameras are built for right-eyed people.
Funny thing is that my dominant eye is my right eye , I found out doing some long bow shooting. Guess I’m a strange mix of right and left
Ruud, a human only has two hands so if both of yours are taken up with the Wacom and your trackpad, the TourBox may get in your way.
I have one and I love the TourBox. Not to program a lot of complex functionality (gives the user a headache, gets in the way, wastes time) but to map my most used functions to tactile controls which suit the task.
For example in DxO PhotoLab, I use the knob to move the sliders in a more natural way (dial up, dial down). I have the dial for now set to do the same thing (moving sliders is the main action in PhotoLab) but may set it to something else later. The mouse wheel is set to zoom in and out. I use the big button to copy settings from one image and the small button to paste selected attributes to another image. Normally both of those are three and four key press actions.
The pad I use to move between images.
I don't have a lot of other functionality set, but just to get my main actions into a physical interface allows me to work faster and more intuitively. Moreover, it reduces carpal tunnel from thumb press drags on the track pad for those sliders. The irregular shape of the TourBox is what makes it so much better than any other similar device (like the a Stream Deck with identical buttons in a non-ergonomic screen where one has to look at the device to use it). With TourBox the user can just work by touch like on a mouse, without looking at the device.
My TourBox is the much less expensive Neo version which is cabled and doesn't have electronic haptic feedback. The buttons and dial have physical feedback and my applications seem to be reliable with mapped actions so I feel like I have enough physical feedback. I like a small pointer type device much better at €140 than €300, though if money was no object I'd prefer the haptic feedback on the Elite.
Definitely worth trying, but don't try to overdo it. Implement TourBox in your key applications on core actions which you do all day.
Thanks for the comment, always interesting to see how others work and how to improve my workflow. The way I work is I move the sliders end click buttons with the Wacom pen, and use the trackpad on my MacBook Pro to zoom and move through the image , I don’t use my thumb to press butttons, just tap with my index finger . I somethings use keyboard shortcuts and for the time being that’s not a problem with the laptop, but next year I will be replacing that with a MacMini of studio, so loose trackpad and keyboard. Maybe than the tour box will make more sense.