Last year Dustin Farrell released a video that gave a quick walkthrough of his time-lapse workflow, we covered it here. He briefly introduced his workflow for shooting and processing his images from camera to export. Last week he released another video which takes a much closer look at the process behind his images.
Mostly shooting portraiture and lifestyle work, I honestly wouldn't be able to tell you the first thing about nighttime time-lapse photography. After watching this guide, I now have the inspiration and understanding to give it a try.
In case you don't have time to run through the whole 21 minute video (save it for later) here's a quick rundown of the time-lapse master's equipment and settings.
Camera Equipment:
Dustin emphasizes the importance of shooting with a full-frame DSLR body, in the video he states that he currently uses a Canon EOS 5D Mark III or a Canon EOS 6D, both tremendous cameras. He uses full-frame cameras for their resolving power and high ISO capabilities (sometimes shooting as high as ISO 6,400). He always shoots in Canon raw CR2 format (for Nikon guys, it's NEF).
Attached to these cameras Dustin is using Canon fast primes such as the 24mm f/1.4L II, or 14mm f/2.8L II if a wider field of view is needed.
While his camera settings will vary depending on the maximum aperture of the lens and available light, for this shoot Dustin shot wide open at f/1.4, with a long shutter between 20 and 30 seconds, at a fairly high ISO.
Processing:
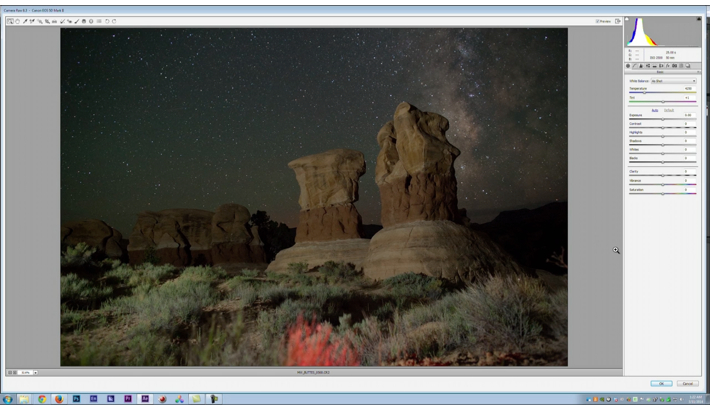
Dustin's post-processing workflow begins in Adobe Camera Raw. Here he fine-tunes exposure, temperature, fixes chromatic aberration, and vignetting.
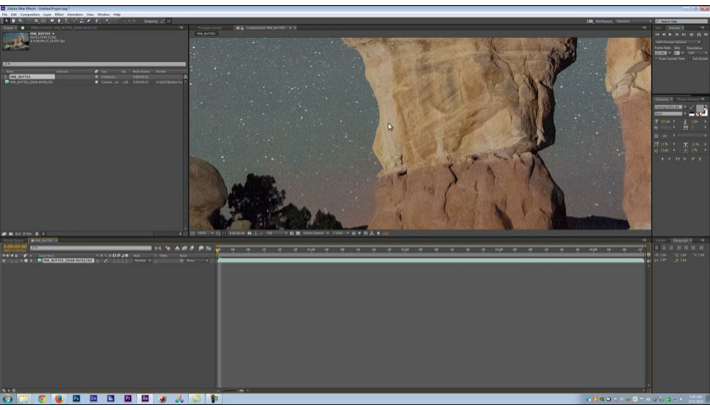
Next the images are imported in a batch into Adobe After Effects. Here he formats the video to 16:9 (4k) at 29.97 fps. Because of the high resolution of the images he is able to zoom and pan an otherwise stationary batch of images. Dustin makes final adjustments to color and performs noise reduction with a plugin called Neat Video (he notes that the default value for this plugin is a little too high and should be reduced to around 15% for best results).
Dustin has more cool time-lapse videos, I've shared a few below:
Landscapes: Volume One from Dustin Farrell
Flagstaff Milky Way from Dustin Farrell
Landscapes: Volume 3 from Dustin Farrell
For all things time-lapse you can check out Dustin on his Twitter and Vimeo accounts.
[Via Planet5D]


Am I missing something? ...where's the video link?
Thanks for pointing that out! It should be up and running now.
Where's the link to Watch Later?
Click the share button and then click the vimeo link and you will find it again on the vimeo page.
and you are right what's the point of disabling it?
I know nothing about time lapse...but where is the sky movement coming from if he's just shooting RAW images?
He's shooting say around 1500 RAW images per 'scene'. This isn't a video but a sequence made entirely from stills.
I could have missed it in the video but I'm curious to know how much time he waited between each shot? Also how many shots he generally takes for each scene?