
When you hear the words cinnamon rolls, what comes to mind? Is it a roll hot out of the oven with a rich creamy icing oozing over the sides? Or do you picture a Saturday morning breakfast with a dish of rolls that have been covered in a rich thick cream cheese frosting? Neither vision of a cinnamon roll is right nor wrong. The key in turning these cinnamon roll visions into reality is the styling.
Let's start with how you would style a solo cinnamon roll shot. Styling begins with cooking your rolls.

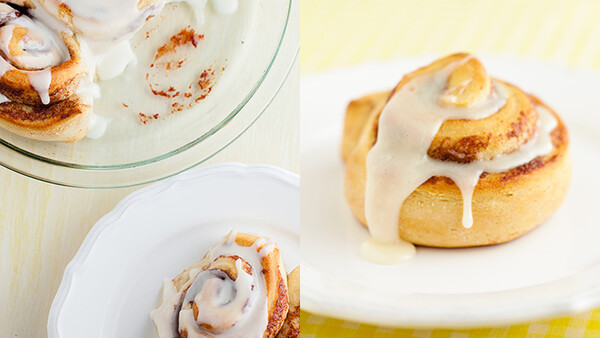
For this shot we want a round roll that has had room to rise and create steps for the icing to fill as it cascades down the side of the roll. For both of these images, I am using the same brand of store-bought cinnamon rolls you can find at your grocery store. Remove the rolls from the cardboard tube and place them on a non-stick or silicone lined baking sheet. Give the rolls enough space for them to expand and not run into each other. On the left are the rolls before baking. On the right are what the rolls look like after baking.

Once the rolls were out of the oven, I looked them over and found the one with the most ideal shape, color, and size. This one is going to be my hero roll. I then looked for a roll of similar size and shape. This will be my stand in. I placed the stand in on set and figured out my lighting.
To add the frosting, I am using an oral syringe (like what you would use to take medicine with). I have heated the icing so that it would flow freely in and out of the syringe. I used the stand in to figure out how the icing would flow out of the syringe and what it would look like as it flowed over the roll. From my test, I learned that I would want a thicker stream on my roll than the the thin streams seen on the stand in.

Above is how I added the icing on the hero version. The roll on the far right is the final shot with a nice cascading flow of icing down the left side.
For the shot of cinnamon rolls in a pan, the focus isn't on a single roll. It is on a group of rolls. For this shot, I will need to bake the rolls in a pan together. Below is what the rolls look like before and after baking.
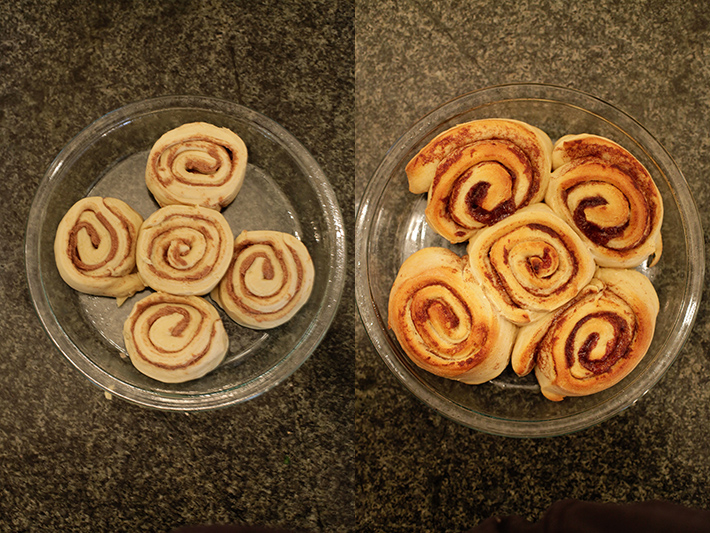
Notice how the rolls have expanded onto one another causing them to form shapes very different from when they were baked individually on a pan.

For the pan shot, the icing pour doesn't need to be as controlled as in the shot of the single roll. Instead of using the syringe, I pour the warmed icing out of the container and let it flow over the rolls. Because of the rolls flat shape and the larger scene that I want to photograph, I decided to shoot from an overhead angle. Here is the final shot of the rolls in a pan.

As you can see in these two examples, the styling preparation of a dish will vary greatly depending on your image's intended final message. Which one do you prefer?
For those of you interested in the lighting set-up, here is the lighting diagram of how these rolls were lit.

For more food photography tutorials like this, CHECK OUT issues 1-4 of photographing FOOD.

Join the Fstoppers community for free
-
Post comments and join in the discussions
-
Browse the site ad-free
-
Share your work and get featured in the community
-
Compete in the photo contests for fun and prizes
6 Comments
Both are fantastic! I am loving these food photography tips! Keep it up!
Looks like I chose the wrong week to quit cakes.
I have an idea: what about you stop styling it and i start eating it?
Drooling all over the place
This is just awesome. Thank you so much!
Taylor - Great write up and appreciate the detail about the syringe. Definitely plan to test this out soon.
Reminded me of this post by Laura Cole: http://yourkitchencamera.com/12-basic-tools-for-food-photography-stylin…