RGB to Black & White Basics
Here for those unfamiliar with this is a basic demo of why DIY can give better results than letting your camera or software deliver B&W, if the latter is what you want.
Virtually all cameras with the exception of some Leicas have colour sensors which detect red, green and blue colours at every pixel. So if you switch your camera to shoot B&W, it actually cooks up the B&W according to its (literally) secret recipe, or algorithm, for blending these colours into a B&W image. Same if you let your software simply convert to B&W, and you will also get mono if you desaturate completely. In all these cases the PROPORTION of the three colours to each other is out of your control
I'm no mono master like Phillip Breske, but found it useful for this B&W panorama to blend the proportion of colours myself.
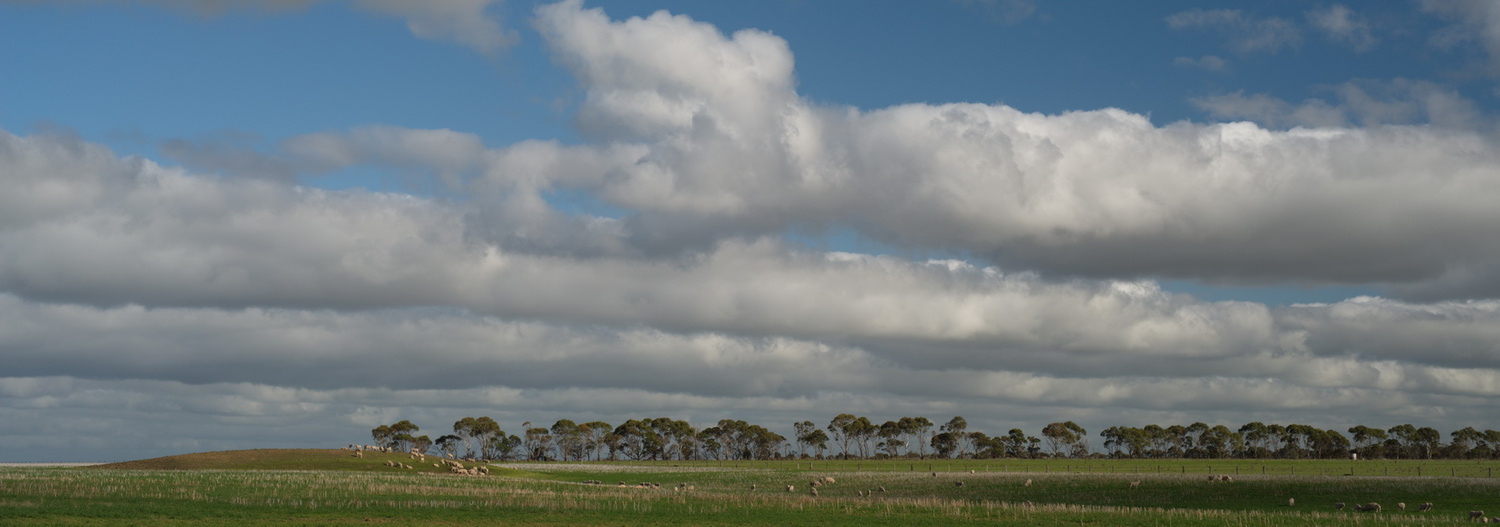
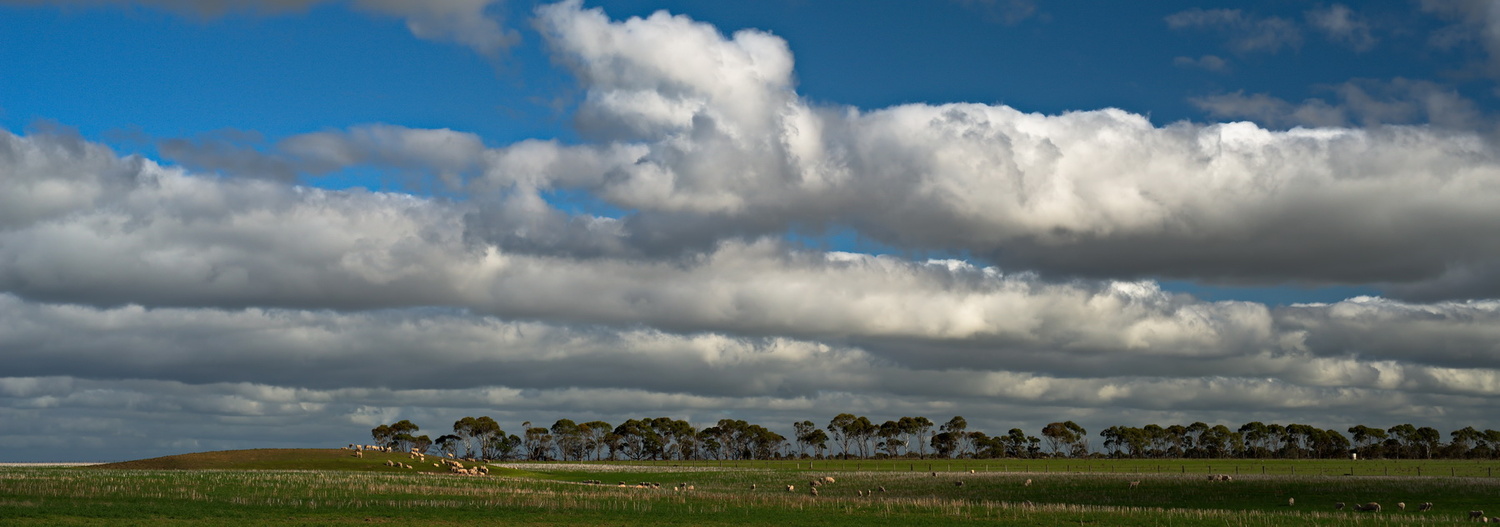
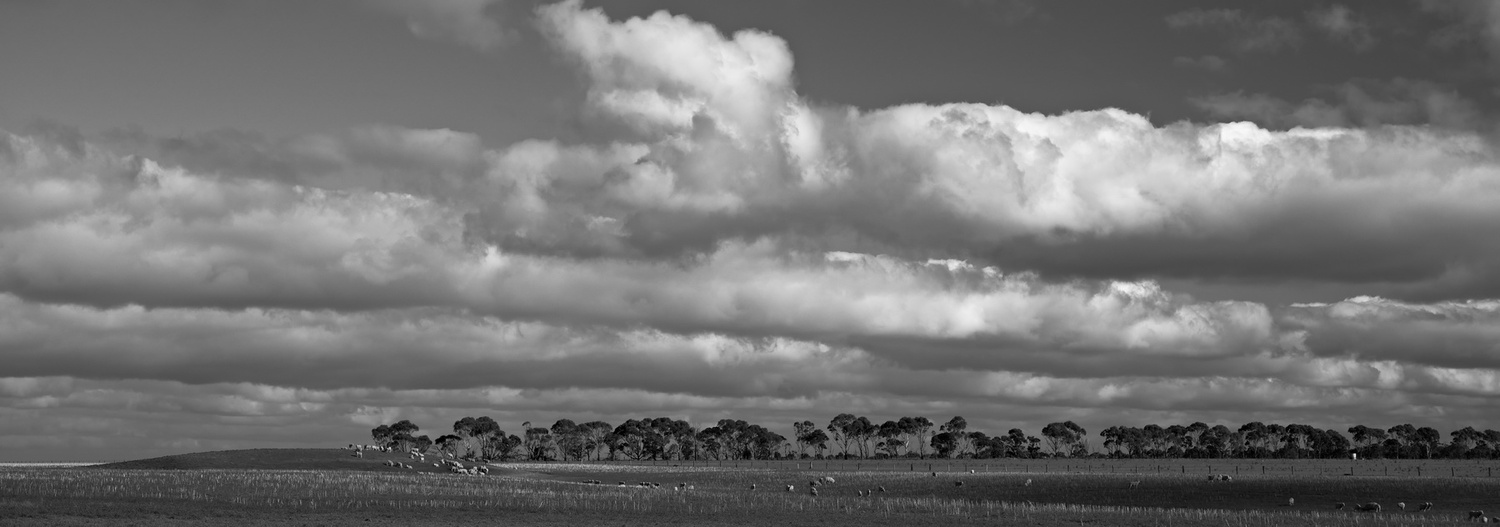
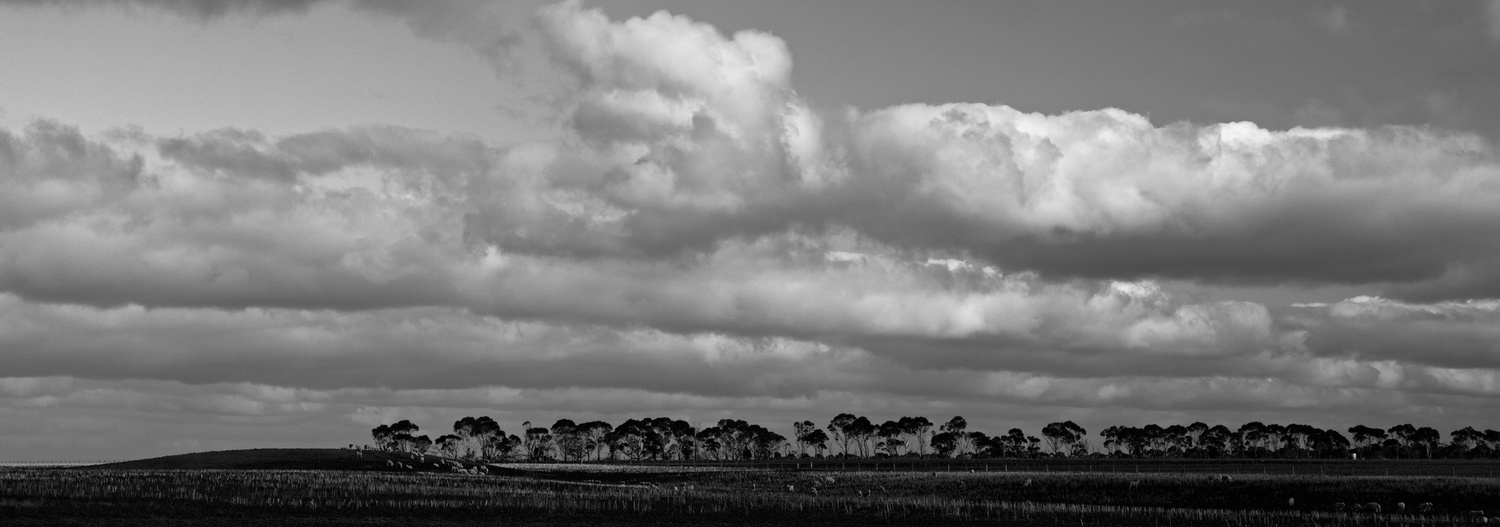
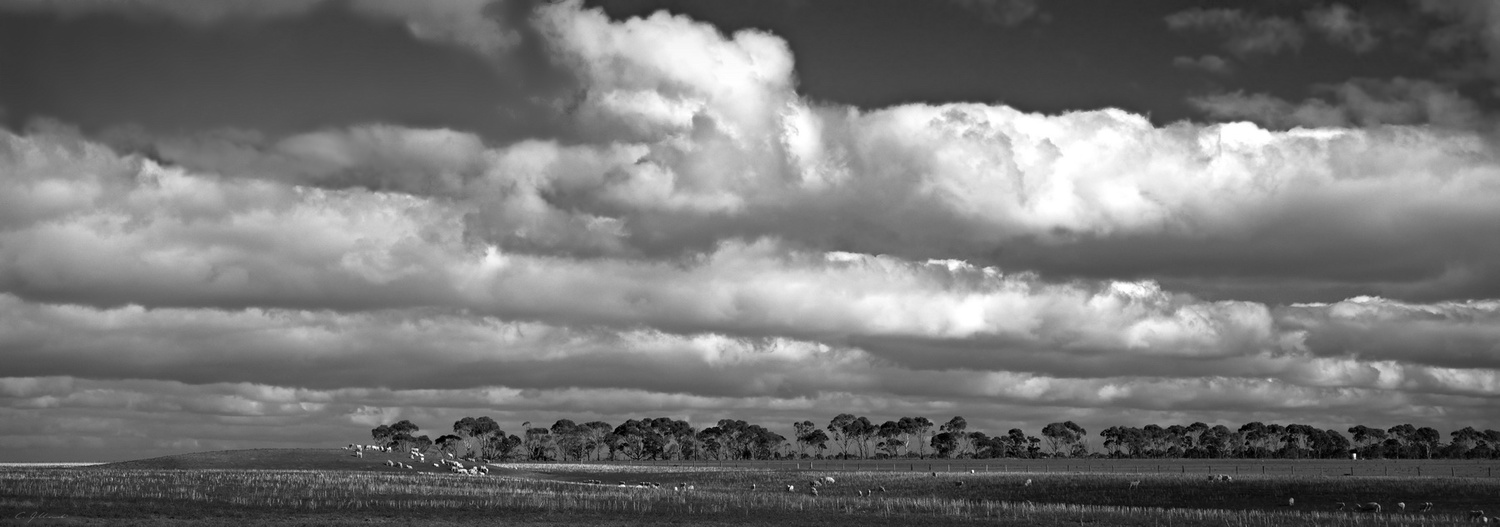
Below, from top to bottom:
A jpeg conversion from the unedited RAW
The edited RAW file.
Just the RED component of this.
Just the GREEN component of this.
Just the BLUE component of this.
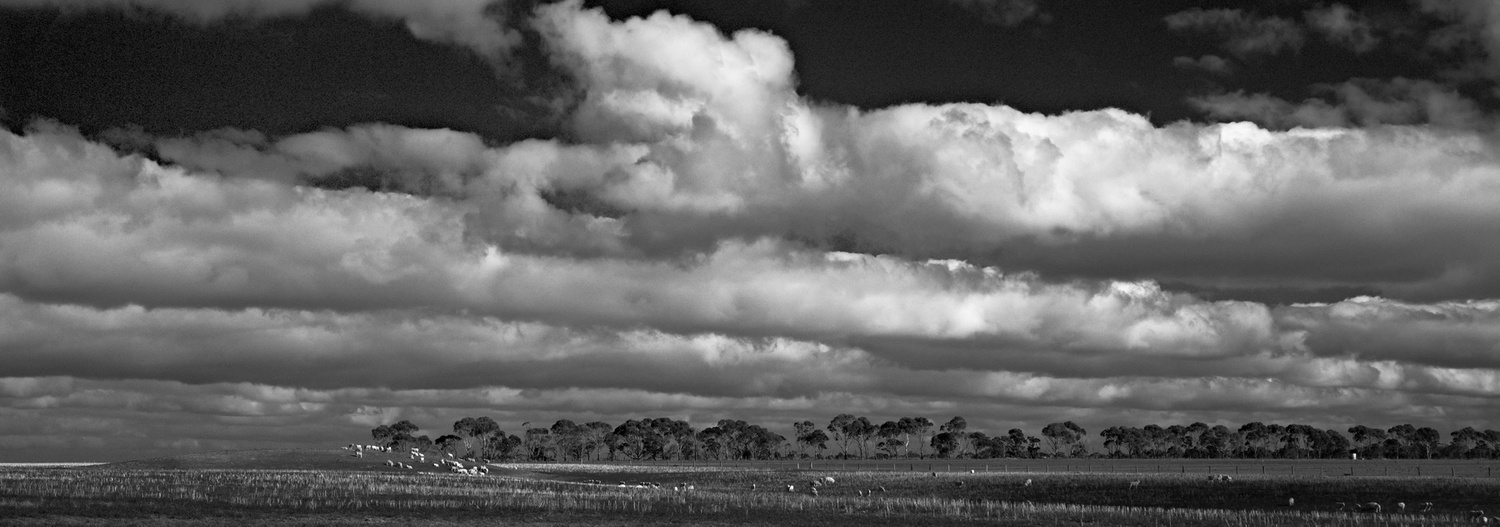
My final file for printing (it comes out a little darker subjectively in print form), using my own blend of these three components.
Note how the blue file gives a very pale sky, the red a very dark one, the green the palest grass - each channel makes that colour brighter in the B&W. B&W film photographers use red and yellow filters to darken the sky and make clouds stand out. My image looks closest to the red channel version, and is pretty close to what a yellow (R+G) filter would yield.


No comments yet