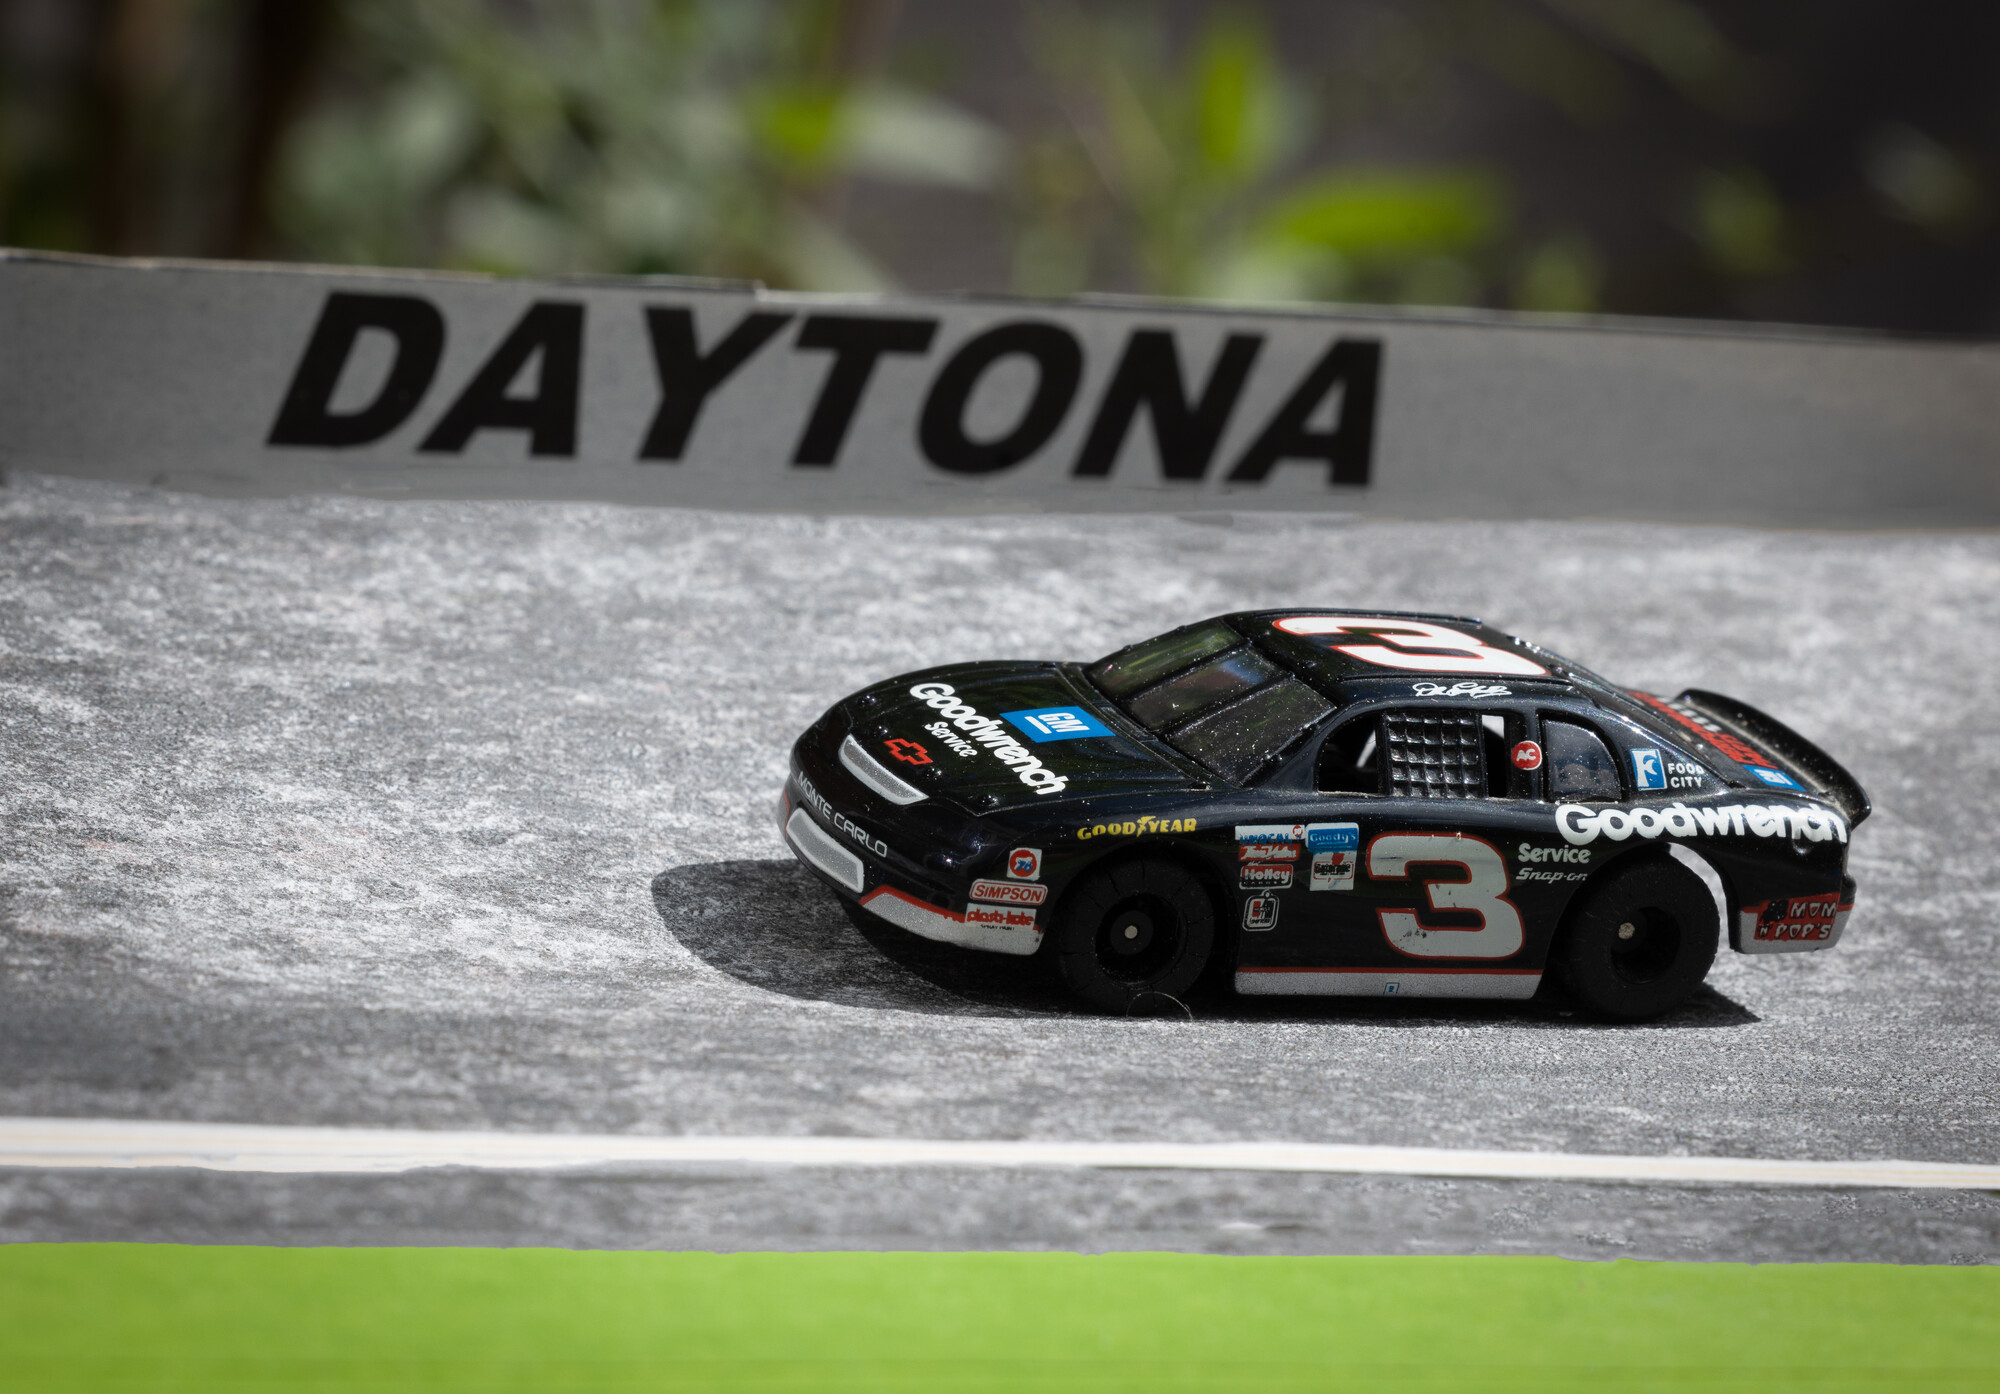
Dale Earnhardt's #3 Monte Carlo @ Daytona
Years ago a dear friend ,who is big time into slot car racing, gave me this slot car as he knows I am a BIG #3 fan.
I am new to PS but I am hoping to learn how to do Motion Blur for this image.
For the racetrack surface I used a sheet of red sandpaper and spray painted it black. While the paint was still wet I added flour to make it look closer to worn asphalt.
There was a five minute break from 18% grey skies so I took advantage for natural light.
EOS R5 w/ 70-200mm L
f/16 ~ 1/100 sec ~ ISO 100 ~ 135mm
(Setup in comments)


14 Comments
Lot's of tape involved...which doesn't stick to sandpaper.
Thanks for posting and allowing others to see your setup Dean. Yes, this immediately cries out for motion blur.
This is easy to accomplish in PS;
- created duplicate layer
- on duplicate select motion blur filter, apply at your discretion
- create a mask to mask areas your wish to apply blur to (paint transition with low opacity for more realism).
- adjust layer opacity to create the effect you desire.
Here's an example using that very same process;
I did manage that, but I am looking for background blur and keep the car "tack sharp" to mimic a panning shot.
Quick and dirty.. Open image. In layers convert background to layer. Use quick selection tool to select car. Go to edit and cut to cut out car. Paste car which will create a new layer with car, hide car layer and select the asphalt layer. Cut out chunks of asphalt around car hole and paste chunks which will create new asphalt layers, move the asphalt chunks around so it covers the hole where the car use to be in the asphalt layer. Merge down layers that are asphalt (don't merge car). Use motion blur filter to blur on the asphalt layer combined layer, unhide car and move it where you want it. I did not do a good job with the shadow under the front of the car but I was not going to spend a lot of time on this since it is not my image.
Thank you. Some of the tutorials said Convert to a Smart Object...
Again, thank you.
My understanding of Smart Objects is that they allow non-destructive edits.
Perhaps useful if you wish to revisit but I suspect make the file size a lot larger (unless you flatten & save?).
Yes Dean, Smart objects are the way to go, it is a newer more advanced concept. It takes time to explain and I did not want to write a novel. It is also better not to merge objects. But for what I did to your photo was all that was needed and you could still make adjustments You could also control Z and reverse (undo) any edits, make changes, and redo anything you had done.
I have been using Ctrl + Z since using Paint in Windows 1.04
So have I which is why smart objects are not really needed for a simple edit like this one was my point.
Great detailed explanation r1ch, and a great result.
This is not something I have done much in PS so appreciate someone with greater experience jumping in with so much detail.
Thank you so kindly everyone. I have been using PS for about one month and with your help I came up with this:
That looks great Dean!
Good job, there are a number of different ways of coming up with this type of effect and different tools.
Keep it simple usually works great for Rookies!