Persistence is key.
I found this little guy as I was hiking up to Pearson's Falls in NC. I stopped for a few minutes to watch him slowly but surely move across the leaf, paying no attention to me or the other people passing by. I'm not sure where he was going, but I hope he finally made it.
I shot this with the lens I had mounted at the time, a 16mm-35mm (this is 35mm)... Not ideal equipment to chase snails, but I think it did a pretty good job. I'm always looking for "wildlife" when I'm out, so any cc to make this better is greatly appreciated!


8 Comments
I'm the same way, even out for a walk on a local trail I'm always peeking around looking for wildlife.
The following are just a few thoughts on this little guy... They might be good or bad, or indifferent, but hopefully they can spark some ideas.
He has one heck of a beautiful shell.
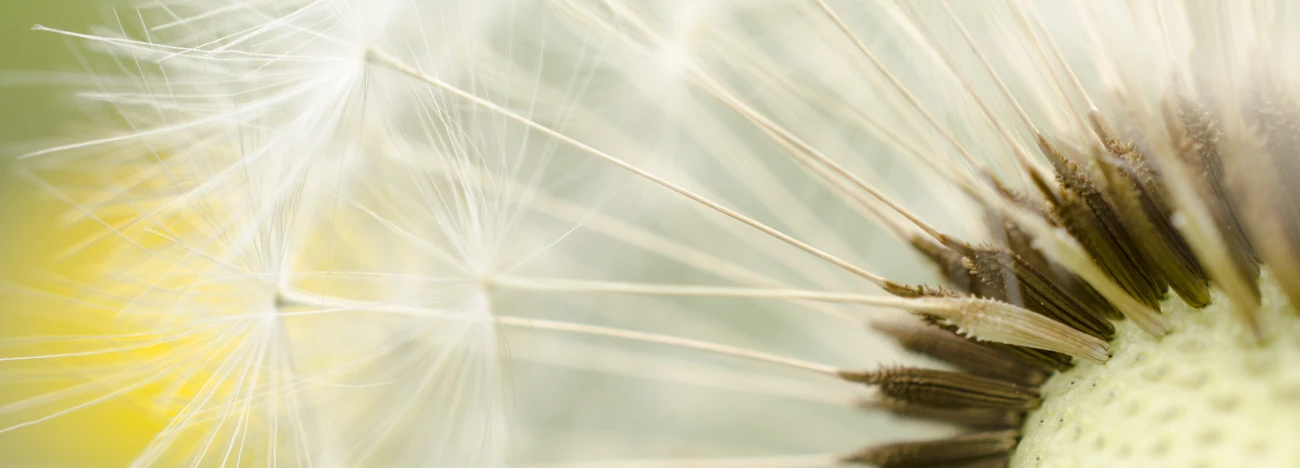
Hi Joe. your take on colours in your image 1 is appealing. could you please share the way you did it. am struggling with colours in PS. thanks.
Thanks!
Hum... Lets see if I can remember. I used a combination of Lightroom, Photoshop and Luminar with my own Custom Presets (to help speed workflow).
In Lightroom I hit "auto" then set Saturation and Vibrancy back to "0", brought down the highlights so they wouldn't clip, and played with Blacks and Shadows to my liking. I couldn't get them to stop clipping, so I ended up just letting them clip a small-fair-amount.
I then head into Photoshop. I ran a noise reduction on the image using Topaz. Then Luminar plug-in but it can be done in Photoshop as well. Using Adjustment layers - I bring the Vibrancy down 40~50 points then bring up the Saturation of Yellow channel, and bring down the Green and Blue channels. This is a judgment call per-case for tastes. And one final Adjustment to bring Contrast down about 20 points.
This will get the colors and tones similar to what I have above. I then hit (Ctrl + Shift + Alt + E) to burn all that into a new layer.
Filters > Camera Raw, then new Mask for the entire image, and do a 10 point adjustment for Moire reduction. Just helps almost all images with cyan and magenta artifacts on the pixel level. (hit ok).
Now I'll go thru and clean up any distractions, in this images case the minor leaf blemishes and holes using the lasso tool and content aware fill (using Shift + Backspace).
Finally I believe I did a light Glow or Orton effect on the image a long with a slight, soft, vignette.
I know this sounds like a lot but it goes pretty fast. I made a preset for Luminar for my "Nature" toning I prefer; but each image is still tweaked afterwards.
tl:dr
Lower vibrancy, lower greens and blues, but boost yellows, adjust contrast down, add soft orton or glow, slight vignette.
Hope this helps. :)
Wow. thanks a lot.
Hi Joe. A last of my workflow. I worked around Orton effect. But is there any other(independent) way of getting GLOW?
thanks a tonn.
Vijay
Hum.. You could try duplicating the image into a new layer, boost exposure slightly (very slightly) on the new layer, then a very.. hum.. soft blur (you'll have to experiment) on the same layer.. Now set that layer to the Lighten blend mode. In a way, very similar to the Orton effect.
Another way would be to bring up the contrast just a pinch on an orton layer; then keep adjusting the contrast adjustment to your liking.
In Luminar, Glow is a slider and I just move it up to 1 out of 100.. and just that slight amount gives images the "pop". I believe what this is doing is an Orton with contrast adjustment. A little goes a long way. Light touch.
Will Try. Thanks.
Thanks so much for the alternative editing, Joe! I really like #1. I plan to sit down tonight and see if I can follow your process below... just reading through it, I learned some new tricks. lol!