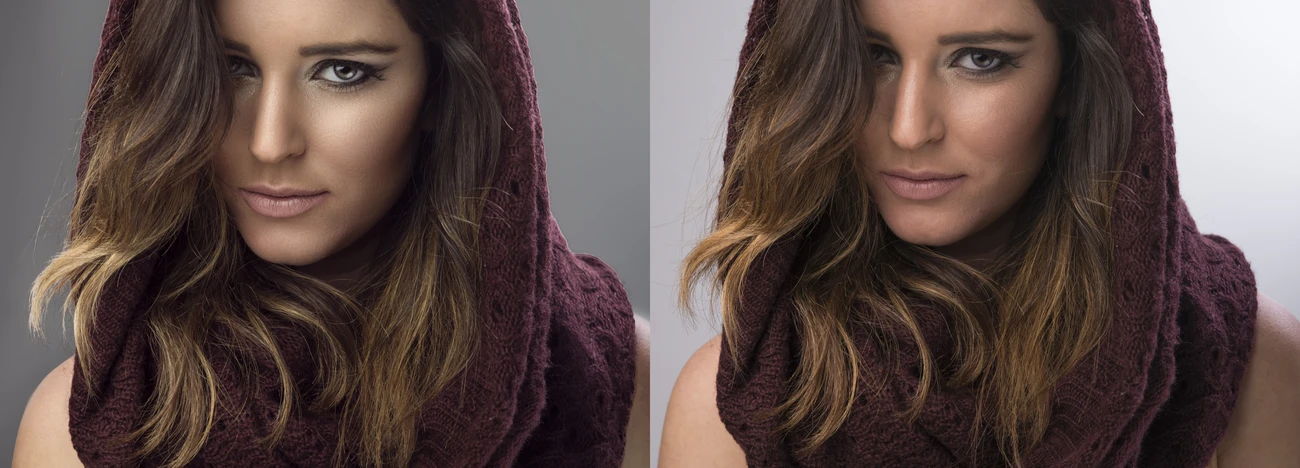
Federica (step by step gif included)
It has been a while since last time I posted a Before/After look.
so here I am again asking for your comments and critiques.
[If there is any issue in gif quality open it in new tab]
Camera: Canon 5D Mark III
Lens: Canon EF 85mm f/1.2L II USM
@ f/2.8 - ISO 160 - 1/640s
Picture Style: Cinestlye by Technicolor
Natural light - Sunny - No Reflector/Diffuser
Retouched in Captureone Pro 10 (skin tone) & Adobe Photoshop CC 2017
Color Graded with my own LUTs & simple adjustments


9 Comments
What exactly can you do in Capture One that is so superior to other techniques in PS and Camera Raw? I have the trial version of Capture One and I to me it's a pain in the butt in terms of skin tones. I have special color profiles for my Sony a7ii and when I load the instead of the standard Adobe profile, I get more accurate skin tones. I also adjust the WB by looking at the skin and if that is not enough I go into the HSL tab and as a last resort, I use a mask and a curves layer in PS (CMYK method).
to be honest there is no superiority for Capture One compared to PS when it comes to techniques because you have much more controls in PS. but the thing that makes Capture One better than Lr or ACR is the export quality and tools it offers.
the point is, whatever works for you then you should do as it suits your workflow, to me Capture One's skin tone tool is very useful, also the layering and masking option is also appreciated because we don't have it in Lr or ACR the same way it works on Capture One.
for sure Hue/Saturation or Selective Color adjustments with masking works the best in PS when your eyes are trained good enough to see even the smallest color shifts or color casts on the skin. otherwise, Capture One might be a better solution to fix the color issue on skin tone.
the other thing I love Capture One is the grain tool and overall RAW processing quality for the program. but for more complicated color grading I would move to PS because I'll have the option to use LUTs and complicated masking or blending modes.
If you are new to Capture One, I really suggest you give it some time and watch some tutorials on youtube to have a better understanding of this powerful program or we can talk and I'll share some of my experiences with you about it. otherwise, it would be a really useless program like many others out there.
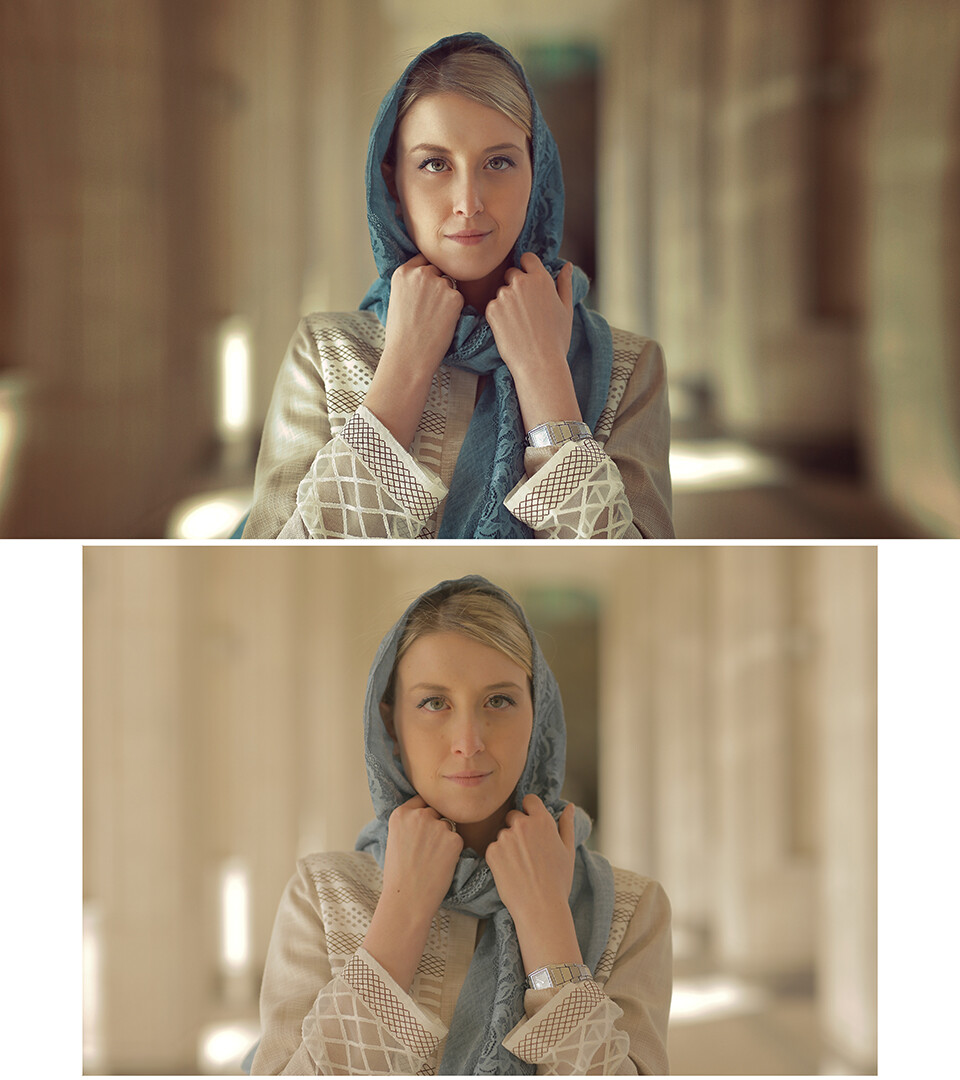
There is actually no difference in quality. Capture one chooses a very high sharpening value and it doesn't use the Adobe profile which is why may say Capture One looks better. If you apply your camera profile or a custom profile (e.g. color checker) and increase the sharpening in ACR or LR the picture will look just as good. I basically just wanted to know why so many rave about the skin tool in Capture One. I couldn't see any benefits over PS. You have to apply a mask and then mess around with the white balance or individual colors to get the right skin tone but there is no tool that automatically tells you what the right skin tone should be. I have yet to find someone that can explain why it is so much better to adjust the skin tone in Capture One. If you get the white balance right, either with a color checker, gray card or a specific profile for your camera, you don't need to do anything regarding skin tones. If the WB is correct there won't be any color cast. Anyways, the picture (except for the warped background, which I don't like) turned out nice!
as I said, there is nothing superior to captureone if you know how to work with photoshop at the advanced level, you can actually do more in Ps. besides not everyone has color checker or their camera profile to apply. the only thing that everyone is talking about which is the skin tone tool is helpful for those who are not really comfortable with Ps or they retouch their images only in one application. some people do their post process only in Lr or Captureone and never goes to Ps at all, so it will be really handy.
I use it because it's fast and easy to use, but I'll do it again at the end in Ps.
This Video might help you how it works
https://www.youtube.com/watch?v=CUEF__3KRYo
or
https://www.youtube.com/watch?v=fjYT_XTI7Qk&t=392s
(around 12min starts the skin tone section)
-----------------------
thanks for the comment, yes the background was warped too much at first (which you see in gif), but I tried to fix it, maybe I should have tried less lens correction at first. This is what I'm doing these days, to make 16:9 images out of 3:2
I would have copied the right and left column to make the picture wider and then just cloned out the lines where it overlaps. Many do it your way which is faster but sometimes the stretching is too much.
Thanks for the vids!
EDIT:
I did it the way I said just to see if it really works in this image. I only spent a little time on the columns but at least it's a perfect 16:9 crop now. I challenged myself and tried to get it to look like yours but I failed. Sorry :D
im not really into copy and cloning because in large scales it would be too obvious that there are repeated patterns even if you do a clean job doing that which is very rare depending on the image !!! haha
what you've done is an example of that, on the right side its almost ok, but on the left side not even close :D
what i usually do (which i ignored to do it in this one) is to make a selection on each side with 0 feathering (make sure not to select the subject it self) and then stretch it out just a little in several times (stretch, then deselect and select again) until i fill the 16:9 crop. the reason that i do its n several times is because if you stretch a part in one time there would be visible distortion in pixels and details special if there is noise.
for this image i wanted to try new and faster technique by using ACR lens correction then reside it to fill the frame. i thought it would make the image look wide or make the location look larger somehow.
Yes you need to spend a lot of time on it but if you do it'll look perfect. Even in my bad example an untrained eye wouldn't see anything. I showed it to a few people and asked if something seems off with it and not a single person saw it. I can see it on the left side but the right is ok. the best way is to take other images from the same scene. What camera/lens did you shoot it with by the way?
yes, most people won't catch that because either they are not really into it, or they only see the small size images. if you are going to post it just on instagram or somewhere over the internet it should be fine, but if you want to print it or use it elsewhere which will be seen in larger size it will be visible.
i already wrote the camera, lens and many other informations about this one in the description. I have a Canon 5D Mark III & 2 lenses which i mostly use the 85mm 1.2L
For some reason I can't read the descriptions when I'm on my phone. When I comment on the computer however I can read it. So yea, I just saw it.