
I'm a symmetry snob. If you are going for the down the center shot, get in the middle. It may seem obvious but at the end of the day a few inches can make a huge difference and actually make or break your photo. So as much as you want to start filling that memory card, slow down and make the fine tune adjustments.
The feature photo for this article is of the South Grand Island Bridges. If you live in Western New York and own a camera you have probably taken a similar shot. It actually is not much different than a down the hallway, down the dock, or down the "you name it" shot. Each of these type compositions use some go to tools that tend to make photos pleasing ot the eye:
- Leading lines starting at the corners will lead the eye into your photo.
- Symmetry and repetition interest the viewer and keep them inspecting the photo.
- Finally the clear depiction of depth gives a three dimensional quality to a flat medium.
I actually used to help curate #leadinglinesmonday, a photo theme on Google+. For those that don't know, all that means is that people could share a photo with the designated hashtag and mention or tag the list of users curating the theme. We would then try our best to come visit your post, check out the photo, and comment accordingly. Doing this really helped shape my opinion and my eye as to what worked and what did not. It is important to note that a leading line does not have to be a line at all. It can simply be a progression of elements in the photo that lead your eye in a certain direction. The most effective photographs lead you directly to the intended subject of the photo. Other times the lines themselves are the subject and lead to a vanishing point.
The photo of the bridges titled "Twins Born 27 Years Apart" is one of my more successful shots and took the honor of the Viewer's Choice Award in the American Society of Civil Engineers 2016 Bridge Photo Contest. I have the calendar with the photo still hanging in my office. People like ot tell me it's the wrong month. I counter telling them it is actually the wrong year!


You see photos sharing these traits all over Instagram and other photo sharing sites. It is almost too easy to point your smart phone and get an interesting shot, but we are looking to take it a few steps beyond interesting. I want your photo to be amazing! Something you are proud to show your friends and family.
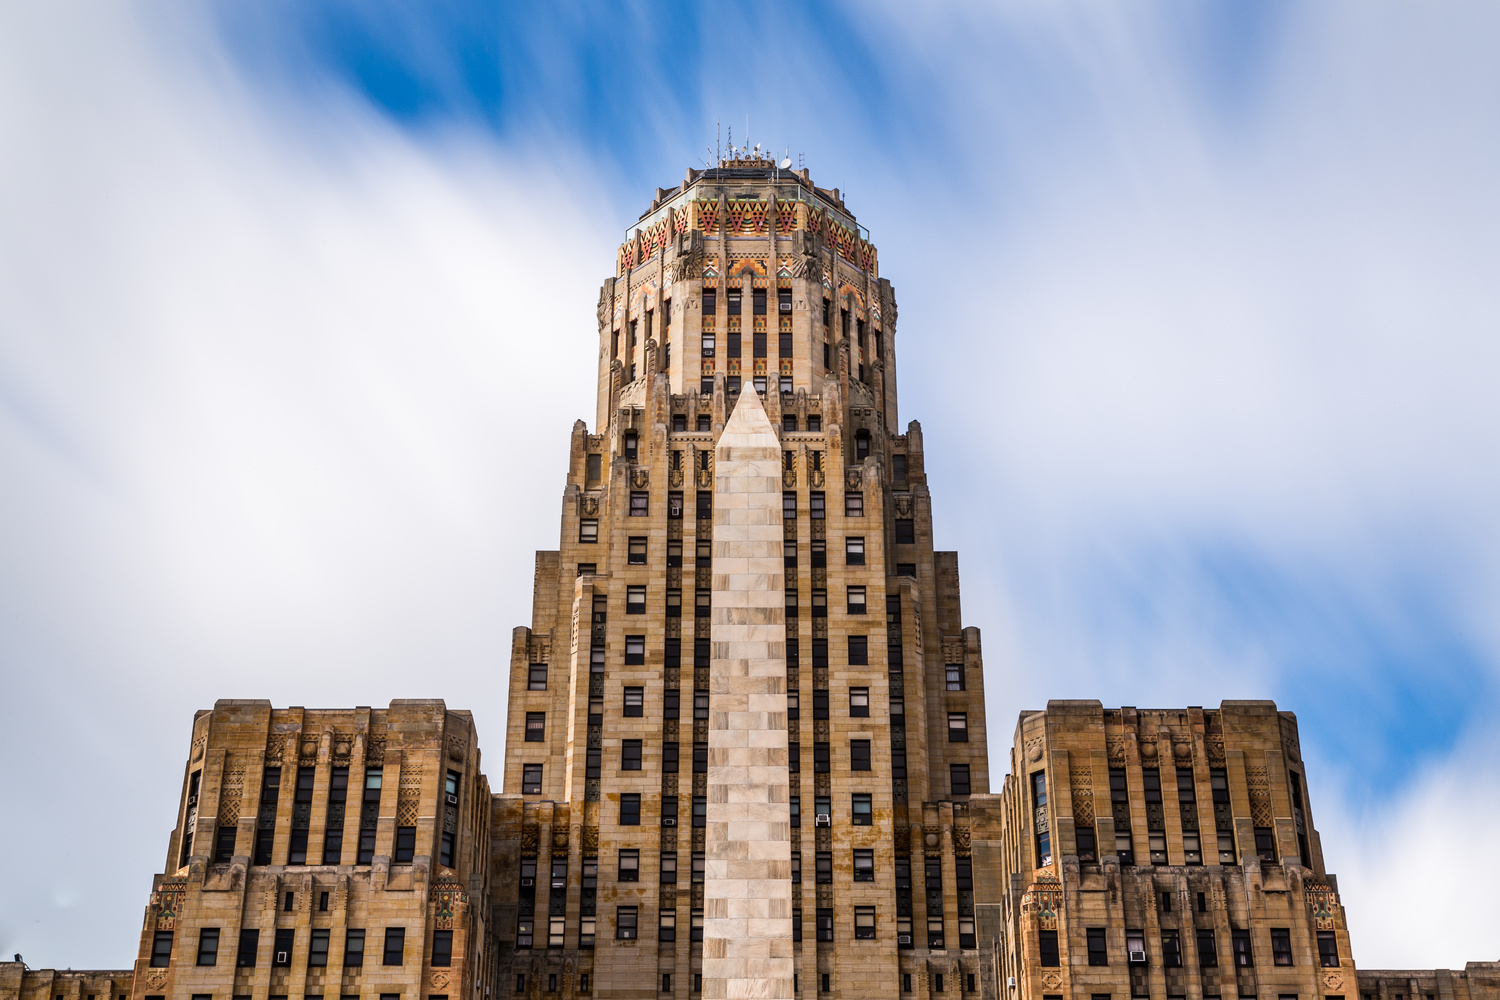
Before lining the shot up in the viewfinder, look with your eyes. Is there a visual que to gage how centered you are? In this photo of Buffalo City Hall, there is an obelisk in front of the building that can be lined up with the center of the windows.

If you are off it will be obvious because of all the grid lines and symmetry. If you are using a tripod it may help to zoom in with the LCD live view. The reason is so important to nail this part now and not wait till post is simply because being off center is not convincingly fixable. I don't mean a simple crop to get the vanishing point in the middle. I’m more talking about the angle of things being just off enough to be noticed.
Once you have found your center you need to get into the viewfinder or on the LCD and get your composition set up. Setting up the camera low, medium, or high will change the look significantly. Don't forget zoom lenses trend to have more distortion at the edges when at their widest so consider zooming in or planning to crop if that bothers you. In fact, I'm starting to shoot alternate zoomed in shots to capture details often missed in the wider photos. Yes you can simply crop, but cropping also equals loss of resolution. Crop a photo enough and you've effectively changed a high res 18mp photo into an 8mp file no longer suitable for larger format printing. Use the grids in the viewfinder or on the LCD display to make your shot level. After doing all this work to get lined up… Now you can start shooting! We'll, at least one shot. And for goodness sake don't bump the tripod now or you will have to start over.
This shot, while I love it, missed the dead center. But I did it so you don't next time!
As you get better at setting up and trying different combinations of things, you'll find the process enjoyable. Each time you learn what works and what doesn't. Slowing down will not only help you improve your photography, but it will save you precious hard drive space! Please come back and let me know if this advice helped any. I know it has helped me tremendously.


Using a geared head and macro 4-way rails helps a lot too. I hate trying to get things just right with a ball head and then, letting go it shifts ever so slightly!
Thanks so much for reading Patrick. Those small adjustments can be a pain.
Are you sure the bracing of the two bridges is symmetrical in reality? I regularly use a PC lens for these kinds of shots but you can emulate it in post. Not my favored method but not everyone can justify the cost of PC lenses.
Thanks for looking. I doubt I'll ever have so much money I'd add a PC lens to my collection. Oddly enough I actually don't like the look over overly corrected shots. I "embrace the distortion" :) Take care
Seeing as you're clearly a SME I'd love to see some examples of shots your approve of. Maybe even some of your work? Might help the other readers.