
As photographers, we choose where we take photographs. While it is undoubtedly a joy to take pictures in a climate-controlled photo studio, tethered to a laptop while your favorite tunes play through speakers, many romanticize taking photographs under challenging conditions. We dream of being assigned to document a war or cover the aftermath of an earthquake.
Some of us desire to work in extreme heat or cold conditions and return home with unique photographs and dramatic tales of what it was like working in these less-than-ideal conditions. Whatever challenging environment you choose to subject yourself to, knowledge and preparation are crucial if you are to walk away from that environment safe, and with a memory card filled with strong images.
This article will examine creating photographs in extreme cold, where you and your equipment will be outside for hours at a time. I spoke with NY-based photographer Jamie Scott, who recently completed a remarkable time-lapse photography and video project that shows how beautiful the effects of brutal cold on nature can be. Our conversation focused on five problems you will need to solve if you aim to create work in a cold environment.
Your Cameras Will Die Quickly

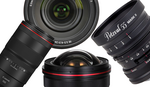
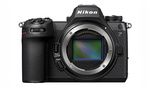
As the temperature drops, battery efficiency decreases. Poor battery life is a minor problem if you shoot for an hour or two, but it is a serious concern on long shoots. "For the projects I was undertaking, I needed the cameras to run for days - I was using the Canon R5 and the Canon R5C. I also needed to be able to change the batteries without ruining the shots, so I did that a couple of ways. I kept the camera batteries inside the bodies, but I powered the cameras with external batteries via USB-C. The advantage is that it uses the USB-C battery before it uses the internal battery, so I could shoot for days, and I just had to change the USB-C battery. USB-C batteries need to be PD (power delivery); otherwise, they won't power the cameras. I learned this the hard way. I was trying to shoot with prime lenses so I could get the benefits of the wider aperture. There are also fewer issues with prime lenses since the focal length doesn't change when the lens is knocked," said Jamie.
With mirrorless cameras, battery life can be as short as two hours in cold temperatures. Jamie sometimes used a Sony a7R III and a7R IV with adapted Canon lenses.
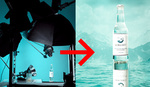
Sony makes an external power block that you can use with four Sony batteries at a time. The great thing is that you can shoot endlessly without disturbing the camera. I would change batteries every 24 hours or so. I always strapped disposable hand warmers to the batteries, and I used tripod hammocks to hold the batteries so they weren't on the ground. I also sometimes put the cameras in a weather pod, which is a small tent with enough space for me to sit in.
Frost Will Form

Another recurring problem was that lenses develop frost. This happens mainly in the morning and evening. "I would get up very early and set up the cameras at around 6 in the morning to start shooting just as the sun was rising to maximize shoot time. That was for the start of the project, though, because by the end, I was renting houses that had property that I could shoot on so I could actually set up the cameras and leave them out for five or six days at a time."
I bought waterproof cases that I could put the cameras in. I cut a hole out for the lens, and I used hand warmers to keep the box warm. I would swap these out every day. In the evening, if I were taking the cameras inside overnight, I had to make sure that I was not bringing them into a warm environment too quickly. Many times I would leave the cameras inside the front porch or in a garage. I needed to be sure the cameras weren't getting up to say, 70 degrees inside and then being taken outside to a 30-degree environment. What seemed to work was keeping the cameras cold when they were indoors and keeping them slightly warm when they were outdoors. It's a matter of keeping the extremes at bay.
In addition to the problem of frost forming on the lens, there is also the possibility of snow and freezing rain falling onto any camera that is left outside for an extended period. Jamie recommends Flex Lens Shades that cover the front of the lens. This shade is a flap that can be quickly raised when the photographer wants to take a photograph or lowered if snow is blowing on the front of the lens. "Whatever precautions I took, I still ended up having to clean ice and snow off the lenses periodically. I would do this by breathing on them and then using a lens brush or wipe."
It Gets Dark Quickly

If you are leaving cameras outside for an extended period of time, it is inevitable that the exposure will change as time passes. During winter, light gets dim by 5 pm, which makes it challenging to shoot in ambient light. If you are near a power source, as Jamie was when he utilized rentals, you can use artificial lighting. When external power is not available, Jamie recommends low-cost camping lights. They aren't great in the middle of the night, but they can extend the shot during sunset. These lights are handy because they are waterproof, rechargeable, and last a decent amount of time on a single charge. If adding lights is not an option, you can adjust the exposure to accommodate changing lighting conditions. However, it is best only to adjust shutter and ISO. Aperture should not be changed because it changes the depth of field, and this makes it difficult to combine shots if you are creating a time-lapse. "If the exposure has been adjusted throughout the sequence, LR Time Lapse is a great application for fixing jumps in brightness. It automatically evens out the changes in luminance by detecting the adjustments to shutter and ISO."
You Need To Move The Camera Smoothly

Camera motion is neither a component of still photography nor a requirement for time-lapse photography. As you can see from Jamie's video, however, adding camera motion can make a time-lapse video more compelling. Jamie suggests trying a slider rather than fussing with balancing and calibrating a gimbal in the cold.
I have four sliders, and at various times, any one of them might be frozen and not working. I found the Dynamic Perception sliders work best in harsh environments. Their systems are not perfect, but it's always been my go-to slider because it is so modular. It's like working with Lego - you can build it into any configuration you like. They use a Kevlar belt to move the camera unit, whereas most sliders run on a rope, and that rope would get wet and freeze. All of the metal sliders I tried would freeze or jam. Something about the rubber-like Kevlar of the Dynamic Perception unit allowed it to keep going. One issue I had with pretty much all the slider systems, though, is that they are controlled from your phone using Bluetooth to connect to the controllers. Bluetooth does not work well in the cold. I would find that if I set up right away after the equipment had been indoors, it worked fine. But if I was trying to connect after the equipment had been out for a few hours, it wouldn't work. If I were to do a cold-weather project again, I would seek to find a way to control the sliders with a wired controller.
You Will Be Cold

When I first started, I was staying outside for as long as my cameras were operating outside. I was trying to stay up from sunrise to sunset. A serious problem with this was my toes and fingers were starting to freeze. I would sweat a lot during the initial setup, but once that was done, I just had to stand still and wait for 10 hours, so my sweat would start to freeze on my clothes. I learned cotton is terrible for this. I was also desperate for the toilet all day, and I could never go when I had to watch the cameras. Something about the cold always makes you want to go more.
Over time, I came up with the idea of renting homes where I could shoot on the property, and I could constantly check on the cameras all day but basically leave them unattended. I also didn't have to worry about people stealing the cameras. Once they were set up, I just had to pop out every few hours to make sure everything was working properly.
My clothing also got better over the years. When I first started, I didn't buy any special clothing, but over time, I found things like proper photography gloves that had an inner lining glove and flip-top mittens. I did a lot of research and swapped cotton t-shirts for Uniqlo Heat Tech thermals. For my freezing toes, I bought Smart Wool socks and insulated boots, as well as hand warmers for my gloves and pockets. I used mittens from the Heat Company. Another important piece of equipment that I didn't have the first few years was ice cleats for my boots. I slipped on some ice in Montreal and hurt my knuckle, which I still feel three years later. Ultimately, I settled on a pair of cleats that could be removed when they weren't needed,
For anyone considering embarking on a project of this sort, or any project that is outside your comfort zone, Jamie offers the following advice: "When I started this project, I did not relish standing in the cold for hours. I had to do it to get the shots I wanted - it was a means to an end. But over the 5 years, I grew to really love it (having the correct clothing helped with this, of course). If I could offer one piece of advice, it would be to enjoy and savor the process.


That video was set up pretty good. Good article!
Great video and helpful advice, thanks.
I've used a Sony A7S, A7R, A7 III and A7R V for winter astrophotography and Aurora Borealis shoots in temperatures at or below -20°C with good luck. The only problem I've run into is battery life and that can be resolved with a USB power supply of some sort. It is also important to watch out for moisture forming all over the equipment when you bring it back into the house!
Beautiful image. In the article, Jamie touches on some of the things you mentioned.
I enjoyed and appreciated the sharing of lessons learned; however I think we need to define 'extreme' cold! :-) For me that is -30º (it doesn't matter at that temp whether we are talking F or C! :-) )
My reality is going out for a shoot into the cold. It would have been interesting to here some more thoughts/insights on how to get the camera/lenses adjusted so they don't fog up when you take the lens cap off. My only thoughts are to put the camera on the rear floor of the car, on a soft material with the car heater and lens cap off.
Thanks for sharing
Although I live in NYC, I choose to define extreme cold as anything under 50 degrees Fahrenheit ;)