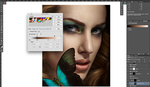
Cleaning skin is one of the most tedious tasks there is when it comes to portrait retouching. It takes quite a bit of time, and when done improperly, the texture can quickly become mushy. To keep the final image as natural looking as possible, there are a couple of techniques that can be used to limit the number of pixels we alter. In this tutorial, Zoë Noble demonstrates how she uses the clone stamp tool to clean the skin.
When it comes to correcting skin texture, some people tend to go straight to frequency separation or rely heavily on the healing brush. Although the clone stamp tool seems like a more rudimentary tool to use because it requires more precision, it’s actually one of the best alternatives if you want to keep your texture intact and avoid altering pixels that don’t need to be touched.
In the video above, Noble shows how she uses blending modes darken and lighten, as well as how she sets up her clone stamp tool settings to retain as much of the original image as possible. Note that she uses the blending modes of the tool and works on a duplicate layer of the background, but you could work the same way on two empty layers and change their blending modes – one to darken and the other one to lighten. Working on a single duplicate layer has its advantages just as much as working on two empty layers. So be sure to try both and find what works best for you.
[via Zoë Noble]


Useful. Thank you.
Very good tips. I use SO much clone stamp ahh!