Mastering Lightroom's sliders is crucial for photographers aiming to elevate their image editing skills to produce the best results, and it starts with understanding the nuanced differences between sliders like Clarity, Texture, and Dehaze. This helpful video tutorial will show you everything you need to know.
Coming to you from Park Cameras, this instructive video dives into the essential sliders within Adobe Lightroom, offering a detailed comparison between Clarity, Texture, and Dehaze. It explains how each slider affects an image, with a special focus on midtones for Clarity, detail enhancement for Texture, and atmospheric correction for Dehaze. Although the sliders might often seem similar in their effects, they have different use cases, and it's worth knowing when and how to use each of them.
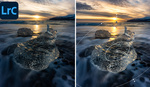
The importance of these sliders cannot be overstated, especially when dealing with landscapes, portraits, or any subjects that require a delicate balance between sharpness and softness. For instance, Clarity's impact on midtones can dramatically enhance texture in landscapes, while being less suited for skin tones in portraits due to its tendency to overemphasize texture and contrast. On the other hand, the Texture slider, being a relatively newer addition, offers a subtler approach to detail enhancement, making it more versatile across different genres. Consider every photo you edit individually and don't just apply a one-size-fits-all approach, as every images requires its own edits. Check out the video above for the full rundown.

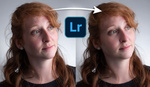
Good job. Very nice explanation and good examples, although a zoom in on the model’s face would have been better to see the results. Please can the terrible music.