Adobe released version 11 of Lightroom a little over a month ago and with it came a lot of new features. In this part of the guide, we'll go over the new sky selection tool, how to apply color or luminance masks, and how to use intersections.
The first part of this guide covered Lightroom's new masking interface along with how to use radial and linear masks which I highly recommend if you're still new to Lightroom. I think many seasoned photographers who actively use Lightroom would agree that masking is one of the most powerful tools the program has to offer. It gives a lot of creative freedom in your edits and unlike Photoshop, those edits can be quickly copied to multiple photos while causing no destruction to your original image.
A lot of what I'll cover today already existed in previous versions of Lightroom but they might have been implemented in a different way. The addition of sky and subject selection is brand new which provides a great tool to use in your future or even past edits so let's start there!
Sky/Subject Selection
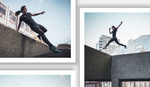
As a landscape photographer, I've had a lot of trouble with the subject selection tool and won't be covering it within this guide. That being said, there isn't much to cover as you cannot do anything to control or change the subject selection. Thus if you use it and it selects your subject correctly, great! If it doesn't then it's basically useless for that particular photo. I'm hoping that a future release allows you to guide Lightroom in a general direction on where your subject might be. That would have been great for the pieces of ice that I'd consider the main subject in many of my images throughout this guide.


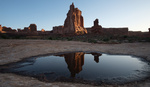
With that out of the way let's talk about sky selection. You won't want to use this feature every time you need to edit your sky, but it will be something that becomes a normal part of your workflow. For example, in part one of this guide, I used a gradient mask rather than the sky selection because it had a more natural result for my image. You'll notice in the above images comparing the sky selection mask to the gradient mask how much the mountains dull when using a gradient mask. These are using the same exact settings and my gradient is applied in the most natural way possible. To me, this is a huge benefit of the sky selection mask. Maybe this is the most obvious use case for the new tool but subtle differences like this are a very welcome change.
Inverting the Sky Selection Tool
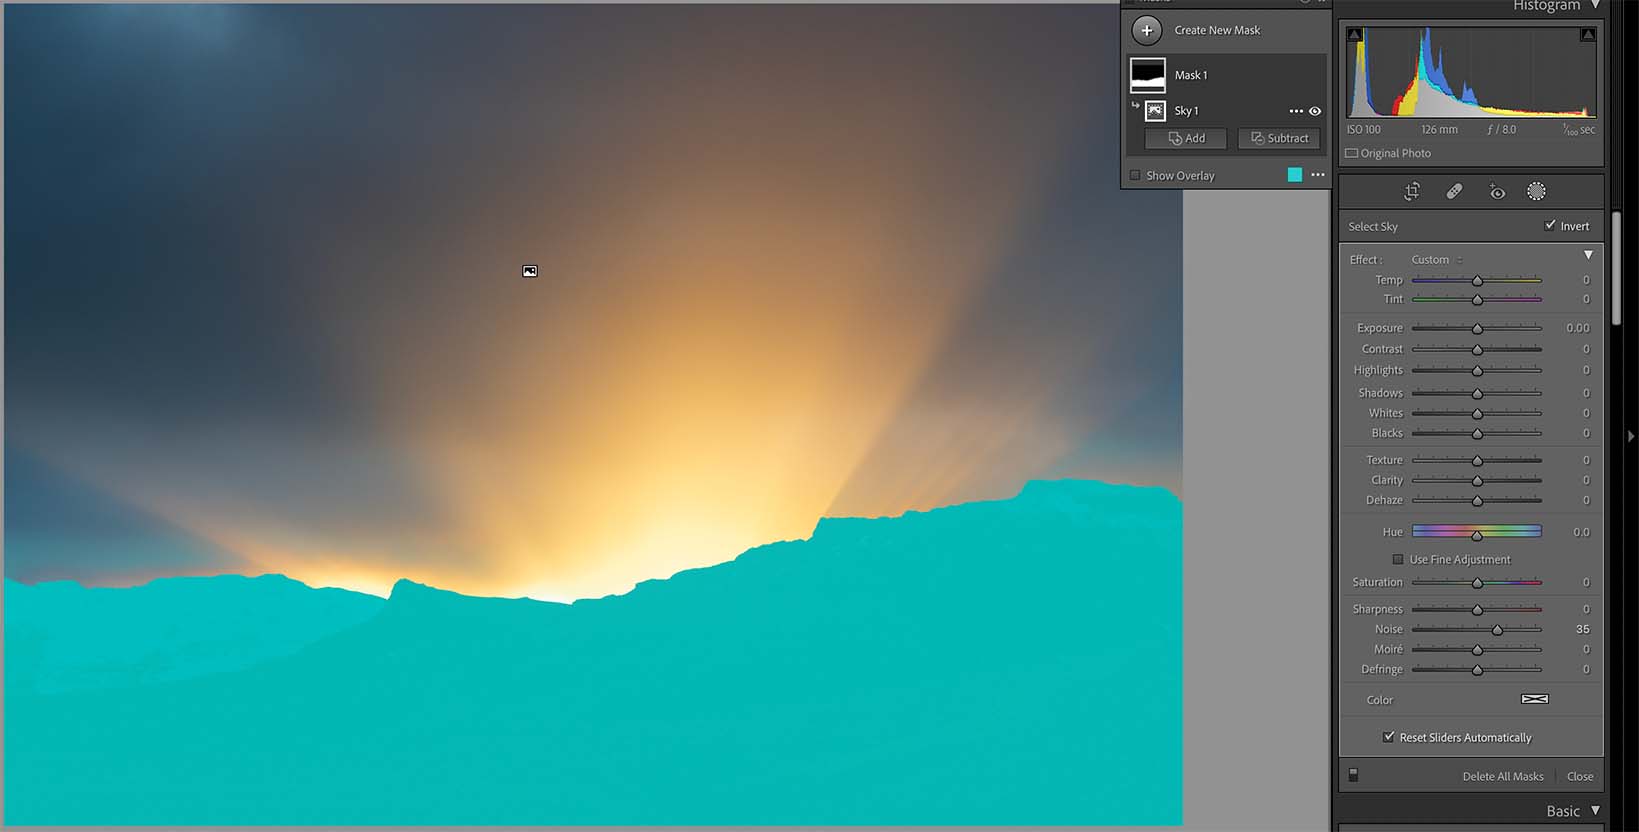
What if we wanted to use the sky selection to adjust everything but the sky? Using the invert button after making a sky selection allows us to do this. You can find the invert selection at the top of your effect adjustments. This is really useful in the example above because my original image was exposed for the sky meaning my foreground is completely underexposed.


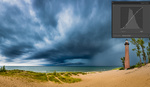
Complicated skylines have always been an issue for gradient filters and typically required working in Photoshop to adjust. As long as your skyline isn't full of foliage, you should have decent results with the sky selection tool. The above edit would not have been possible using a gradient mask. Something you should always check when using the tool is to zoom into 200-300% where the mask transitions from the sky to the middle ground and make sure there is no "haloing" or obvious transitional issues. If you push your edits too far or if the transition in the mask isn't perfect these will absolutely show up in your edits.
Color/Luminance Masks and Intersections
If you're following along by watching the video, for this part I'll be using the same exact image and edit from the video but I will not be using the black and white version to explain color masking as it's too challenging to follow in text.
Add a Color Range Mask
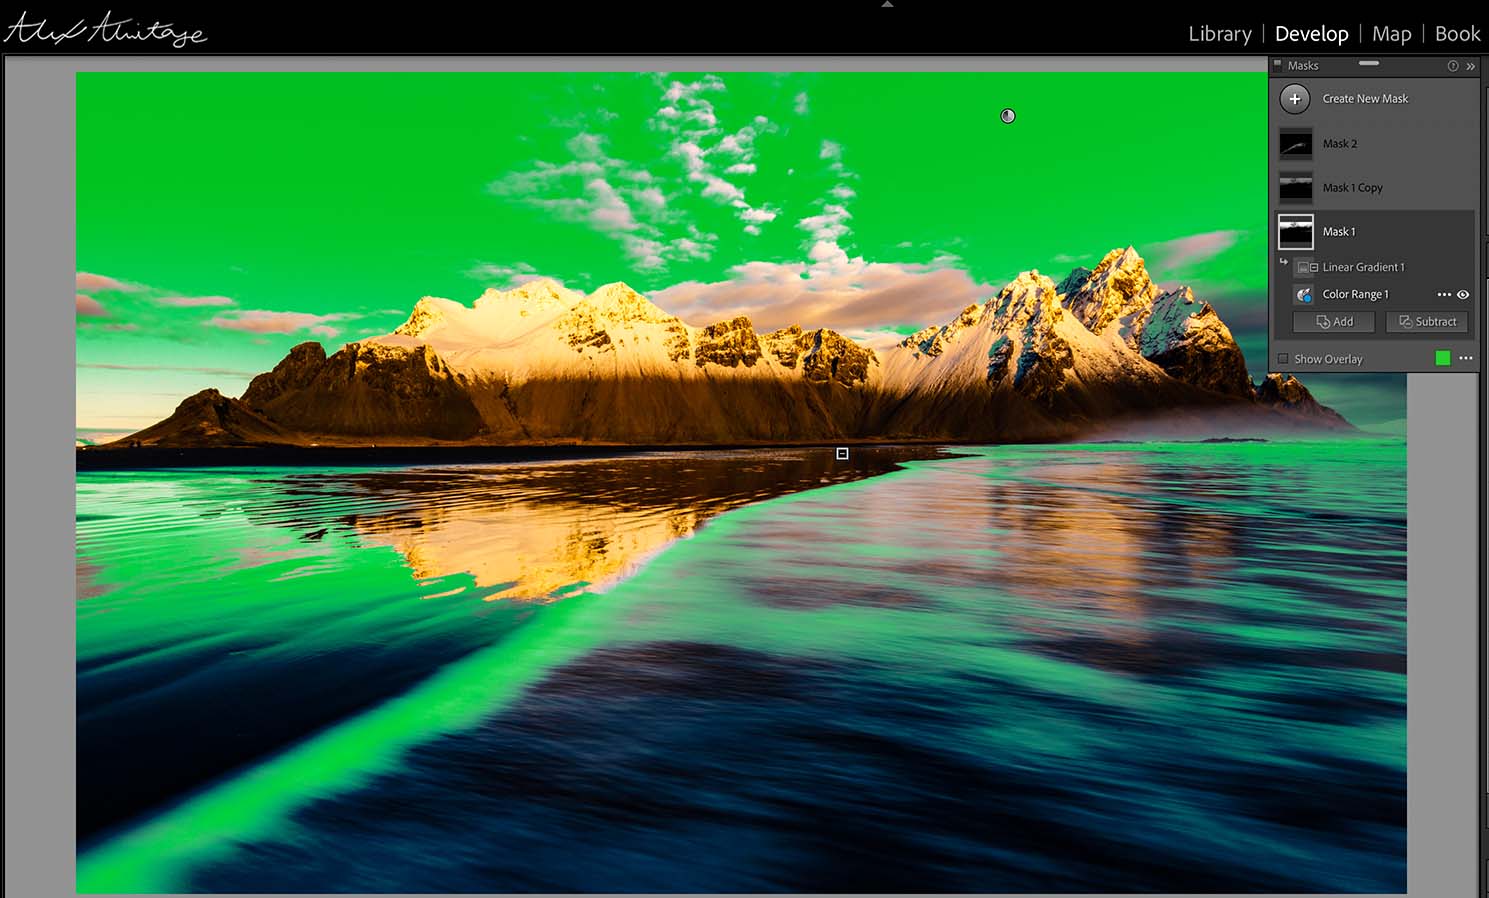
Both color and range masks existed in previous versions of Lightroom but were handled within the brush/gradient/radial masks. Now when you add them they will apply to the whole image unless you add intersections or subtractions. Let's start with the above example by creating a color range mask and selecting the blue sky. This is a great starting point but we don't want this adjustment to change any of the waves in the foreground. Also, notice if we had used the sky selection mask it would affect our clouds which we also don't want.
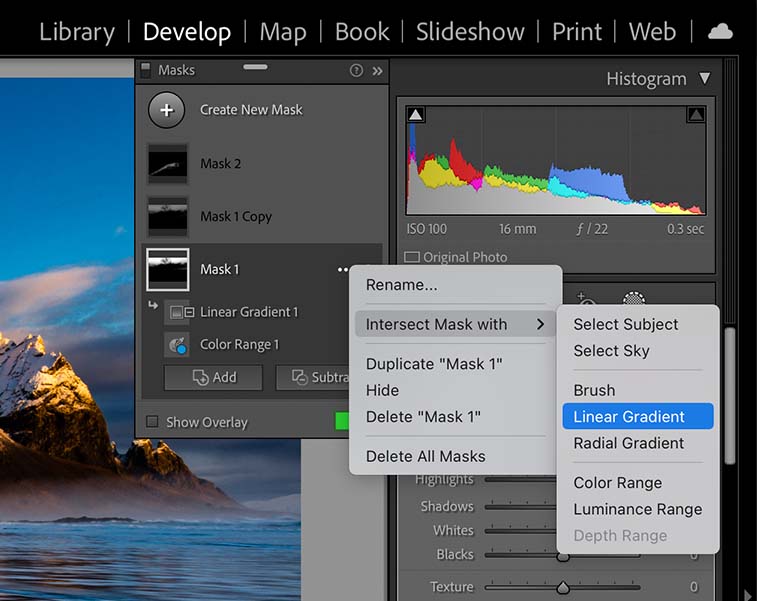
Adding an Intersection Mask (Hold "Alt")
This is where we'll use intersections (or subtractions). By clicking the "..." icon next to your mask (or you can hold alt on your keyboard and add/subtract will change to intersection) you can select what type of intersection you want, in our case we'll use a linear gradient.


Intersections will cause the masks to only apply where the two masks intersect. This means when we apply our linear gradient we want it to affect all of the sky, thus removing the bottom half of the image from the selection. The left image above is the gradient mask intersection and the right image is the result of the two masks intersected. You can do this exactly the same way if you used the "subtract" tool and selected a linear gradient to be applied to the entire bottom half of the image to subtract the gradient from the selection. The result will be exactly the same!
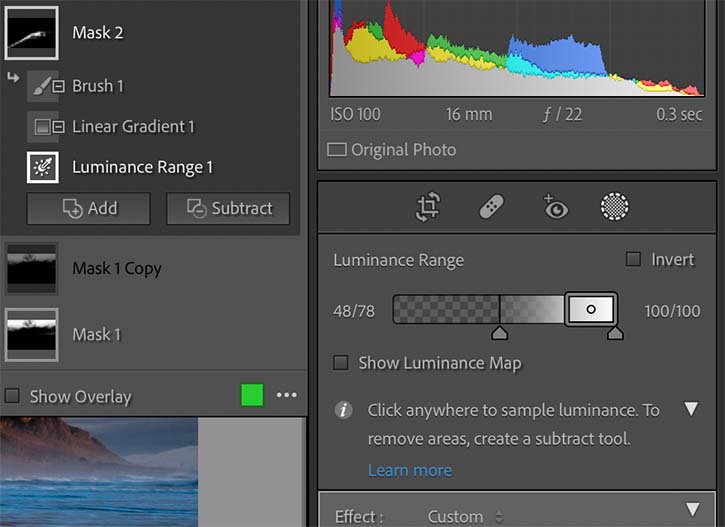
Luminance Mask Interface
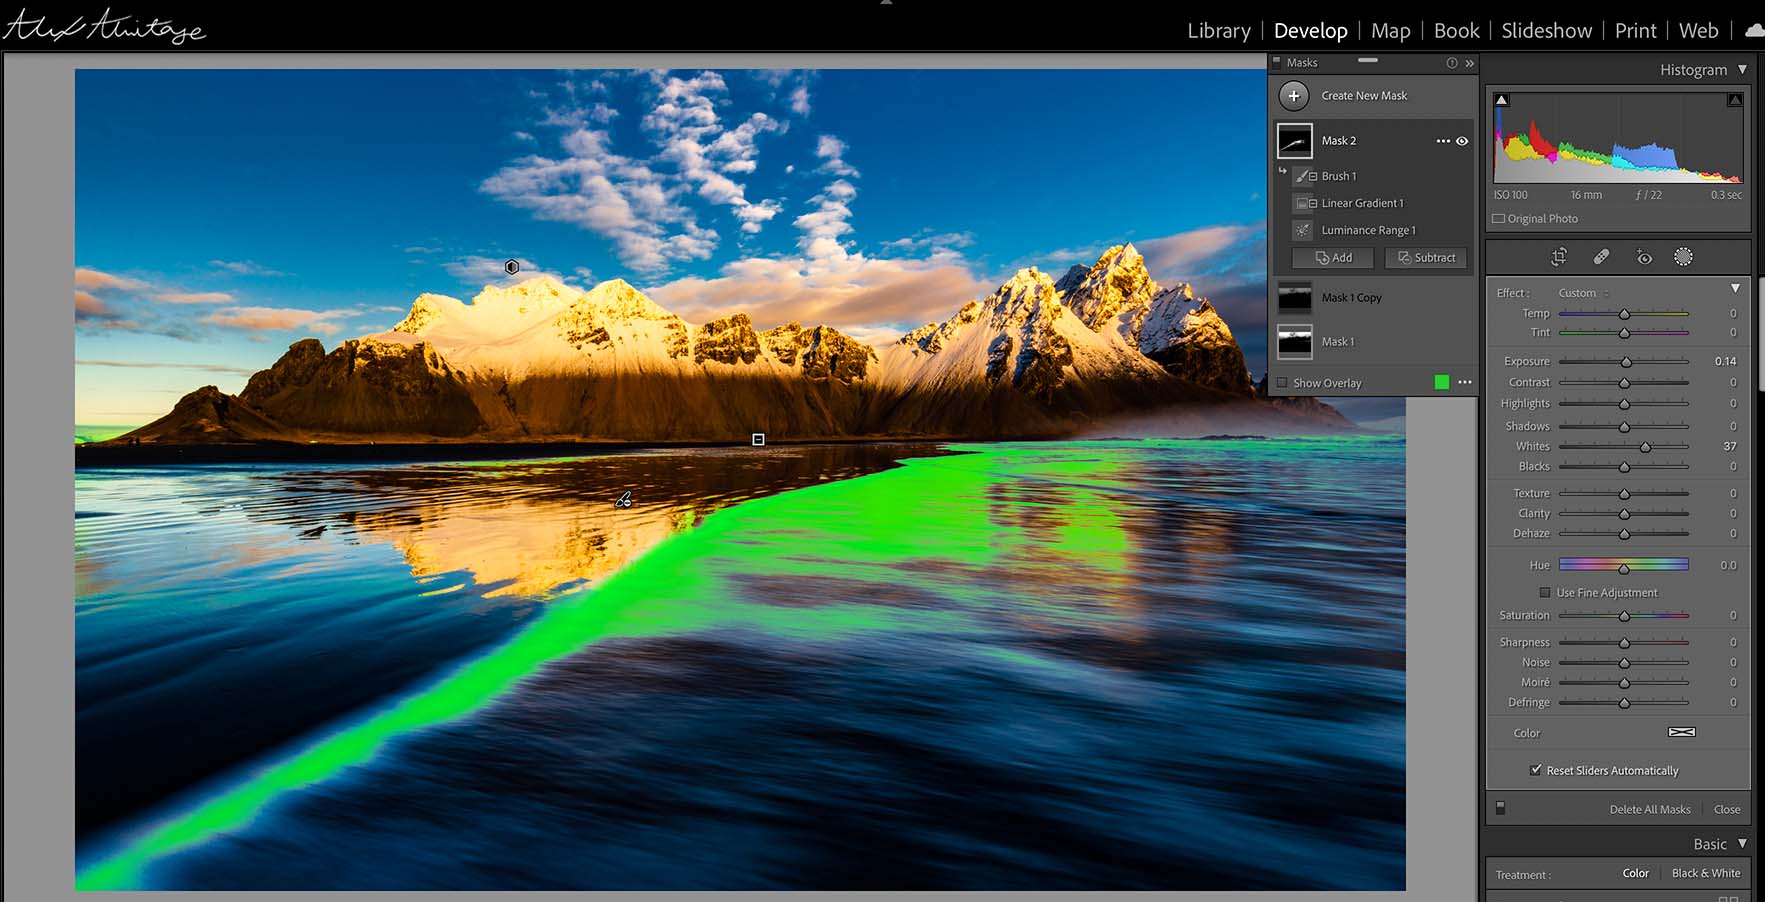
The luminance mask works in the exact same way except instead of selecting a color, you select a luminance value. For this part, I want to brighten the line of white in the waves to make them stand out more. I'll start by adding a luminance mask and selecting the white of the waves. You'll notice this bar will appear to tell you exactly what values you are selecting with the dropper tool. Adjusting the bolded outer line changes what luminance values you want to select while the bottom arrows adjust how much feather you want between your selection.


Just like the previous color range, I'll add an intersecting gradient mask so that I'm not affecting any of the mountains. The left image is the luminance mask and the right image is the gradient mask being intersected with the luminance mask.
Luminance Mask Intersected with a Gradient Mask
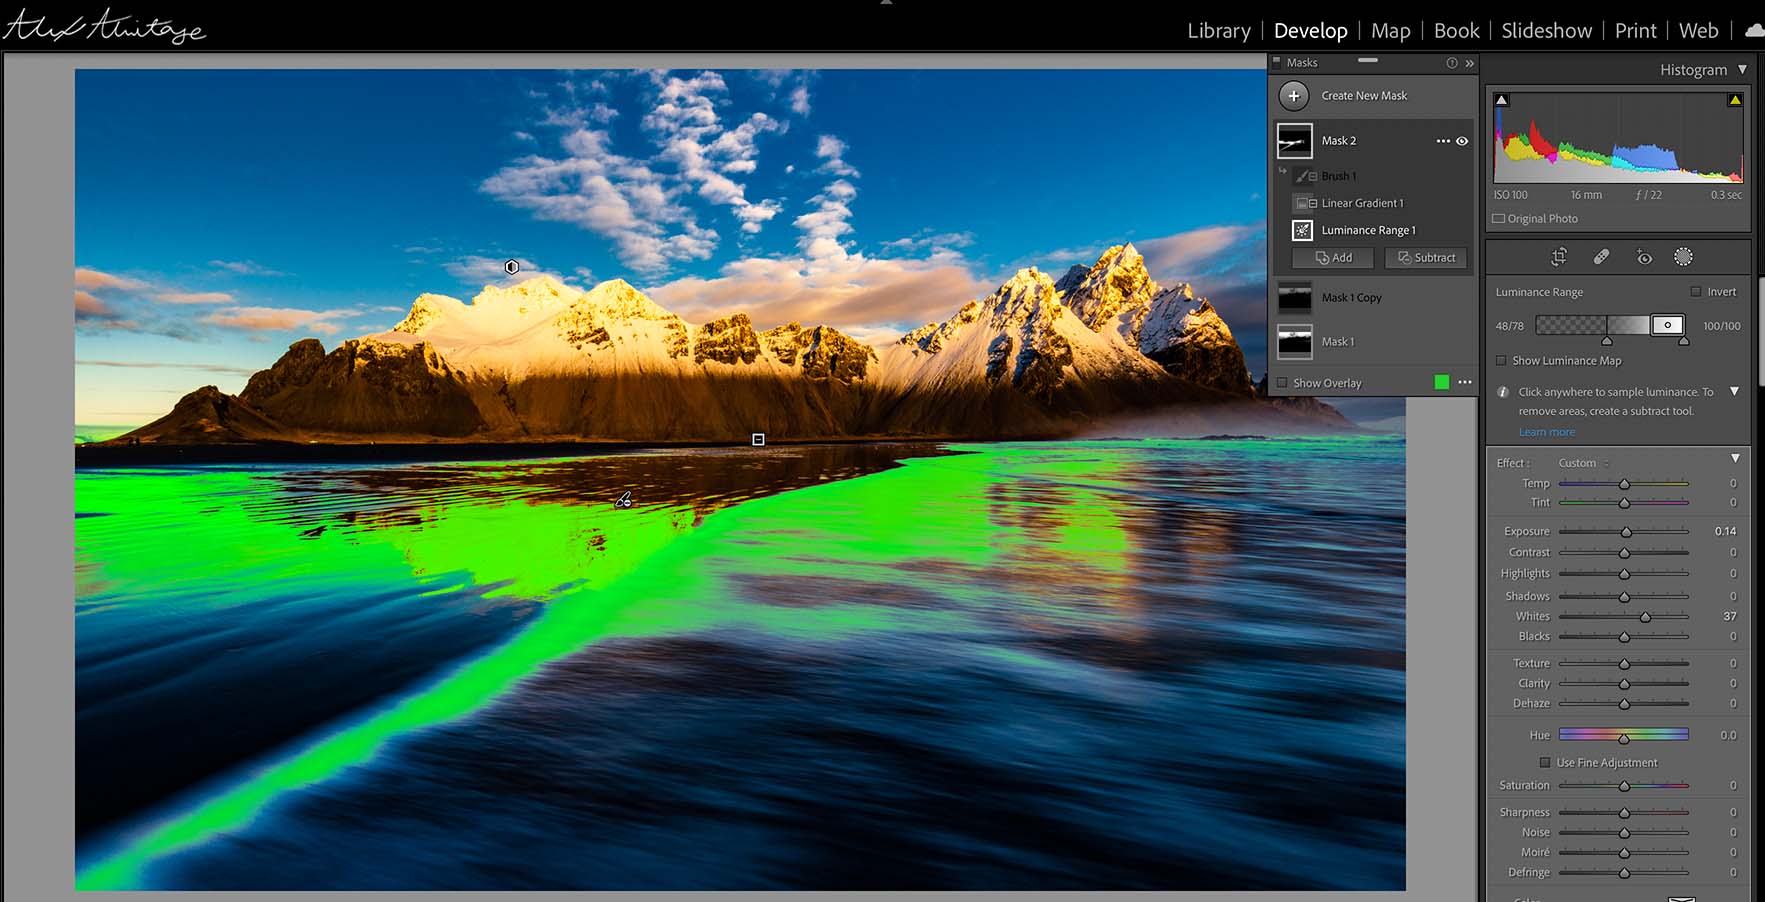
The result is the mask above but I don't want to brighten the reflection of the mountains otherwise it draws too much attention. Not a problem, we can just add a subtraction brush mask by selecting subtract > brush within our mask. Once you do that, any brush effects you apply will remove those parts of the mask from your luminance mask.

Above you can see our applied brush mask and the final luminance mask used in the image. Remember that anywhere the brush mask is applied it's actually subtracting from the overall mask. You could do this in reverse by adding an intersecting brush mask and only painting in the areas that you want to include.


Now that you've seen the entire guide in color, here is the before and after of only the masking edits in the intended final black & white version.
Conclusion


I used nearly every masking tool discussed throughout this guide very subtlety in the above before and after. A great reminder that just because the tools do powerful things doesn't mean images have to be pushed to their limits. Sometimes adding changes incrementally creates the most natural edits. Think of it like you're painting on a blank canvas continually adding new layers of paint to build on the ones below it.
I hope I covered everything you could possibly want to know about the new (and old) masking features of Lightroom version 11. There's a lot of creative ways to use these masks that I couldn't cover within this guide but this should get your feet wet enough to start thinking of new ways you can use them for your own images. As always thanks for reading and let me know if I missed anything in the comments!


Exceptionally well-done post. Including the text along with the video is nice, as some of us get more out of reading text (sometimes several times!) to understand what you are doing. This was the first time someone gave me a good demonstration of the "intersection mask". Many thanks!
Hey thanks so much Roger and I'm glad it was helpful!