
Recently Adobe released Lightroom version 11 and with it came a completely revamped interface for masking. After a month of real-world use, this guide will help you get up to speed on anything you could possibly want to know about masking in Lightroom for 2022.
If you’ve had trouble adjusting to the new interface or you haven’t done the update because you’re avoiding change, I have good news for you. The majority of the features already existed in previous versions of Lightroom, they just have a new face to them. At first, I wasn’t in love with the changes but as I’ve given myself more time and put in the effort to adapt, I find the new layout to be an improvement on previous versions.
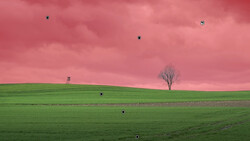
The biggest additions are the sky and subject selections that were ported over from Photoshop. As a landscape photographer, I won’t be covering the subject selection very much but I will say it’s been very subpar in my experience. The sky selection, which we will get to more in-depth in part 2 of this article, has been great in practice thus far.
I'm breaking this guide into two parts. This first part will cover the new interface and introduce how to use Radial and Linear Gradients. Part two will cover the new sky selection tool, color/range masks, and how to use intersections. If you're still new to masking in Lightroom then I'd highly recommend reading this part.
Interface Revamp
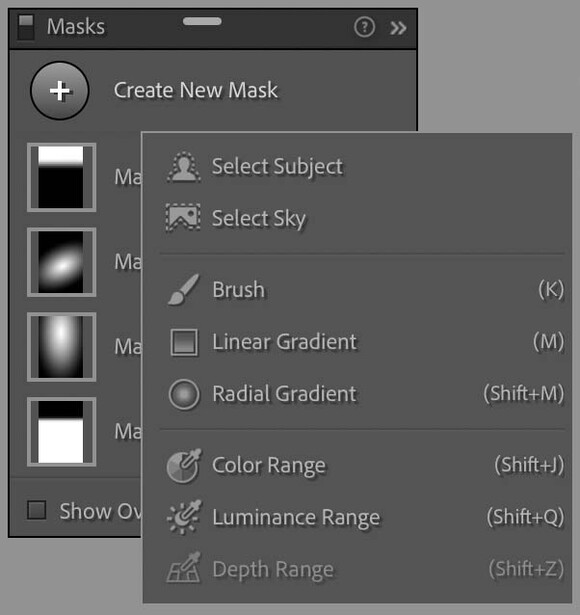
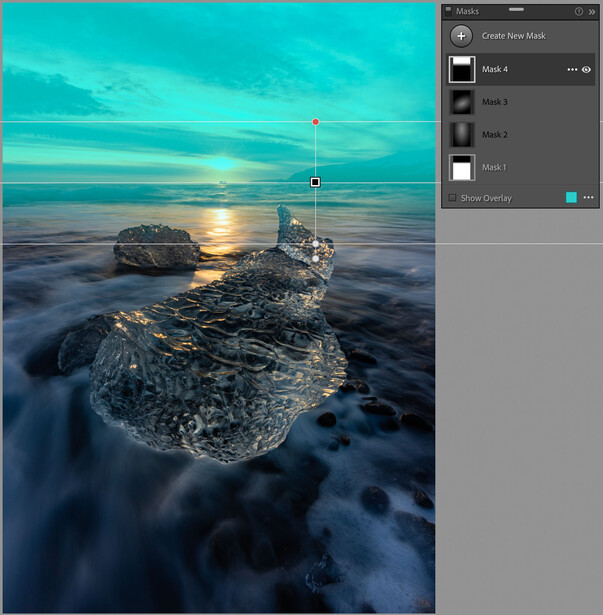
The biggest change in this version of Lightroom is the interface for masking. Previously all the masks were listed individually as separate tools, now they are housed in their own panel similar to the layers panel in Photoshop or Capture One's adjustment panel. This is a much-needed change, previously you had no way of seeing what masks were doing or where they were within your image unless you could find their "dot" to adjust them. This was painfully frustrating when revisiting an old edit or just trying to find effects you might have created off-screen. If you’re familiar with masking from the previous version you’ll notice that the range masks have been separated from the other masking tools, something we’ll cover in part two.
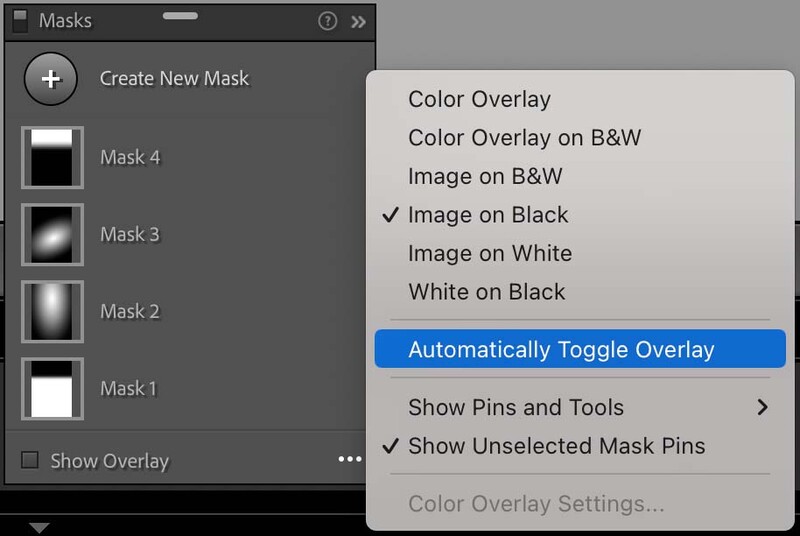
One change I immediately had to turn off was the mask overlay automatically toggling anytime I selected a mask or reset a setting in a mask. My workflow involves changing a value on a slider and resetting it to see exactly how much I want to change something. With this setting on it would enable the overlay every time I reset the setting, which was quite annoying.
Another setting you might want to change for your personal preference is how the mask overlay (Letter “O” on your keyboard) displays. The default is to use a color, noting you can change the color to whatever you like. Personally, I use “Image on Black” or “Image on White,” this is completely up to you but I’d highly recommend trying out which one works for you. For these tutorials, I'll be using a teal color overlay to make it easier to understand.
Radial Gradient, Linear Gradient, and Brushes
These are functionally exactly the same as they were in previous versions of Lightroom, with the only difference being how to add range masks which will be covered in part 2. They did add the ability to control and see the amount of feather you can adjust right in the interface which is a welcomed addition but doesn’t change any of the functionality of the tools. All three of these tools have the same controls and simply apply the settings in different ways, thus if you learn how to use one of them you’ve essentially learned how to use all of them. Let's go over a few examples to give you ideas on how you can use these tools in your photos.
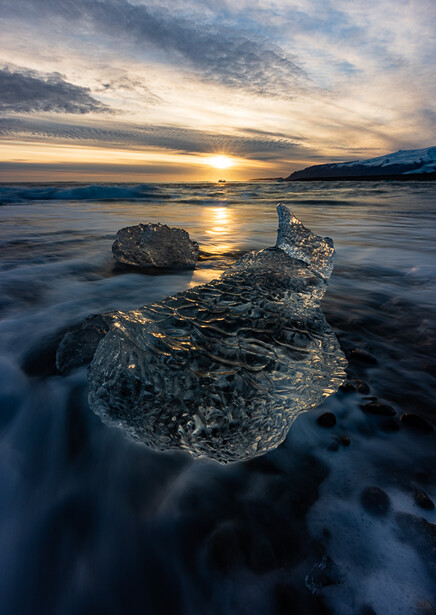
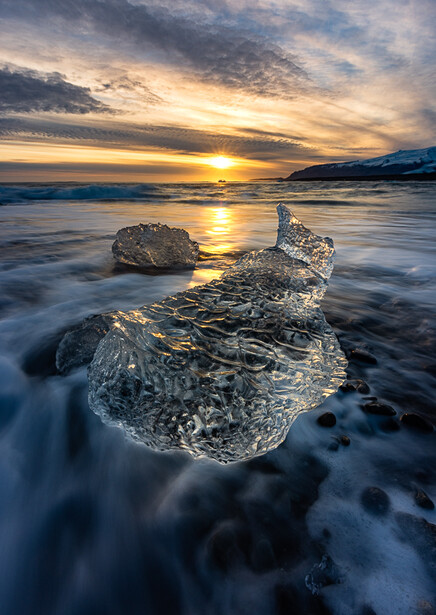
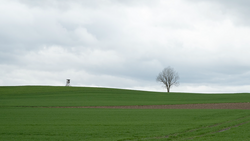
The linear gradient was originally created to mimic what a graduated filter does in the field. In the photo above I want to brighten my foreground and darken the sky slightly. To do this we are going to add two linear gradients.
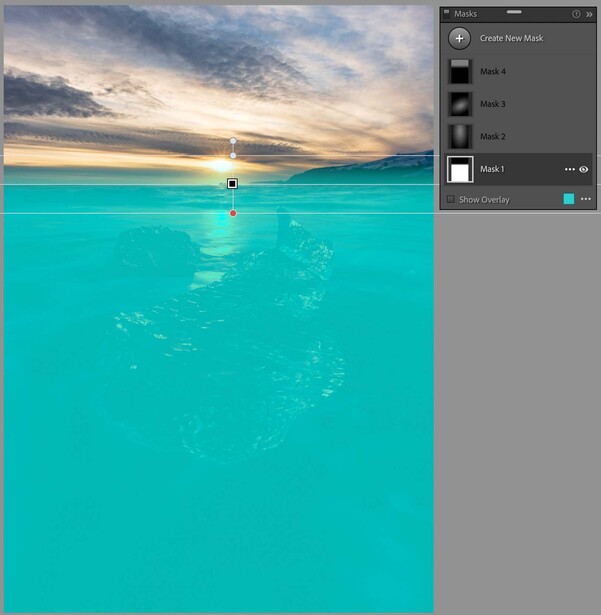
Select “Create New Mask” and select “Linear Gradient,” I highly recommend learning the keyboard shortcut “M” for the Linear Gradient and “Shift+M” for the Radial Gradient. To apply the mask to the bottom of the image, drag your cursor from the bottom to the top (note you can hold “Shift” to create perfectly horizontal or vertical gradients). The distance you create between the two lines is how much feather you want in your transition. Once this is added, I increased my exposure and shadows to brighten up the bottom half of the image subtlety.
Next, we want to darken the sky and create a little more contrast. Note we are not using the new Sky selection tool even though it would be sufficient. I prefer to use the Linear Gradient unless my horizon line or sky area is more complex, something I will cover in part two of this tutorial with examples. You’ll add this Linear Gradient (M) exactly the same way except dragging from top to bottom, you might want to use a larger or smaller feather than I do. Once added I decreased the highlights and increased the dehaze.
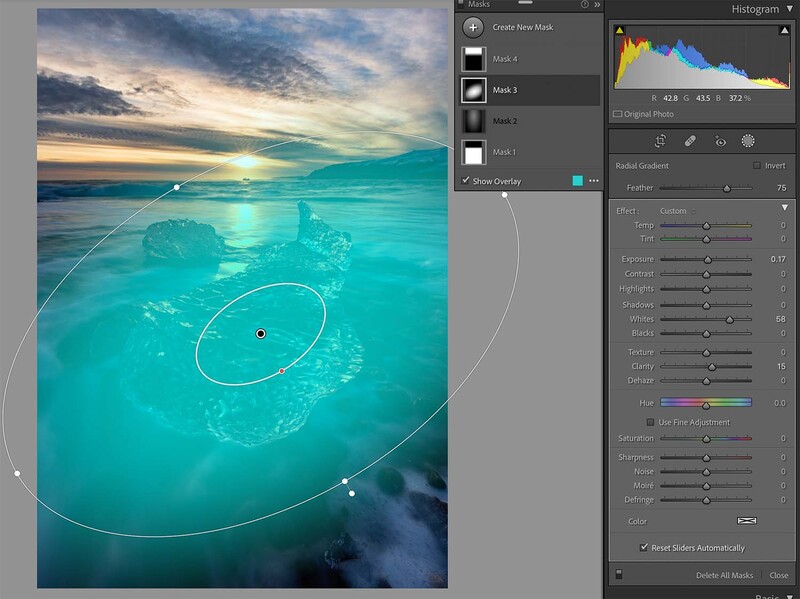
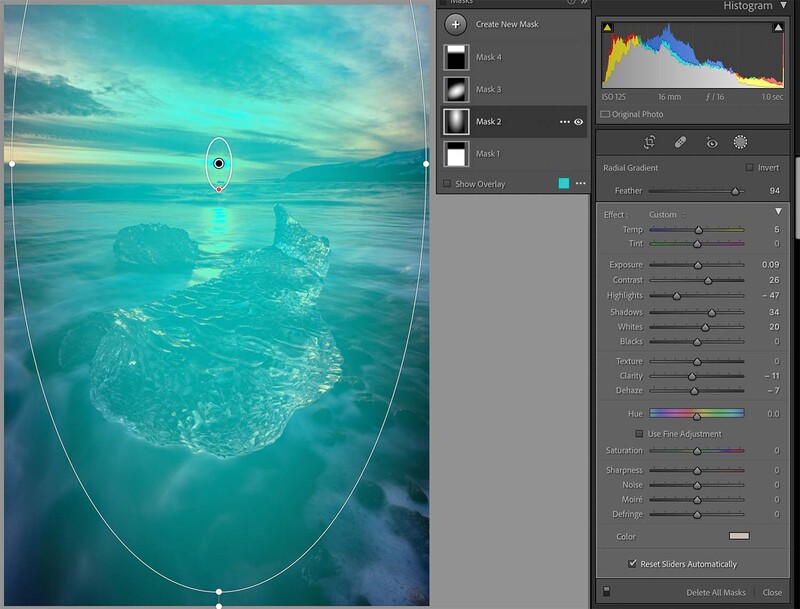
The next thing I want to do is brighten up the piece of glacier ice that’s intended to be the main focus of the image. We’ll use the Radial Gradient (Shift+M) and drag it to be slightly oversized on the ice. You should see two circles appear with a red dot. That second circle and red dot is a new addition in this version of Lightroom that allows you to change the feather in the graphical interface rather than with just a slider like in previous versions. Once you’ve got your gradient set, adjust your settings accordingly. I brought up the exposure, whites, and increased the clarity for the effect I wanted.
For this last part, the objective is to create more glow in the image. Once again we’ll add another Radial Gradient (Shift+M) and shape it to take up the majority of the image, feathering the small circle to be centered on the sun. I adjusted quite a few settings for this: increasing the temperature to warm it up, exposure, contrast, reducing highlights, shadows, whites, reducing clarity, and reducing dehaze. Some of these should be self-explanatory but a few need explanation. The reason the majority of the sliders are increasing the overall brightness yet I’m decreasing the highlights is to prevent the brightest spots from clipping. Reducing both the clarity and dehaze also creates a slight glow throughout the image.
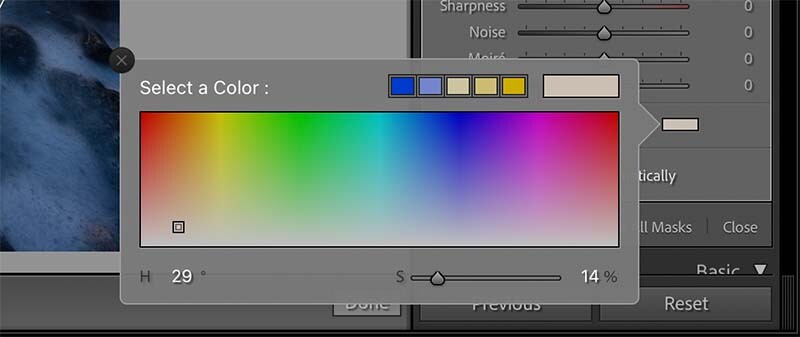
The last thing I did with this filter was add a slight tone saturation. Basically adding a tiny bit of color to the same effect as warming up the temperature, the difference being that this will add color to the areas where we are clipping whites whereas changing the color temperature will not.
For this image, I didn't use the Brush tool but it functions in the exact same way as these masks, but is simply applied like a brush. I will cover using a brush in a more complex example in part 2 of this guide.
More Resources
The above example barely scratched the surface of the power and editing you can accomplish with gradients in Lightroom. If you want a few more ideas you can check out a few other articles I’ve written in the past:
- Incredible Results Using Lightroom's Radial Filters
- Create Dramatic Light in Your Images Using Radial Filters
- Lightroom's Range Masks Will Absolutely Improve Your Photography Editing
While those will use the older interface, the concept and execution are exactly the same. Next week we’ll go over intersections which is the new way to implement color/range masks within your other masks. Along with that, we’ll cover the AI selection tools and how to use the brush within your masks.
As always thanks for reading and be on the lookout for part two!

Join the Fstoppers community for free
-
Post comments and join in the discussions
-
Browse the site ad-free
-
Share your work and get featured in the community
-
Compete in the photo contests for fun and prizes
2 Comments
Call me cynical but why is there a noticeable increase in articles about Lightroom around the time of Capture One releasing their new version.
Adobe Max happened around the end of October. Photographers have had time to explore the new features, apply them to their regular photoshoots, and come up with interesting ways to use the tools well, and not just show you a preview from a pre-release version.
Capture One 22 was released just days ago. It will be a while before photographers are intimate with its new features.