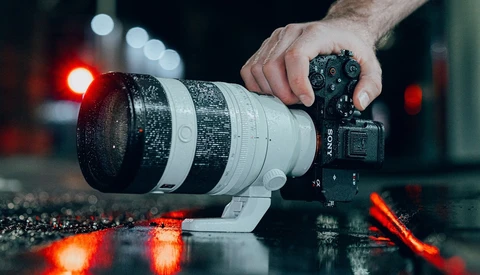
Why "Learn Manual First" Is Bad Advice for New Camera Owners
Someone was offered a free camera with one condition attached: they had to commit to learning and using manual exposure. Was it worth it?
After years of evolving as a photographer and filmmaker, I realized my website was cluttered and was not landing paid client work. With guidance from a marketing strategist, I honed my messaging and focused on how I help clients. Let’s discover how we can transform our site into a compelling platform that resonates with our audience.
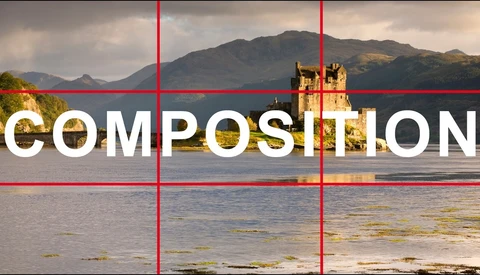
Ask ten photographers what makes a good photograph and you'll get ten different answers, and the person asking might have given a completely different reply three decades earlier. That gap between the beginner's checklist and the experienced eye is where the real lessons hide.
Most woodland advice tells you to wait for flat, overcast light. Summer dawn breaks that rule, handing you a narrow window where low, dynamic sun arcs through the canopy and rewards anyone willing to lose sleep over it.
You take a photo of a beautiful sky, glance at the back of the camera, and it looks fine. Later, on your computer, the sky is a flat sheet of pure white with no clouds, no gradient, nothing to recover. That is clipping, and it is one of the most common ways a promising shot quietly dies. The good news is that clipping is easy to understand, easy to spot in the field once you know where to look, and almost always avoidable. Learning to catch it before you press the shutter is one of the highest-value habits a photographer can build.
Warm highlights, cool shadows, and a foreground green cast that has to go: this is the color puzzle behind most sunset landscapes. Getting those tones to feel intentional rather than accidental is the difference between a flat raw file and an image people stop scrolling to look at.
If you have spent any time reading about camera settings, you have heard the advice to keep your ISO as low as possible for the cleanest image. The lowest normal ISO setting your sensor is built around has a name: base ISO. Understanding what it is, and why files shot there look better than files shot anywhere else, is one of those small pieces of knowledge that quietly improves every photo you take. It explains why your daylight shots look so crisp, why your dim indoor shots get grainy, and when it is worth chasing the lowest number versus letting it climb.
Flat light gets a bad reputation. The moment the sky turns from blue to a sheet of gray cloud, a lot of photographers pack up, assuming the good light is gone for the day. That instinct is backward. Soft, flat, overcast light is one of the most forgiving and flattering kinds of natural light there is, and the only reason it disappoints people is that they treat it as a finished product rather than a starting point. Learn a few simple ways to shape it, and a dull gray day becomes some of the easiest portrait light you will ever work with. This is about natural light specifically: no strobes, no flash, just the daylight you already have and a couple of inexpensive tools to bend it your way.
Ask any printer to be cheap, good at black and white, and simple to use, and you're chasing something that doesn't exist. Anyone who has tried to pull a truly neutral monochrome print off an inkjet knows the frustration of watching subtle color casts creep into what should be clean gray.
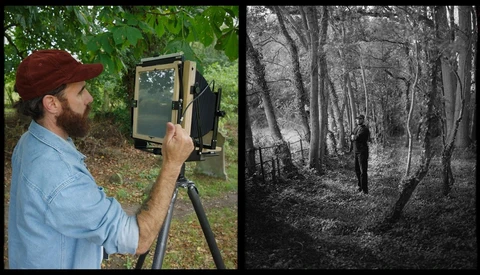
Landscape photography in the summer can be frustrating, especially when shooting woodlands and forests. The forest is thick with green foliage, and parts of the bright blue sky shine through the canopy, creating hotspots in your image. But surely landscape photographers don't stow their cameras away for six months every year, so there must be an alternative?
Photoshop's Camera Raw keeps getting features that Lightroom users have been waiting years for, and the gap between the two is worth watching. If you organize in one program and edit in another, the question of whether you should mix them has a clear answer.
The pixel stretch effect looks like something out of a high-end ad campaign, yet it comes down to a handful of clicks in Photoshop. If you've ever wanted to add motion, energy, or a graphic edge to a portrait or product shot, this technique gets you there in minutes.
Most photography advice tells you to learn more, shoot in manual, and chase the perfect trip. Doing the opposite of all three might improve your work faster than any tutorial ever could.
A headshot has one job: to make a person look like the best, most confident version of themselves, and to do it in the fraction of a second a viewer spends forming a first impression. That is a narrow target, and it is easy to miss. What helps is that these failures repeat. Most weak headshots are not ruined by the camera or the location but by the same handful of mistakes, almost all of them fixable once you know what to look for. Here are ten that quietly kill a headshot, each with the fix.
The single biggest mistake in real estate photography has nothing to do with your camera or your marketing budget. Getting good before getting busy separates a business that lasts from one that burns out fast.
A single sunset photo, edited three different ways in the same frame, is the kind of thing that changes how you think about white balance. The trick lies in treating the sky and the water as separate zones instead of pushing one warm slider across the whole image.
A portfolio is not a gallery of your favorite photos. It is a sales tool, and its only job is to answer one question in a potential client's mind: can this person deliver the specific thing I need, done well? Most portfolios fail at that job not because the photography is bad, but because of a handful of avoidable mistakes in how the work is chosen, ordered, and presented. A viewer forms an impression in well under a second and decides whether to keep looking or move on within a few images. Here are eleven mistakes that quietly cost you that decision, each with a fix.
Your best portrait gear does nothing if the person sitting in front of the lens looks stiff and posed. That truth reshapes how you approach every shoot, and it costs nothing to apply.
If you open the main compartment of your backpack during the day, your packing system is working against you. Every zipper you fumble with, every sack you dig through, and every rain cover you peel off burns energy you could spend covering ground.
You stand in front of something stunning, a valley flooded with evening light, a city skyline at dusk, and you press the shutter sure you have captured it. Then you look at the file and the magic is gone. The colors are flatter, the sky is blown out or the ground is a muddy mess, the mountain that loomed over you looks like a small bump, and the whole thing feels ordinary. The instinct is to blame the camera, or your skill, or to start shopping for a better lens. Usually none of those is the real culprit. The real explanation is that your eyes and brain were never showing you the scene the way a camera records it, and once you understand the gap between the two, you can start closing it on purpose.
A flat, cold panorama of a cloud over farmland becomes a dark, dramatic storm scene using nothing but contrast adjustments. The difference comes down to knowing which sliders control contrast globally and which ones do it locally, then applying each in the right place.
Landscape photography looks like it should be easy. You find a beautiful place, point the camera at it, and press the shutter. Then you get home, look at the files, and the magic that was right in front of you has somehow drained out of the picture. Almost always, the cause is not your gear or the location. It is a handful of specific, fixable habits that nearly every beginner falls into. Here are 11 of the most common, each with a fix you can apply the very next time you are out.
Most slow shutter advice sends you straight to a tripod, a waterfall, and a 30-second exposure. There's a whole range of shutter speeds you can shoot handheld that keeps part of your frame sharp while letting motion streak through it.
There is a belief that follows almost every beginner around: that real photographers shoot in manual mode, and that the semi-automatic modes on the dial are a kind of training-wheels embarrassment you are supposed to outgrow as fast as possible. The aperture priority setting even gets the dismissive nickname "A for amateur." It is one of the most persistent myths in photography, and it is wrong. Plenty of working professionals shoot in aperture priority every day and have for decades. The mode you use says nothing about whether you are a pro. What matters is whether you understand what the camera is doing and why.
Editorial work once brought in 75% of one photographer's income. Today it accounts for about 5%, and the shift wasn't forced on him by failure.
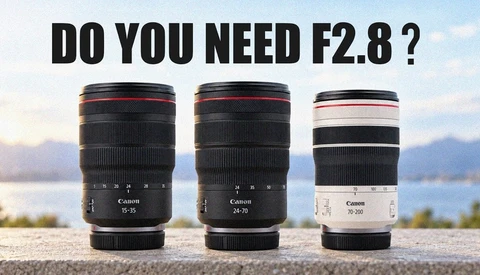
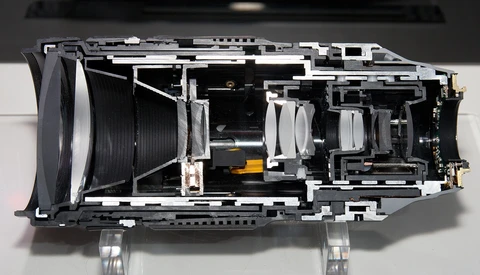
You may have noticed that photography lenses are marked in f-numbers, f/1.4, f/2.8, f/8, while cinema lenses are marked in T-numbers, T1.5, T2.9, and wondered whether they mean the same thing. They are closely related, they sit in the same spots on the aperture ring, and a T-number looks just like an f-number with a different letter in front. But they measure two genuinely different things, and the gap between them tells you something real about how lenses work and why a cinematographer cares about it while a portrait photographer mostly does not.
Printing the same image twice with two different profiles and then comparing them under controlled lighting is one of the most effective ways to sharpen your eye for print quality. Most people look at a finished print and react to it instinctively, but that habit makes it nearly impossible to diagnose what's actually working or failing.
Lightroom's masking tools are powerful, but there are times when a sky mask or landscape mask alone won't isolate exactly what you need. The intersect tool lets you combine two masks so only their overlapping area is targeted, giving you precise control that add and subtract alone can't match.
Almost every camera has a shutter, the mechanism that controls how long light hits the sensor, but not all shutters work the same way. Among mechanical shutters, there are two main designs, the leaf shutter and the focal plane shutter, and the difference between them is not trivia. It determines how fast you can sync a flash, how quiet your camera is, how big and expensive your lenses get, and which kind of photography each system is best suited to. If you have ever wondered why a small fixed-lens camera can do something your big mirrorless body cannot, the shutter is often the reason. There are electronic shutter modes too, which we will come to, but the mechanical pair is where the story starts.
You come home from a trip with hundreds of images, sit down to edit, and feel nothing. It happens more than most people admit, and it usually isn't a gear problem or even a skill problem.
Window pulls are one of the most technically demanding parts of real estate photography post-processing, and getting them wrong is more obvious than most people expect. A bad blend doesn't just look overprocessed; it can make an entire interior shot read as fake, which undermines the entire purpose of the image.
You frame a landscape with a striking rock in the foreground and mountains on the horizon, you focus on the mountains because that is your subject, and when you get home the foreground rock is soft. Or you focus on the rock, and the mountains go mushy. The scene your eye saw as sharp from front to back will not cooperate. The fix is more than a century old and it is one of the most useful, and most misunderstood, ideas in landscape photography: the hyperfocal distance.
Choosing the right light is one of the most misunderstood skills in portrait photography, and most advice online focuses on the wrong things entirely. Gear and camera settings have almost nothing to do with why certain portraits feel alive while others fall flat.
Choosing between flash and continuous LED lighting is one of the more consequential decisions you'll make when building out a studio kit. The gap between the two has narrowed, but it hasn't closed, and understanding where each system breaks down in real-world conditions changes how you spend your money.
Pull focus on a video clip from a near subject to a far one and watch the edges of the frame. On many lenses, the image seems to subtly zoom in or out as the focus shifts, as if the lens is quietly inhaling and exhaling. That is focus breathing, and once you have noticed it you cannot unsee it. For photographers it is usually a footnote. For anyone shooting video, it is one of the defining differences between a photo-first lens and a lens built for video or cinema, and it explains a large part of why true cinema lenses cost what they do.
If you shoot wildlife and you've never looked at which focal lengths you actually use most, you're probably making lens decisions based on guesswork. Jan Wegener and Duade Paton did exactly that analysis, and what they found challenges some of the most common assumptions about which lenses wildlife shooters actually need.
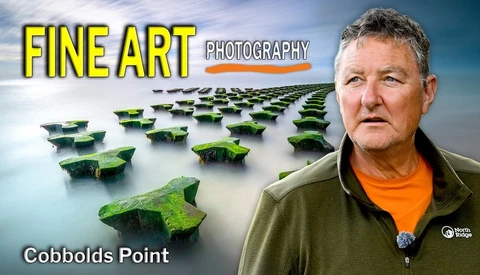
The best landscape compositions have an expiration date, and most people don't realize it until the scene is gone. Sea defenses get completed, piers collapse further into the ocean, buildings get renovated, and the shot you kept putting off simply disappears.
Bokeh is one of those words you hear constantly in photography and almost never hear defined. People use it to mean "blurry background," they use it to mean "expensive lens," and they use it as a compliment without being able to say what they are complimenting. So let us clear it up, because once you understand what bokeh actually is, you can stop chasing it blindly and start using it on purpose.
Knowing what you want to make and actually making it are two very different problems. The gap between them isn't talent or equipment; it's the mental framework you're using to approach creative work.
Stacking a polarizing filter with an ND filter on a wide angle lens creates serious vignetting issues, and that's exactly where this long exposure edit begins. Knowing how to work through that kind of technical constraint while still landing on a warm, airy, high-key result is a skill worth building.
Patience is the crucial skill that separates wildlife shots you'll actually keep from the ones you delete. No lens upgrade fixes leaving a location too early.
Most Fujifilm shooters either ignore the Grain Effect entirely or crank it to Strong/Large, decide it looks too noisy, and turn it off again. That pattern makes sense if you've never seen what the setting can actually do when used correctly.
I am, by training and inclination, a black and white photographer. My very first exposure to black and white photography, as an artful medium, was a photograph that I saw when I was in art school many years ago that was entitled "Monolith, the Face of Half Dome." At that time I was studying to become a Board Illustrator, which would have been a bored illustrator. The moment I saw that one photograph became a transformative one for me. Of course, when that happened the only option in terms of doing photography was to use film (this was way before digital was available), and my goal was to use black and white photography as my means of artistic expression.
Getting better wildlife photos doesn't require buying anything. The gap between forgettable shots and compelling ones almost always comes down to technique, not equipment.
Getting genuine, relaxed-looking images from couples at weddings has less to do with knowing the right poses than most people assume. The mental shift behind how you approach directing people is what separates stiff, uncomfortable photos from ones that look effortless.
Landscape photography has a reputation as a gear-hungry genre, and it is easy to believe you need a closet full of equipment before you can shoot a decent mountain. You do not. The genre actually rewards a small, deliberate kit more than almost any other, because you are usually on a tripod, working slowly, with time to think. This guide walks through the categories that matter, points you toward solid current options in each, and is honest about what you can skip.
As photographers, we're inundated with images all day — ads, social media, billboards. Which ones actually inform our work, and where should we be looking?
Lightroom Classic 15.4 shipped with a duplicate finder, improved AI masking, and smarter culling tools, and at least a few of these updates will change how you manage and edit images day to day. If your library has grown to tens of thousands of files, one of these features alone is worth knowing about.
Landscape photography has a bias problem. The vast majority of images flooding social media and print focus on sunsets, northern lights, and those much-visited "honeypot" locations where tripod holes wear into the ground from overuse, while whole categories of equally compelling scenes get ignored entirely.
The fastest way to make better portraits is not to buy a flash, a softbox, and three light stands. It is to learn to see and shape the light you already have. Natural light is free, it is forgiving once you understand it, and it teaches you the fundamentals that every lighting setup later builds on. This guide covers the gear, the camera settings, and the posing and light-shaping basics that get a beginner from snapshots to real portraits, all without a single strobe.