When you're looking to capture a sense of place or a cinematic feel, shooting on location isn’t always practical or affordable. Using a digital projector might be your solution to creating vivid, believable scenes without leaving your studio.
Coming to you from Lindsay Adler Photography, this straightforward video breaks down how a digital projector can instantly shift your portraits into completely different environments. Adler typically opts for clean, graphic images with seamless backgrounds, but here she explores how adding projected scenes can significantly enhance creativity. Adler uses Midjourney, an AI image-generation tool, to create highly customizable backgrounds that complement her subject's attire, resulting in cohesive, stylized images. She points out that the quality of your projector matters significantly—brightness and resolution influence the realism of the scene, recommending at least 3,000 lumens. You’ll also learn practical tips about setting the projector and managing its limitations, such as adjusting camera settings to match lower light intensity.
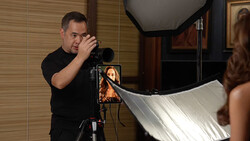
Adler carefully details her lighting approach to ensure subjects blend seamlessly into the projected environment. She emphasizes the importance of lighting consistency, particularly through rim lighting, and describes why and how she uses orange gels to unify the color palette. Adler also covers the thoughtful use of specialized modifiers like the Westcott Optical Spot, which helps achieve precision in lighting your subject's face and adds a cinematic quality. Additionally, Adler shares her decision-making process behind using strobes versus continuous lighting, weighing the pros and cons of each depending on the scenario.
Building on that foundation, Adler offers insight into critical color grading techniques that further enhance realism. She demonstrates how adjusting white balance significantly impacts the image's overall believability and atmosphere. Adler also highlights a subtle but effective editing trick: adding complementary color tints in highlights and shadows to unify the subject with the projected background, creating a cohesive visual narrative. To further elevate the cinematic feel, she employs a specialty filter—the Tiffen Black Pro Mist—that enhances highlights with a subtle glow, adding depth and dimension to the scene.
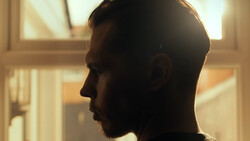
Adler's method is not just technical; it's creative, encouraging you to consider expression and movement to strengthen the cinematic illusion. The final images clearly demonstrate the effectiveness of her detailed approach, showcasing vibrant and dramatic results you might otherwise struggle to achieve without extensive logistical planning. Adler underscores how projecting backgrounds not only simplifies your workflow but opens opportunities to experiment creatively within controlled conditions. Check out the video above for the full rundown from Adler.
If you would like to continue learning about how to light a portrait, be sure to check out "Illuminating The Face: Lighting for Headshots and Portraits With Peter Hurley!"


Join the Fstoppers community for free
-
Post comments and join in the discussions
-
Browse the site ad-free
-
Share your work and get featured in the community
-
Compete in the photo contests for fun and prizes
No comments yet