

Photography is a notoriously expensive hobby, but lack of funds doesn’t have to stifle your creativity. Here are great alternatives to expensive gear and annoying subscriptions.
Many photographers actively seek free or low-cost alternatives out of budget constraints, curiosity, or a desire for a minimalist setup. Whether you’re a student watching your spending or a seasoned shooter looking to simplify, there are plenty of ways to get great results without breaking the bank.
The Appeal of Free (or Nearly Free) Alternatives
Photography is a notoriously expensive hobby, but lack of funds doesn’t have to stifle your creativity. In fact, many photographers actively seek free or low-cost alternatives out of budget constraints, curiosity, or a desire for a minimalist setup. Whether you’re a student watching your spending or a seasoned shooter looking to simplify, there are plenty of ways to get great results without breaking the bank.
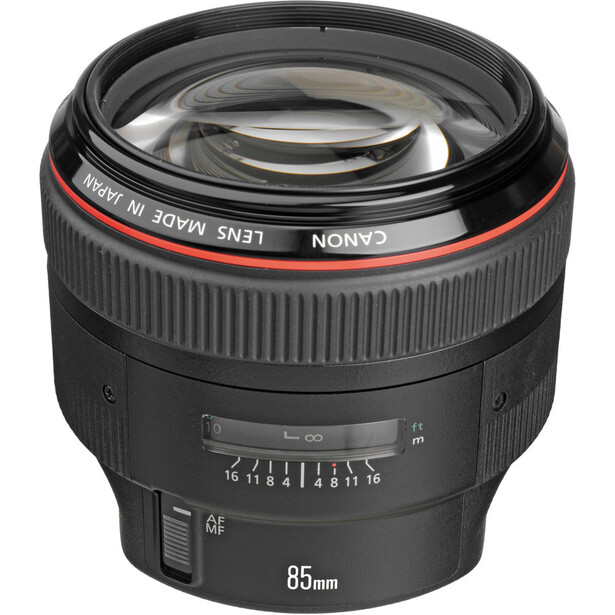
One key strategy is to repurpose older or hand-me-down gear. Yesterday’s high-end DSLR can be today’s bargain workhorse – older models from the 10-megapixel era (think early Canon EOS or Nikon DSLRs) often sell for around $100 and still deliver excellent results in good lighting. These “outdated” cameras are incredibly budget-friendly and yet can produce print-worthy images for walls, books, or personal projects. For beginners, an old DSLR offers full manual controls with tactile dials, making it a fantastic learning tool to master the exposure triangle without the cost of a new camera. Even experienced photographers find that older cameras – especially those with unique CCD sensors – have a distinct image character and a nostalgic feel that can ignite creativity by imposing creative limitations. In other words, the quirks of older gear can challenge and inspire you in ways that fancy modern equipment might not.
Don’t overlook DIY solutions for lighting and modifiers. Photographers have long crafted homemade diffusers, filters, and reflectors to achieve effects without pricey equipment. For example, a simple white foam board from a craft store (a few dollars at most) makes an excellent reflector to bounce light for portraits or still life. In fact, anything shiny can serve this purpose – after all, commercial reflectors “simply reflect light,” so anything that is shiny enough can be used as a reflector. A piece of cardboard covered in aluminum foil, a cheap car windshield sunshade, or even a large white poster board can all soften shadows and mimic a professional reflector panel. Need a diffuser for harsh light? With a little ingenuity, you can get soft, flattering light with the cheapest of modifiers. A frosted shower curtain liner (which costs just a few dollars) stretched between the sun or a lamp and your subject will scatter the light beautifully – it’s hard to beat the cost-to-performance ratio of this trick. Homemade solutions like these underscore a central theme of budget photography: what matters is understanding light and mechanics, not the price tag of your tools. With creativity, a bed sheet can become a backdrop (just keep it taut and wrinkle-free), a Pringles can becomes a snoot to narrow your flash beam, or a cardboard box with baking parchment taped over the front transforms into a softbox. A bit of DIY spirit can replicate many high-end accessories using everyday items.
Free Editing and Photo Management Software
One area where photographers often feel locked into paying is software – monthly subscriptions to Adobe Lightroom/Photoshop or pricey licenses for editing suites. Fortunately, there’s a rich ecosystem of free and open-source photography software that can handle everything from raw processing to pixel-level retouching. The key is to find the right tools (and be prepared for a bit of a learning curve). Here are some of the top no-cost solutions:
-
GIMP (GNU Image Manipulation Program): Often hailed as the best free alternative to Adobe Photoshop, GIMP is a powerhouse image editor with a deep set of features. It supports layers, masks, various plugins, and pretty much any image editing task you can think of. In fact, everything you can do in Photoshop is also possible in GIMP — though the methods may differ. The trade-off is that GIMP, like Photoshop, is complex and can be intimidating for newcomers. Both programs share a steep learning curve and mastering them requires time and dedication. But if you’re willing to invest the effort, GIMP rewards you with professional-grade editing capabilities for the price of $0. Its open-source nature means a community of developers and users continually improve it, and you can expand its functionality with free plugins (such as the popular G’MIC filters suite). Some photographers use GIMP only for specific tasks where it truly shines – for example, removing unwanted elements, advanced layer blending, or compositing – while doing basic adjustments in simpler programs. The bottom line is that GIMP can cover most (if not all) of your post-processing needs without a penny spent.
-
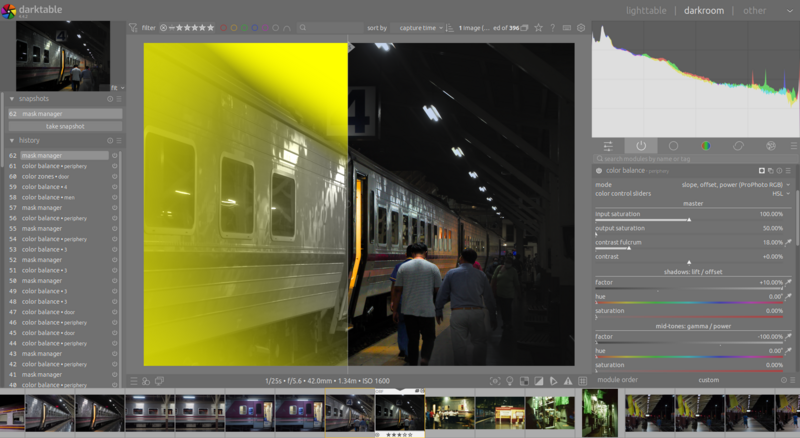
Darktable: This is a free, open-source program designed as an alternative to Adobe Lightroom. It acts as a virtual lighttable and darkroom, handling both the organization of large photo libraries and RAW image development. Darktable supports non-destructive editing of raw files, much like Lightroom, with a wide array of modules for exposure, color, tone curves, sharpening, etc. It’s often considered the closest replacement for Lightroom in terms of combined workflow functionality. For example, Darktable can import and catalog your images, apply edits in batches, and export finished files, all within one system. It's a powerful raw image processor – and for the price of $0.00, it is an attractive alternative to Lightroom. The software is cross-platform (available on Linux, Mac, Windows) and has a devoted user community. However, new users should be aware that Darktable’s interface is quite dense – there are many panels and sliders, which can feel overwhelming at first. Experienced Lightroom users often note that where they might move one slider in Lightroom, they may need to adjust multiple in Darktable to get equivalent results, due to differences in how the tools are designed. This isn’t a knock on Darktable’s quality – it’s capable of high-end results – but it may take some time to find a comfortable workflow. The upside of that complexity is extensive control. Once you become fluent in Darktable, it offers powerful features like parametric masking, advanced color mapping, and even some features Lightroom lacks. In summary, Darktable is feature-rich and might be the perfect choice if you’re absolutely set on paying nothing for a raw processor, as long as you’re patient in learning it.
-
RawTherapee: Another excellent free raw developer, RawTherapee specializes in converting and editing raw files with high-quality output. It has a robust set of tools for exposure, color, and detail enhancement, and is known for its advanced demosaicing algorithms (yielding great image quality). RawTherapee’s interface and workflow are a bit different from Lightroom’s; it does not have a built-in cataloging system in the same way, focusing more purely on image development. RawTherapee is free and open software to edit your raw photographs, but it’s just development software – not a full digital asset manager. This means you may need to pair it with other tools for tasks like tagging, organizing, or searching your library. Some users manage their files in folders or use a separate program (for example, DigiKam – an open-source photo organizer) for cataloging, then open images in RawTherapee for editing. In terms of editing capability, RawTherapee is very powerful and, for many fundamental adjustments, just as effective as Lightroom. In fact, for photographers who mostly apply basic global adjustments (exposure, contrast, color, etc.), RawTherapee can be just as useful as Lightroom. It even offers some innovative tools like Contrast by Detail Levels, giving fine-grained control over contrast at different scales. The major drawback is speed and convenience: RawTherapee can be slower to preview changes, especially as you stack multiple adjustments (some sliders may not update in real-time, requiring a moment to render). And as of the time of writing, it lacks advanced local adjustment tools like a robust healing brush or gradient filters (Darktable tends to be ahead on those features). A sensible workflow is to use RawTherapee for initial raw processing – benefitting from its quality and zero cost – then export images to GIMP for any retouching or complex editing. In fact, integration between RawTherapee and GIMP is possible (you can configure RawTherapee to send an image to GIMP with one click), creating a seamless free editing pipeline. Overall, RawTherapee is a fantastic no-cost tool to have in your arsenal, especially if you shoot in raw and want to break free from Adobe’s subscription model.
-
Affinity Photo (One-Time Low-Cost Alternative) – While not free, Affinity Photo deserves a mention because it offers a very affordable alternative to Adobe Photoshop with a one-time purchase model — no subscription required. Developed by Serif, Affinity Photo provides professional-grade editing tools including RAW development, advanced layer editing, compositing, retouching, and more, all in a sleek, modern interface that many photographers find more intuitive than GIMP or open-source options. Its powerful toolset covers nearly everything Photoshop users expect, from healing brushes and frequency separation to live filter layers and non-destructive editing. Importantly, it runs natively on Windows, macOS, and iPad, offering a unified experience across devices. At the time of writing, the full license costs less than a few months of an Adobe subscription, making it a compelling choice for photographers who want high-end capabilities without ongoing fees. Affinity Photo is not open-source and technically not free, but because it eliminates monthly costs permanently and delivers exceptional value, it’s often recommended alongside truly free options for budget-conscious creatives who want a more polished commercial-grade alternative.
-
Photo Management Alternatives: Replacing the library management functions of something like Lightroom can be a bit tricky, but there are free options. If you choose Darktable, it will handle library and editing in one. If you prefer RawTherapee or other editors, consider DigiKam: an open-source photo management program that allows you to import photos, add tags/keywords, sort and search, and even do basic edits. DigiKam is quite powerful in organizing large collections and supports features like face recognition, geo-tagging, and versioning. DigiKam users often manage their files there for intake, culling, and metadata, then open the files in RawTherapee or Darktable for processing. Another simple (if old-school) approach is to use your operating system’s folder structure and naming conventions to organize photos, supplemented by free utilities for bulk renaming or metadata tagging if needed. Some photographers also leverage cloud services – for example, Google Photos or Apple Photos offer free (limited) storage and basic organization, though they are not as feature-rich for raw files and might compress images. The key point is that you don’t have to pay for Lightroom just to keep your library sorted: with a bit of effort, free software plus good habits (like maintaining a consistent folder hierarchy, and backing up regularly) can effectively replace paid asset management.
In summary, the software landscape for photographers on a budget is very encouraging. Programs like Darktable and RawTherapee prove that free and open-source software is surprisingly useful – in fact, for many use cases, the downsides compared to paid software are quite small. You may not get the absolute polish or speed of the industry-standard apps, but you also avoid monthly fees and gain tools that are constantly improving through community-driven development. Remember that every program has a learning curve; even if you’re used to paid software, switching to a new free tool will require patience. As one expert put it: with time and patience, you can master any tool — and these free options are worth the effort. The freedom of not being tied to subscriptions is liberating, and it reinforces the idea that your creativity and skill are the true drivers of your photography – not the cost of the software you use.
Creative Approaches to Lighting and Studio Setups
Lighting equipment and studio accessories are often the most expensive components of a photographer’s kit. Studio flashes, softboxes, reflectors, stands, and backdrops can collectively cost thousands of dollars. But if you’re resourceful, natural light and DIY solutions can achieve stunning results at little to no cost. Let’s explore some budget-friendly lighting techniques and setups:
Embrace and Shape Natural Light
The sun is the ultimate free light source – natural light is free, abundant, and beautifully versatile. Learning to work with sunlight can often eliminate the need for fancy lighting kits, especially for genres like portraits, still life, or product photography. Here are some tips:
-
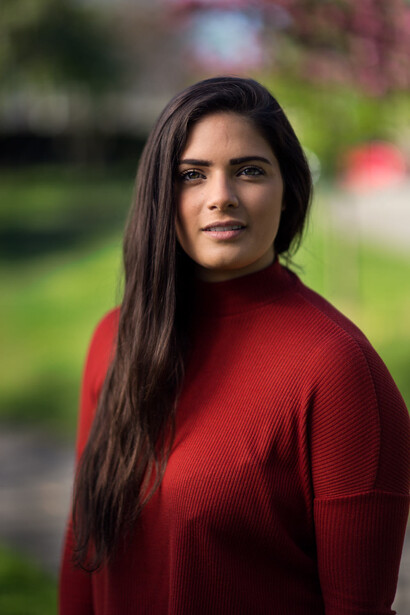
Use Windows and Doorways: A large window can serve as a gorgeous soft light source (essentially a huge softbox). Indirect window light, or direct light diffused through sheer curtains, gives a gentle illumination perfect for portraits or food photography. Position your subject near a window and use a homemade reflector (even a piece of white foamboard) on the opposite side to fill in shadows. By varying the distance to the window or using curtains/blinds, you can control the intensity and direction of the light. Many professionals shoot with window light because it’s flattering and cost-effective.
-
Time of Day: Take advantage of the golden hour (shortly after sunrise or before sunset) when the sun’s light is warm and diffused. This costs nothing and often yields better outdoor portraits than any expensive flash could. Conversely, midday sun is harsh – but you can still work with it by finding open shade (for even lighting) or by diffusing the sunlight. For instance, shoot under a white canopy or simply hold up a translucent shower curtain or silk fabric between the sun and your subject to create open shade anywhere. This DIY scrim technique mimics a professional diffuser panel.
-
Outdoor Reflectors: The environment can act as a reflector. Light sand, concrete, or a pale building can bounce sunlight back onto your subject. Snow is an excellent natural reflector in winter. If you need to direct some fill light, a car sunshade reflector is a popular trick – those folding windshield reflectors (silver on one side, sometimes white or gold on the other) cost a few dollars but work really well, are super cheap, and require almost no crafting. Keep one in your camera bag to add a pop of light to backlit scenes or to brighten up shadows under a model’s chin. It’s essentially a ready-made collapsible reflector for a fraction of the price of pro models.
-
Use of Hard Light: Don’t be afraid of direct sun when you want a dramatic look. You can shape natural hard light by moving your subject into a narrow beam (for example, a ray of light coming through a window in a dark room) to create high-contrast, artistic effects – all free. Use cardboard cutouts (impromptu gobos) to break up light into patterns or to selectively light a subject’s eyes, etc. These techniques cost nothing and can replicate sophisticated lighting setups.
DIY Reflectors, Diffusers, and Light Modifiers
If you do need to augment or control light, DIY modifiers are your best friend. We’ve touched on some already, but we’ll detail a few effective ones:
-
Reflectors: As mentioned, anything white or metallic can bounce light. Common household stand-ins include white poster boards, foamcore panels, aluminum foil, mirrors, or even a plain white T-shirt stretched on a frame. A large piece of polystyrene insulation (the kind used in home construction) is excellent – it’s lightweight and often white/silver coated. You can prop it up easily to reflect window light back onto a subject. The core idea is simple: all they do is reflect light, so anything shiny enough can be used as a reflector… it is really easy to make your own. For a warmer fill, try bouncing light off a gold-colored surface (gold foil or a survival blanket) to mimic a gold reflector and add a sunset glow to your subject. Many photographers also use V-flats (large foam board panels, black on one side, white on the other) to either reflect or flag light. You can DIY this by hinging two foamcore boards with gaffer tape.
-
Diffusers: The shower curtain trick effectively acts as a portable diffusion panel. Other options: white bed sheets (thin ones work best) can diffuse sunlight or flash. Baking parchment paper or wax paper taped over a small LED panel or flash head will soften it (be cautious of heat if using on a continuous hot lamp or flash that runs very hot). For on-camera flash, something as simple as a cut-up milk jug or a white business card angled in front of the flash can bounce and diffuse the light for a softer look. A DIY softbox can be made by cutting a hole in the back of a cardboard box just big enough to stick your flash through, and then taping thin white fabric or parchment over the front opening – instant softbox. It won’t be as pretty or durable as a commercial softbox, but it works in a pinch for portraits or product shots.
-
Creative Light Mods:
-
Pringles Can Snoot: A Pringles potato chip can is almost the perfect size to slide onto a hotshoe flash. Cut out the metal bottom, slip it over your speedlight, and you have a makeshift snoot that narrows the beam of light. You can even use the plastic lid as a diffuser, or cut a slit in foil covering the front to create a strip-light effect.
-
Flags and Gobos: Black foamcore or cardboard can act as a flag to block light and prevent lens flare, or as a gobo (go-between object) to cast shapes. Cut out patterns (like window frame shapes, or leafy patterns) in cardboard and shine a light through to project interesting shadows on your subject or background.
-
Household Lamps: If you don’t have studio strobes, use what you have – desk lamps, clamp lights, etc. Regular household lamps with LED or daylight bulbs can be surprisingly effective for still life or portraits. No flash? Use household lamps of various shapes and sizes. You can use a lampshade to diffuse for softer light or remove it for a harsher light. True, a lamp might not be as bright as a flash, but with today’s high-ISO cameras and some careful positioning, you can absolutely do a full portrait shoot lit by a couple of Ikea desk lamps and a big window. Try placing a lamp at 45 degrees to your subject as a key light and use a white poster board opposite as fill. These continuous light sources also have the benefit of letting you see the lighting effect in real time. Just make sure to set your camera’s white balance accordingly or shoot in raw to adjust the color later, since household bulbs can vary in warmth.
-
-
Backgrounds and Backdrops:
-
A plain bed sheet (preferably cotton to avoid reflections) can serve as a seamless background. Dark, light, or even patterned sheets all create different looks. To avoid wrinkles, clamp the sheet tightly or weigh down the bottom edge. A quick pass with a fabric steamer (or even tossing it in a dryer for a few minutes) will remove creases. If the sheet is thin and you’re backlighting it, double it up or put something opaque behind it to prevent light leak.
-
A cheap vinyl roller blind from a hardware store can act like a roll of backdrop paper. Neutral colors (white, gray) are most versatile. They might not be as wide as professional backdrops, but for portraits of one or two people, they do the job; any floor that isn’t covered can later be edited out.
-
Large rolls of craft or wrapping paper are inexpensive and come in many colors and patterns. You can tape a roll to the wall and roll it down to create a quick backdrop sweep. Even gift-wrap paper can be used for smaller subjects (like product photography or headshots), adding interesting textures or colors as background.
-
Walls and Textures: A brick wall, a garage door, a lush hedge – all can serve as backdrops if framed correctly. These are free and can lend an authentic atmosphere that a studio setup might lack. Similarly, a projector (if you have access to one) can cast any digital image as a backdrop on a wall behind your subject.
-
If you need a support stand and don’t have one, improvise with a clothes rack or string a rope between two hooks. You can clamp or pin the fabric. If shooting outdoors, find a couple of trees and tie a line between them as your backdrop holder.
-
-
Studio Stand-Ins: Tripods, light stands, and other grip gear can also be improvised. In a pinch, any stable surface will do to support your camera. If you don’t have a tripod for a long exposure, try propping the camera on a table, a stack of books, or even the ground. An ironing board can make a surprisingly good adjustable-height platform for your camera. For low angles, the ground and a small wedge (like a folded cloth or even a rock) to tilt the lens might suffice – plus it gives a unique perspective. Need a macro tripod? A bean bag or a bag of rice can stabilize your camera on uneven surfaces, molding to the shape of your gear. As for light stands, floor lamps can hold lightweight LEDs, or a broomstick clamped to a chair can hold a flash in a fixed position with some tape or rubber bands. It might look odd, but it works.
Cautionary Notes and Best Practices
While free and DIY solutions are empowering, it’s important to acknowledge potential downsides and practice some precautions to ensure you get the best results. Here are some cautionary notes and tips for mitigating any issues:
-
Learning Curve and Workflow Adjustments: Open-source programs like GIMP or Darktable may have a steeper learning curve or different workflow than the paid software you’re used to. Be prepared to spend time learning through tutorials and community forums. The good news is that there are countless free tutorials, documentation, and user communities for these tools – you’re not alone in the journey. Remember that the software you’re currently proficient in also took time to learn; with patience, you can become just as fluent in the free alternatives. One strategy is to start with small projects on the new software to build confidence before fully switching your professional workflow (if you’re a working photographer). Also, consider combining tools: for instance, use Darktable for library and raw tweaks and GIMP for retouching, playing to each program’s strengths.
-
Performance and Compatibility: Older cameras and computers might struggle with modern tasks. Free software can sometimes be less optimized, meaning it might run slower on an old PC than a lighter paid app would. Try to close other applications to give editing software more resources, and use proxies or smaller preview images if the program allows (this can speed up editing on underpowered machines). With older cameras, you might face limits like smaller buffers (so fewer continuous shots), lower resolution, or poorer low-light performance. Know the limits of your gear and plan around them. For example, if your older DSLR doesn’t handle high ISO well, try to use noise reduction software during editing. If its autofocus is slow, work that into your approach or pre-focus manually when possible.
-
Feature Limitations: Some free solutions lack certain features of their paid counterparts. For instance, as of this writing, RawTherapee doesn’t offer robust local adjustment brushes or layers like Lightroom does. If you anticipate needing those, you might use Darktable (which has more local editing tools) or incorporate GIMP for that part of the workflow. Similarly, older camera gear might miss modern features like eye-detect autofocus, in-body stabilization, or 4K video. A workaround for missing eye-AF is to take more shots to ensure focus (rely on your skill to nail focus or use center-point AF and recompose). If you don’t have stabilization, use a tripod or higher shutter speed to avoid blur. Adapt your technique to compensate for what the gear or software can’t do automatically.
-
Quality and Reliability: DIY gear, by nature, may not be as sturdy or precise as commercial gear. A homemade reflector or light stand might be more prone to wobbling or could even pose hazards (a poorly secured lamp could tip over). Always exercise common sense and caution: tape things down, use sandbags to weigh stands, and never leave a DIY rig unattended if it involves heat (like a lamp near fabric). When using cheap adapters for lenses, note that while most are fine, extremely inexpensive ones might have slight play or light leaks – test them beforehand (you can often fix light leaks with some gaffer tape around the adapter). Vintage lenses might have quirks like color tints or flaring; you can usually correct color in post-processing and manage flare by using a lens hood (or a DIY hood made of paper). Keep realistic expectations: your $50 vintage lens won’t have the razor-sharpness of a modern $2,000 lens wide open, but it can still produce beautiful results with a character of its own. Embrace those imperfections as part of the creative look.
-
Maintenance of Older Gear: One downside of relying on older hand-me-down cameras and lenses is that they may require a bit more care and maintenance. Rubber grips might come loose (easily fixed with a bit of adhesive), sensors might be dirty (learn to use a rocket blower and sensor cleaning swabs, or get a professional cleaning), and battery life on older cameras can be shorter. Also, be mindful that older gear might not be weather-sealed; exposing it to rain or dust could cause damage. To protect your camera in foul weather without buying an expensive rain cover, use a clear plastic bag or shower cap over it. In extremely humid places, store your equipment with silica gel packets or in a dry cabinet to avoid fungus.
-
File Backup and Formats: Free software should handle standard raw and JPEG files, but always keep backups of your originals. Some open-source programs save sidecar files or their own library databases; make sure you back those up too. It’s wise to also export edited photos in a common format (TIFF or high-quality JPEG) for archival, in case you switch software later and compatibility changes. Essentially, practice good digital hygiene – which you should do regardless of free or paid tools. This includes maintaining backups on external drives or cloud services.
-
When to Invest: Despite all these free solutions, there may come a time when spending money is justified. Recognize the signs – for example, if you consistently find that a certain limitation is holding back your professional work or causing undue hassle, it might be worth saving up for that item. The goal of using free alternatives is to allow you to keep shooting and learning until you truly need the upgrade. By squeezing every ounce of potential from cheap tools, you’ll be in a better position to appreciate and fully utilize any high-end gear you eventually acquire. And even then, you’ll know exactly why you need it. In the meantime, lack of gear is not a hindrance but an opportunity to use your creative problem-solving abilities.
-
Safety First: A quick note on safety: If you’re DIYing electrical things (like a lighting setup), make sure you’re not overloading outlets or risking electrical fires. Use LEDs over halogen bulbs to keep heat down when diffusing with paper or fabric. Don’t leave lamps on and covered for long periods unattended. When rigging makeshift supports, ensure it’s secure so it won’t fall on a subject or yourself. And when using tools like scissors or knives to build modifiers, be careful.
By being mindful of these considerations, you can enjoy the benefits of free gear and software while sidestepping most pitfalls. In many cases, the limitations themselves can be formative – they encourage you to truly understand your equipment and light, to double-check your work, and to be creative in solving problems. Those are skills money can’t buy. Even a 15-year-old DSLR with its technical limitations is still capable of producing images that would satisfy professional standards, given the right technique. The same is true of much budget gear: in capable hands, it can produce results indistinguishable from top-of-the-line equipment.
Conclusion: Creativity Over Cost
Relying on free or low-cost photography solutions is not just about saving money – it’s a mindset of resourcefulness that often leads to greater artistic growth. By using older cameras, you focus on fundamentals and craft rather than high-tech crutches. By editing with open-source software, you gain a deeper understanding of the image process (and a greater appreciation for the tools). By lighting with natural sunshine or a DIY modifier, you train your eye to see light in ways that automations and expensive gear might bypass.
There are tremendous advantages to going free and frugal: obviously the cost savings, but also the freedom to experiment without fear. When you’re not worried about wasting money, you tend to shoot more and try new techniques. A cheap hand-me-down lens might have weird flare or low contrast – but maybe that pushes you to create a dreamy, vintage-style photo you wouldn’t have envisioned with a clinically perfect lens. These kinds of happy accidents and learning opportunities are more plentiful when you cobble together gear and improvise.
Of course, it’s important to remain aware of the potential pitfalls: the learning curves, the time investment to DIY, and the limitations of the gear. Free solutions might ask more of you – more effort, more troubleshooting – than turnkey paid ones. But the payoff is a more intimate connection with your craft. You become the problem solver and the artist, not just a consumer of gear. And when something truly is a hindrance, you’ll know exactly what specification to look for in an upgrade, making your future investments smarter and more impactful.
Finally, remember that great photography has never been about having the newest, most expensive kit. Iconic photographs throughout history were often made with gear far less advanced than what we consider entry level today. Vision, creativity, and skill outclass megapixels and dollar signs. As the saying goes, “the best camera is the one you have with you” – we could extend that to: the best gear is whatever gear you can get your hands on, as long as you use it thoughtfully. True artistry emerges from creativity and problem-solving, not from automated settings or premium glass. By boldly experimenting with these accessible alternatives, you just might discover new techniques and styles that set your work apart.
In a world where tech and gear marketing is constantly telling us we need the latest upgrade, choosing to make the most of free tools and DIY techniques is a refreshing path. It brings photography back to its inventive, bootstrap roots – a craft of light and composition that anyone can participate in, regardless of budget. So go ahead: pick up that old DSLR or your phone, tape a shower curtain to a window, download a free editor, and shoot fearlessly. Your wallet will thank you, but more importantly, so will your development as a photographer. After all, when constraints are embraced, creativity flourishes – and that next great shot might be just a clever hack away.

Join the Fstoppers community for free
-
Post comments and join in the discussions
-
Browse the site ad-free
-
Share your work and get featured in the community
-
Compete in the photo contests for fun and prizes
5 Comments
good suggestions...some of which I used when starting my photography journey...some I still use every now and again!
Glad to hear they're useful!!!
Very nice, well-thought-out article, Alex. But like any piece that attempts to be a relatively comprehensive list of product alternatives, there will always be the unavoidable “you forgot”, so here is my contribution... In the software section you forgot FastStone Image Viewer, a highly developed, polished photo organization and processing application for Windows. It has a small footprint of 6-8mb and consumes a relatively negligible 256mb of memory, allowing it to run on older, less powerful equipment. It is extremely fast and displays/processes a wide range of formats including a range of raw files. It has a set of highly refined processing tools, is updated as needed and, to top it all off, is free to keep and use as long as you want. I just wanted to throw that into the mix! (I am not associated with FastStone in any way… I’ve just been using it for years.)
For those with Olympus/OMDS cameras, OM Workspace is a free download. (You must enter a valid camera serial number to show you have an Olympus/OMDS camera.)
It's a bit clunky and slow in some respects, but it can do things no other program can do, like use your attached camera for processing, or rank a Pro Capture bust by quality of focus. In my experience, it is the best for processing Olympus/OMDS RAW images.
Very good information. Adding my '2 cents'...
If a photographer mounts telephoto lenses to a lesser resolution (6 to 10 MP) camera body while mounting wide angle to normal lenses on the higher resolution camera body, he or she has a nice kit and won't need to reframe that much in post-production (depending on ISO).
My experience with smartphones so far is that their native angle of view falls between 18 to 21 mm without digital zooming: good for highly lighted interiors and sunny to cloudy exteriors. Knowing to light subjects pays out.
In the past I have used plastic foam and even hard plastic white translucent cups over a wide angle or normal lens to use my film camera as an incident light exposure meter. I'm yet to try this with my current kit, but makes sense that it should work, too. If someone has already done this with a DSLR or mirror less camera, let me know.
Last, if looking for a budget but good tripod, be sure to double check it. I've seen broken levers and worn locks on many second-hand tripods and mono pods. Enjoy, everyone.