
Your entry into photography might feel like a massive ocean of techniques, gear choices, and social media comparisons. Most people talk about shutter speed, aperture, ISO, composition, and basic post-processing. Those topics matter, but they don’t reveal the quieter corners of the craft.
Those quieter corners can change your approach to taking pictures more than you might think. They nudge you toward angles and moments you wouldn’t have otherwise considered. They lead you to anticipate the quality of light with more sensitivity. They also show you how unexpected details can enrich an image, or how the way you handle your gear can improve your confidence.
Below are 10 lesser-known principles. Each has some technical edge or creative twist that typically isn’t emphasized in beginner tutorials. They’re not advanced for the sake of being fancy. They’re meant to push you to see beyond the usual boundaries. They also encourage you to refine your habits so that each click counts.
1. Sensor Dust Management
Sensor dust often gets shrugged off as a minor annoyance. It usually appears as tiny gray blotches on an image, especially noticeable in bright skies or uniform backgrounds. Leaving dust on your sensor undermines the integrity of every shot you take. Many brand-new bodies have self-cleaning systems, but those aren’t foolproof. It helps to learn safe manual cleaning methods, using a specialized swab and sensor-cleaning fluid or, ideally, a rocket blower. Read this article for more on how to clean your gear. Automatic dust removal features sometimes leave behind stubborn particles. Spot-healing in editing software only does so much before you start warping details in your image.
You might wonder why repeated sensor checks and a few minutes of cleaning matter. A spotless sensor ensures each pixel accurately captures light. The more dust accumulates, the more you rely on post-production corrections. That eats away at your time and can degrade image quality if dust appears over intricate textures. Check your sensor at least once every couple of weeks if you’re switching lenses often.
2. Harnessing Negative Space and Going Beyond Basic Color Theory
Negative space is often explained as leaving room around your subject so it doesn’t feel cramped. A lesser-known strategy is to use negative space to shift the emotional weighting of an image. If you fill three-quarters of the frame with emptiness—like a sky or a softly lit wall—you invite the viewer to focus on a small yet poignant subject. That tension can be amplified by placing your subject off-center or near one edge. This leads to a more provocative effect than the usual balanced composition.
An under-discussed factor is how different camera brands interpret color. Canon tends to skew slightly warm and magenta in certain skin tones. Sony might push greens a bit cooler. Nikon might bring out more neutral or slightly greenish tones in low light. Fujifilm’s color profiles often aim for a filmic character with deeper blues and punchier reds. When you align your color strategy with these inherent tendencies, you save time in post and keep your images consistent. You can also intentionally break that consistency when you want a unique effect, like shooting with a brand known for cooler tones in a warm desert scene to amplify the contrast in color temperature.
Breaking away from mainstream color habits can start with small experiments. If you usually pair bright orange with standard teal, switch it up. Lean into unusual splits like muted purple with a dusty green. Check how they interact on screen and in prints. Keep a color wheel handy, but treat it as a loose guide rather than an absolute rulebook. The aim is to refine how color directs your viewer’s eye and emotional response.
3. Fill Light and Reflective Surfaces in Uncommon Places
Fill light is overshadowed by the allure of key lights and dramatic shadows. Many tutorials talk about bright highlights from a main source but ignore how gentle fill light shapes depth. A subtle fill lifts the darkest shadows without flattening your subject. The difference between a polished look and a harsh look often comes from how you handle the fill. You don’t always need an expensive secondary strobe or reflector. Sometimes, a white wall or even a piece of Styrofoam does the trick if you place it strategically.
When you understand fill light, you start seeing reflective surfaces everywhere. Metallic car roofs can bounce sunlight back onto a nearby face. Store windows, with their reflective glass, can send a soft glow onto an unsuspecting subject. Painted sidewalks and walls in bright midday sun can create an upward fill that’s more flattering than expected. Finding these natural fill sources makes impromptu portraits or street images more dynamic, even without official lighting tools. Step back and scan your environment before raising the camera. Notice how the available reflections might shape the final look.

Think about the direction of your fill source. If you’re near a reflective building, place your subject so that the building is behind you, creating a natural fill on their face. Position your subject half a step to the left or right to fine-tune those reflections. That small shift can define cheekbones more delicately or soften eye shadows. Once you get comfortable with fill light, you start molding light in everyday locations.
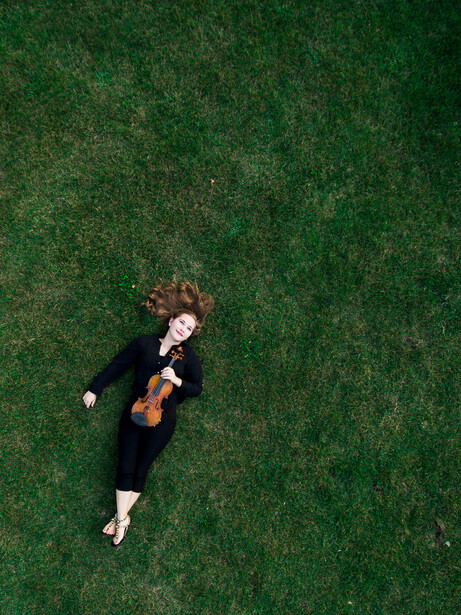
4. Embracing Unplanned Environments and Unusual Focal Lengths
Plenty of guides push you to scout locations meticulously. Scouting is helpful, but spontaneous discovery has a power of its own. Going for a walk with your camera and shooting wherever you happen to be can feel chaotic. It can also be the best way to stumble across unrepeatable moments. Unplanned environments force you to solve problems on the fly. Lighting can be strange. Backgrounds might be cluttered. You might feel there’s no obvious subject. That tension drives you to think differently.
You can also unlock creativity by trying focal lengths you rarely use. If you always reach for a 50mm prime, consider going extreme with a 14mm wide angle or a 200mm telephoto. This shift in perspective changes how you see distance, compression, and background. A wide angle can exaggerate foreground subjects and highlight spatial relationships. A long lens compresses space and isolates details that might seem unimpressive at a more standard focal length. One way to push this further is to limit yourself to just one unusual lens for a day. Leave your normal kit at home. This forces you to handle compositional hurdles in new ways. Each shot might feel awkward at first. You’ll notice vantage points you’d never consider if you had your usual gear.
Multiple exposures can be part of that exploration. Some cameras offer an in-camera multiple-exposure mode. You can overlay one shot over another without turning to software. It’s not just a gimmick. Layering a cityscape over a flower shot can create surprising textures. Overlaying a silhouette of a person’s profile with a colorful wall can produce experimental portraits. Once you see how these layered images can look, you’ll start imagining every scene as a potential building block for something else.
Embracing accidents is a hidden advantage of unplanned shooting. You might bump your settings or trip the shutter at the wrong moment, only to discover a fascinating blur or an unusual composition. Those happy accidents open your eyes to possibilities that a planned approach might systematically avoid. That sense of risk fosters growth, as you start letting chance guide you toward unexpected results.
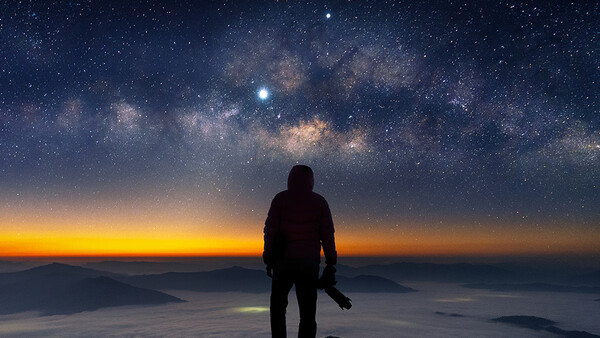
5. Capitalizing on Weather, Seasonal Shifts, and Time of Day
People talk a lot about golden hour and blue hour, but there’s more to atmospheric influence than that. Weather patterns can infuse your scene with drama or subtlety. Fog wraps objects in mystery, softening backgrounds and letting shapes stand out. Overcast skies act as a giant diffuser, removing harsh shadows from faces. Light rain can cause reflective surfaces on streets, doubling the impact of city lights. High wind can add movement to hair or clothing. Different seasons change the color palette of nature. Spring’s fresh greens, fall’s deep oranges and reds, winter’s barren branches and stark tones all suggest unique moods.
Midday sun usually gets a bad reputation. People complain about harsh shadows and blown highlights. There are moments when that direct overhead light has a punch that suits certain subjects. Deep shadows can add a sense of grit or drama. If you’re into black-and-white conversions, midday can be your best friend. Morning light has a cooler temperature, while late afternoon skews warmer. Winter sun sits lower in the sky for more hours, giving you extended angles of light that can be flattering.

6. Overlooked Gear Considerations, Vintage Adapters, and Simple DIY Lighting
Vintage lenses can bring a character that modern lenses lack. Third-party companies like Sigma or Tamron have glass that rivals or surpasses brand-name options in certain focal lengths. You can also find older manual-focus lenses with unique bokeh, color rendition, or flares. Adapters help you mount them on mirrorless bodies like a Sony a7 V or Canon EOS R5. You sacrifice quick autofocus, but you gain creative possibilities and sometimes save money. Manual focus slows you down in a good way. It forces you to pay attention to each shot more carefully. That mindfulness can help you spot details or anticipate moments better.
DIY lighting hacks can be surprisingly effective. If you need a softbox in a pinch, you can stretch wax paper or white cloth over a homemade frame. A plain white umbrella from a thrift store can act as a diffuser with a speedlight. LED panels meant for video calls can serve as constant lights. They won’t have the power of dedicated strobes, but they can fill small spaces with workable illumination. Experimenting with these lower-cost or improvised solutions builds a hands-on relationship with light.
Reflectors don’t have to be store-bought collapsible discs. Foam boards from an art supply store cost a few dollars. Sheets of Mylar or reflective wrapping paper can bounce light in interesting patterns, though they might create uneven reflections. Sometimes you want that irregular bounce. Gear doesn’t always need to come from a photography brand. You can discover unusual lighting or perspective tools in hardware stores, craft shops, or even your garage. Different textures on your homemade reflectors can impart a signature look to your images.
Pay attention to weight and size as well. If you own a large prime lens with a wide aperture, you might be inclined to leave it at home because it’s heavy. That means you lose those dreamy wide-aperture shots for spontaneous moments. Sometimes having a lightweight prime, even if it’s not top-of-the-line, is more practical because it lives on your camera. That’s how you capture fleeting moments instead of fumbling with lens swaps.
Micro-contrast is another dimension that doesn’t get enough attention. It’s the subtle difference in tonal variation within fine details that sets an image apart. It’s different from overall sharpness. Two lenses might have the same advertised resolution, but one can render finer transitions between light and dark areas with more clarity. Micro-contrast can also shift slightly based on the sensor’s design and the camera’s color science. Some older manual lenses, often from reputable film-era brands, excel in micro-contrast even though they lack modern autofocus. Modern digital lenses sometimes prioritize corner sharpness or wide aperture performance and miss a bit of that nuanced tonal separation. When you’re aiming for more depth and richness, test different lenses rather than focusing on mere focal lengths and maximum apertures. That subtle tonal rendering might breathe more life into your shots.
Experiment with a test subject, like a textured fabric or leaves in partial shade. Shoot with a lens known for strong micro-contrast and one with a flatter rendering. Compare how each lens handles the transitions between highlights and shadows. You can gain a sense of which lens is more expressive in subtle changes of light. That knowledge helps you pick gear that resonates with the mood you want, rather than just chasing specs or large aperture values.
7. File Organization and Backup Strategies for Long-Term Peace of Mind
File organization is an unglamorous topic. You don’t see many tutorials about the best folder structure or how to label external drives. Yet it’s essential if you plan to build a cohesive library of images. Even if you only keep a moderate number of shots, a well-organized system spares you from rummaging through random files when you need to find a specific shot. One approach is to maintain a year-month-day folder structure, such as “2025-04-26 EventName,” or something similar. That way you automatically sort by date and remember where key events fall on the calendar.
Keywording can be your friend. In software like Adobe Lightroom Classic or Capture One, you can add tags like “landscape,” “portrait,” “sunset,” “indoor,” or even location names. This step takes extra time but saves headaches later. Customizable software-based organization also helps you keep track of your best shots across multiple shoots. Some rely solely on star ratings or color labels. Others rename their files upon import to a more descriptive convention like “2025-04-26_SunsetPark_001.” Whatever you choose, consistency is more important than complexity. If your structure is consistent, you won’t end up with rogue files or ambiguous folder names.
Backups protect your work from the heartbreak of drive failure or accidental deletion. It’s good to keep at least three copies of important files: one on your working drive, one on an external local backup, and one in a cloud service or off-site location. Some people use portable SSDs or spinning hard drives, and others use a Network Attached Storage (NAS) device. Cloud services like Backblaze are easy to set up but can be slow if you have tens of thousands of raw files.
Organizing your files on import is simpler than trying to reorganize months or years later. It’s routine that pays off in the long run. It also helps you revisit old shots more easily, which can spark new ideas and let you apply fresh editing techniques to older images.
8. Advanced Color Grading, Specialized Plugins, and Printing Profiles
Raw development isn’t just about exposure, highlights, shadows, and saturation. Color grading is a subtle art that extends well beyond the standard Hue/Saturation/Luminance sliders. Plugins or built-in features let you adjust color in targeted ways. You can shift the hue of only the shadows or only the highlights. You can isolate skin tones and tweak them without affecting the rest of the scene. Some software options let you create custom LUTs (Lookup Tables), commonly used in video editing, which can unify a series of images with a specific color style.
Specialized plugins from companies like Nik Collection or Topaz Labs can expand your editing palette. Nik Collection’s Color Efex Pro has filters that let you add specific tonal contrasts or color casts in ways that standard software doesn’t. Topaz Labs offers advanced sharpening and noise reduction that might outperform built-in methods. Some people shy away from external plugins because they seem complicated or they worry about artificially altering their images too much. With restraint and intention, these tools can enhance subtle qualities without making the result look overly processed.

Investing energy into color grading and printing opens the door to a deeper understanding of light and color relationships. Your images gain a tactile, crafted feel when you see them in physical form rather than just on a glowing screen. That final print can reveal nuances in your editing that you might not notice in digital format.
9. Counterintuitive Shooting Habits That Spark Fresh Creativity
Sometimes the best way to break a plateau is to break the rules you usually follow. When the sun is bright, the safe route is to keep your exposure balanced. Intentionally underexposing can produce rich, moody shots with dramatic shadows. You might lose detail in some areas, but you gain atmosphere. Underexposure can also protect highlights on a sunny day. You can recover some shadow information in post. That slight underexposure might be the difference between a shot that looks mundane and one that feels cinematic.
Playing with unusual white balance settings can also snap you out of routine. Auto white balance aims for neutral tones, but your scene might benefit from a cooler or warmer rendition. Set your white balance to “Tungsten” in daylight conditions to introduce a bluish cast, or choose “Shade” in midday sun to get a warmer effect. Sometimes your camera’s presets won’t match the desired look exactly, so you can dial in a custom Kelvin value. If you’re going for a science-fiction vibe, you might want a heavily skewed color temperature. If it’s a nostalgic summer look, push things a bit golden. This might look strange in your live preview, but you can reevaluate later. Even if it doesn’t work every time, it expands your range of expression.

A whimsical approach can refresh your eyes. Set your lens to manual focus and attempt zone focusing at a wide aperture like f/1.8. Move around your subject and trust your instincts rather than always checking focus in the viewfinder. Many images will be soft or missed, but some will stand out with a dreamy intimacy. You might catch an emotion or a moment that you’d miss if you were obsessing over tack-sharp precision. This habit trains you to sense distance and perspective in a more intuitive way.
Rotating your camera in ways that break the standard horizontal or vertical framing can also jar you into new compositions. Tilt the frame heavily or shoot from extreme high or low angles. You might reveal interesting geometry or diagonal lines that highlight your subject in ways you haven’t attempted before.
10. Vision for Lifelong Learning and Personal Style Development
Continuous exploration nurtures an evolving style. It’s normal to go through phases where you emulate certain artists or try specific techniques obsessively. Over time, those influences blend into your own voice. Putting yourself in fresh situations—like traveling to a new city or working with a different set of creative collaborators—lets you see how universal principles combine with your personal preferences. Even small shifts in gear or environment can spark a wave of new work.

Read books by masters like Adams or watch interviews with people who shaped the medium. Looking at paintings, cinema, and even graphic design helps you cross-pollinate new ideas. An open mind ensures you never stop refining your craft.
Reflection
Those lesser-known techniques invite you to look at every aspect of your workflow with heightened awareness. They ask you to notice tiny details on your sensor or in your environment. They prompt you to experiment with color, negative space, odd focal lengths, or printing profiles. They redefine your relationship with light, turning everyday objects into fill sources and forcing you to see nuances that typical advice might ignore. They foster a mindset that’s always ready for unexpected beauty.
Adopting these under-discussed approaches can elevate you beyond a rote repetition of standard tips. They might even set you apart by infusing your work with distinctive elements that others miss. They can add up to a confident style that blends technical precision with creative edge. Now get out there and take some pictures.


Join the Fstoppers community for free
-
Post comments and join in the discussions
-
Browse the site ad-free
-
Share your work and get featured in the community
-
Compete in the photo contests for fun and prizes
1 Comment
A good set of points hardly spoken about. A good refresher for me. Thanks