
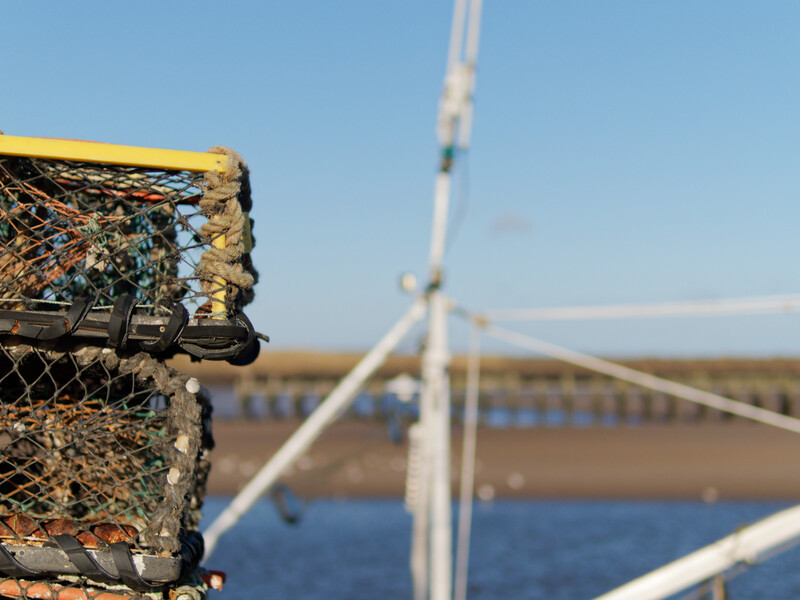
Besides composition, choosing the correct exposure is essential for your photography. Achieving that requires understanding how metering works and how to control the camera's settings. It's here that some cameras excel and others let you down.
Metering measures the amount of light coming into your camera through the lens (TTL metering). It, in turn, tells your camera what settings are required for a good exposure. You then decide whether to stick with these settings or change them.
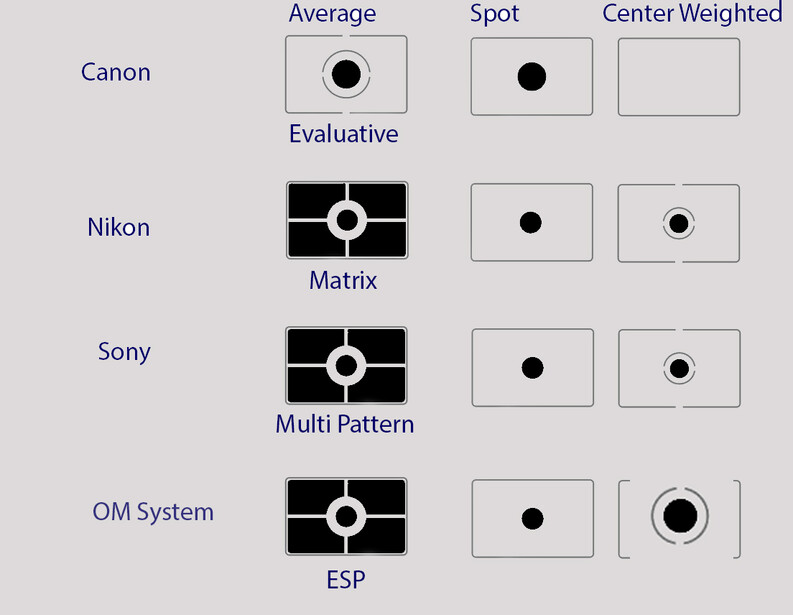
Years ago, cameras used the average brightness of the entire scene to set the shot's exposure. This, wisely, was called average metering. Then, the intelligent technicians in Japan decided that the cameras should be a bit cleverer and adjust that average to consider varying amounts of light and dark in the photo, a modified average. This was much more accurate in many circumstances.
However, the marketing departments of the camera companies decided that they should give that modified average a name that would appeal to the customers. So, average metering mode was given an array of stupid labels: Sony picked Multi-Pattern. Olympus chose ESP, short for Electro-Selective Pattern metering; I always wondered whether this was deliberately ambiguous with Extra Sensory Perception. Canon used Evaluative, Nikon chose Matrix, Panasonic used Multiple, and Leica, Multi-Field. Whatever you call it, for most photographers, it's easiest to think of it as average metering.
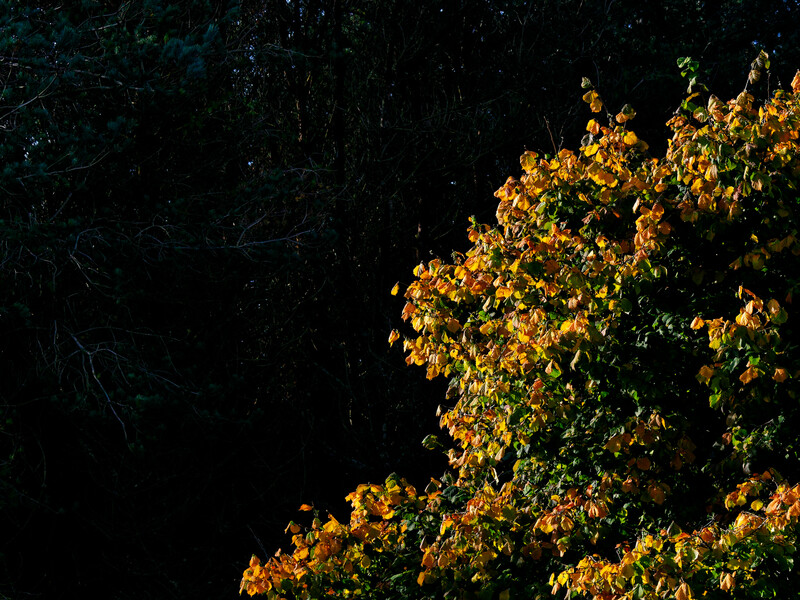
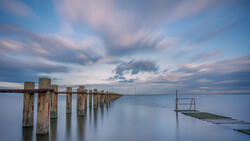
Average metering can be great for landscapes with little contrast in the shot. The resulting picture should look as bright as your eyes saw the scene. In many instances, this mode does good work of giving you a good shot. However, there are times when it doesn't.
This is one of the first things a photographer should learn: shooting a bright scene with average metering can lead to underexposure. Even some experienced photographers misunderstand this. I recently intervened in an online conversation. A business owner was seeking advice. A professional photographer said he should reduce the exposure when photographing their brightly toned products against a white background. They were wrong; the exposure needed to increase.
It's counterintuitive, but shooting a bright scene will unwantedly cause your camera to reduce the exposure. Your camera expects the world to be in a Goldilocks zone, neither excessively bright nor too dull. If you want to delve into the technicalities, it thinks the world is mid-gray, or 18% gray. If you are shooting a scene that is brighter than that, your camera will try to compensate and darken the image.
Conversely, if you are shooting a predominantly black picture, the camera's metering will expect that blackness to be mid-gray too, and thus increase the exposure.
Head out into the snow or a sandy beach on a sunny day, and you will see what I mean. Alternatively, here's an experiment to prove this. Take a white piece of paper and draw a small X in the middle so your camera has something to focus on. Fill the frame with the paper and take the shot. The paper won't look bright white but dull gray in the photo.
Now, do the same with something black. Fill the frame with it and take the shot. That will also be a dull gray in your photo and not black.
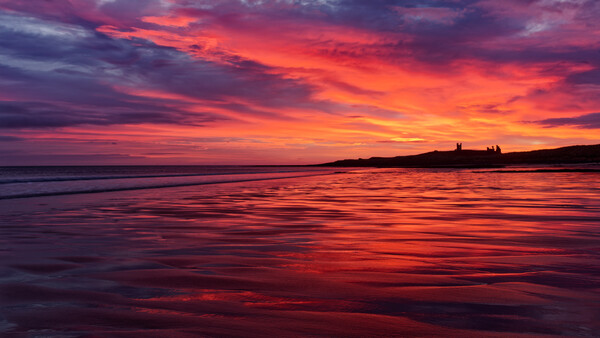
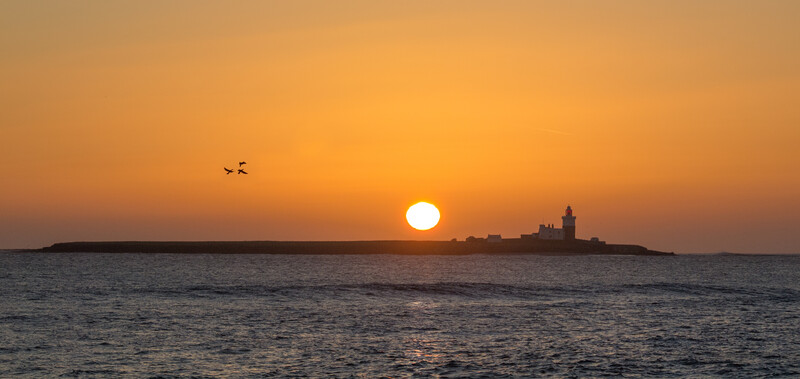
There are times when you may want the camera to take advantage of over- or underexposure. Reducing exposure makes colors look more saturated. So, pointing your camera towards a sunrise or sunset, the colors will be emphasized, but foreground objects will become silhouettes.

Increasing exposure adds more white to the colors, making them less saturated. But it also brings out details in the shadows without producing noise. Fortunately, modern camera sensors are improving at retaining detail in both highlights and shadows. I rarely must think about noise now. I can now retrieve overexposed bright highlights in the sky, which would have been unrecoverable with cameras produced only a few years ago.
There are other metering options than average. Like its name suggests, center-weighted measures the light in the middle of the frame, ignoring the edges. That's great for head and shoulder shots where you want the exposure on the face to be correct.
Spot metering measures a tiny spot, usually in the middle of the frame. That can be as small as 1% of the entire picture. You can place this spot on a single subject you want properly exposed, and it will ignore the rest of the scene's lighting. If the spot metering on your camera is tied to the center of the frame, then you would need to place the subject there. You can lock the exposure by either half-pressing and holding the shutter button or using the Auto Exposure Lock (AEL) button, and then you can recompose. Some cameras have spot metering that follows the focus point that negates this method.
There's more than one method of doing most things in photography, and despite these excellent metering modes, I rarely use them. Instead, I leave the camera in the average metering mode and check the image and histogram I have displayed in the viewfinder. I then change the exposure using the front and rear command dials.
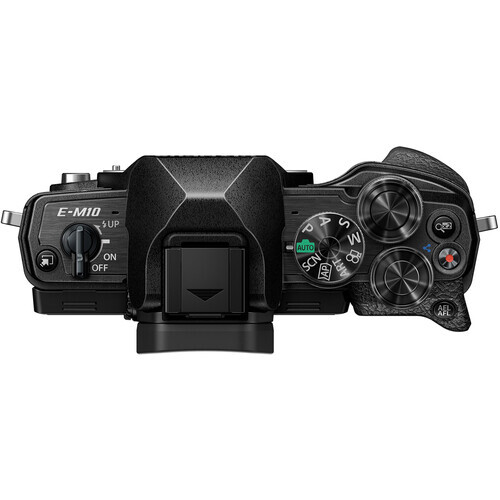
If you want the best advice I can give about buying a camera, get one with two command dials. These sit on top of the camera front and back. You spin one with your forefinger and the other with your thumb to change the camera's exposure settings. Some cameras are lacking, having only one dial. Therefore, they require you to fumble about, find and hold the +/- button and then turn the dial simultaneously to change the exposure settings.
Having two dials is far easier to operate than that. There is a worse design, however. These cameras have a second wheel, but it's situated halfway up the right side of the back of the camera. Besides being rotated, it can also be pressed in four directions as buttons. Everyone I know who owns one of these accidentally presses the dial when trying to spin it with their thumb. Just as bad are those with one dial that changes functionality when you press it. Photographers who own these also struggle to rotate the dial without accidentally pressing it.
In manual mode, you will usually have one command dial set to change the shutter speed and the other to change the aperture; I prefer the aperture to be on the rear dial, while others favor the front dial. As you reduce the size of the aperture with your thumb, you can balance the amount of light entering the camera using the front dial, which will decrease the shutter speed.
I only use manual mode about ten percent of the time, however. Mostly, my camera is set to aperture priority. Why? It does a lot of the heavy lifting for me.
In aperture priority, usually marked as A on the mode dial, but, oddly, Av on Canons, I can set the aperture to whatever I like using the rear dial. I can then quickly readjust the exposure by using the front dial. The front dial is still changing the shutter speed but from a start point selected by the camera. My desired exposure rarely exceeds stops from the camera's recommended exposure value. Consequently, I can choose the value I want in the blink of an eye. It takes longer in manual mode, and I may miss the action.
Moreover, in aperture priority, it is fixable even if I make a mistake and shoot before I have set the correct exposure. There is invariably sufficient dynamic range in the shot for me to correct it in post-processing, starting from the camera's default exposure setting.
Aperture priority is beneficial when shooting in varying light levels, such as at a wedding when one is stepping inside and out. Furthermore, the exposures are limited by the maximum and minimum size of the lens iris. No matter whether it is wide open or at its minimum, if you shoot in a hurry and make a mistake, the result is a usable image, even if it's not perfect.
In shutter priority and manual mode, the longest shutter speed on my camera is 60 seconds, and the fastest is 1/32,000 s. It's relatively easy to end up with a hugely over- or underexposed image at the extremes of those parameters. Moreover, stepping from a dimly lit room to a bright tropical day might mean changing the shutter speed from 1/30th second to 1/32,000, which takes a laborious 30 clicks of the dial.
There's always more than one way to take a photo, and maybe you have a different approach to metering and exposure than me. I haven't even mentioned ISO or flash here, which deserve their own articles.
Perhaps you love having a single command dial. It would be great to hear your thoughts in the comments.
Join the Fstoppers community for free
-
Post comments and join in the discussions
-
Browse the site ad-free
-
Share your work and get featured in the community
-
Compete in the photo contests for fun and prizes
30 Comments
I agree that modern exposure meters in-camera have greatly advanced and improved. Other methods not mentioned would be hand-held incident meters and spot meters. In-camera meters are still only measuring reflected light, although very good at it these days. Incident meters measure light falling on the subject directly. A much more accurate measurement.
That is true what you say, Timothy. I have some incident meters but I rarely use them though, only for studio flash work. I did go through a phase of carrying one some years ago, but for me it was just more hassle and more kit to carry. Those far outweighed any minimal advantage it brought. I'm all for embracing every technological advancement that makes life easier and that opens up photography for more people. But, nevertheless, you are quite correct. Thanks for taking the time to reply to my article.
Yes, I agree as well. The meters now in cameras are very good. Doing mostly landscapes I have the luxury of using incident and spot meters as I'm not pressed with time or moving subject, except maybe water. This is when I need to be very critical with the image, but all-in-all I just use the camera. Then again, I was remembering former years when these meters were essential. Thank you.
I've often wondered why you couldn't buy a "filter" that was just a white diffuser. That would turn your camera into an incident light meter.
I've used a plastic cup to do this. Depending on the opacity of the plastic, it may require that some extra exposure be dialed in. Works great!
The Expo Disc does this, although its main intended use is for setting white balance.
While it is true that separate incident meters are accurate, their reading is not guaranteed to give a good exposure. Most lenses do not come with accurate T stop (transmission stops) markings, only F stops (fraction of focal length) which are only an approximate measure of the actual light arriving at the sensor. Your f1.4 wide open may actually be an f1.6 for exposure purposes. Zoom lenses tend to lose more light than primes, and it can vary as you zoom. As a lens is focused closer to the camera it also projects a dimmer image for a given f stop.
For these reasons the exposure measured by the sensor is more accurate than a separate meter because the variations caused by the above are automatically accounted for. This photographer is quite happy not having to carry a light meter that was essential in the days of manual film cameras. The latest mirrorless cameras are not just assuming an average scene, but evaluating the image against likely subjects. I find that they are even beginning to get the hang of snow! That said, I’m often using aperture priority and if the histogram looks OK then the exposure will be fine.
I like your article. I shoot Olympus/OMDS and utilize the two top dials with Program Mode. I set the front dial first (exposure compensation) and make sure the image in the viewfinder has the highlights or shadow details where I want them. Like you have pointed out, sometimes I have found myself going counter in exposure than what is found in the books. Then, with Program Mode, I adjust the shutter speed / aperture opening (rear dial) to favor what I want or need out of the subject. The two dials on top for my thumb and forefinger plus viewfinder allow for extreme quick changes in exposure to accomplish what is needed for the shot. Obviously, when it is necessary to control the aperture or shutter more tightly, Aperture Mode or Shutter Mode are selected with the two top dials again giving one total control of the viewfinder image and, ultimately, the final image. Because of the image stabilization of the Olympus/OMDS system, the choice of what would be "too slow a shutter speed for handholding" with other systems is rarely a problem. Your noting the dial placements as an issue to types of shoot is something every photographer should properly take into account before buying into a system. Again, a very good article.
Thanks William, that's kind of you to say that. It's always fascinating hearing how different people use their cameras. One of the great things about photography is that there is no right or wrong way. I haven't used P mode for years. On my next trip out I shall.
Thank you for commenting
1/32000 is not unusual , you live in a very sunny area. That 2.5x brighter than sunny 16 at 1.4 iso 100.
The base ISO of my camera is ISO 200. And yes, I live at the coast and the sea, sand, and indeed the foliage is brighter than mid gray. I am invariably adding +1 EV exposure compensation here. As you suggest, the sunny 16 rule has its limitations. Thank goodness for TTL!
Thanks for the comments.
I always measure for the brightest part and place that at about +3 Ev in the build in light meter , if I calculate my exposures from an exposure on a very sunny day on the coast ( taken at f8 at iso 100) to f1.2 at iso 200 and add a stop to compensate for the polariser that’s often on the lens. I get about 1/8000s. So 1/32000 could occur , but it’s hardly common. And I think we are lucky living on the coast , we just live on opposite sides of the North Sea.
Always enjoy reading your articles.
Thank you Ruud.
For street photography (shot with a manual lens with aperture ring) I usually have the metering of my Sony A7III set to highlight (priority) and sometimes use the zebra feature set to 107 sensitivity to give better accuracy for RAW files and avoid clipping the highlights. I mainly use the histogram to check what is clipping, mostly protecting the highlights as we know shadow recovery can be done in post should the photo need it or deliberately losing shadow detail for an effect. Often though, street photography doesn't give me the luxury to set correct (my version of correct) exposure as is the fast paced nature of the genre so I do eyeball the exposure a fair bit with a glance at the histogram knowing how good software is at recovering detail. Of course I could just 'cheat'😉 and just use aperture priority with min/max values set for shutter and ISO.
Ha ha, that's not cheating, that's using the technology to its best advantage. I absolutely agree with you about street photography, which is why I use aperture priority and the front dial for exposure compensation for it, and event photography too. For landscapes I do the exact opposite and do everything as slowly and precisely as possible.
You are right about being able to recover details too. I recently tested the raw files of my camera and could happily push the camera by three stops of under exposure and get good results. That is a greater margin of error than I have ever accidentally achieved and far more than was possible a few years ago.
Thanks for joining in the conversation.
When I said 'cheat'😉 (note the wink emoji), I was just joking. Of course aperture priority is totally valid. I do notice in aperture priority on Sony cameras, when setting min/max values for ISO and shutter speed, if it reaches the max ISO it will annoyingly select a slower SS below the minimum set to get the correct exposure, whereas other camera brands don't do that. I do use auto ISO quite a bit, not always but I prefer to chose my own shutter speed. I do often like to slow down the shutter and use IBIS to capture some movement - I use one of the custom settings for that.
There is a difference between average metering and what Nikon calls matrix metering and canon calls evaluative metering etc!
Average metering originally was used in cameras back when meters were first put into cameras and the meter took a totally average reading of the scene without any bias to any part of the scene. This resulted in underexposed images because the sky affected the reading!
Matrix, evaluative and whatever camera companies call it is not average metering! In this type of metering the meter is programmed to analyse the scene against its database and places lenses weight on the upper part of the image where the sky is! This is why the schematic shows different sectors! The reasoning behind this is that this will result in more accurate exposures!
Centre weighted metering has a bias to the centre of the image! Sans of course spot metering theoretically only measures thr light on a very small portion in the centre of the image! It is 1° in some cameras but not as small in others!
Nowadays cameras have a vast database of images in their computers to compare the metering with, something that didn't exist when cameras first had meters!
The other opt-in is to use a handheld meter to either spot meter or to use as an incident meter which measures the light falling on the subject rather than the light being reflected off ur!
Thank you. Yes, I hope I explained in the article that it is a modified average. I am a proponent of and making things simple for photographers; the modified average metering mode (whatever you call it) does that. However, whatever camera you use, if you fill the screen with mid-gray, it will expose correctly. Fill the frame with something black or white, and the camera will try to adjust those to the exposure to the "average" mid-gray of the world.
I think it's a shame that manufacturers didn't come up with a single, universal word to describe that function instead of the less obvious terms they adopted. I think "Average" would have been as good as any. Evaluative, Matrix, etc. are not instantly descriptive of the function to the beginner photographer. Similarly, AI Servo would have been better named Continuous Autofocus.
Thanks for joining the discussion.
Manufacturers collaborating on things like a universal word for multipatten metering?? Not a chance!!
Yeah, pigs might fly.
For the most part, I ETTR, so long as it makes sense. I try to capture as much of the data as possible. What I see in the EVF (or screen, preview) + histogram just needs to make sense exposure wise and what I can recover if need be. I'm typically in Aperture Priority (unless using flash). It's more efficient for what I shoot.
I used to expose to the right, but I've found it has become less necessary as the dynamic range of cameras has improved. Also, I use Lightroom far less now and that always displayed my cameras' raw files as being 0.7 EV under-exposed.
I cut my teeth on cameras that only had manual mode. My first aperture priority camera was the Olympus OM-2n, and it was a boon. My camera is on A mode most of the time, unless (as you say) using flash, or shooting long exposures at night or with an ND1000, or using some of the computational modes.
Thanks for the comment. It's interesting hearing how others work.
I used to intentionally underexpose, but, decided to go with best practice of getting it right in camera as much as and whenever possible. If there was an auto-ETTR option, I'd used that in most cases.
Remember also to use Zebras. In the daytime with the sun high if there are clouds there are and lot of zebra the clouds will be washed out. If you have an +/- EV dail you can go negative and capture the clouds also, I do this in aperture mode, yes a dark image in the field but in post up exposure or shadows to bring things back. I also do Aperture mode for day, You paid for the camera magic and no one will know the difference.
Yes, Zebras are hugely useful. I agree that using the camera in whichever way you prefer is fine. Viva aperture priority! Thanks for taking the time to comment and for sharing your images. You have some fantastic scenery where you are.
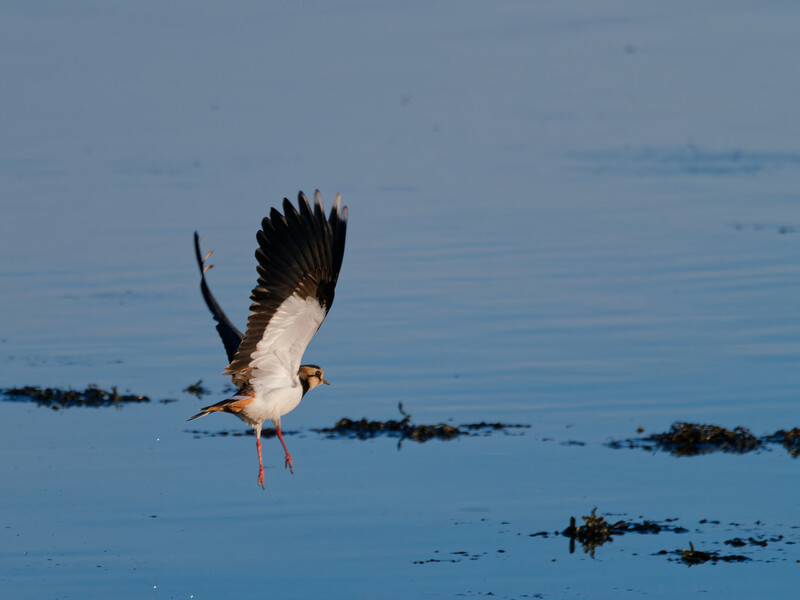
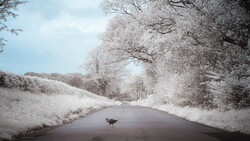
The Bird Image
With modern cameras like my OM-1, there is more flexibility. I underexposed this shot by one stop to help increase the shutter speed and then brightened the image in processing, which I could do without producing the noise that would have been prevalent with older cameras....
Yep WHY A mode your dead from the start? If you metered the birds whites with spot and set the correct exposure in M mode camera meter PLUS 2 no matter where the bird flew in the same light right, your exposure is perfect. (would be better if camera manufactures made histograms from RAW images with channels instead of JPEG) In A mode your shutter speed changes BLURY photos very possible your ISO changes noise in shadows. YES there are times for A mode but that Bird image wasn't one of them and you wouldn't have to underexpose and PP to get a balanced file you would of been free to acquire the perfect pose and with the perfect tones in the right light.
Be proactive in you exposure determination use a high shutter speed to freeze the action don't shoot wide open to get the sharpest part of the lens and just use AWB.
You highlight the issue there: the light levels changed dramatically. At first, that bird was sitting in the shade of a boat at the waterline. Furthermore, I was looking down at the bird from slightly above, so the whites under the wings were hidden. When it took off, the lighting on it was utterly different. I would never have been able to change the shutter in time, so let the camera do the heavy lifting.
It is possible with the OM-1 to set the minimum shutter speed in aperture priority mode, adjusting the ISO automatically. I usually have it set to 1/1600th for large birds like this. Dialing in under-exposure made sure that the whites were not blown, and the bird not blurred, (Menu, camera 1, sub-menu 3, ISO-A Lowest S/S.)
Thanks for the comment.
I'm terrible sometimes I'll miss exposure completely in a shot but I'm so lucky because I use GFX cameras and honestly you can just about recover a black photo which in some instances that will happen but generally speaking I have found the Fuji cameras to be really good with exposure even the XT5 has pretty good dynamic range for a crop sensor camera and yes I do use my histogram but not on every single shot. I tend to use it in landscape photography, but not much else.
Thanks for the great comment, Nev. Yes, the XT-5 has an excellent dynamic range of about 13.9 stops. Most contemporary ILCs have over 13 stops of dynamic range, which is more than sufficient for most photography. It wasn't that long ago when 35mm (full frame) sensor cameras like the 5D Mark III, considered excellent in its day, had only 11.7 stops, so new entry-level cameras outperform that. Even my Micro Four Thirds OM-1 Mark II camera has 13.6 stops, and recovering shadows and highlights is never an issue for me.
So we are operating at about the same range as Fujifilm GFX 100 film and about double Kodak Ektachrome E100 film.
A typical human eye has 18-20 stops of dynamic range, so as sensors improve, can we expect the technology to aspire to that?
it's really funny. I've never actually understood the lights and the number. I'm probably one of the least technical photographers you'll ever meet. I know how to take great photos. Don't get me wrong but I don't always understand the technical terminology but there is a fair bit of difference between my GFX 100 Sii and XT5 .... allegedly the GFX is 14.5 stops and the XT5 is 13.9 like you said but when you edit the photos the reality is very different but there's probably other factors of play with that one of the reasons I love my GFX camera for my weddings is that you don't have to worry about exposure too much just get the shot and fix it later
Photons to photos gives me some other values, but still the OM beats the 5D mk3 at base iso, it catches up at ISO values above 600.