
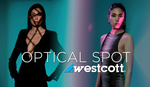
The Westcott Optical Spot by Lindsay Adler is a modifier that can be used to create a variety of in-studio effects including shapes, patterns, hues, and selective shadowing of a subject or background. If you are a portrait photographer, this device can open up a myriad of creative options for you and your clients.
What Is It, Exactly?
The optical spot is not a flash, nor does it come with a flash. So, if you are considering purchasing one, the first thing to know is that you will need to use it with an existing flash system. Westcott gives you the option to purchase it with a variety of mounts to fit all of the major flash brands, so you do not necessarily need to use Westcott lights.

As the name suggests, it is an optical spotlight and includes a lens that you can use to focus light to create either hard or soft lines in your image, as well as project any number of shapes. The effects are accomplished by using gobos (or go-betweens), which are pre-made shapes that literally go between the flash and your subject, projecting the pattern onto your subject through a lens on the front of the device. This particular spot includes a variety of gobos and many other shapes can be purchased separately. Another excellent feature is that the spot has four built-in shutters that can be manipulated to create custom shapes or flag the light.
If you are a Canon shooter, one advantage is that the lens mount accepts any Canon EF lens, which gives the device even more flexibility as different focal lengths will affect how the light is projected.
To use the optical spot, simply attach it to an existing light (either a flash or continuous light), and slide in the desired gobo to project a variety of shapes, lines, or patterns onto your subject. The spot can be used by itself as the main light source or in conjunction with other lights, and you can also attach colored gels to the lens for added versatility.

Brandon lit with a Westcott flex panel as key, a Westcott Optical Spot to create the round circle of light around his camera right eye, and a light stick to add the purpleish hue to the background.

A self portrait using one light fitted with the Westcott Optical Spot.
What’s Included in the Box
- Carrying case and shoulder strap
- Optical ppot
- Lens and lens pouch
- Gobo holder
- Eight gobos (heart, star, window, three sizes of circles, two patterns)
- Five gels (red, green, blue yellow, and orange) and gel holder for the lens
- Small case for gobos and filters
- Instructions and other paperwork
I was pleasantly surprised by the large, sturdy case that the optical spot arrived in, and as is always the case with Westcott products, the item itself is well-made and has a premium feel.

Behind the scenes, using two Alien Bees flashes, one fitted with a beauty dish and the other with the Westcott Optical Spot.

An image of jazz musician Nicholas lit with a beauty dish and Westcott Optical Spot projecting a pattern.
Setting Up the Optical Spot
If you are using strobes, you need to use a modeling lamp to see how and where the light is falling. The lens can be focused to make hard or soft edge lines, although this becomes a bit of a challenge if your flash system does not have a powerful modeling lamp. With Alien Bees flashes, I need to reduce the ambient light in the room to clearly see the effect of the modeling lamp and tweak the projection shape, size, and focus. Another downside of using my Alien Bees is that the optical spot becomes extremely hot, and I must be careful while handling it if I've been shooting for a while. Putting that aside, using the spot is fairly easy and straightforward, and the above challenges may or may not be an issue at all depending on your brand of lights.
One of the coolest features of the optical spot is that it has four built-in metal leaves which you can manipulate to create custom shapes or flag the light as you see fit. I’ve used these to create a single strip of light across a face, or a triangle,for example. It’s very easy to adjust and an excellent feature. Adding a gobo is also easy, as you just slide one of the round gobos into the holder and then the holder into the spotlight. And, if you so desire, you can add a colored gel on the front of the lens. It’s quite simple to operate.

This image was lit with a single Westcott flex panel as a key light, and the optical spot fitted with a pattern gobo.

This self portrait was lit with a flash in reflector as key, and the Westcott Optical Spot was used to project a circle onto the background.
Using the Optical Spot
So far, I have used the spot as a single key light, as a fill light for additional flashes, and with mixed lighting using Westcott flex panels and light sticks.
By far, my favorite way to use it is with mixed lighting using Westcott flex panels as my main light (or lights). I like doing this for several reasons. First, the flex kit is my go-to studio lighting system, so I am comfortable using it. I love being able to see exactly how the light falls on my subject before pressing the shutter, and it's easy to dial in a key light before adding the spot. Second, I can turn down the ambient light in my studio so that I can see the results of the modeling lamp, while still being able to retain enough light in the room via the flex panels themselves.
A challenge with using the optical spot is that your subject needs to remain perfectly still once you dial in your settings, or you will need an assistant to constantly adjust the angle of the light as your subject moves. If you are creating a strip of light across one eye, for instance, and your subject moves even a little, they will not be in the sweet spot. Again, this is not a big deal, but something to keep in mind as the session progresses. If I am working without an assistant, I just remind my client to stay as still as possible.

This image of Dana was lit with a beauty dish, with the Westcott Optical Spot projecting the sutble strip of light across the camera right eye.
Is It Worth the Investment?
I think the biggest question regarding the Westcott Optical Spot by Lindsay Adler is, do you need one? For me, the answer depends on the type of clients you work with. If your clientele consists primarily of corporate sessions, then the answer is probably no. I can’t think of a situation where a corporate client would like a strip of light across their face or a pattern projected on the background of their headshot, and although I suppose there could be a corporate client who would want something like this, it's certainly not the norm.
If you are working with models or artists, however, I think the optical spot can be a great addition to your studio. As someone who works with artists frequently (mostly musicians), the spot has been an excellent addition to my arsenal of modifiers, and I have created images for clients that have been well-received. Also, speaking from a financial standpoint, I can offer my clients an even greater variety of images, which means I can sell more images. For me, it has been a win-win.

Nicholas lit with a beauty dish and Westcott Optical Spot using the built-in metal leaves to create a line of light.

Brandon lit with two light sticks and a Westcott Optical Spot fitted with a heart shaped gobo.
Conclusion
I have found the Westcott Optical Spot by Lindsay Alder to be an excellent addition to my studio, and I feel like I have only scratched the surface of what I can do creatively with it. As I experiment with it more and more, I will continue to offer my clients unique images that will stand out, and be an asset to their brands. You can purchase yours here.


My biggest problem with using optical snoots is strobe overheating - between the modeling light (which you need to aim the pattern properly) and the heat of the strobe pops I found my strobe (Godox AD600) shutting down or missing many 'pops' because of the internal heat protection circuits. I would love to hear if anyone has an idea/solution to help!
This is the only reason I haven't bought this yet. I'm afraid either my AD600 or VL300 would overheat with it on. I've only ever seen it used with Lindsay's Profoto setup.
I don't have Godox flashes but I've heard they tend to overheat in general, so if this is true, I could see it being a major issue to use them with the optical spot. With my Bees, the spot gets super hot, and it's metal, so you've got to be careful, but they haven't overheated or stopped working.
I've been using the AD600s for about 5 years now and have only had an issue with overheating once, and that was in the middle of summer when they were in direct sunlight.
When I used White Lightnings, the fans kicked on all the time so it's good to hear that the ABs can handle it without shutting off.
The fans on the ABs sound like prop planes LOL
Oh yeah, on more than one occasion, I had a client look concerned and ask me if something was wrong when my WL fans kicked on.
As I see some compare tests, Westcott have a better solution against heating, Godox optical snoot is very hot
I just used it for the first time yesterday! I've seen it used in portraiture before but I was curious about bringing it into the product world I need to keep working on the idea but I love the creative opportunities this opens up
This is amazing work, Michelle! I didn't even think about using it for product photography. Great idea and excecution!
First of all, $499.00 is way too expensive for that! Here's my take on even the cheaper ones from China.
1. That's baked into your image, a major No-No for me.
2. I use Boris-Effects-Optics, It's a plug-in for Photoshop, and I can create anything that this device can project, onto a Layer. Then I can manipulate it in so many ways, it's stupid! Yes, even have it wrapped to the subject's shape.
One less thing to carry around, or have in the studio. Boris-Effects Optics is only $99.00!
Baked in like, the lighting, setting, wardrobe, makeup, basically everything? If you wanted limitless flexibility you should be a 3D artist lol
Hey Leon, I would love to see some examples of this, as I've never tried to do these kinds of effects in post.
In general, I prefer to get my images as complete as possible in camera, without relying on editing. Part of this is because I just don't like editing and staring at a screen for hours, but it also makes it much easier to create and execute a concept, since I see the results immediately. It's also much more exciting and engaging as a process when I have a model and crew on site, since we are viewing the final results in real time as the photos pop up on my monitor. I think it would be so boring and silly to tell my client, "I know this image looks flat and boring, but don't worry, once I get it into photoshop, you're gonna love it! I'm gonna do some wicked light painting on your face!" LOL but this is just how I see it of course.