When shooting beauty, there is a lot to keep in mind. How does the makeup look? Is the lighting clean? In the background clean? How is the model's expression? Learn my own process and join me behind the scenes in shooting a male beauty story with the Fujifilm GFX 50S.
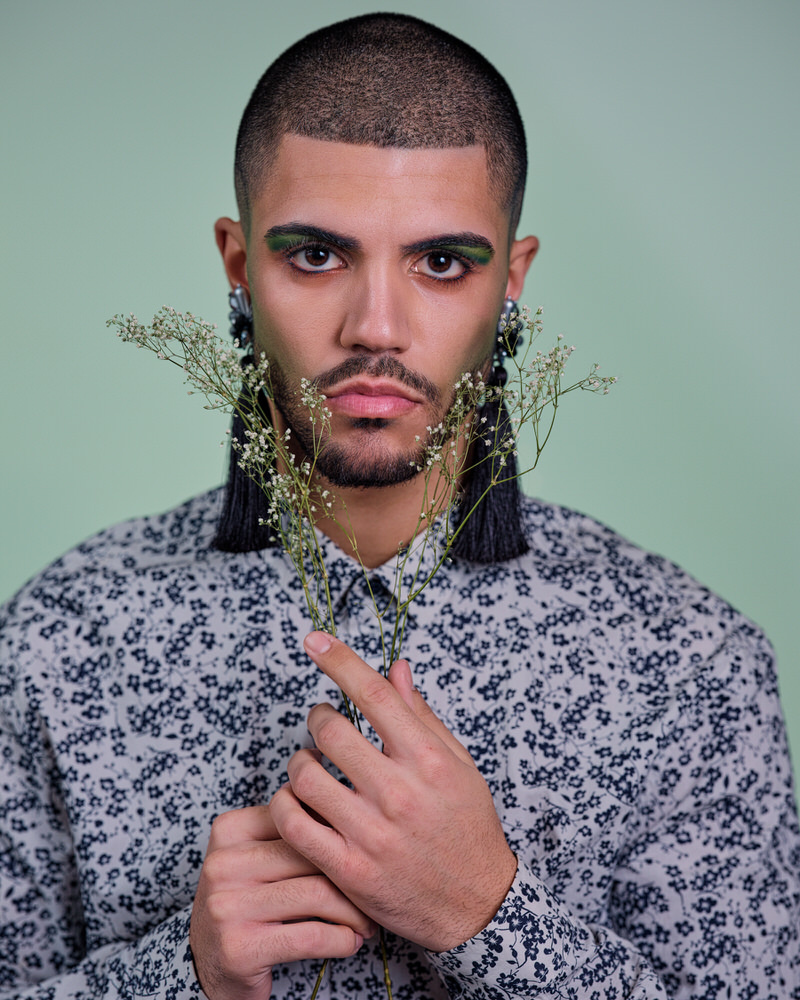
I have somewhat recently learned that I really enjoy photographing beauty and want to pursue that more in the future. I recently had the opportunity to try out the Fujifilm GFX 50S to see if I wanted to buy it, and while I have decided against that purchase, I did utilize it recently photographing Zachary Mitra of BnM Models for a beauty editorial which was published in SHUBA magazine.
Preparation
Almost every photoshoot I do starts on Pinterest. The ability to put together a look book and pull references together so quickly and easily to share with the creative team is second to none. Next is pulling together said team. I have worked with makeup artist Sangeeta Bhella before so she was my first choice and, thankfully, she was super into it. I knew I wanted to have some beautiful jewelry as well for our model to wear so I contacted Toronto designer Nina Spade and she was gracious enough not only to loan us some beautiful pieces, but make some specifically for the shoot.
We were fortunate to shoot in the gorgeous Studio Fontana here in Toronto on a cold January day. My assistant and I brought all of our gear to the location only to discover that while I had thought Bhella had booked the studio, she thought I did. Fortunately, no one else was booked that day so we could still shoot but that was a close call. We started unloading our gear and I got to doing my lighting tests.
Lighting and Setup
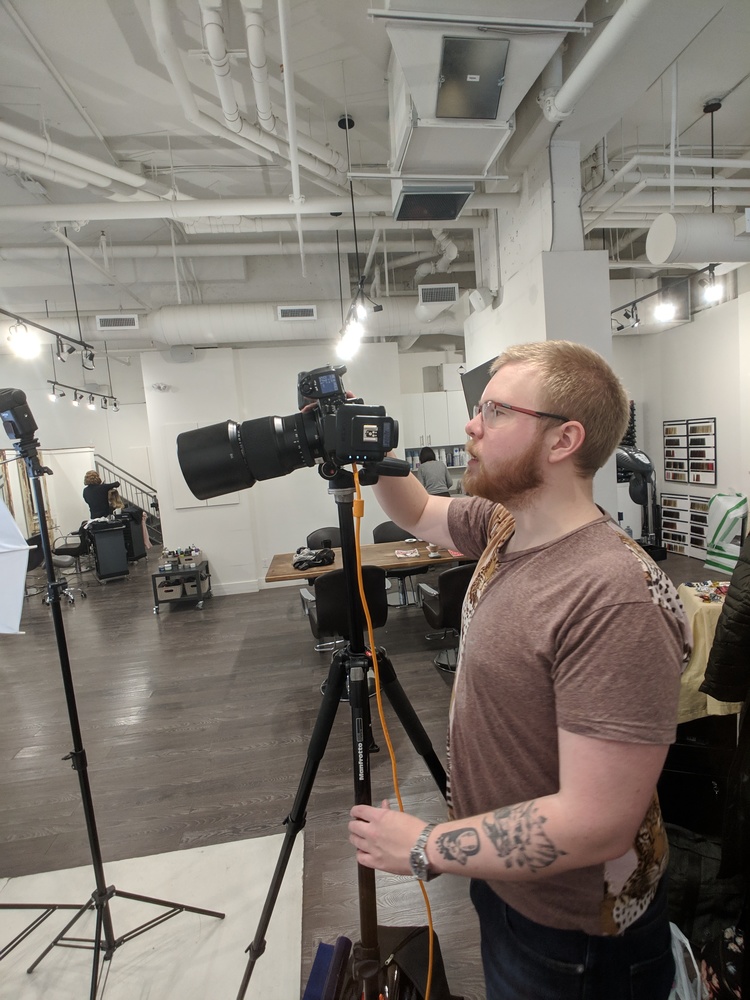
For lighting this shoot I used three Cactus RF60s — well two Cactus RF60s and one RF60x — triggered by the Cactus V6 II trigger. I had one flash camera right shooting through an umbrella, a second light camera left firing into the window blinds to reflect and give me some fill, and the third light was pointed at the background, but I will get to that in a moment. Since there was not a lot of light with the blinds shut, I also used a cheap Chinese light wand (similar to an Ice Light but one-tenth the cost and not as nice) right next to the umbrella because I wanted to keep the model's eyes from dilating too much. As you can see in the below image, I was tethered into Capture One with a Tether Tools USB 3.0 cable to ensure that I could properly monitor the image and check my histogram, etcetera (you can also see we drank a lot of water on this shoot).
Directly behind Mitra was my third light pointed at the background which was extremely important as the studio simply has a white wall and I do not use backing paper for most of my photoshoots. When I want a different color, I use gelled light to get any color I want. For each of the four looks, I used different Rogue Gel filters to get the color I wanted, sometimes mixing them together like a painter to get the exact right tone. For example in the photo below, I used a green correction gel with a 1/4 CTB to give me just the right shade of mint green.
It was finally time to shoot our first look and, along with every other photo in this shoot, I used the Fujifilm GFX 50S and the GF 110mm f/2.0. This is just a magical combination. The 50 megapixels on the GFX 50S did result in a lot more work for retouching, but that resolution and the larger format gave me a beautiful, unique look with lots of room to crop if I needed it as you can see below by the 100 percent crop versus final image.
[beforeafter label1="100 Percent" label2="Final Image"]

a 100% crop of the GFX50S100% crop of 50MP on the GFX50S

the full final image zoomed out
We shot every image at ISO 100 and f/4 at 1/125 of a second and I shot four looks: pink, blue, orange, and white. While it could be construed as the four seasons, that wasn’t really our goal but it definitely fits and it’s not something I thought of until this very moment writing this BTS article. I don’t like to micromanage so I try to work with the same group of people as much as possible so that we can develop a shorthand and adapt to each other's specific preferences and build that trust together. Having worked with Bhella before I have learned to trust her implicitly so I just gave her some rough direction and went to work on tweaking the light, finding the right outfit, and pulling some selects while we waited between looks. Spade became more than just a jewelry designer and provider but a real collaborator helping us choose just the right flowers for each shot and the shoot wouldn't be the same without her.
Throughout most of the shoot I kept myself pretty straight on to the subject, but for the orange and white look I wanted to shoot down on Mitra a little bit, just for a touch of variety to the shots. Thankfully I had the Fujifilm EVF Tilt adapter so I didn’t need to get up on a non-existent apple box to see what the camera saw.

BTS shot showcasing me using the GFX tilt adapter. Note how the camera is tilted down to the left but the eye-piece is tilted down to the right.
Postproduction
After shooting, it came time for my least favorite part of photography: culling. My culling process is generally to run through the photos as quickly as possible and mark photos I don’t immediately hate as two stars, then I go through a second (and third, and fourth, and fifth time) continually culling through marking shots that don’t make the cut a one-star sort of a "survival of the fittest" style of image culling. I find it fast and efficient and also lets me keep an eye on the total number of images for when I'm working with clients that want a specific number of selects.
Lastly, I had to edit my selected photos, three shots of each look. I do most of my color correction in Capture One and final retouching in Photoshop. For color correction I wanted things to be punchy and saturated while keeping most of my detail since, originally, things were a bit too flat straight out of camera.
Next came Photoshop. I knew that I needed to even out the skin tone and remove most of the small blemishes, as well as straighten out Mitra's hairline a little since it had grown in a bit before we started shooting. We attempted to clean it up on set but Mitra's skin was sensitive and began to bleed. It's easy enough to fix it in post so we took like The Beatles and just let it be. I also used some luminance masking to bring the midtones down and make the highlights pop without clipping resulting in a final image like this.
Conclusion
As you can see, you don’t need any fancy lighting to make impactful images. I could have used a much more rudimentary camera; When talking about photographs like this they don't matter that much (especially for a shoot that will, mostly, live online) but I had access to the GFX so I used it. Overall I am extremely proud of this whole editorial and look forward to my next shoot. If there is one thing I hope you learned from this it is that utilizing gels allows you to turn any background into almost any other background quite easily, and adding colors to each other allows you to create even more colors. A 1/4 CTO folded over itself can become a 1/2 or full CTO — these things add onto each other.


