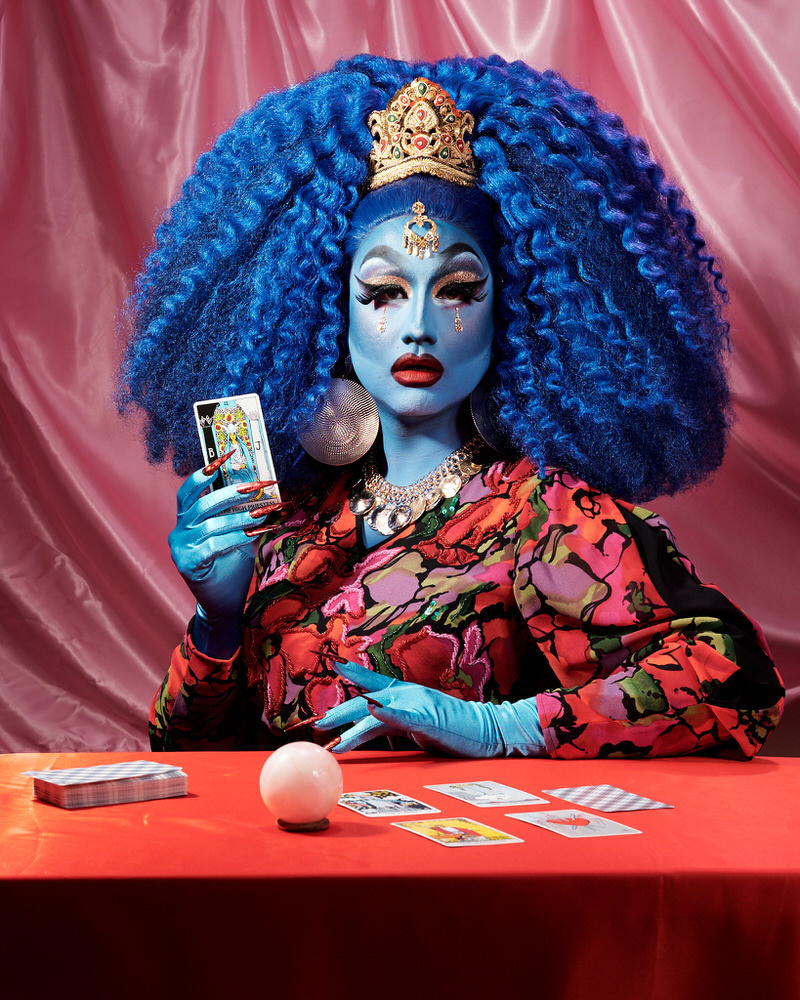
When taking a portrait of an artist, I find it is always a good idea to try and tell the story of the artist through the image. If someone is a musician, the aesthetic of a photograph should help you understand the type of music they play. Similarly, if someone is a drag queen – I try to photograph them in a way viewers can instantly ‘get’ their character. Join me behind the scenes in photographing Mango Sassi, a Drag Queen from Toronto, ON, and have a look into what it can take to create a collaborative image!
Building a Concept
The first thing before any photoshoot is to nail down a concept. I chatted with Mango regarding their inspirations for their character, which is a lot of astrology, mysticism, and some Hindu references. I knew that I wanted to incorporate some of that into the shot so I went to work pulling images I like and putting them onto a Pinterest board, while Mango went to work creating her look. I like using Pinterest because of the flexibility and ease of use to pull references from all over the web - as well as the collaborative capabilities of it. Mango and I talked about all of our ideas over the course of a few days - ensuring that we were both on the same page creatively - before finally nailing down a date to shoot... And then moving it because I got another gig... And then moving THAT because she got a gig... And then, finally, getting together to create our images.
Building the Set
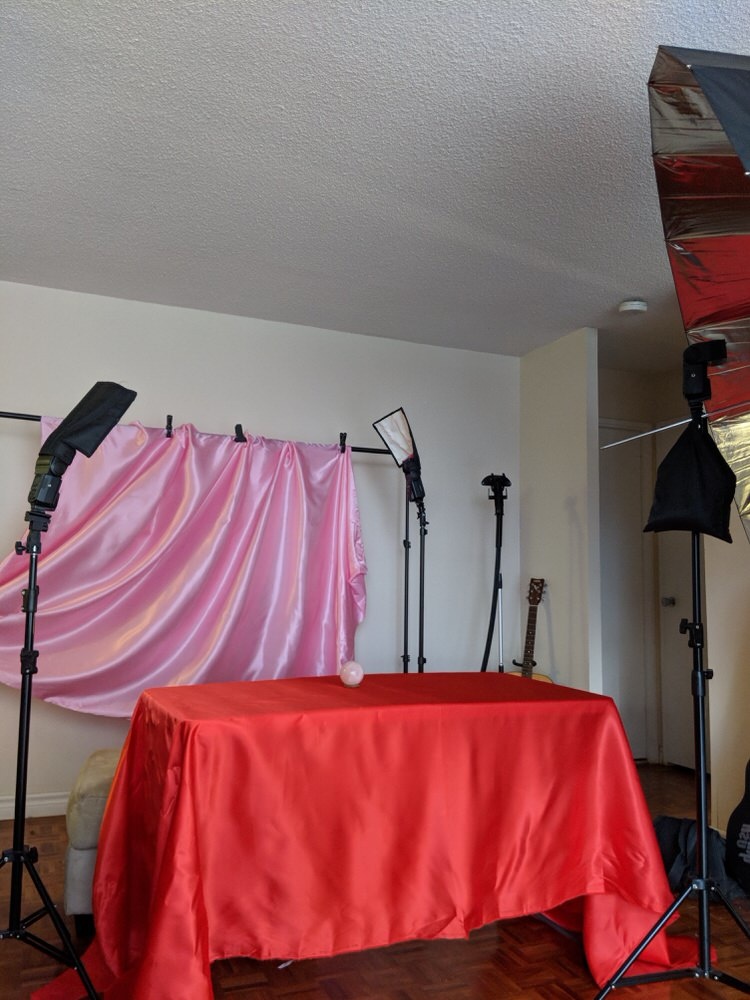
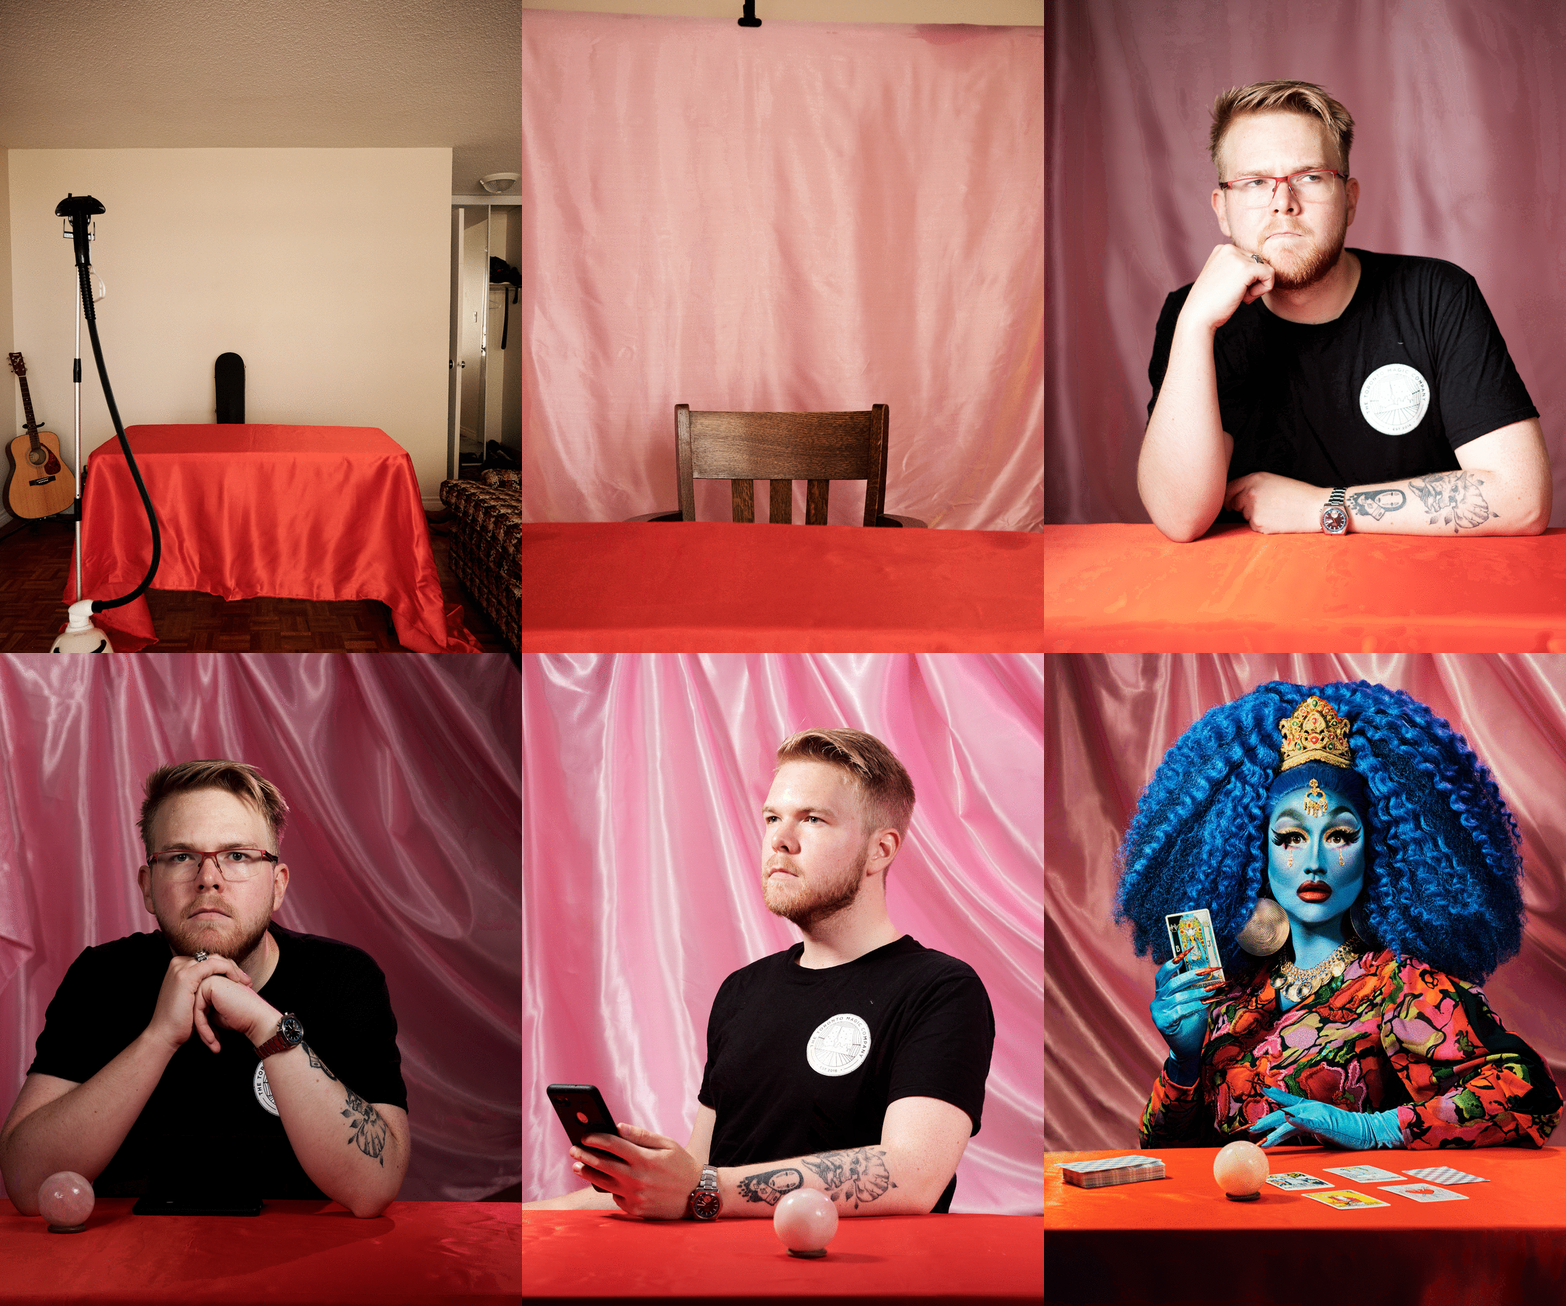
I don’t often build sets for my photoshoots, I’ve only done it once or twice and I definitely want to do it more, but for this shoot, I had a specific idea in mind referencing the TIME magazine spread for Game of Thrones in 2018. I grabbed some satin fabric I have laying around for backdrops etc. and one of those plastic tables you see at trade shows. I grabbed my steamer (A must for every photographer) and got to work setting up. I wanted this to look perfectly imperfect, almost regal. I knew that Mango would be painting her face blue, so I knew to use some pink and red fabric for bold contrast. It took a while to steam the fabric – this is not a material designed to be used as a backdrop – but I got it looking good enough and used some backdrop stands and clamps to mount it. I only have a small home studio – but something to keep in mind is that the viewer only sees what the camera sees so as long as what your camera sees looks nice, that's all that matters. What was rather funny is the table I have is rather short, so instead of a chair – she had to sit on an ottoman which you can see in the lighting shot below.

BTS of the lighting setup on our set
SETTING UP LIGHTING
I knew I wouldn’t have long with Mango, so I decided to pre-light as much as possible. Since drag is generally an illusion I knew I wanted a lot of light to fill in all of the pores etc. I knew that I wanted the lighting to be extremely soft so as to not highlight her male jawline. One challenge when shooting drag queens is that they often have 5+ pairs of fake eyelashes on – so lighting from above is generally a no-go because it throws their eyes into deep deep shadow. For this shoot I used three Cactus RF60x flashes (Two RF60 and one RF60x) triggered by the V6ii – one was firing into a 65 inch reflective umbrella camera right, one was firing into a flexible on-flash bounce camera left and the third flash was up and behind the subject with a pink Rogue gel as a small hair-light.

Building the set and lighting setup for the photoshoot - including myself sitting in for loghting tests

Shooting the Photos
Shooting this was super fun, though due to a lot of outside influences, what was originally going to be an afternoon, only ended up being about an hour or so to get two different looks. Another reason to pre-light whenever possible is to save your butt when plans suddenly change. With everything already set up for our first look, I got Mango to sit and did some final lighting tweaks. It was only a few frames until we got into the groove of things and we were off to the races! For this shoot, I used the Fuji X-T1 and the 56mm 1.2 as my lens of choice. After just a few shots, I knew we had the image and we moved to the next setup (which is a story for another post). Below you can see the straight out of camera shot we settled on for this specific photo. The settings we settled on were ISO200, F8, and 1/125s because we wanted it to be sharp with deep depth of field.

Straight out of camera photo of Mango Sassi - the final shot we landed on for this image
Post Processing
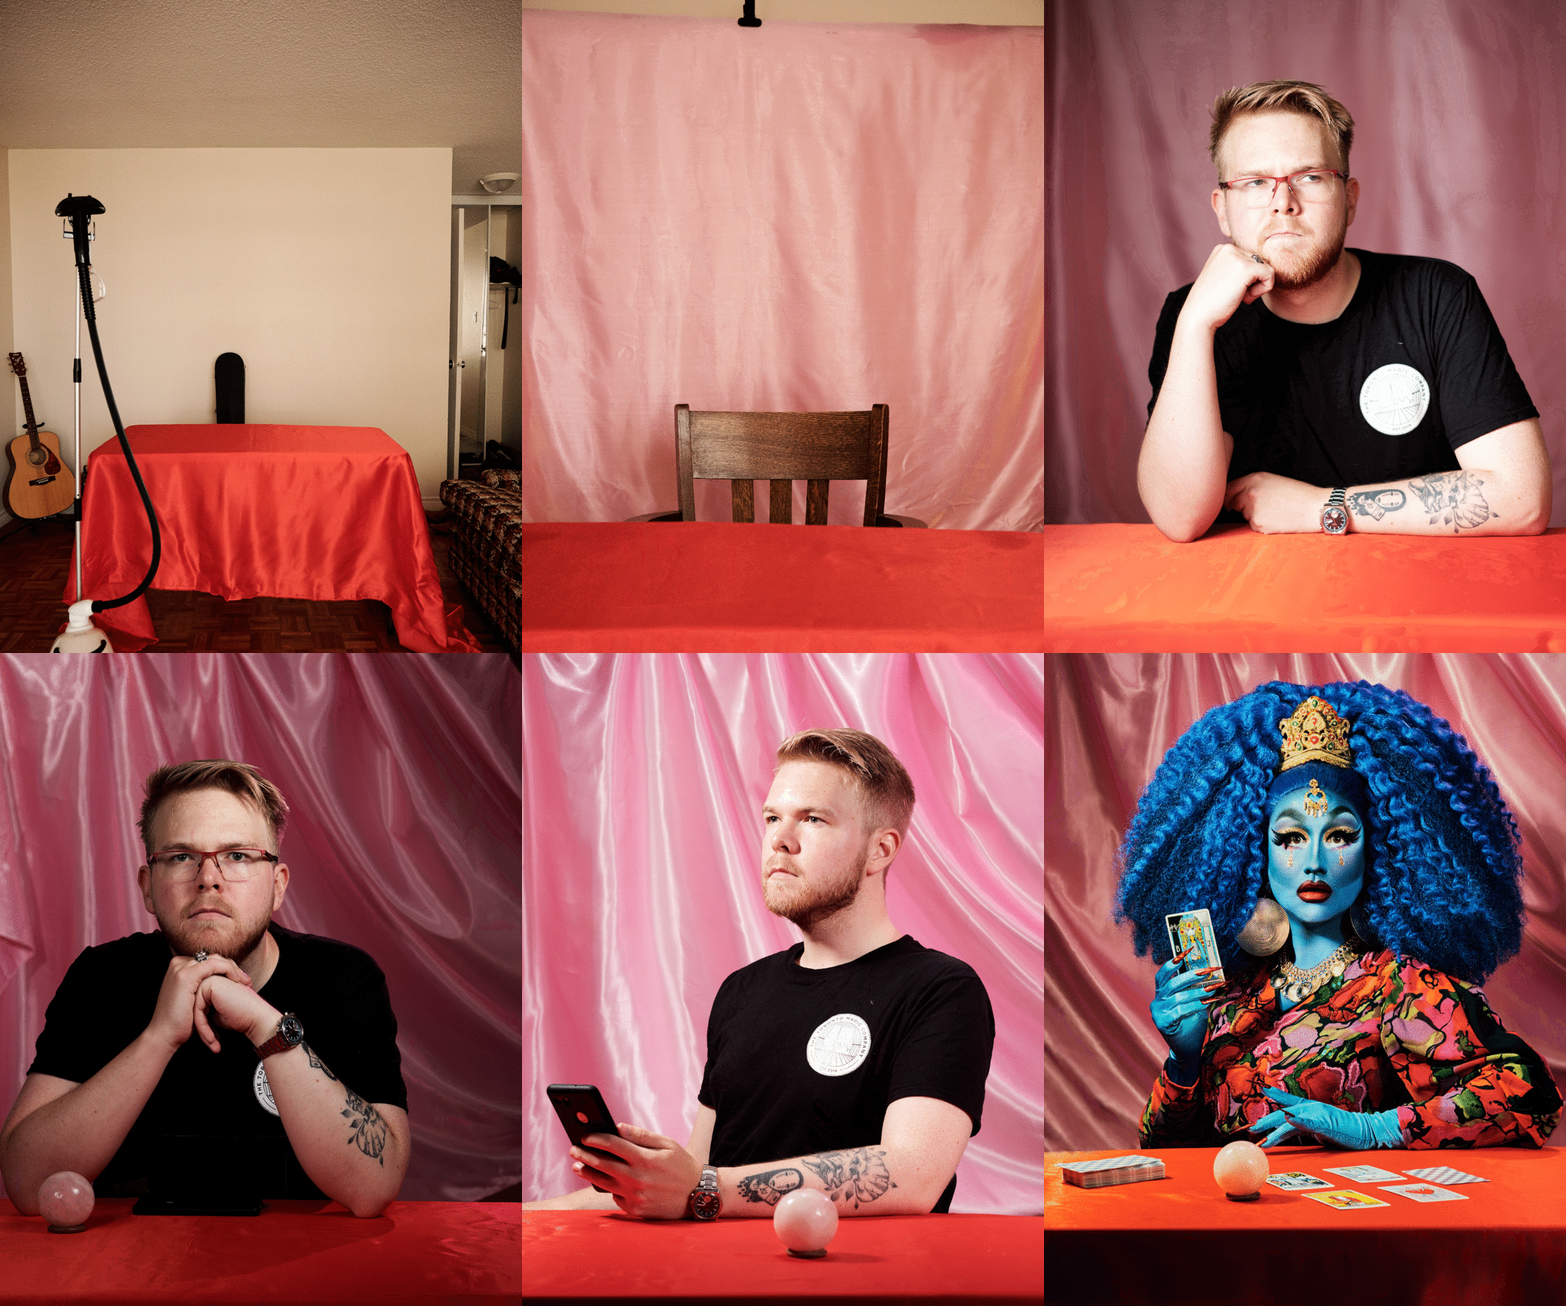
I am a Capture One Pro user, and this shoot was no different. I used it for all of my culling and basic editing, Photoshop for everything else. As you can see above, along with the image being overall a little low contrast and purple – there is some messy hair, the background still has some wrinkles, and the biggest issue of all is Mango’s eyes are too dark. Thankfully, I used a tripod for this shoot so it was no issue for me to grab a shot with nice eyes and blend the two images together. I used some dodging and burning, color tweaking, and cleaning up of the wig and skin we ended up with an image I am extremely proud of.

The photoshop process of Mango Sassi's image - showing off cleaning, dodging and burning, compositing and all of the final touches
As you can see with a little ingenuity, you can use relatively meager equipment and collaborate on a good idea to really pump out something unique and eye catching – merging references between you and your collaborators, building off of the art of the past and coming up with something truly new and old at the same time.


Thats awesome David! Great write up and explanation...keep up the good work!
Great write up, really enjoyed it!!
Fun and beautiful portrait. Thanks for sharing your process.
Thank you! I hope to write more articles like this in the future!