
Creating a music video for a national act is one of the most intense tasks for a modern day filmmaker. Sure, the tools are more affordable, but declining budgets and insane turnaround times can turn your production into a sprint. Last month, my company, McFarland & Pecci, was tasked with creating two new music videos for the Grammy-nominated metal act, Killswitch Engage. My partner, Ian McFarland, and I drop everything when these guys call. Not only are they a blast to work with, but after about five successful projects with them, they completely trust our creative ideas. We are also known for delivering our products on time and well within budget. This can be challenging with an album release schedule and the fact that music videos tend to be decided at the last possible minute. For this video, we were tasked with shooting, editing, adding effects, and mastering in 10 days!
We need a solid plan, specific shot list, and a tight post-production workflow. That’s the only way we could ever deliver this video on time.

Strength of the Mind
We set out to make an energetic performance video, but not the cliché “head banging in a basement” type. We wanted something fresh. Our idea was to create what an eight year-old would think the writing process for a metal album is really like.
So, the band writes in a room that is on fire! The room is filled with crocodiles, rattlesnakes and half-eaten pizzas. When the singer writes down his lyrics, they are so powerful, they jump off the page. The music is so intense, so heavy you can’t see straight! Did I mention the fire? Well, yeah, it’s blue!
Yup, that’s how it started. First things first, the band had to be in it! Not only is it cost effective, it’s ultimately what the fans want to see on a heavy track like this. The song's tempo dictated a fast-paced edit, which threw any sort of traditional narrative out the window. If we were going to impress our inner child, it had to look cool! If we were going to make the deadline, all the special effects and visual tricks were going to have be shot in camera. We didn’t have time for post-heavy effects. My first thought was a technique called “lens whacking.” Basically, the camera records without a lens attached. The operator holds a loose lens in front of the exposed mount and moves it in and out to give the footage an intense shake and random moments of focus. It also allows for some serious light leaks and dynamic flares. This technique allows for gorgeous happy accidents, and most importantly, it gives the operator the opportunity to perform the effect to the music with the artist.
The exciting part for me was that everything would have an organic feel, unlike those stock flares that everyone likes to apply in post. We’ve done some previous testing and discovered that using this technique with a specific set of Sigma still lenses could get flares that had sharp edges and light leaks that formed strange patterns and shapes. I used these shapes to cover up portions of the frame that seemed empty or less dynamic or to sometimes reveal a specific detail in the musician’s performance. During that testing, I also discovered that LED video walls (running color patterns and video loops) gave off a specific kind of light that caused some amazing variations in the lens flares. We partnered up with Tristan Rudat from JDI Productions, who does the video walls for Killswitch’s live shows. Together, we designed a running loop of colors, strobes, and blue flames set to the music. The road crew then built an 8 by 10 ft. video wall on wheels that could be rolled into the background of each small set built by our art director, Jennifer Dunlea. The flares created were beautiful!
Graphics and Titles In Camera
One of the other concepts for this video was to show quick flashes of the lyrics that the singer was writing in a scene. We wanted to have the ability to flash these at random points during the song to help carry the viewer’s interest. Could we have made these in After Effects? Sure, but where’s the fun in that? I also find that if you have unlimited options when creating graphics, it can take forever to make a decision. I wanted a bin full of chaotic happy accidents that we could quickly overlay in the timeline.
We had specific lines of the song printed out in various sizes on vinyl and attached to sheets of plexiglass. Mounted on c-stands, we were able to arrange these words in front of the lens at varying distances. Racking focus through the words "Strength of the Mind" (printed on three sheets of plexiglass) would make the text appear and disappear out of nowhere. We set them up in front of a 12 by 12 ft. black solid, making it easy to quickly blend the lettering in the edit timeline using the "screen" overlay feature. We lit each one independently, using my ikan ID1000 1’x1’ LED lights. Every light is different, and it was all about picking the light that looked good on the vinyl. The ikan units were perfect for this, because with the twist of a knob, I could dial in a custom white balance, and they gave off a soft clean light.
Metal Never Looked so Good
If you look at our past videos, you will find a common theme of vibrant colors and meticulous color grading. In the past, color grading a music video was a time-consuming process. Making sure the colors and contrast were consistent over the hundreds of individual clips just takes time — time that we didn’t have. We needed to come up with a faster workflow for color. That meant getting the lighting as close as possible on set and thus, designing a color profile that could be applied simply to the flat C-Log raw footage. In a perfect world, I would want to be able to light to the final color grade on set. This is why we decided to use LUTs.
What is a LUT? LUT stands for "Look Up Table." Basically, it’s a specific color and contrast setting that you can later apply to your flat or C-Log raw footage before you start color correction. Want that Michael Bay Transformers look? There is a LUT built with that specific blue hue. Want your film to look like The Kingsman? Grab the LUT that pulls out most of the reds in your footage and pushes the yellows to gold. Once you start playing with these (specifically the Vision Stock LUTs), you will start seeing these looks all over the place. Some folks who use LUTs seem to think that using them is a replacement for light-sculpting on set, that you can simply apply a stock look and get rid of the need for advanced color grading. I disagree. The best part of filmmaking is telling a story from a specific point of view. The director can use all of the tools at his or her disposal to guide the audience’s eyes, ears, or thoughts in a specific direction. That means you still have to create depth while lighting on set. It means that contrasting colors are important. A LUT won’t replace these essential tools. As a matter of fact, the best way to think of a LUT is like a film stock. Properly set your white balance and you can depend on the LUT to shift your colors to your desired look. One of the more recently affordable ways to use LUTs is to load them into your on-set monitor. Small HD has created a series of calibrated monitors that can hold multiple LUTs so you can see how the lighting will be affected by the color look live. These means you can tweak and play to get it almost perfect on set. With a little bit of research and using a LUT from Vision Color, we were able to cut our post color grading time down to one day.
Speeding Up for the Finish
Performance music videos are made in the edit. Ian has been cutting music videos for over 15 years, and he has the ability to turn around an edit for a three-minute song in five days. That’s ingesting, rough-editing, approvals, and final cut in a week. Because he had everything on day one (all the effects and titles), we were able to get it all approved in one pass, and then, it was time to apply the LUT and do our simple color correction.
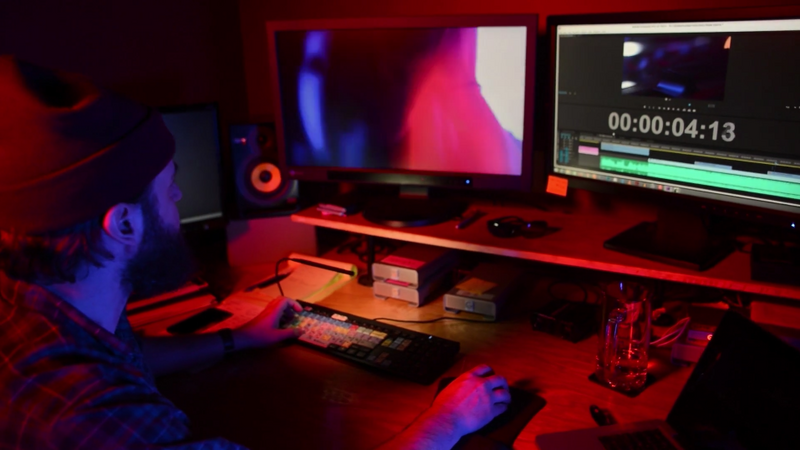
At McFarland & Pecci, we currently edit our projects in Adobe Premiere Pro. With its ability to edit any codec on the market, it’s powerful integration with other Adobe programs (After Effects and Photoshop), and its lightning fast workflow, why would we use anything else? Here is something else that might surprise you. We edit on PCs! Yes, we decided against upgrading to the shiny, expensive black “trashcan” that Apple is selling and went with a custom-built Genisis II 4K edit suite from Puget Systems. This affordable, upgradeable, high-speed machine allows me to edit 4K raw footage in real time and apply effects and grades right in my timeline — no playback rendering, no waiting. I hate waiting.
Our system is complete with the Eizo Color Edge 277 self-calibrating monitor. Let me take a second and talk about the importance of a calibrated monitor. Every tweak you make, every contrast adjustment and color shift you spend hours doing is useless if it looks different to everyone else. The first thing I ask for on set is a calibrated monitor, and the first thing I do before grading is make sure I’m viewing my work in the right color mode. Eizo has built a self-calibrator into its Color Edge series that will automatically test the output of your monitor against the lighting in your room and make sure you are seeing true whites and that the colors you are seeing are actually those colors. It also has super cool modes that allows you to shift through different standards.
Want to see how it will look on your Mac or iPhone? View in sRBG mode. Want to see how it will look on your HD TV? Go into REC709 mode. You see what I’m getting at here, right? If you are a visual artist, the place to spend your money when buying an edit system isn’t on fancy drives or cool accessories. Do yourself a favor and get a self-calibrating monitor, and save yourself the agony of delivering a product that “looks too dark on my phone.”
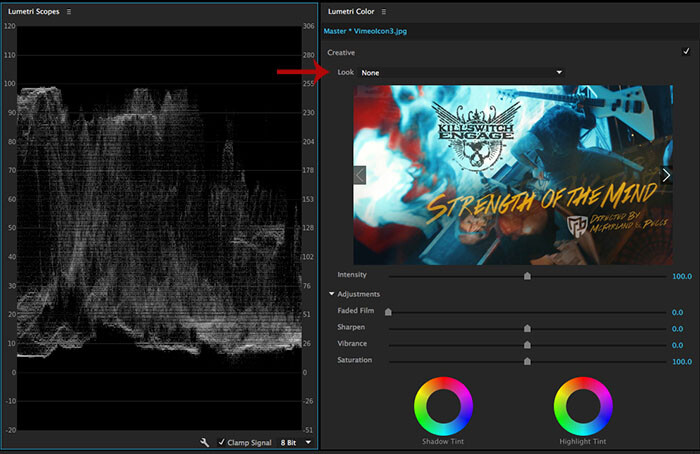
Coloring the footage was a quick process. The newest version of Premiere has an extremely powerful new feature called "Lumetri." It allows for advanced color grading right in your timeline. Once applied, you can paste it on all the other clips. You can apply your LUT in two places, either the “Basic” tab (the first step in the grading process) or the “Creative” tab (which is applied to the footage processed through the Basic step). I highly suggest applying it to the creative tab, because you can adjust all your brightness and contrast settings in the Basic tab before the LUT is applied. This allows you to adjust the unaffected raw flat C-Log footage and see the changes to the LUT’s luminosity without introducing additional noise. Because we were able to get the lighting right in camera, the grading process went lightning fast. We just spent the day adjusting brightness and contrast only on shots we couldn’t get right on set.
Killswitch Engage was thrilled with the result, noting: "The video visually captures a bit of the anxiety and chaos that the song touches on lyrically. It is almost a bit surreal and dream-like with the camera effects."
That made us happy! Now, it’s time for beers! Let me take a minute to plug my crew. We can't make these things without a team of outstanding individuals that have a taste for the creative and a good beer!
Directors: Mike Pecci and Ian McFarland | DP: Anthony Jarvis | Gaffer: Jesse Hicks | Grip: Chris Abbey | PA: Gina Manning | PA: Richie Arms | Art Director: Jennifer Dunlea | Nicole Coakley | Studio: Red Sky Studios


Join the Fstoppers community for free
-
Post comments and join in the discussions
-
Browse the site ad-free
-
Share your work and get featured in the community
-
Compete in the photo contests for fun and prizes
9 Comments
Pecci and McFarland are the best... looking forward to digesting this later.
Hey man, thanks! Let me know what ya think!
Will do man, my foray into music promos has ben very limited and totally DIY/No gear... but managed to do one for Coliseum that I was very happy with.
Loved the short doc you did on Jacob Bannon a while back.
We start DYI too but quickly pushed for more. Ian directed that piece on Jake. I'll tell him you said so.
Oppps sorry man!! I think my main issue is in furthering film work is I have too many strings on my bow: graphic designer, photographer, film maker... and hardcore vocalist hahah. Need to focus on one really.
In my brief time try to get to grips with film, I think my best work has been covering music photographer Steve Gullick, this was the first:
https://vimeo.com/61607832
Then we focused on his work with Nirvana, which i think improved in terms of footage and editing...
https://vimeo.com/86618557
Thanks for explaining in so much detail the incredible process you went through to make this killer clip. And in just 10 days - amazing.
A question : the clip focussed on the individual members of the band throughout, with generally close ups. I'm wondering what was the motivation for this creative choice, rather than also using some shots that include more than one band member, or the whole band together? Thanks!
There were a few factors. First being that members would be showing up throughout the day. Part of being a good music video director is working with the talent and making the shoot enjoyable for them. We also wanted to show how they actually write. They live all over the country and most times write their parts individually. So it was true to the process. In the next video we had the jamming together though. It's a lot more work for each member at that point. They play the track over 40 times instead of around 15. The drummer is exhausted.
Thanks for that, Mike, that is a very well explained answer which makes a lot of sense. Thanks!
Always on the up and up Mike. Glad to see your post here. Look forward to reading this later.