
Product photography is quite technical. Having the right gear is not enough. You also need creative ideas. Learn from my mistakes to shoot better product photographs.
From a Beginning Photographer to Beginning Photographers
Whenever I’m not writing, I work as a documentary photographer with the tendency to hike, wander, and shoot landscape photographs in my free time. Yet, I’m quite interested in different forms of photography. Hence, I decided to try some new styles and areas of photography which I have never tried before. Product photography was one of them.
In a first attempt, I shot the images without any knowledge about the special needs, requirements, or skills for product photography. After I took a first look at the images and found their flaws, I searched for some resources which taught me how to do better. Here is what I've learned.
First Attempts of Product Photography
“It’s just a bottle of Whisky” I thought, “It can’t be too difficult.” When you deal with human beings in an unfamiliar environment, you need a lot of soft skills additional to your control over your camera. You need to be spontaneous and react within seconds. This is where I use to work. Product photography is quite the opposite. You can control everything and need to develop a concept before you shoot.
In my first attempt, I wanted to keep it simple. I got two cheap LED softboxes, a backdrop, my empty desk, a tripod, and a camera. The plan was a neutral background, some diffused light on the objects and a teal and orange color scheme, which makes it pop. This is how the setup looked like:
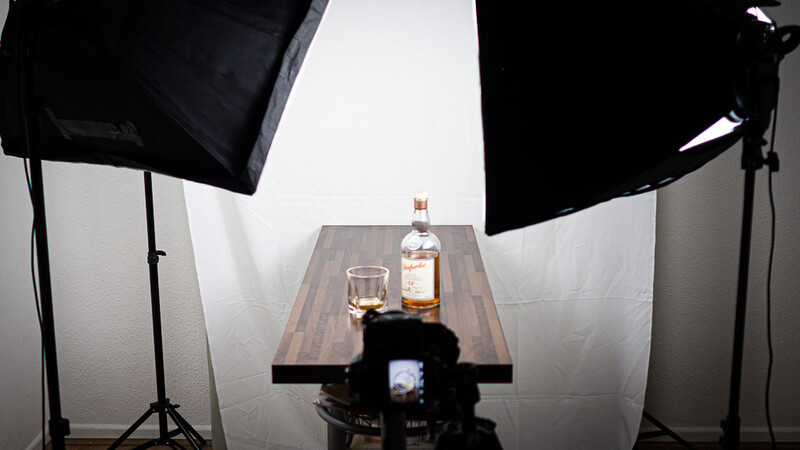
Image From the Setup
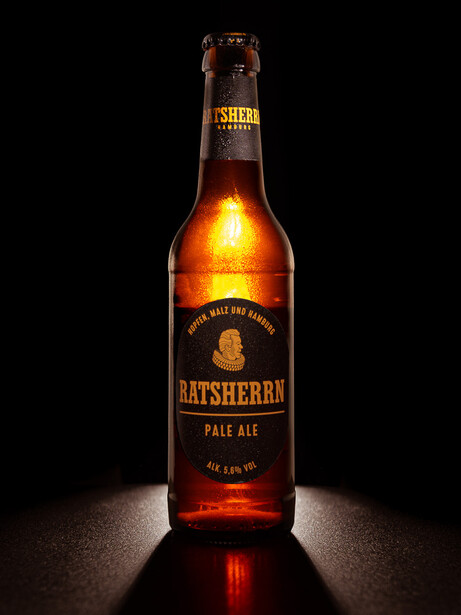
The shot was done quite quickly. The only thing that I changed during the shot was the background. I replaced the white cloths with black fake velvet. After figuring out the right exposure, I captured two images: One with the bottle in focus and one with the glass in focus. I looked at the exposures and loved the out-of-focus look of the black velvet backdrop. In Photoshop and Lightroom, I added a nice vignette, some clarity, orange to the highlights, and blues to the darker parts. This is the result:

I like the image and I guess the idea of the color scheme works quite well. Yet, there are many issues. While setting up the whole composition, I didn’t see that the glass could have been a lot cleaner. I spent a while with the spot removal tool in Lightroom until the worst parts were cleaned up. Other bigger flaws are the out-of-focus top of the bottle and the prominent reflections of the softboxes. Even though the colors are quite appealing to me, I’d also like to find out how to make the products pop a little more by adjusting the lighting.
How to Improve Product Photography
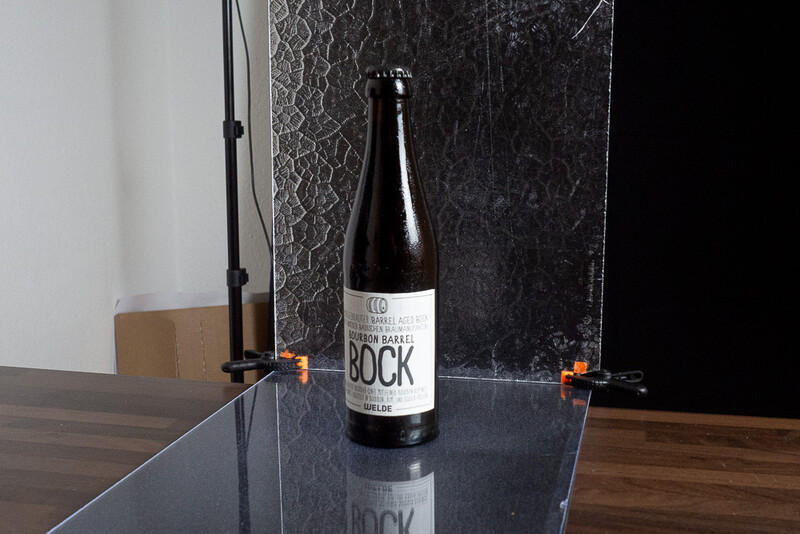
Luckily, our editor Alex Cooke has reposted a video "How to Create Glassware Photography With Just Two Speedlights" the day after my first attempt. It turned out to be a good resource. I felt quite ashamed when I realized that I didn’t have to put my light in front of the glass but could also place it slightly behind. It’s glass, stupid!
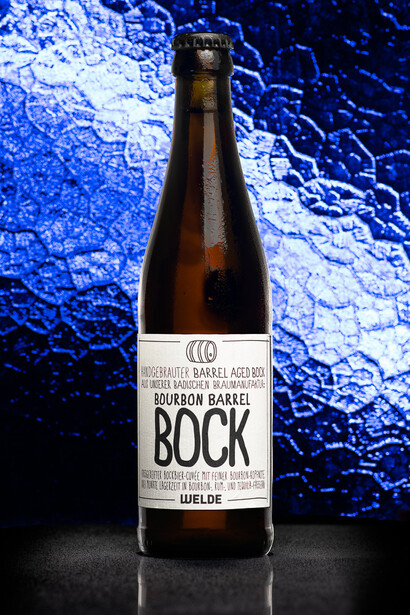
If I didn’t realize these basics on my own, how much more could I possibly discover? The Fstoppers Tutorial "The Hero Shot" covers all the information which upcoming product photographers need for their first steps towards success. In a free video, you can also check out some great tips how to work with glass bottles in product photography. These tutorials opened my eyes and immediately improved the quality of my images:

Lessons I Learned
I gave it a second (and third and fourth) try and realized that there are indeed certain skills needed almost exclusively for product photography.
1. Preparation Makes the Difference
One does not simply walk into a successful product shoot. You’ve got to plan it. Even though the controlled environment does allow you a certain degree of experimentation and adaption, you need to plan before. Which props do you need? Do you have the right light modifiers (I haven’t)? Do you need an assistant? There are many things which you can organize quickly, but more that you will have to prepare. Did you ever think about how you could create long-lasting water drops on a bottle?
2. Keep It Clean
Honestly, the biggest challenge for me was keeping the products clean. Especially while working with glass and reflective surfaces, you will see every fingerprint. Working with small objects and a macro lens will make you worry a lot about dust. Especially on a black surface, the small spots will cost you ages in post processing. The only way around this problem: Clean the products, keep them locked away until you need them, and wear gloves. That looks quite professional, too.
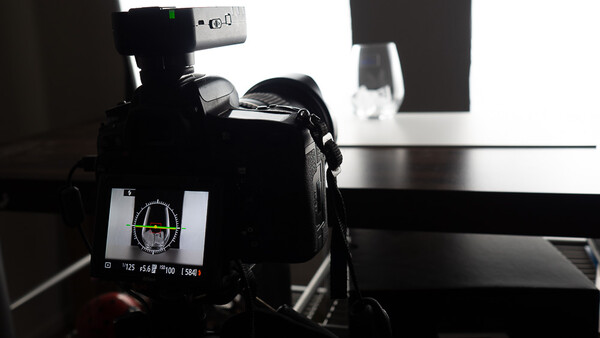
3. Tether
Tethering means connecting your camera to your computer. It gives you a better overview of the image and lets you check possible adjustments while shooting. I hadn't tethered before, but it's not complicated. Especially in product photography, every little detail counts. You can get an overall feeling of the image from the display of your camera, but you won’t recognize all the subtle changes of light and how it gives shape to the product. Tethering is great if you have the space.
4. Gear Matters
Most of the time, I am one of the people who will tell you that you can shoot amazing images with basic gear. You can! In product photography, one important aspect is sharpness. After all, you want the image quality to be outstanding. That’s still possible with a kit lens, but you should know its weaknesses. For the first time, I realized how much sharpness gets lost at the edges, when I put my beloved Tamron 24-70mm f/2.8 on. It’s a great, versatile lens. Still, I had to learn about its weak spots the hard way.
5. The Path Is Long
If there is one basic post processing skill that I have never cared about, it’s creating paths in Photoshop. Dodge and burn? Sure. Frequency Separation? Fun. Paths? Heaven forbid!
I love post processing. Daubing some color into someone’s face or giving shape to flat objects is amazing; it feels like art. But squeamishly following the shape of an object with the pen tool for twenty minutes or more feels like maths to me. It’s a dry, repetitive activity. Unfortunately, it has to be done with focus on precise accuracy. Especially when you're working with multiple layers and a solid color background, there is no way off the beaten path.
Give Yourself Time and Become a Perfectionist
All of these lessons require some kind of skill. Tutorials like "The Hero Shot" give you an insight into all the basic techniques, but they won’t make you an expert just by watching them. Most of the skills require time and practice. It took me a while to create better images, because every form of photography has its own challenges and workflows.
I still find flaws in all of my product photographs, but that’s great. If you want to master product photography, I guess you’ll have to be a perfectionist. Every little detail counts.


Join the Fstoppers community for free
-
Post comments and join in the discussions
-
Browse the site ad-free
-
Share your work and get featured in the community
-
Compete in the photo contests for fun and prizes
1 Comment
These are all the reasons that I love product photography! Also I kinda hate posing people, but it's probably something I should just get better at.