When shooting an ingredient shot, shadows can make or break an image. Sometimes you want less noticeable shadows while other times dark shadows can add a lot to an image. In the case of this pomegranate, I shot it both ways. Let me show you how playing with the shadows will have a dramatic effect on your final image.
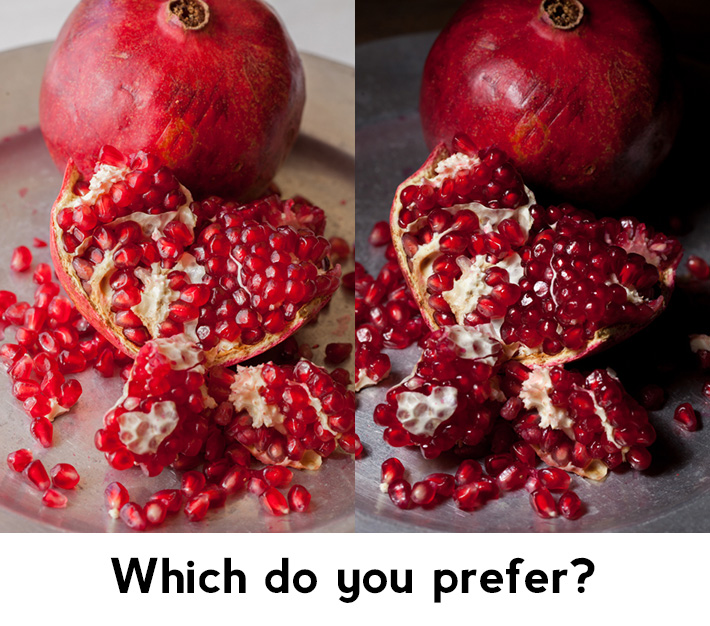
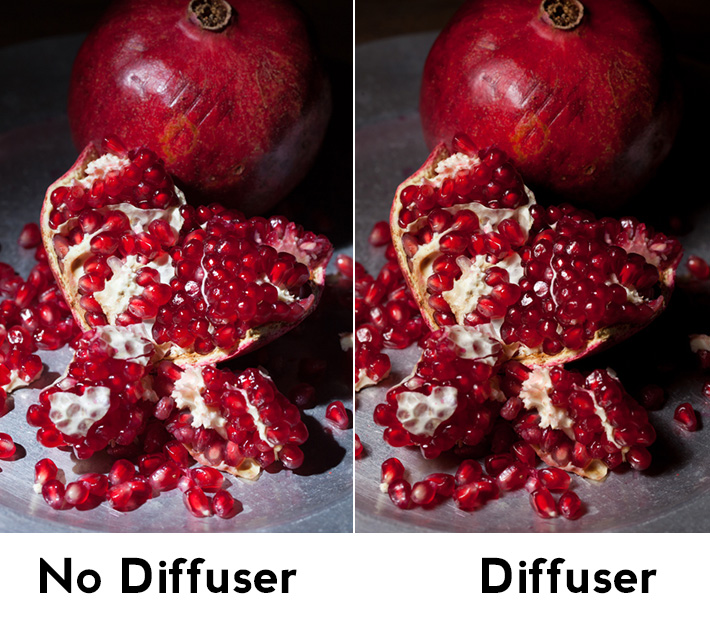
Above are the final shots. At first glance, is there one that you prefer? The image on the left was shot with diffused daylight, while the image on the right was shot with a snooted flash. Let's take a closer look at how the one on the left was shot.
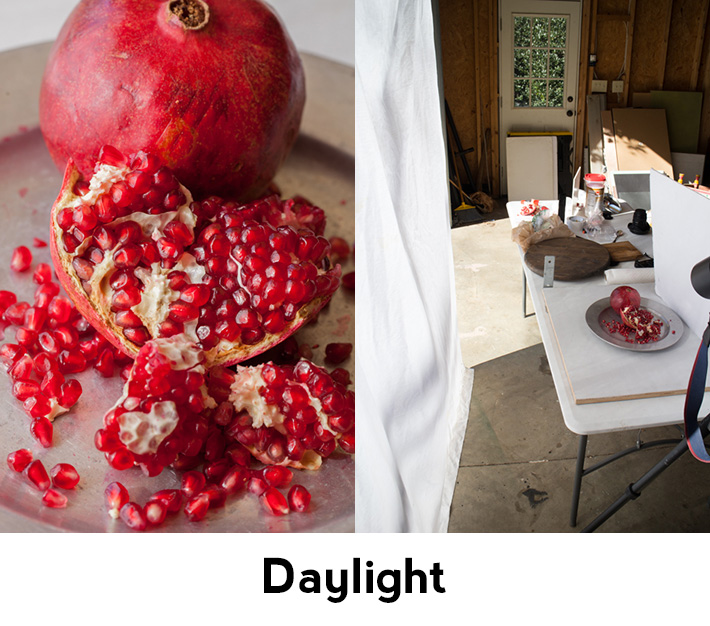
For the daylight shot, I used a white bed sheet hanging from a garage door to create a large, soft, diffused light source. With the light source on the left of the subject, the shadows will fall on the right. To fill in those shadows, I placed a piece of white foam board close to the subject on the right. This lighting set-up is very easy to create with any window, diffusion material, and a reflector. If you are looking for a soft, low contrast image, this is the way to go.
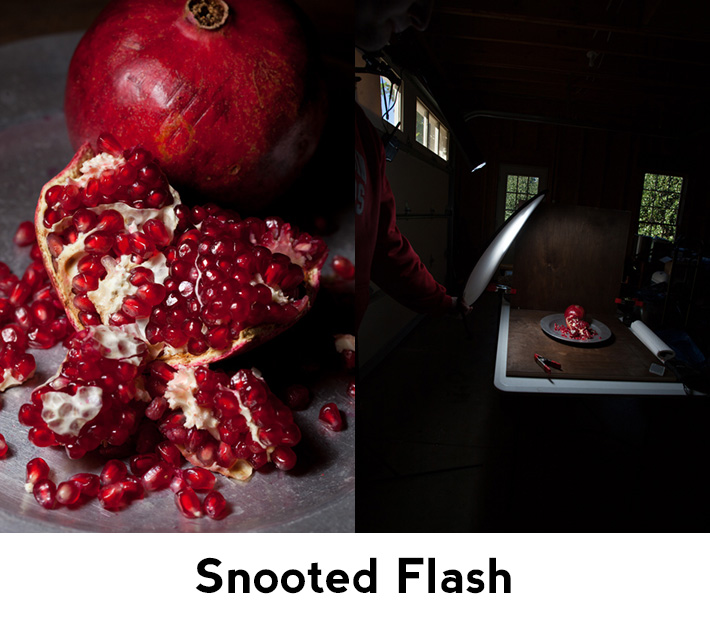
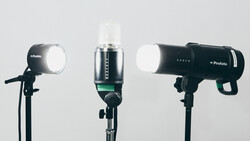
To create an image with a completely opposite look to the shadows, I used a small battery powered flash. I knew that I wanted to control the spread of the flash, so I used a snoot to gain this control. This would prevent light from spilling onto the background and concentrate the light on the pomegranate. Here is a look at the set shot.
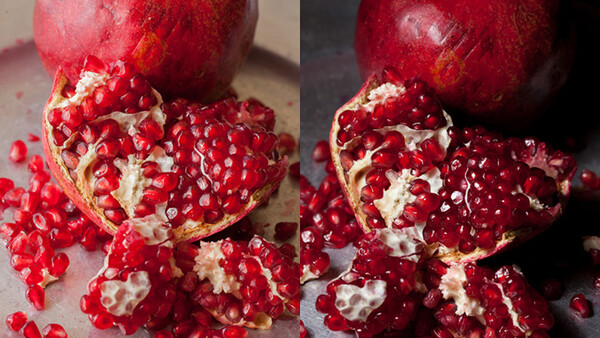
In the final image, I used a diffusion disc to soften the light from the snoot. I know what you maybe thinking, "Won't adding a diffusion element that close to the subject spread light onto the set?" Yes, it did spread some light, but it was minimal and I thought the softer light looked better on the subject. Here is a look at the snooted flash with and without the diffusion disc.
For the snooted flash shot, I played around with different positions of the flash until I found one that would place the flash on the left side of the pomegranate pieces, but wouldn't fall over onto the right side. This placement and not adding a reflector for fill on the right side, helped create the strong dark shadows.
As you can see, the lighting set-up you select will have a great impact on the shadows and overall look to your image. Which version of the pomegranate do you prefer?
Want to learn more about food photography? Until the end of today (12/2/13) photographing FOOD issues 1-8 are 25% off in the Fstoppers store! You can download the 8 issue set for only $30 with the code BF2013 at checkout!


Join the Fstoppers community for free
-
Post comments and join in the discussions
-
Browse the site ad-free
-
Share your work and get featured in the community
-
Compete in the photo contests for fun and prizes
10 Comments
Really nice touch on each. I like them both for different reasons and its cool to see the darker lighting setup with both diffused and without.
Thanks Andrew! Glad you liked the side by side shots.
Your tutorials always make me want to go buy tons of stuff at the grocery store, bring it home and smash it only to take pics of it. =) Sign of some good tutorials.
Thanks Bert!
both great shoots, great settings :)
Another trick would be to replace the white reflector with a non reflective black fabric (on the daylight shot). This way we get to keep the beautiful diffused "window" light look and have more pronounced shadows.
I love the look of the darker one. I know that If I was going to go and so something on my own, I'd probably try to light it up as much as possible but the shadows and contrast really work on the bright pomegranate.
Nice article.
For eating, I prefer the lighter exposed photos. The food looks more inviting and fresh and light.
For art, I prefer the darker photos, as it looks more like oil paintings with lots of mood and character, but not inviting to eat.
I like the one on the left ... personal pref only.
This is such a great demonstration ... thanks ! I have a shoot tomorrow and was thinking about using the diffuser with a snoot ... now I'm convinced that can be a successful approach :) kudos !