
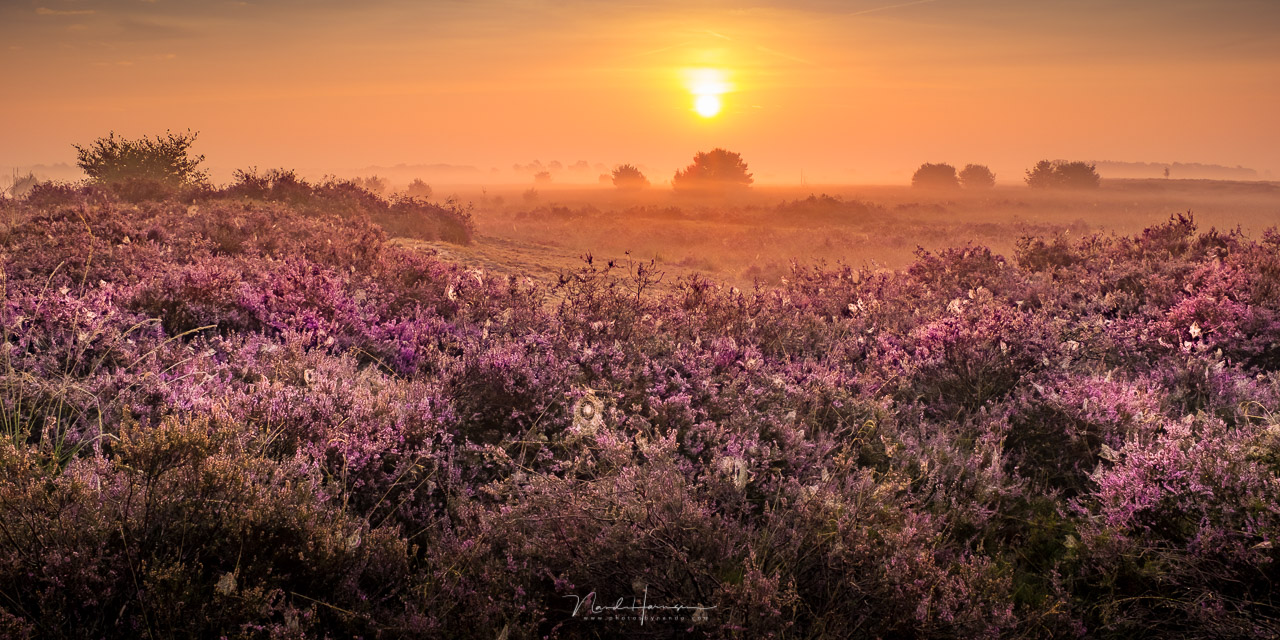
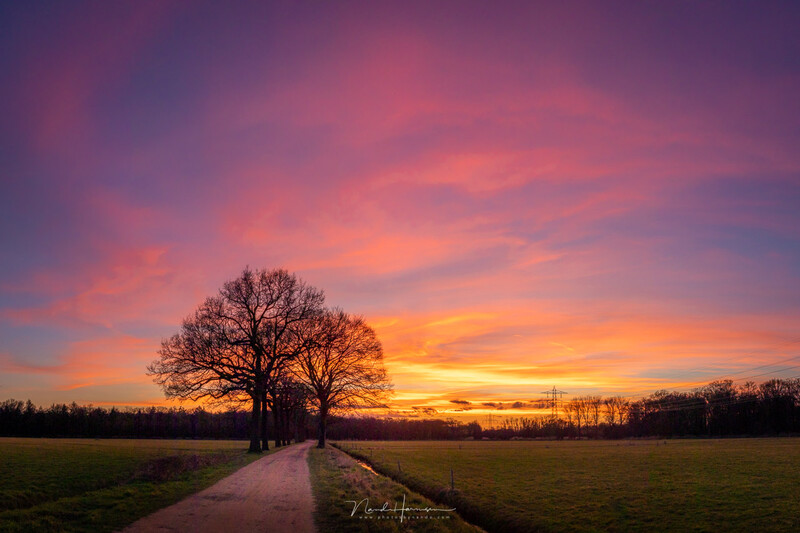
You've probably seen the photos featuring a landscape with an intense red sky. There is a simple but effective way of achieving such a photo even when the colors are only a small band at the horizon.
Have you ever witnessed a sunrise or sunset with a sky that was almost completely intense red? Maybe only once or twice. Those moments when the sky is filled with colors are magical. This is what landscape photographers are hoping for.
More often, the colors are only located close to the horizon — a nice colored band that quickly changes in a lot of blue skies. These photos can be great, but the red sky isn’t that impressive in the photo. Even in those moments, it's possible to enlarge that colored band at the horizon. In fact, there are a few possibilities.
Wide Angle Is Making Things Small
Many landscape photographers will use a wide angle lens to shoot a landscape. It allows you to capture a nice foreground and a wide landscape in the back. Because a lot of elements have to be fit inside the boundaries of the frame, everything will appear small in the photo. The wider the angle becomes, the smaller the objects in the frame will be.
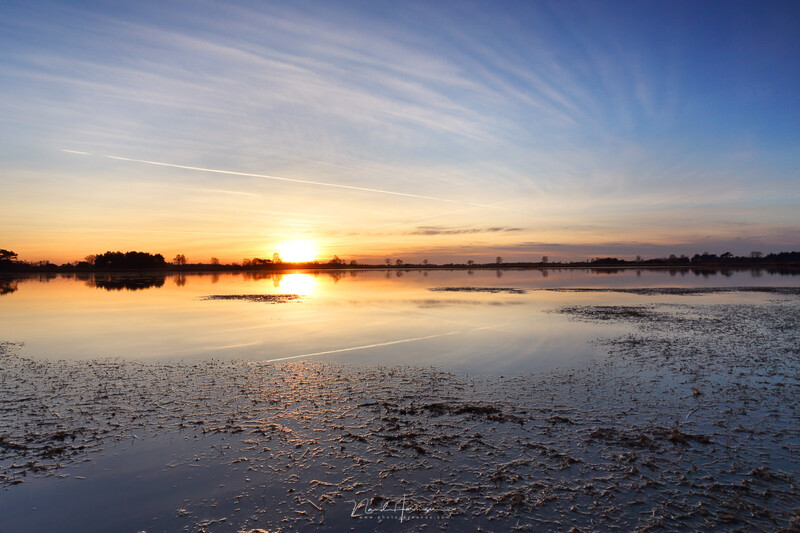
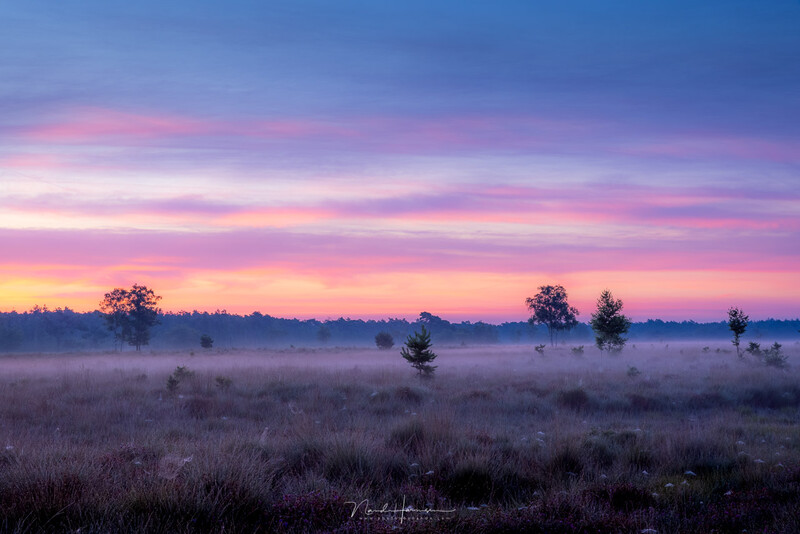
If there is only a thin red band at the horizon, it will appear small when a wide angle is used. The normal blue sky will occupy the majority of the frame. Unfortunately, it reduces the impact of that red part of the sky.
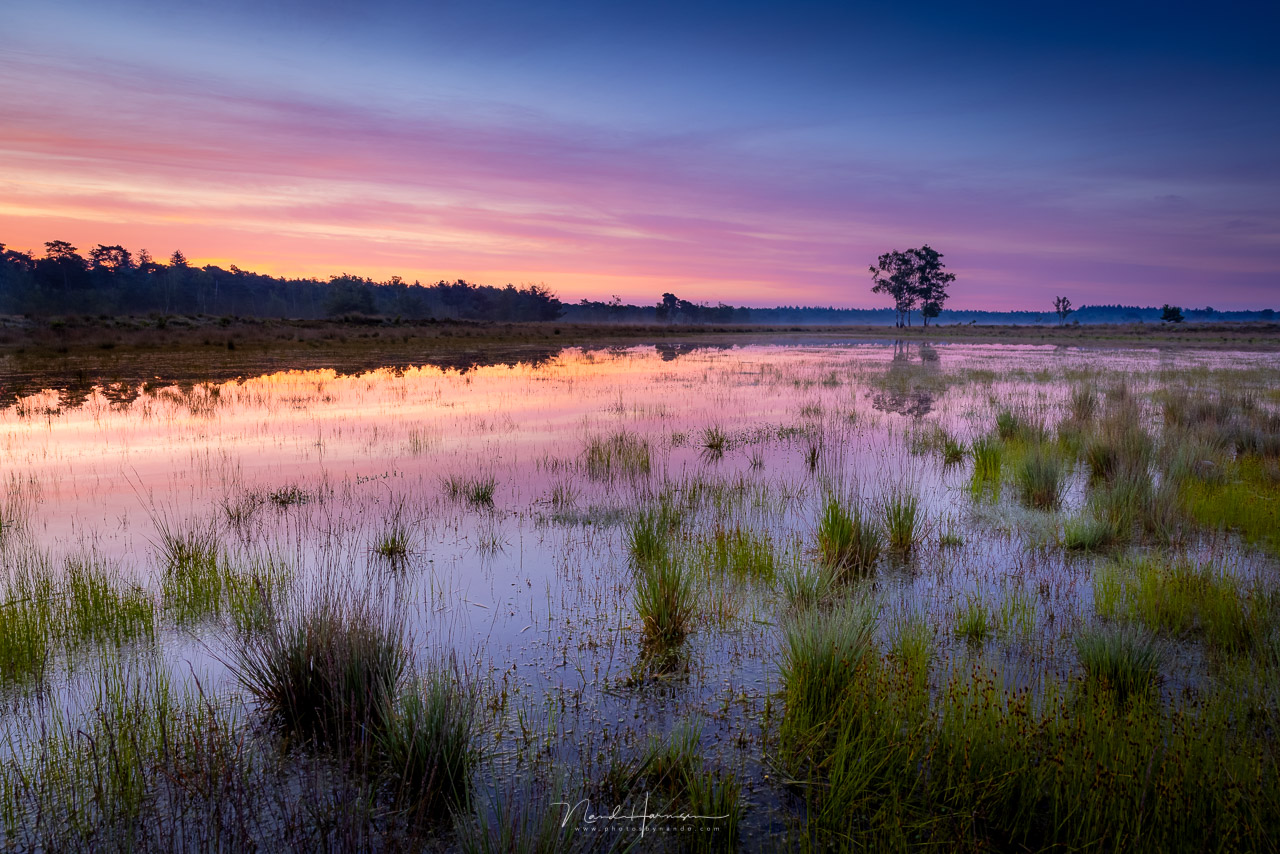
Capture More Foreground
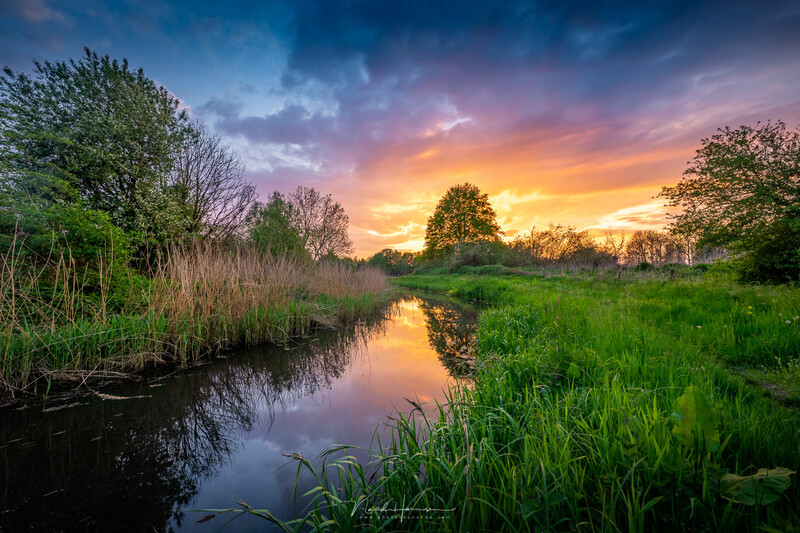
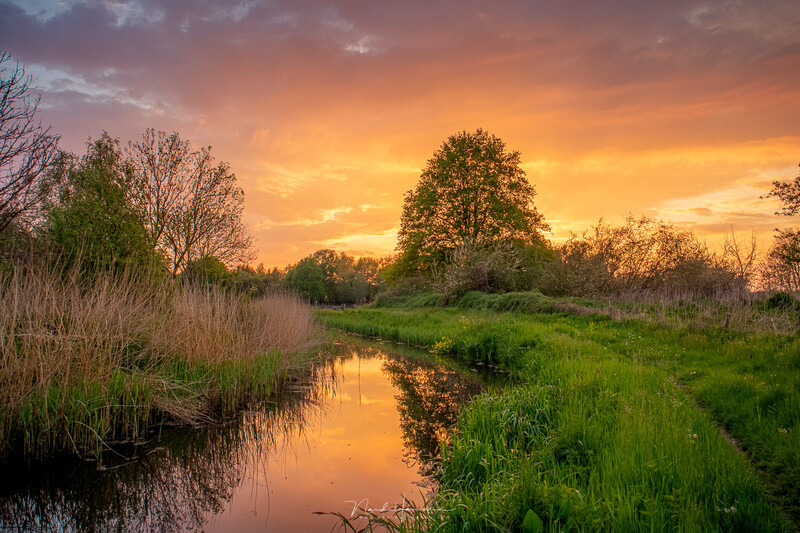
If you have a only thin red-colored band at the horizon, you can ignore the sky completely. Just point the camera downwards and capture more of the foreground. By placing the horizon in such a way that the blue sky is no longer in the frame, the sunrise or sunset will look more intense.
You need to be careful. If the illusion of an intense red sky is created, it also needs to influence the color temperature of the landscape in the foreground. If there is only a blue sky, the landscape can appear much cooler in temperature. This can easily be corrected by local post-processing. This way, you can create a nice overall balance in color temperature.
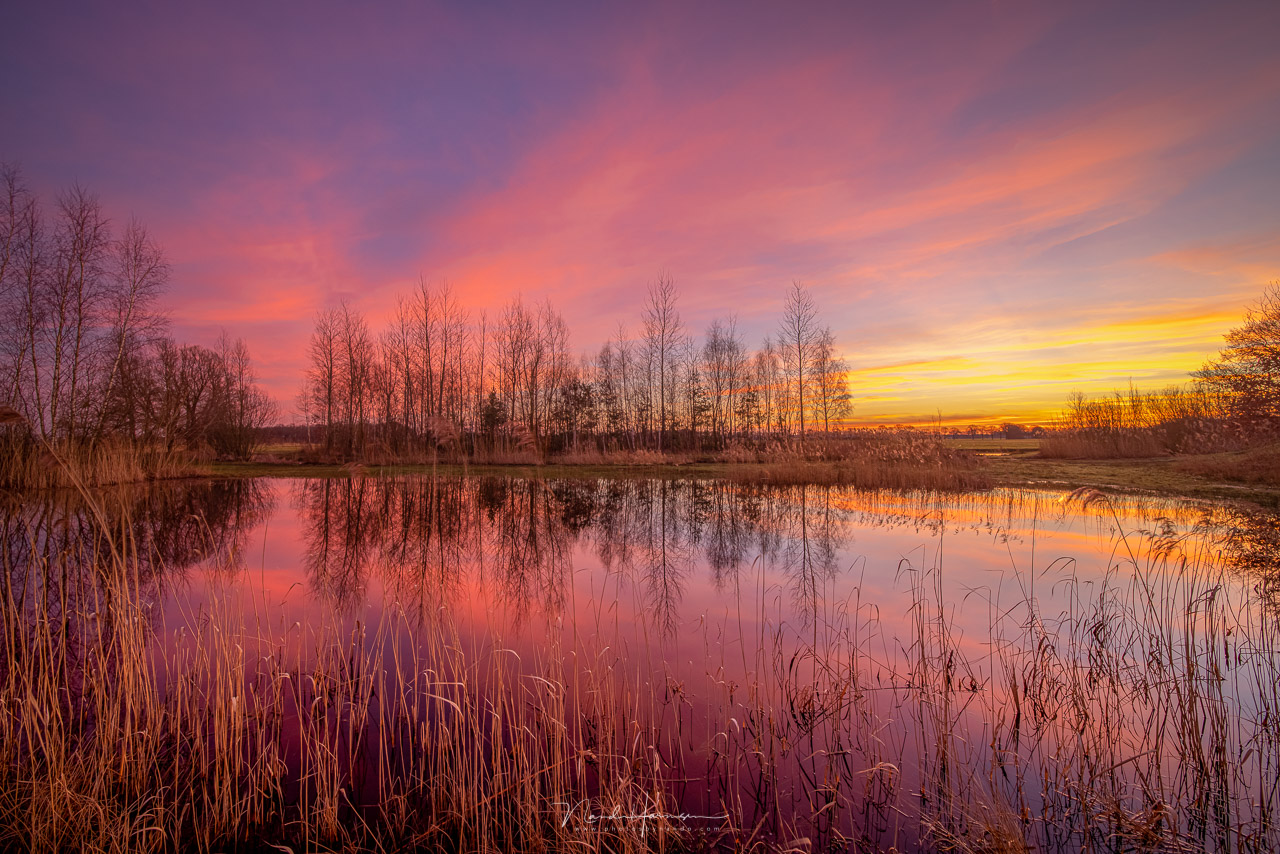
Choose a Longer Focal Length for the Intense Red Sky
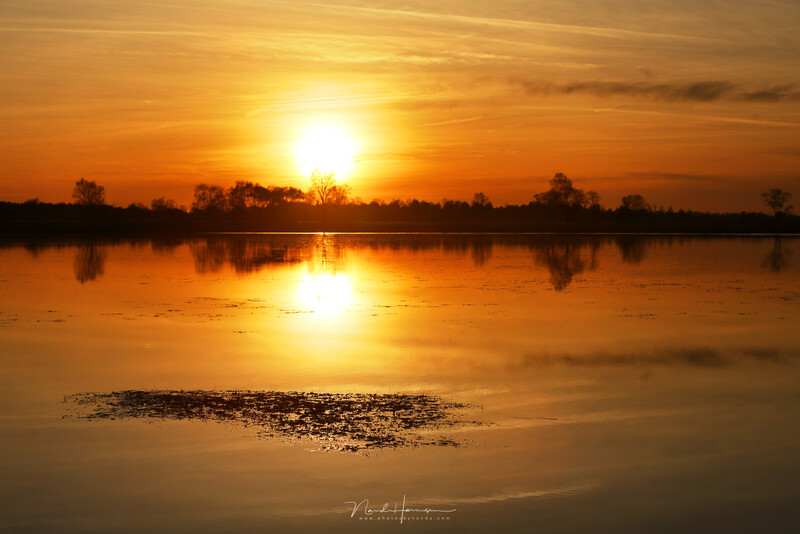
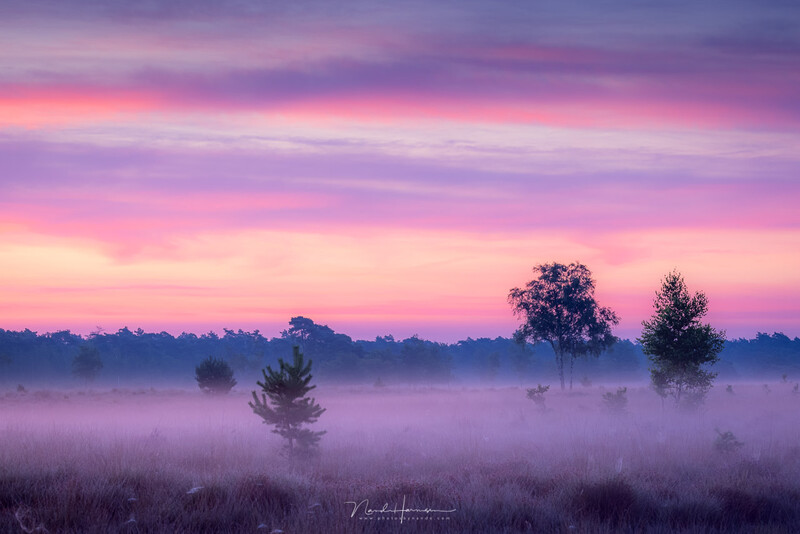
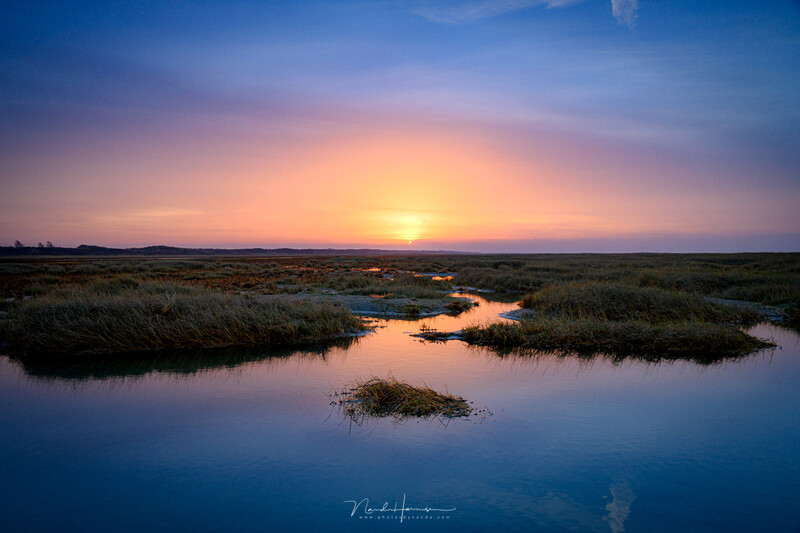
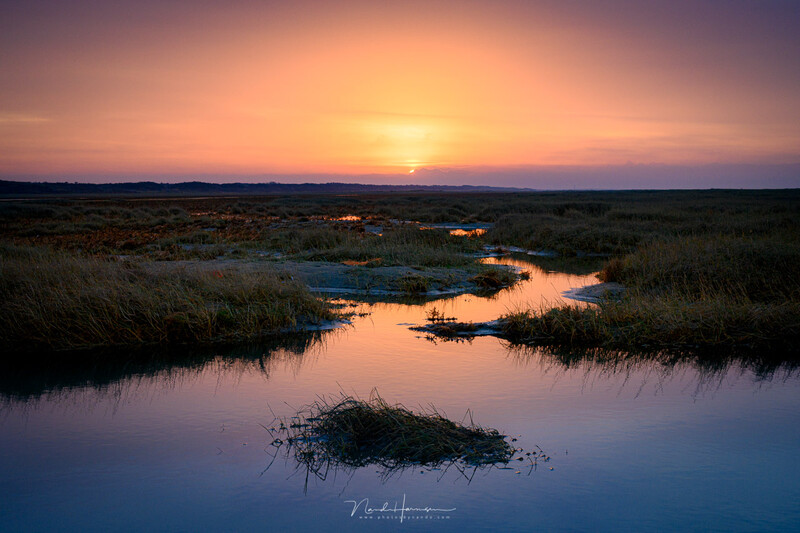
If you want the red part of the sky to be larger, you can use a longer focal length. It is quite simple. A wide angle makes things smaller while a longer focal length will enlarge elements in the landscape. It will also enlarge the red part of the sky. By using a longer focal length, the nice colors will occupy most of the frame. Just make sure there is no blue sky in the frame anymore.
As you may have guessed, there is a downside to this method. By zooming in, you will lose some foreground in the frame. With a longer focal length, the photo will be completely different. Perhaps it will become necessary to make a new composition. But I think it’s just a small price to pay. You will get that amazing red sky filling the frame.
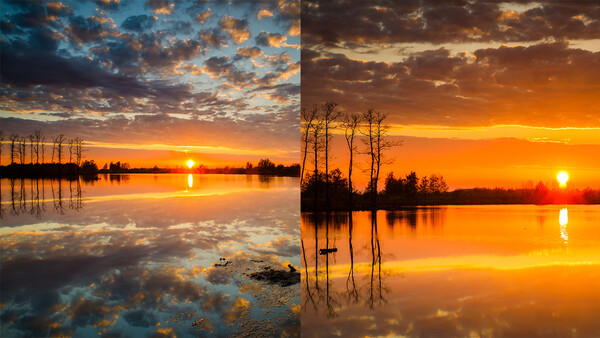
I have a few examples from my archives to show how much of a difference a longer focal length makes. Remember, it's not about wrong or right. It is about how you can manipulate the appearance of the photo to get an impressive red sky at sunrise or sunset, even when it's only a thin band at the horizon.

Zooming but Keeping the Subject the Same Size
By using a longer focal length, everything in the frame will become larger., not only the red sky at the horizon but also the foreground. On some occasions, the subject in the foreground will grow so large it won't fit the frame anymore.
Fortunately, you can counteract the growth of the subject size by stepping backward. Making the focal length twice as large, the objects in the frame will become four times as large. After all, the field of view will be twice as small in both vertical and horizontal directions. You are able to correct the size of the foreground object by increasing the distance to the foreground object with the same factor.

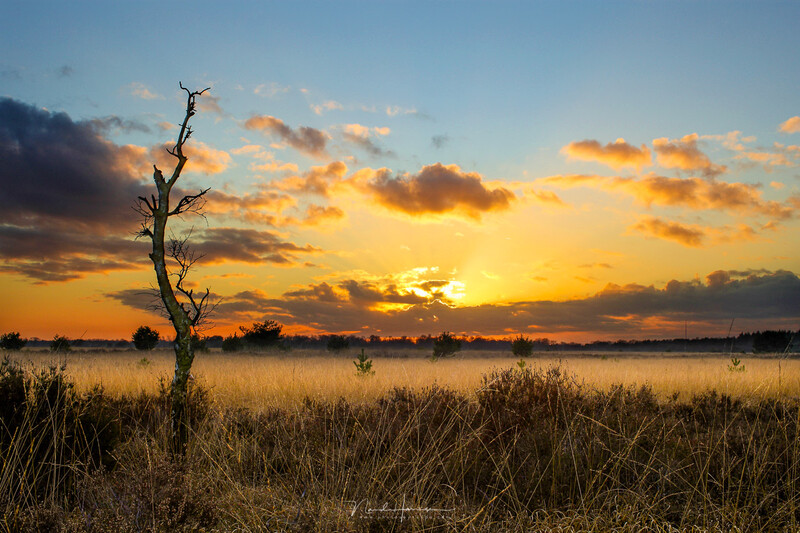
In the example, I used a 15mm focal length for the wide-angle photo, and I stood about three meters from the dead tree. The second photo was made with a 35mm focal length at a distance of six or seven meters to keep the dead tree about the same size. At the same time, the background appears about four times as large.
Only When It’s Possible
With these two techniques, you are able to keep a dull blue sky out of the frame. This way the focus, will be on the colors at the horizon. Pointing the camera downwards is almost always possible, just like increasing the focal length. But moving backward while zooming is not always wise to do or even possible.
Use zooming while increasing the distance to the subject only if it's safe. Don’t do this when there is a canyon behind you. Or a busy freeway. Or perhaps a fence. The use is very dependent on the situation you’re in and the location itself. But if there is a possibility to move around, a longer focal length will increase the chance of capturing a sunrise or sunset with an intense red sky that is filling most of the frame.
How do you manage to capture an intense red sky? Do you wait for the moment to arise? Or perhaps you turn to sky replacement techniques to get the desired photo. Please share your ideas and opinion in the comments below.


Join the Fstoppers community for free
-
Post comments and join in the discussions
-
Browse the site ad-free
-
Share your work and get featured in the community
-
Compete in the photo contests for fun and prizes
10 Comments
This post came at a great time for me. Thank you for putting it together. The examples of going from wide to tight on the horizon was really helpful for me to understand how to get more warm colors in a sunrise/sunset. I think my main hurdle for trying this earlier is I've been so focused on getting that foreground element setup in a way that's eye-catching for a wide angle shot that I forget I can crop my focus to the telephoto range and get those fiery colors like you show in your examples. Living in the Pacific Northwest, we often have low clouds at sunrise/sunset at the horizon, so it looks like using 200-300mm on full frame would be a perfect way to take a less than ideal time with the clouds and focus in on the color.
In retrospect it seems obvious, but I've never thought about it,
Was expecting a lame post production tutorial, was pleased to find this!
Excellent article, unlike so many that just complain about something and give no practical advice or examples how to improve. This shows some real world examples and what a dramatic difference it can make, while I do like some of the bluer ones. Just like you said it is more about controlling the scene and not just red or blue.
Thank you for this tutorial!
I had never thought about it but it makes so much sense. Thanks for the useful tips.
Good tips, thank you for the informative post!
Well done and very useful article, that you very much
In my opinion the sky replacement it is no more photography
This is not about sky replacement. It is the real deal, no digital manipulations.
Ummm, just like the Nando said. The article is not about sky replacement.
And yes, even with sky replacement. It still is photography. Be like saying it's not painting if use a mixed medium instead of just oil or acrylic.
You just blend one photograph with another. One good example is you might have an amazing landscape shot but the sky is cloudy so you cannot expose the Milky Way. You don't always have the luxury of coming back or it is in a time of year where the Milky Way is not visible.
So paste one in, you can use your own shot or someone's else's. But still the same concept.
And there are so many other reasons or applications.