
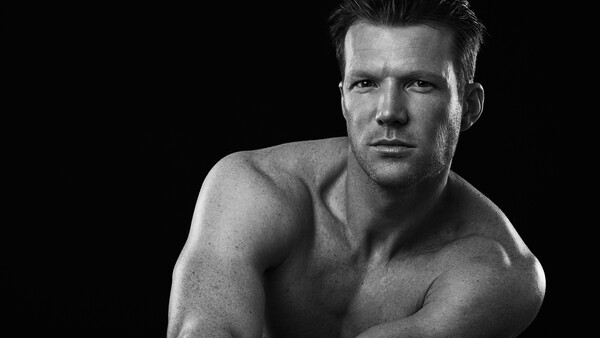
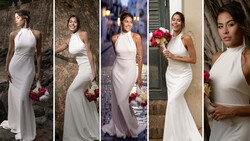
In this week's lighting breakdown, I'm going to explain the three-light setup I used to create these striking portraits in studio.
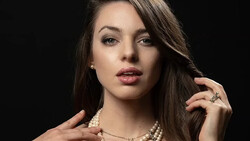
For this shoot, my plan was to create something inspired by cologne advertisements and Calvin Klein ads. I knew I wanted directional light with a good amount of contrast, and that the resulting images would be in black and white. For this shoot, I also wanted to include a bit of rim light to really make my subject pop off of a black backdrop.
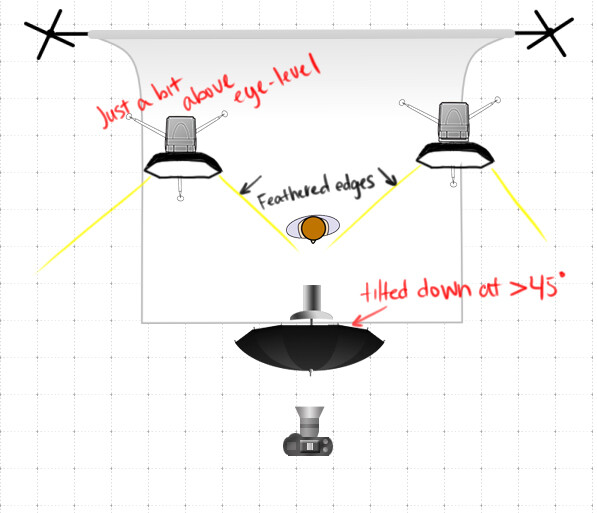
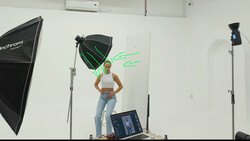
Below, you'll see the lighting diagram that gives the general placement of my lights. The important thing to notice is that the rim light on the subject is only coming from the edges of both strobes, which were fired through octaboxes. The resulting light is more diffuse than it would have been if I'd used bare bulbs.
The key light was an Alien Bees 1600 fired through a 60-inch Photek Softlighter, which was just above the subject's eyeline (you can see the height of it by checking out the catch lights in the subject's eyes) and tilted down less than 45 degrees. It was also placed fairly close to the subject, and I shot with my camera just beneath it.

It's also important to know that these photos were not only taken against a black backdrop, but in a dark room with black curtains drawn and all ambient light cut. I wanted to keep as much contrast as possible without any interference from other light sources.
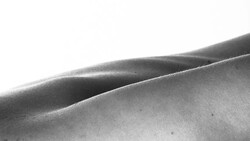
Because the key light was close to the model, you can see the fall off is relatively fast and, while the shadows are open enough to retain detail, they're still fairly dark.
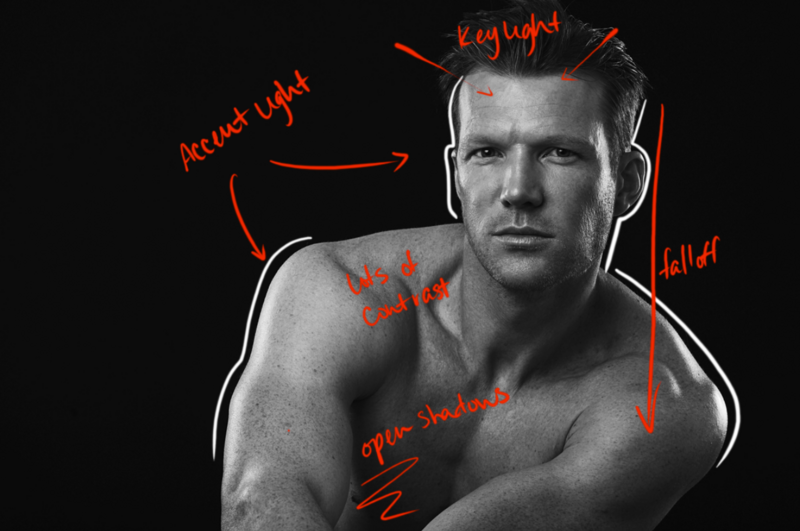
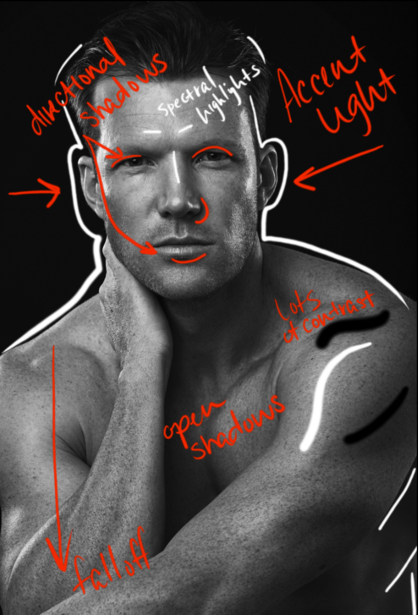
One more factor that is important to know if you're interested in obtaining a similar look is that the makeup artist used an oil-based lotion to give the model's skin a sheen that would create spectral highlights under strobe light. This means you've got to be particularly careful not to overexpose so you retain detail in the highlights. While editing, this leaves a lot of room to play with contrast. Since I tend to prefer lots of contrast in my black and white photos, I pushed the contrast until I had something very dramatic.
If you've used this set up before, how did you like it? Was there anything you struggled with? Let me know in the comments.

Join the Fstoppers community for free
-
Post comments and join in the discussions
-
Browse the site ad-free
-
Share your work and get featured in the community
-
Compete in the photo contests for fun and prizes
9 Comments
Thanks :)
Great work! Thanks for passing it along.
Very nice article, Nicole! Thanks for sharing it!
Nice one, thanks for sharing! Would it be possible to include some BTS shots of the set? Would be super helpful :)
Unfortunately, I lost the BTS for this one :( but I'm going to try to make sure I have them for future Lighting Breakdown articles!
I love the details of this solid explanation. Really awesome. I am going to share it with my list tonight.
Hi, Michael! I was brought here by being on your list. Thanks again for another great heads up. Be careful. I think the guy who commented below me may be a homo. :)
I appreciate that, Michael! Many thanks.
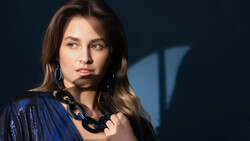
Used this setup to create these. Thank you for the inspiration, it was really fun trying it out.