

Previsualization may be the one thing standing between you and a smooth production resulting in incredible photographs.
Coaches and trainers have known for years that visualization practices can make the difference between a first-place finish and obscurity. Big time movie production companies also invest a visualization exercise known as “previs” — short for pre-visualization — before they begin production. Why could this be game changing for photographers? For the same reason long trips require a map: you need to know your destination as well as what turns you’ll have to make to get there.
For photographers, visualization can be split into two parts: pre-visualization, and the exercise of visualizing the shoot itself.
Pre-visualization
Before multi-million dollar movies are made, the producers will employ a team of people to create storyboards, concept art, and simple CGI that mimics camera angle and movement in a scene. Previs of this kind is so valuable to photographers because it will help the photographer build a concise vision of the image they want to create, allowing them to create a road map for their team team and talent, who then understand exactly what they’re creating and what will be required to make it happen.
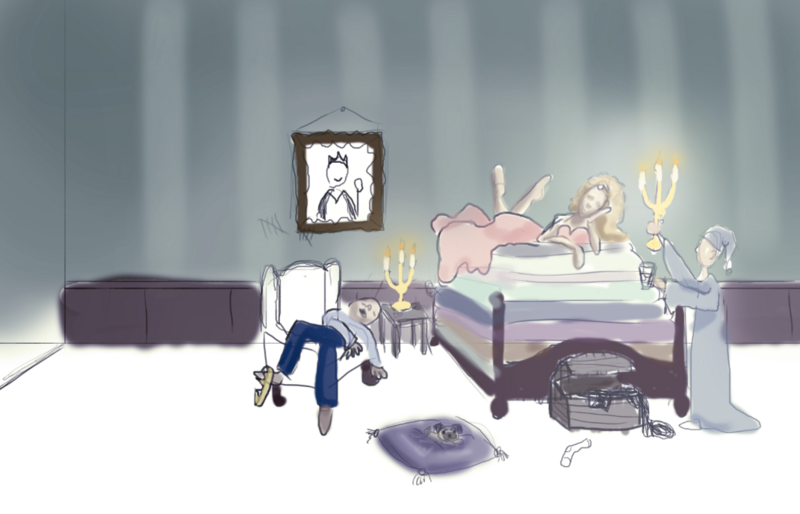
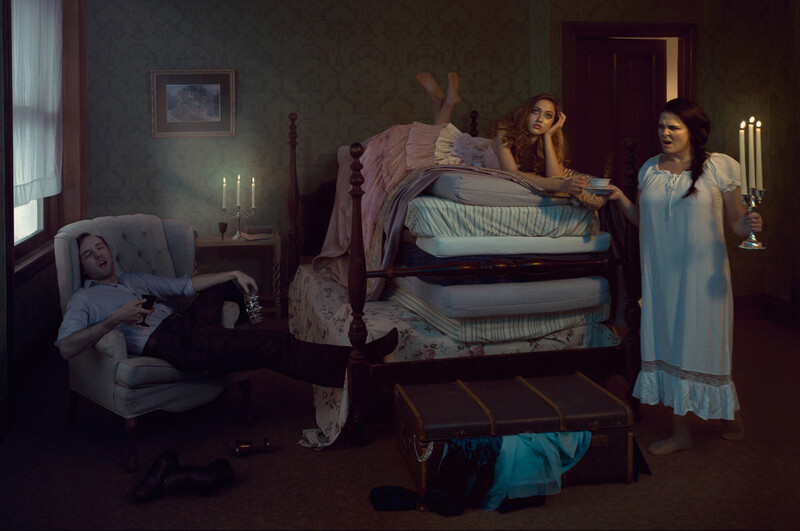
In this example, you’ll see quick sketches that were done as previs exercises for photoshoots. In each sketch, important elements of the final image are included, from composition to color, blocking, and key light placement. Having this knowledge meant that grips knew where lights belonged, talent understood the mood of the final image, set pieces and talent could be placed in the scene for the correct composition, and I had a strong enough image in my head that I could direct the entire production in service of it. In addition, because the image had, in a way, already been created, I knew what I would need to get my hands on to pull it off, whether that was a faux artifact, or a picture frame that balanced the composition.
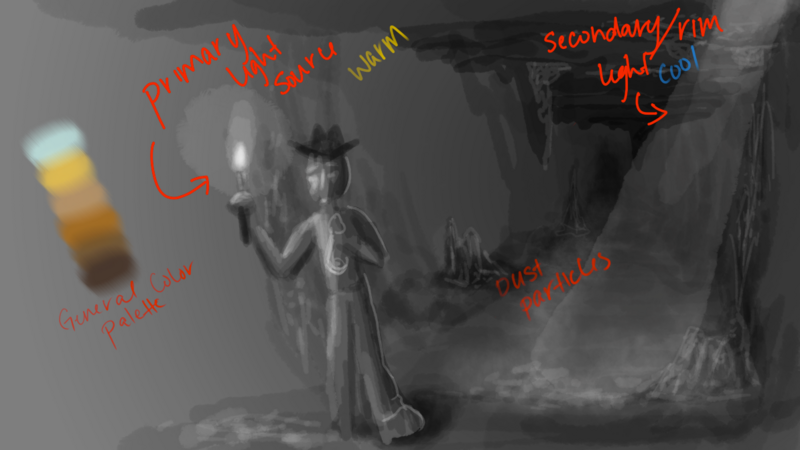

Rather than making it harder to extemporize when sudden inspiration strikes during a shoot, previs makes it easier to follow your muse because the foundation for great work has already been laid.
To do previs for your own project, try the following:
- Picture the image you want to create in your mind. Pay attention to every detail. Note the color, the light position, temperature, and quality, expressions, location, composition, etc.
- Make a visual representation. This could be a stick drawing with notes, a story board, pasted together images with an accompanying mood board, or a full-scale piece of art. Be sure to include what you imagined in step one so that you and your team will have a good idea of the technical aspects needed to complete the image.
When you’ve done this, you’ll have the blueprints for a great photoshoot.
Visualizing the Shoot
This is an invaluable exercise. Visualizing the shoot, from beginning to end, can reveal potential problems during pre-production and bring up new aspects of the shoot that need to be addressed, but it also produces some amazing affects in your body.
According to scientific studies like this one, the brain cannot always tell the difference between a vividly imagined scene and reality. Because the body reacts physiologically to the imagination, visualization exercises can actually improve performance and inspire confidence. Having already run through the shoot, imagined the scenarios you might encounter, and thought up ways to deal them that will still lead to a successful shoot, you’ll walk on set with self-assurance.
To do a pre-shoot visualization exercise:
- Imagine the shoot from beginning to end in as much vivid detail as possible, including the five senses. The more detail, the more believable the scenario is to your body.
- Play out scenes imagining not only your success but what problems might arise that you can handle.
- Do this more than once if you can, as repetition helps establish neural pathways.
At first glance, this might seem like it’s suitable only for highly planned circumstances and not ideal for shooters who need to react to changing situations during a wedding or family portrait session, but visualization can come in incredibly handy in those environments as well. Having thought through the event and planned for eventualities like what you’ll do if Uncle Bob steps in front of you with his camera during the ceremony, or when a toddler has a break down during golden hour, you’ll be prepared to deal with each situation with grace because as far as your mind and body are concerned, you’ve already done it.
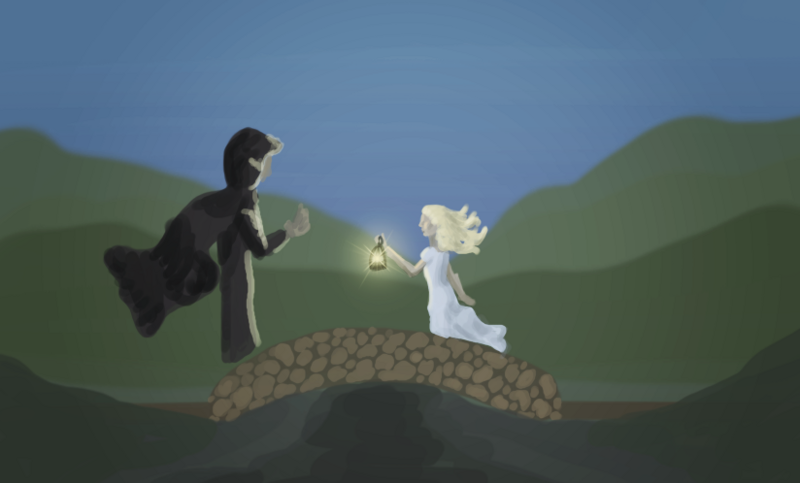
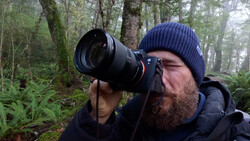
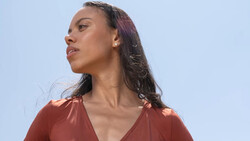
In a similar circumstance, I had planned for the following image below, but I worried that the actual location (which must be shot from a distance) and the need for compositing might compromise the power of my idea and break the viewers connection with the subject. To account for that, I shot not only my pre-planned shoot but several variants that would also work. When it became clear that my initial previs wouldn't be successful, I was able to switch gears to a variant of that photo. Because of pre-planning, I was still able to create an image that I love.

As the saying goes, “success is 90 percent preparation and only 10 percent perspiration.” Do the prep work, not only with your hands but with your mind, and the rest is smooth sailing.


Join the Fstoppers community for free
-
Post comments and join in the discussions
-
Browse the site ad-free
-
Share your work and get featured in the community
-
Compete in the photo contests for fun and prizes
3 Comments
Great article. I do this all the time when I shoot portraits or fine art. I try to have at least one shot pre-visualized and then go from there. My drawing is terrible but it gets the blocking/framing in the ballpark when working with others. Fun fact, these photos were shot 1 day apart.
Great share! I find it so incredibly helpful to have things laid out in your mind this way.
I always do this. Many times when I arrive at the location - walk through it and start visualizing the shots/compositions I want to capture. And I always have a final image in mind when I shoot a particular composition. The image make look odd in camera, but I already know what I am going to do with it in post. Excellent advice Nicole.