
As photographers, part of our job often involves making a relatively unexciting location into something exciting. Everything from subject to exposure to framing plays a part in this transformation but one often overlooked tool at a photographer's disposal is color. By adding color to a scene with the use of gels a photographer can bring an uninteresting scene up a notch by creating ambiance and drama.
It All Begins With Concept
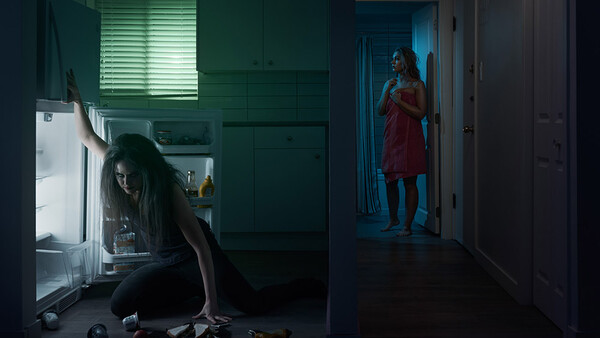
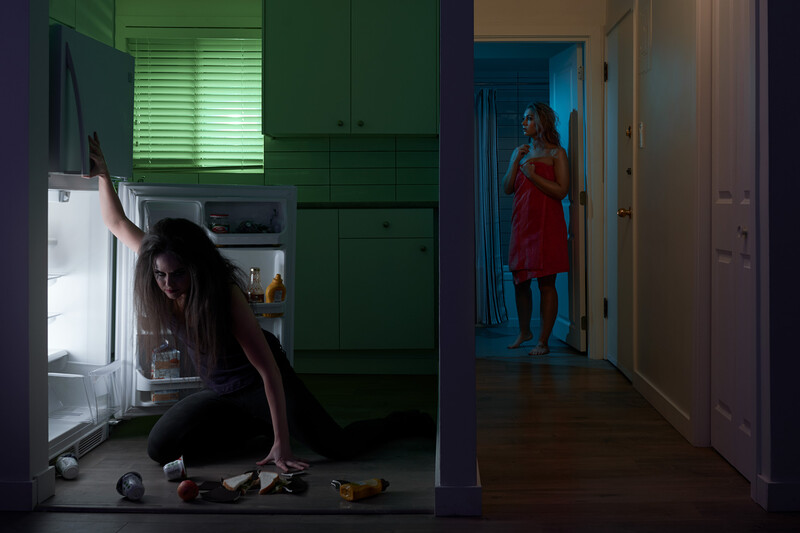
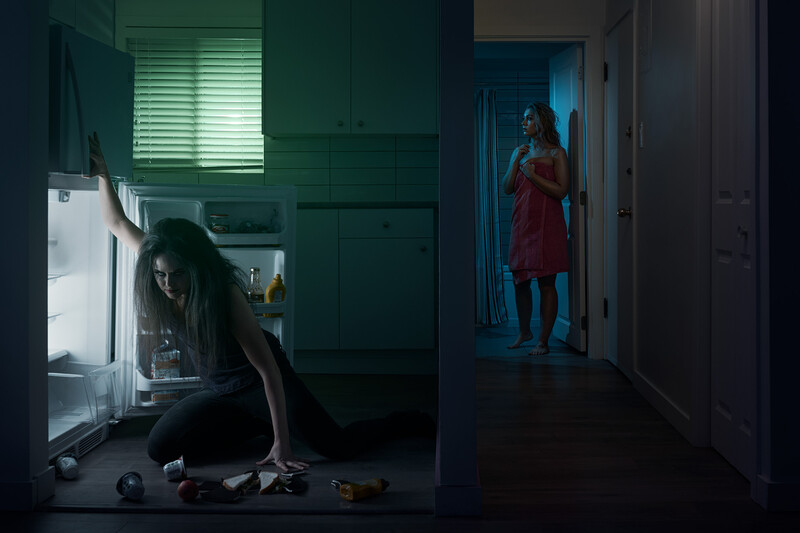
Blasting a rainbow of color around the set won't really help with anything other than creating a clash of pointless colors. Begin with a concept so that you can make each color meaningful. Take, for example, in this possessed shoot. Each color has a purpose for being in the frame. The green ambient light wafting in through the window is designed to create a sense that there is some sort of magical force transforming a girl to a monster. The blue is designed as moonlight pouring in from the bathroom window. Even the subtle purple fill has a reason to be as it represents moments before the character was watching some sort of television show in the other room before going to make a sandwich only to encounter an evil force. Each light should have an explicit purpose and even if the audience fails to actively gain awareness of that purpose the existence of a purpose help ensure that lights do not become a distraction.
Build Your Lighting Step by Step
The first instinct of many photographers is to set up every light then to start shooting. This method depends on a great deal of chance that becomes quite challenging to adjust as one isn't always aware of which light is causing which problem. Instead, construct your scene one light at a time. The cost of firing a few dozen images while setting up one light at a time is trivial and will reward you with the freedom to designed the impact of each light to perfectly match your creative vision.
Don't be Afraid to Experiment
Many photographers become far too comfortable in the notion that a shoot involves quickly setting up lights in a relatively consistent manner moments before the model is ready. With cinematic, gelled lighting the setup becomes far more complicated. Experimenting and testing is key to success. Allocate time to make sure that each light matches your creative vision and don't feel as if you are too rushed to do it properly. For this particular shoot all the light were set up the day before in order to experiment with the perfect placement.
Color Grading is Critical
Most creative gel kits offer a decent range of colors but they certainly don't allow for specific fine tuning of tone. With the power level of the light relative to exposure you can control saturation to a degree but to truly fine tune to the exact tone that is desired without making compromises is often quite difficult or even impossible given the tools available. Instead, master color grading so that in post you can quickly bump the tones of your image to best match your creative vision.
Subtle is Often Your Friend
Perhaps, this shoot isn't the best example of subtlety as it doesn't particularly call for it but always err on the side of caution with gels. Particularly when it comes to skin tones. A green light may be cool but if it transforms your model's skin to looking sickly and diseased, they are not going to be happy with you. Instead, aim to set up your gels in a way to complement the mood of the scene without compromising the esthetic of your model.
Use Tone to Control The Eye of The Viewer
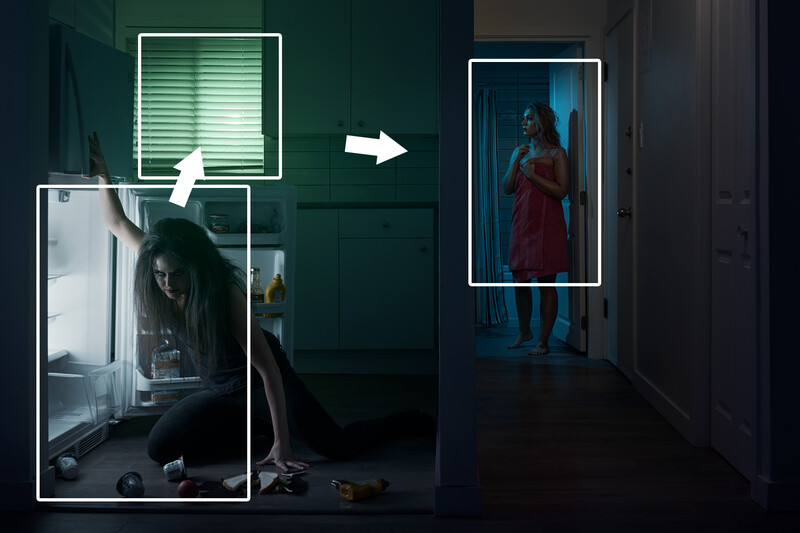
A scene with half a dozen lights firing in all directions can easily become a confusing mess that distracts the viewer from the purpose of the shot. Wrangle in your lights to ensure their power levels are carefully chosen to draw the viewer's eye around the frame. In this particular example the white light in the fridge is designed to be the most powerful in order to draw the viewer towards the creature as it tears through the fridge looking for something more... "living" to snack on. The next brightest spot in the frame is then the magical glow coming from the window designed to somewhat explain the situation followed finally by the blue light drawing the viewer to the realization of the vulnerable situation of the second girl as she walks out of the bathroom after showering.
Conclusion
Gels are a fantastic way to augment the mood of a photo. Don't be afraid to experiment with them to take your photography in a new direction. If you would like to see more shots from this set don't forget to head over to my Instagram where I will be posting more over the next few days. Finally, don't forget to head down to the comments below and share some of your favorite shots that leverage the power of gels to transform an otherwise fairly boring location into a cinematic scene.


Join the Fstoppers community for free
-
Post comments and join in the discussions
-
Browse the site ad-free
-
Share your work and get featured in the community
-
Compete in the photo contests for fun and prizes
3 Comments
I have done some test with headshot/portrait shoot and it works amazingly... this is short video from the shoot https://www.youtube.com/watch?v=eWBeEQ9UTIY&t=3s
Good stuff! Great work!
Thanks for sharing. So far I've only really used CTO gels on location but I definitely want to experiment with other colours soon.